


 66Likes
Hot Bodies D413 1/10 4WD Buggy
 02-11-2015, 10:46 PM
#7636
For me, I just slightly sanded the chassis to take off the edge but did not put CA. I did CA the front shock mount. After a few crashes, I could see some damage before I put CA on it. But CA stopped that. Otherwise, my chassis has help up.
 02-12-2015, 04:48 AM
#7637
I would seal your edges. Mine started to split at one of the edges. I sanded and glued it, and it been fine since.
02-12-2015, 05:04 AM
#7638
Put on the RC Shox ackerman last night and it does eliminate a lot of slop. But has anybody thought about a tighter linkage between the steering rack and the servo horn. I figure you can eliminate close to another millimeter of slop.
02-12-2015, 06:31 AM
#7639
We're still talking about slop?
02-12-2015, 06:32 AM
#7640
R/C Tech Elite Member
iTrader: (12)
I also removed the bushings from my steering blocks and filed them down a bit. That helped to take a little slop out and it still moved free with the screws tight.
02-12-2015, 06:51 AM
#7642
My wiring job, one zip tie is all I needed to keep everything neat and in place.
Wiring has kinda become my thing, been 6 years at flying heli's.
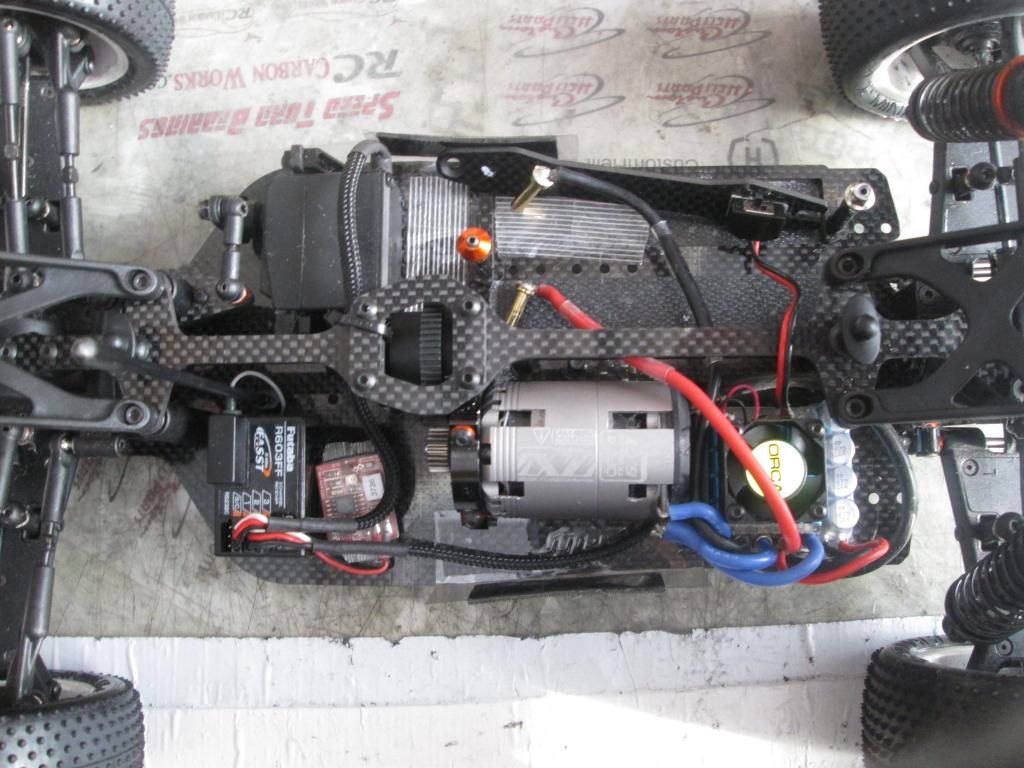
Wiring has kinda become my thing, been 6 years at flying heli's.
 02-12-2015, 07:23 AM
#7644
Anyone else try running associated pistons in their car?
Building my shocks last night I wanted to stick with a 2 hole setup for more pack and being an AE guy i have a boat load of AE pistons lying around. The center hole is larger and won't center well but i found once you put the washers on they hold well. To get them to center up, I put the nut on loosely, inserted the assembly into the shock body all the way to the bottom and then tightened up the piston nut. Smooth as butter through the whole stroke.
Building my shocks last night I wanted to stick with a 2 hole setup for more pack and being an AE guy i have a boat load of AE pistons lying around. The center hole is larger and won't center well but i found once you put the washers on they hold well. To get them to center up, I put the nut on loosely, inserted the assembly into the shock body all the way to the bottom and then tightened up the piston nut. Smooth as butter through the whole stroke.
02-12-2015, 07:30 AM
#7645
Ya know, I was debating on doing it at all. But I ended up doing my chassis, and I used emory paper, sharpie a rag and some CA. I didn't go crazy on rounding them off I just put the chassis in a clamp sanded it and wiped it clean, then used a Sharpie around the edge. Then left it in the clamp at an angle and with a fine tip on my CA glue I applied CA at the top and let it run down the chassis leaving a nice fine and shiny edge. I will probably end up taking the rest of the carbon off and doing it. IMO it's too easy to do it so why not.
02-12-2015, 07:43 AM
#7646
To apply the CA, I use a Q-Tip
02-12-2015, 08:39 AM
#7647
Build progress! I had to mount the electronics ahead of the steps so I could take it in to get soldered today.
Yes I'm aware my rear arms are backwards, I was half past tired when I put them on haha
Yes I'm aware my rear arms are backwards, I was half past tired when I put them on haha
02-12-2015, 08:56 AM
#7648
 02-12-2015, 09:17 AM
#7649
02-12-2015, 09:23 AM
#7650
Anyone else try running associated pistons in their car?
Building my shocks last night I wanted to stick with a 2 hole setup for more pack and being an AE guy i have a boat load of AE pistons lying around. The center hole is larger and won't center well but i found once you put the washers on they hold well. To get them to center up, I put the nut on loosely, inserted the assembly into the shock body all the way to the bottom and then tightened up the piston nut. Smooth as butter through the whole stroke.
Building my shocks last night I wanted to stick with a 2 hole setup for more pack and being an AE guy i have a boat load of AE pistons lying around. The center hole is larger and won't center well but i found once you put the washers on they hold well. To get them to center up, I put the nut on loosely, inserted the assembly into the shock body all the way to the bottom and then tightened up the piston nut. Smooth as butter through the whole stroke.