


 28Likes
Ultima RT5 3D-printed custom upgrade chassis
 11-25-2021, 10:29 AM
#1
Hello.
I started to develop this upgrade chassis for slightly newer cars, as after designing an 3D printable Kyosho Ultima ST Type-R EP chassis and its other parts, i bought RT5. Its a great car, but its old and doesnt support any other gearbox/motor combination than rear motor.
Here is one quick vid from my previous 3D print project (the Ultima ST Type-R EP that i mentioned), the 3D printed part list in in the video description:
(And sorry for the ball diff screaming, the balls aren�t round anymore).
This project actually started from just upgrading the RT5 front end to more up to date bellcrank system like in a RT6, to move the servo more towards the front. It took lots of work to make it work in a composite/3D printed chassis and the official Kyosho front end parts are not compatible with it, except the steering link (ackerman link) and the RT5 front shock mount, even though it looks almost like RT6/RB6 front end.
After that was done, i focused on chassis flex that my previous 3D printed chassis had a little bit too much. I made a simple flex plate system and also adjusted some stuff here and there:
After doing that, the project actually started, as i had an idea to mock up the design with canvas from laydown:

Started to design the rear end of the chassis from scratch:

After some hours:

Rear motor configuration with support craddle:

Rear battery tiedown, that can be also used to adjust flex:

Laydown with custom 3D printable motor plate (also supports stock plate):

Sideview:

Front:


Also supports inline and sideways battery, but the sideways currently only has like 8mm of total adjustability.
LD motor mount printed from CF/PETG and motor/gearbox package ready to be installed:

First proto chassis printed:

Midmotor 4 gear:

Rear motor (without the craddle in the picture):

Lay down:

Some test assembling:

Rear motor configuration support cradle (not bolted on):

Fully assembled in laydown configuration, ready for test drive:


After the test, only "broken" thing was the rear shock lower cap (it just got loose).


Balance test (without ESC/receiver):

Second proto chassis printed from PLA, cause its cheaper. I needed to do the first print from PETG/CF to check flex.

Inline with 3S LiPo:

2S sideways:
Custom rear bulkhead in rear motor configuration and custom rear shock tower (i needed to do some changes, as the stock RT5 or SC6/RT6 shock towers are not compatible with rear motor configuration with rear motor gearbox without the spacer (mainly RB5 and RT5 gearboxes).


This chassis is currently compatible with RB5/RT5 style front end (stock parts except the upper plate, my custom plate is needed) and also RB6/RT6 style front end, but that needs fully custom front end parts as it was impossible to make it work with stock parts and also retain stock steering geometry in my chassis as the original chassis is aluminum. Old Ultima ST EP/GP/RB front end is also compatible, but with custom upper plate. Stock motor mount plates are also supported, i just designed a 3D printable motor mount plate for laydown, as i dont own the stock plate. I also have 3D printable motor plates for rear motor configurations as well as i designed those in my last project.
As for the rear i suspect stock bulkheads should work, but i cannot confirm it as my design attaches the bulkhead to the rear support cradle in rear motor configuration. For the midmotor, the stock bulkhead should be fine.
After lots of testing with different filaments in several different projects, the most easiest to print (sticks to powder coated bed like crazy and it never warps) and the most stiffest material i could find was FormFutura CarbonFill Black PETG/CF. Its actually stiffer than the Nylon CF i have (that i was finally able to print) and much stiffer than stock PETG or PLA. I combine the best from that filament with using supporting stuff in the design to make it 3D printable and also durable. I use heat pressed brass M3 inserts in critical places,i dont use self tapping screws for chassis posts and other critical parts. Instead of that, i wrap aluminum M3 posts with plastic in the design to prevent it from moving and then bolt parts to those post. By doing that, several different parts from the design are height adjustable after printing the chassis by simply changing the aluminum posts to different lengths. I also think about printing orientations in the design stage of the parts to maximize durability of the parts.
And a small disclaimer. I�m not a professional designer, or engineer. Just a self learned Fusion 360 user. I started learning Fusion from the scratch somewhere around January 2020, never been using mechanical design cad programs before (only electronics, with different design software). I did lots of raw modelling using just a caliper and paper. After some time i found out that i can check some things more quickly using canvases, so yea, learned a lot during these projects, but there�s still a lot to learn.
I started to develop this upgrade chassis for slightly newer cars, as after designing an 3D printable Kyosho Ultima ST Type-R EP chassis and its other parts, i bought RT5. Its a great car, but its old and doesnt support any other gearbox/motor combination than rear motor.
Here is one quick vid from my previous 3D print project (the Ultima ST Type-R EP that i mentioned), the 3D printed part list in in the video description:
(And sorry for the ball diff screaming, the balls aren�t round anymore).
This project actually started from just upgrading the RT5 front end to more up to date bellcrank system like in a RT6, to move the servo more towards the front. It took lots of work to make it work in a composite/3D printed chassis and the official Kyosho front end parts are not compatible with it, except the steering link (ackerman link) and the RT5 front shock mount, even though it looks almost like RT6/RB6 front end.

After that was done, i focused on chassis flex that my previous 3D printed chassis had a little bit too much. I made a simple flex plate system and also adjusted some stuff here and there:

After doing that, the project actually started, as i had an idea to mock up the design with canvas from laydown:

Started to design the rear end of the chassis from scratch:

After some hours:

Rear motor configuration with support craddle:

Rear battery tiedown, that can be also used to adjust flex:

Laydown with custom 3D printable motor plate (also supports stock plate):

Sideview:

Front:


Also supports inline and sideways battery, but the sideways currently only has like 8mm of total adjustability.
LD motor mount printed from CF/PETG and motor/gearbox package ready to be installed:

First proto chassis printed:

Midmotor 4 gear:

Rear motor (without the craddle in the picture):

Lay down:

Some test assembling:

Rear motor configuration support cradle (not bolted on):

Fully assembled in laydown configuration, ready for test drive:


After the test, only "broken" thing was the rear shock lower cap (it just got loose).


Balance test (without ESC/receiver):

Second proto chassis printed from PLA, cause its cheaper. I needed to do the first print from PETG/CF to check flex.

Inline with 3S LiPo:

2S sideways:

Custom rear bulkhead in rear motor configuration and custom rear shock tower (i needed to do some changes, as the stock RT5 or SC6/RT6 shock towers are not compatible with rear motor configuration with rear motor gearbox without the spacer (mainly RB5 and RT5 gearboxes).


This chassis is currently compatible with RB5/RT5 style front end (stock parts except the upper plate, my custom plate is needed) and also RB6/RT6 style front end, but that needs fully custom front end parts as it was impossible to make it work with stock parts and also retain stock steering geometry in my chassis as the original chassis is aluminum. Old Ultima ST EP/GP/RB front end is also compatible, but with custom upper plate. Stock motor mount plates are also supported, i just designed a 3D printable motor mount plate for laydown, as i dont own the stock plate. I also have 3D printable motor plates for rear motor configurations as well as i designed those in my last project.
As for the rear i suspect stock bulkheads should work, but i cannot confirm it as my design attaches the bulkhead to the rear support cradle in rear motor configuration. For the midmotor, the stock bulkhead should be fine.
After lots of testing with different filaments in several different projects, the most easiest to print (sticks to powder coated bed like crazy and it never warps) and the most stiffest material i could find was FormFutura CarbonFill Black PETG/CF. Its actually stiffer than the Nylon CF i have (that i was finally able to print) and much stiffer than stock PETG or PLA. I combine the best from that filament with using supporting stuff in the design to make it 3D printable and also durable. I use heat pressed brass M3 inserts in critical places,i dont use self tapping screws for chassis posts and other critical parts. Instead of that, i wrap aluminum M3 posts with plastic in the design to prevent it from moving and then bolt parts to those post. By doing that, several different parts from the design are height adjustable after printing the chassis by simply changing the aluminum posts to different lengths. I also think about printing orientations in the design stage of the parts to maximize durability of the parts.
And a small disclaimer. I�m not a professional designer, or engineer. Just a self learned Fusion 360 user. I started learning Fusion from the scratch somewhere around January 2020, never been using mechanical design cad programs before (only electronics, with different design software). I did lots of raw modelling using just a caliper and paper. After some time i found out that i can check some things more quickly using canvases, so yea, learned a lot during these projects, but there�s still a lot to learn.
Last edited by HiTec; 07-05-2022 at 12:15 PM.
 11-26-2021, 09:56 AM
#2
Also thought to add some nice touch to some of the parts, with 1mm layer of glow in the dark filament:

(Dont mind the inline battery plate, it shouldnt have that text, but it was the first part i where i tested this, so its use in my own car):
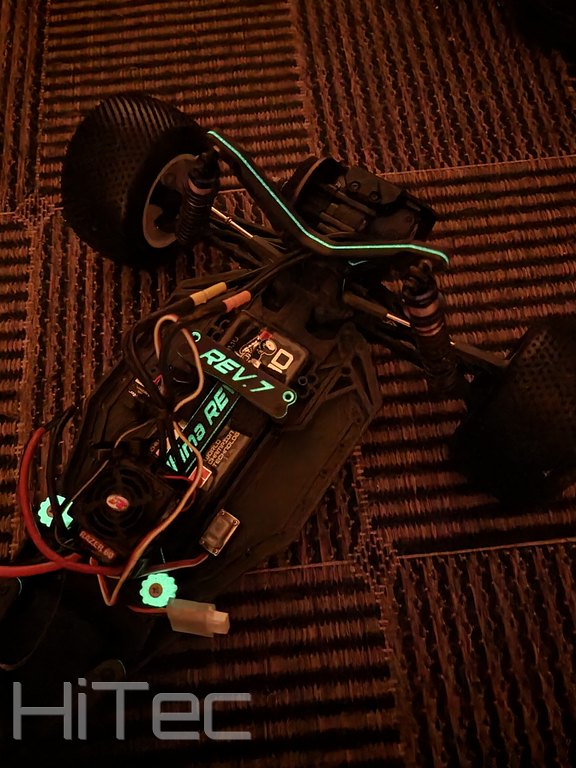
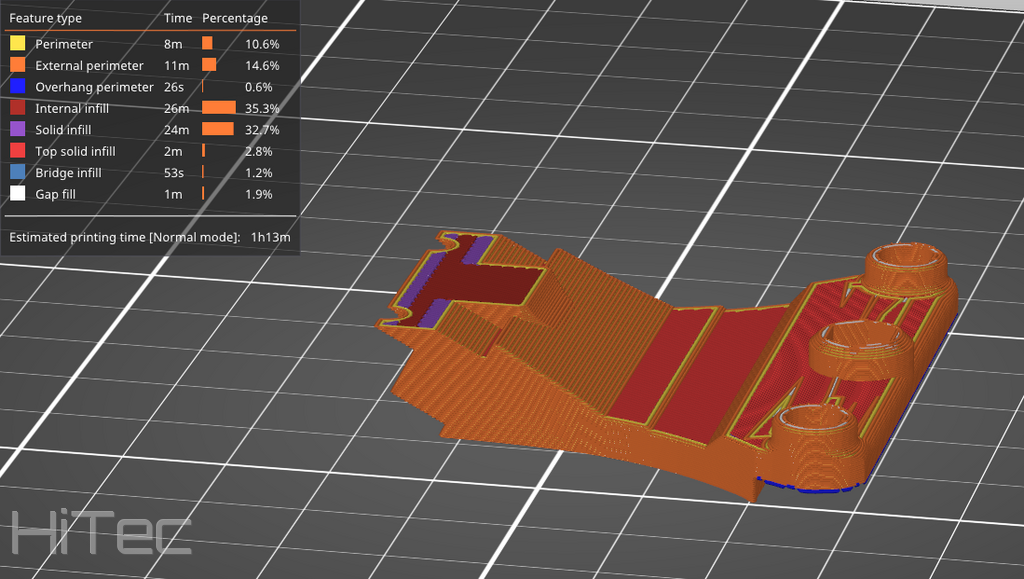
Im also using that same technique for colour coding the some of the parts that are flex adjustable. Example. The most hardest rear shock tower is 100% infill, with translucent , glow in the dark stripe. 80% infill has red stripe, 50% has translucent green stripe. Im testing that should i adjust the flex with infill or with a material choice.
Not much of work done today actually. This starts to be in the stage where i can just test different setups and configurations. Drove a couple of full battery cycles with laydown configuration, before swapping it to rear motor.

(Dont mind the inline battery plate, it shouldnt have that text, but it was the first part i where i tested this, so its use in my own car):

Im also using that same technique for colour coding the some of the parts that are flex adjustable. Example. The most hardest rear shock tower is 100% infill, with translucent , glow in the dark stripe. 80% infill has red stripe, 50% has translucent green stripe. Im testing that should i adjust the flex with infill or with a material choice.
Not much of work done today actually. This starts to be in the stage where i can just test different setups and configurations. Drove a couple of full battery cycles with laydown configuration, before swapping it to rear motor.
Last edited by HiTec; 11-26-2021 at 11:31 AM.
11-26-2021, 04:47 PM
#4
Tech Adept
Very nice indeed!
How's the little part with the kick up holding up in hard crashes? That's the part I would be concerned the most. Maybe it would be wise to use a small bent aluminium plate instead of a 3D printed part.
Keep it up!
Andreas
How's the little part with the kick up holding up in hard crashes? That's the part I would be concerned the most. Maybe it would be wise to use a small bent aluminium plate instead of a 3D printed part.
Keep it up!
Andreas
11-27-2021, 02:23 AM
#5
Thanks for the feedback belewis01 and andreas78
@andreas78
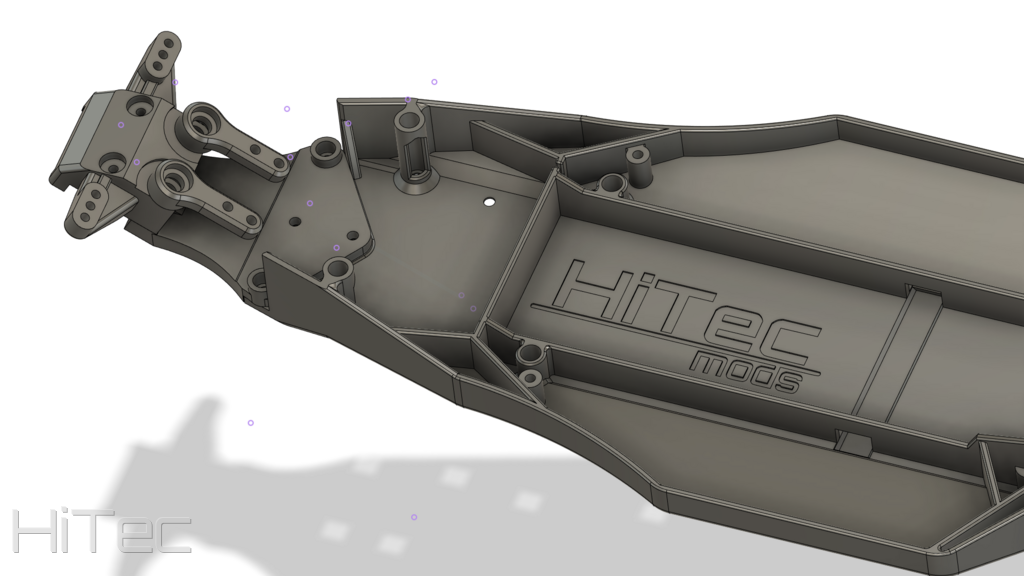
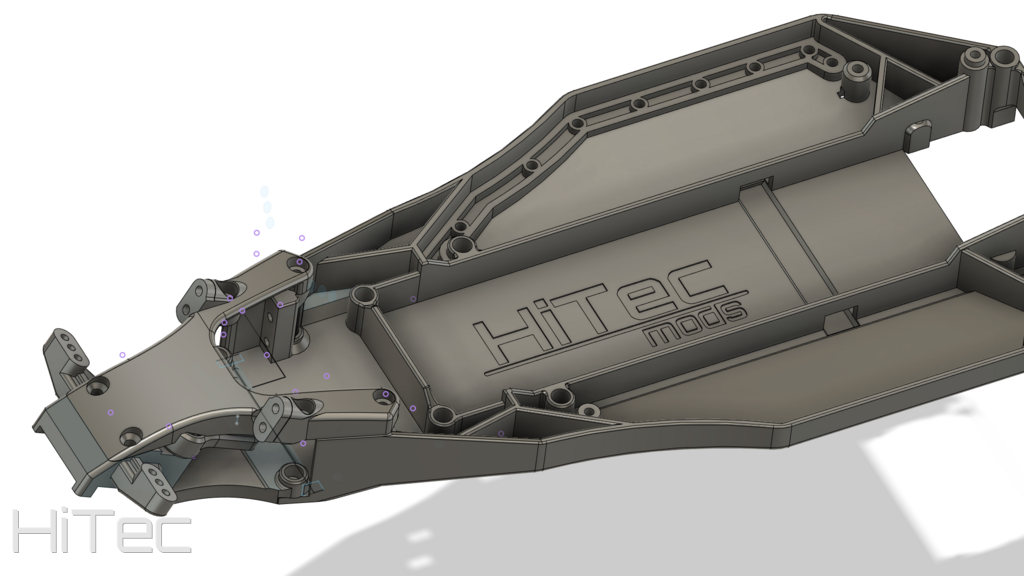
That is one of the most difficult thing to get right in this chassis, because there is so little space around bellcranks and the 28 degree kickup angle (start angle, which is then altered with hinge pin holder angle) of the front lower plate "flap" where it starts to raise towards the front of the car is challenging for FDM 3D printing when thinking about layer adhesion and layer area. The picture i posted where you see the thickness of the flap is actually not the final release part. I took new pics where you see how it actually is:
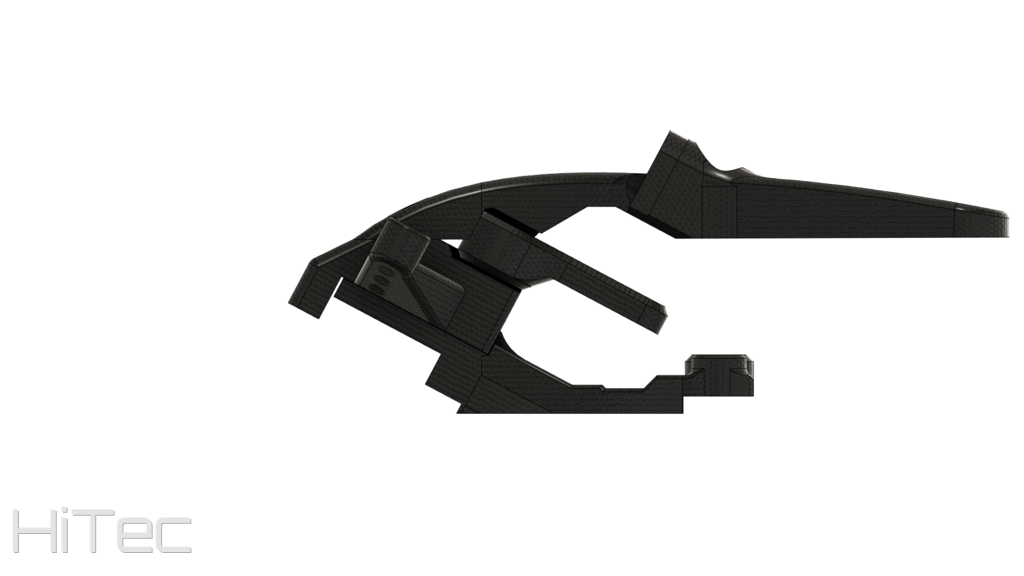
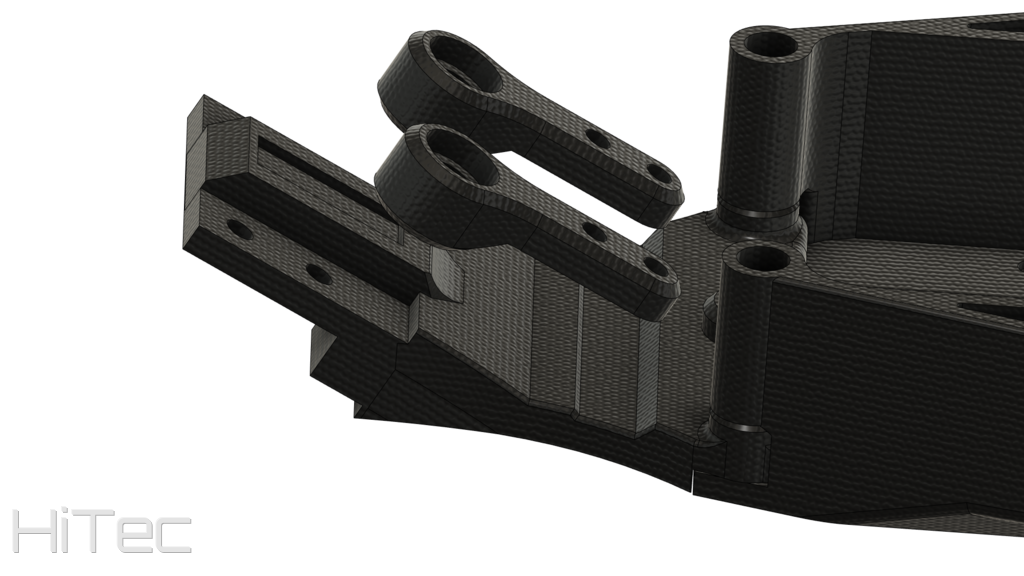
I think the weakest point is still somewhere around these layers:
I�ve tried my best to fiddle around with "adding some beef" around there, using the pressure of the surrounding parts when everything is bolted together. I was also worried about how this part bolts on to main chassis with just 3 screws from the lower side, so i modified the chassis to wrap those side aluminum posts with main chassis material to reduce flex and tearing force that goes to those 3 screws. These things will ofc move the weakest point to the front upper chassis plate, so it also needed some supporting modifications, even though, reducing the lower plate flex/bend will ofc reduce possibility of the front upper plate failure in "normal driving". And as always, everything needs to be done so there�s no serious amount of extra weight added, so its kind of a never-ending limbo. Here you can also see why i said earlier that the stock RT6/RB6/SC6/RB7 parts are not compatible in the front end with my chassis.
There are still a couple of tricks in the sleeve with this part what can be used. One of those to mention is to tie up this part with 2 screws to the aluminum standoffs where the steering bellcrank arms use. The final trick is combining this design with aluminum plate. Your suggestion with aluminum is good, but in this design, it would be hard to do it just from aluminum, at least with simple home tools (which is kind of my point with this chassis).
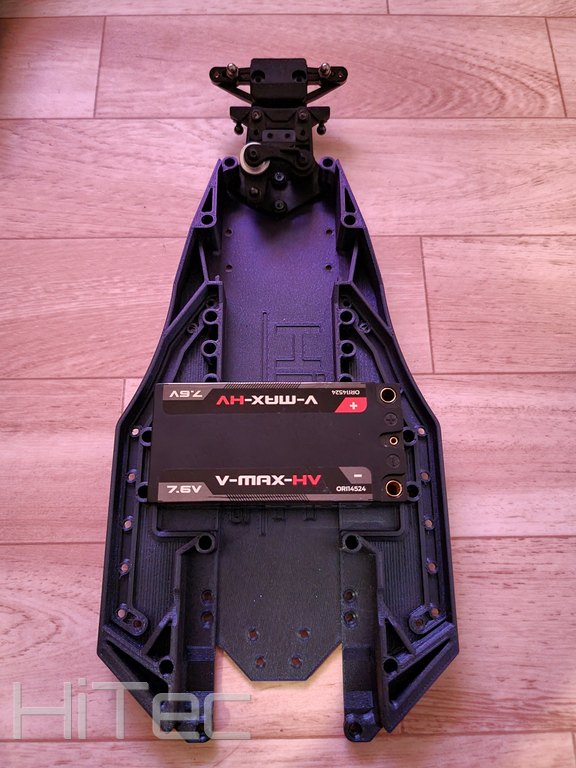
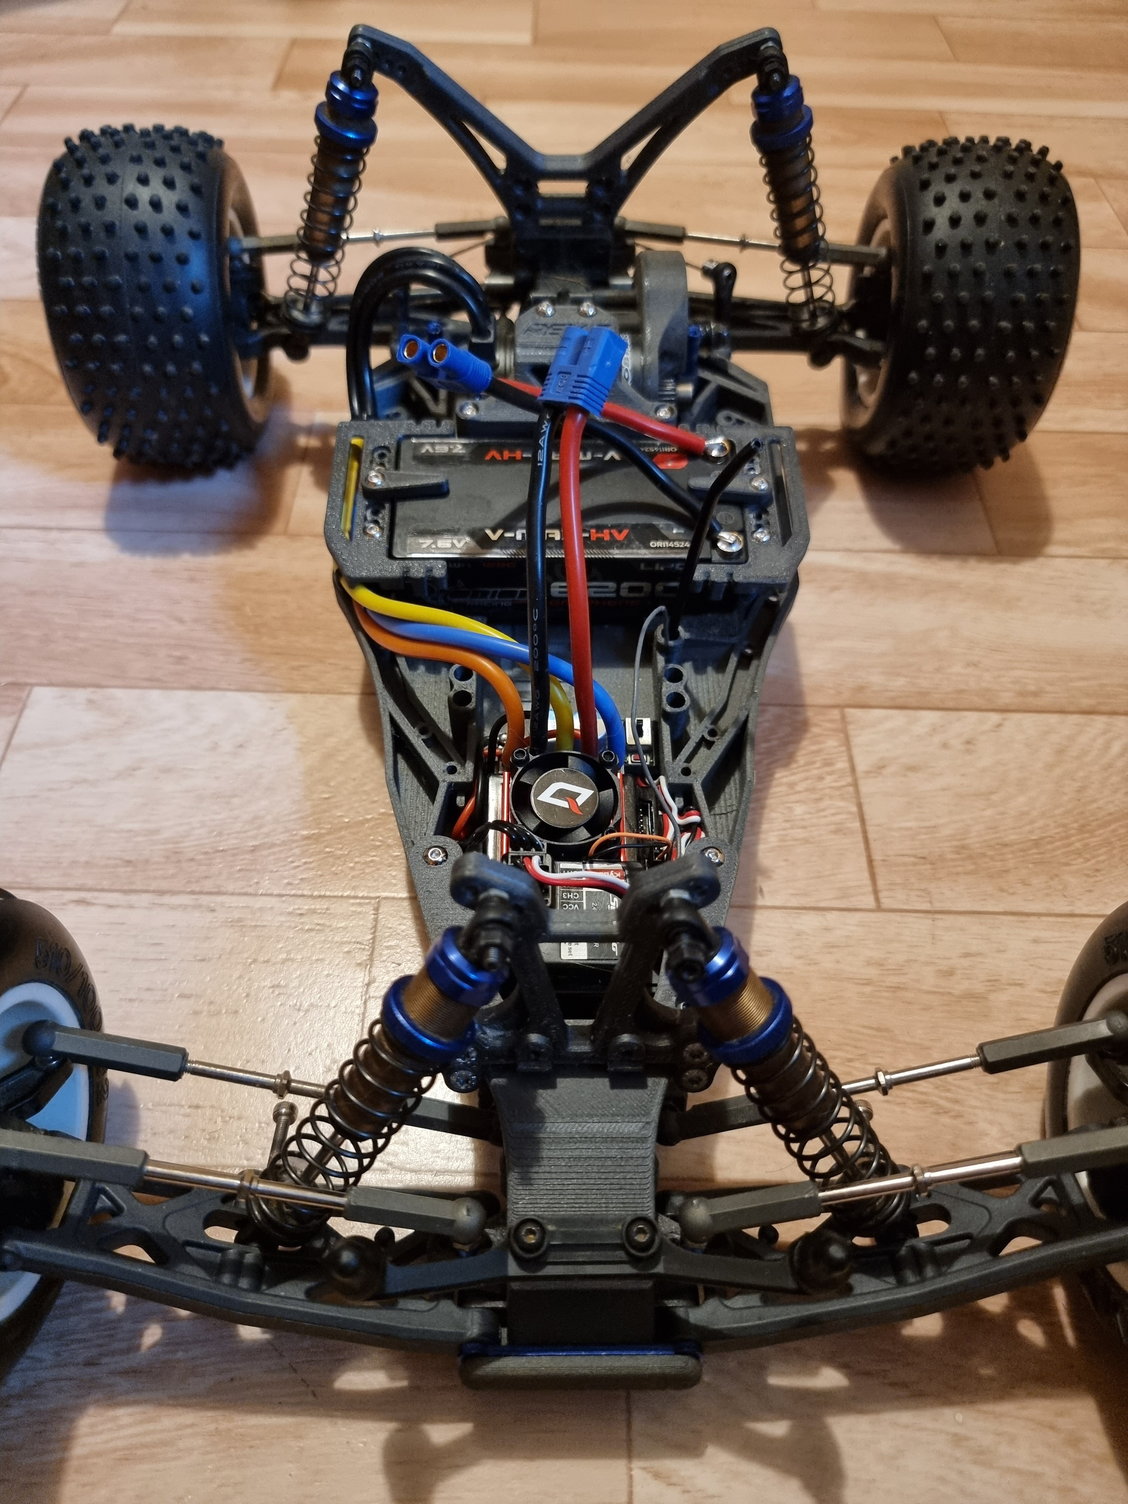
Heres actually some comparison from the original RT5 chassis and my pla proto. Dont mind the "missing" front sideways support just behind the steering servo, its just a removable plate to gain support for stock RT5/RB5/SC 1gen stock front end parts minus the upper plate. I wanted my chassis to support to support those "previous gen" parts as much as possible, so thats why i needed to design a removable brace behind the steering servo, because in a same time i wanted to maximize the inline battery adjustability window. With my english skills its hard to describe this, but when using RT5 front end with my custom upper plate (not released yet), you need to swap the steering servo more towards the back (to the rear most holes in the chassis). When you use my custom front end, you can also ditch the support plate if you want to move battery more towards the front in inline batt configuration, and add more sideways support with battery front tie down strap instead. If you dont need the battery to be on front, you can also use the sideways "stock" brace.


The PLA proto version still has some unused body posts and un-optimized material use here and there, but i think its pretty nice.
The front lower plate part has held fine with my driving in the -10 degrees celsius, with a couple of crashes and roll-overs, but i really cant tell what is the maximum beating it can hold up. Plan was to print some different style of parts and go to nearest indoor track which is like 100km from here where i live, but the exploded corona situation here has made this impossible right now.
@andreas78
That is one of the most difficult thing to get right in this chassis, because there is so little space around bellcranks and the 28 degree kickup angle (start angle, which is then altered with hinge pin holder angle) of the front lower plate "flap" where it starts to raise towards the front of the car is challenging for FDM 3D printing when thinking about layer adhesion and layer area. The picture i posted where you see the thickness of the flap is actually not the final release part. I took new pics where you see how it actually is:


I think the weakest point is still somewhere around these layers:

I�ve tried my best to fiddle around with "adding some beef" around there, using the pressure of the surrounding parts when everything is bolted together. I was also worried about how this part bolts on to main chassis with just 3 screws from the lower side, so i modified the chassis to wrap those side aluminum posts with main chassis material to reduce flex and tearing force that goes to those 3 screws. These things will ofc move the weakest point to the front upper chassis plate, so it also needed some supporting modifications, even though, reducing the lower plate flex/bend will ofc reduce possibility of the front upper plate failure in "normal driving". And as always, everything needs to be done so there�s no serious amount of extra weight added, so its kind of a never-ending limbo. Here you can also see why i said earlier that the stock RT6/RB6/SC6/RB7 parts are not compatible in the front end with my chassis.
There are still a couple of tricks in the sleeve with this part what can be used. One of those to mention is to tie up this part with 2 screws to the aluminum standoffs where the steering bellcrank arms use. The final trick is combining this design with aluminum plate. Your suggestion with aluminum is good, but in this design, it would be hard to do it just from aluminum, at least with simple home tools (which is kind of my point with this chassis).
Heres actually some comparison from the original RT5 chassis and my pla proto. Dont mind the "missing" front sideways support just behind the steering servo, its just a removable plate to gain support for stock RT5/RB5/SC 1gen stock front end parts minus the upper plate. I wanted my chassis to support to support those "previous gen" parts as much as possible, so thats why i needed to design a removable brace behind the steering servo, because in a same time i wanted to maximize the inline battery adjustability window. With my english skills its hard to describe this, but when using RT5 front end with my custom upper plate (not released yet), you need to swap the steering servo more towards the back (to the rear most holes in the chassis). When you use my custom front end, you can also ditch the support plate if you want to move battery more towards the front in inline batt configuration, and add more sideways support with battery front tie down strap instead. If you dont need the battery to be on front, you can also use the sideways "stock" brace.


The PLA proto version still has some unused body posts and un-optimized material use here and there, but i think its pretty nice.
The front lower plate part has held fine with my driving in the -10 degrees celsius, with a couple of crashes and roll-overs, but i really cant tell what is the maximum beating it can hold up. Plan was to print some different style of parts and go to nearest indoor track which is like 100km from here where i live, but the exploded corona situation here has made this impossible right now.
Last edited by HiTec; 11-27-2021 at 12:20 PM.
11-27-2021, 07:12 AM
#6
Looks cool man, The glow in the dark bits are a nice touch!
11-27-2021, 10:24 AM
#7
Thanks! I like that detail too, looks awesome.
Enjoy, please respect the licence and give the feedback/suggestions in here or through other channels.
https://www.thingiverse.com/thing:5147467
Enjoy, please respect the licence and give the feedback/suggestions in here or through other channels.
https://www.thingiverse.com/thing:5147467
Last edited by HiTec; 11-27-2021 at 11:29 AM.
11-29-2021, 11:27 AM
#8
Added new gen style front wheel hubs to the set, as they are needed for correct steering geometry (you cant use RT5 front bearing hubs with my custom front end). They should be printed so the hinge pin what attaches to C-hub is vertical on print bed (even though this makes the bearing hole little bit uneven). These can be ofc ordered from Kyosho also and its propably a better option, as these are hard to print so they are durable enough. I printed and assembled them myself and i will test drive them in a couple of days. (Its almost -20 degrees celsius here, so fingers are freezing when testing. RT5 style C-hubs should be compatible, so no need to swap those i think.
I'll try to shoot a test drive video in a couple of days or so. Car will be in a rear motor configuration, as there really isnt any grip here right now.
I'll try to shoot a test drive video in a couple of days or so. Car will be in a rear motor configuration, as there really isnt any grip here right now.
Last edited by HiTec; 11-29-2021 at 11:41 AM.
01-07-2022, 02:52 PM
#9
There hasnt been updates, as I've been busy and mostly just testing the car when i've had time, so no videos, sorry. I found two weak spots when doing some jumps in freezing temps and fixed them. The updated and re-tested parts have been added to REV7 thingiverse files.
Car works great. Handles very nicely and is durable. I printed the rear lower chassis plate from Nylon Carbon Fiber, as i saw that the rear hinge pin holder screws started slowly chewing out the PETG screw holes.
The next updates/addons are small. Just adding some parts that Ive been testing before release that are missing from the package. Im also assembling a second test car with PLA main chassis to test what it can handle. Overall very happy with this chassis. You can also slice RB5 update chassis from this. If i remember correctly, just slice the main chassis 23mm shorter than originally and you have RB5 chassis.
06-19-2022, 03:02 PM
#10
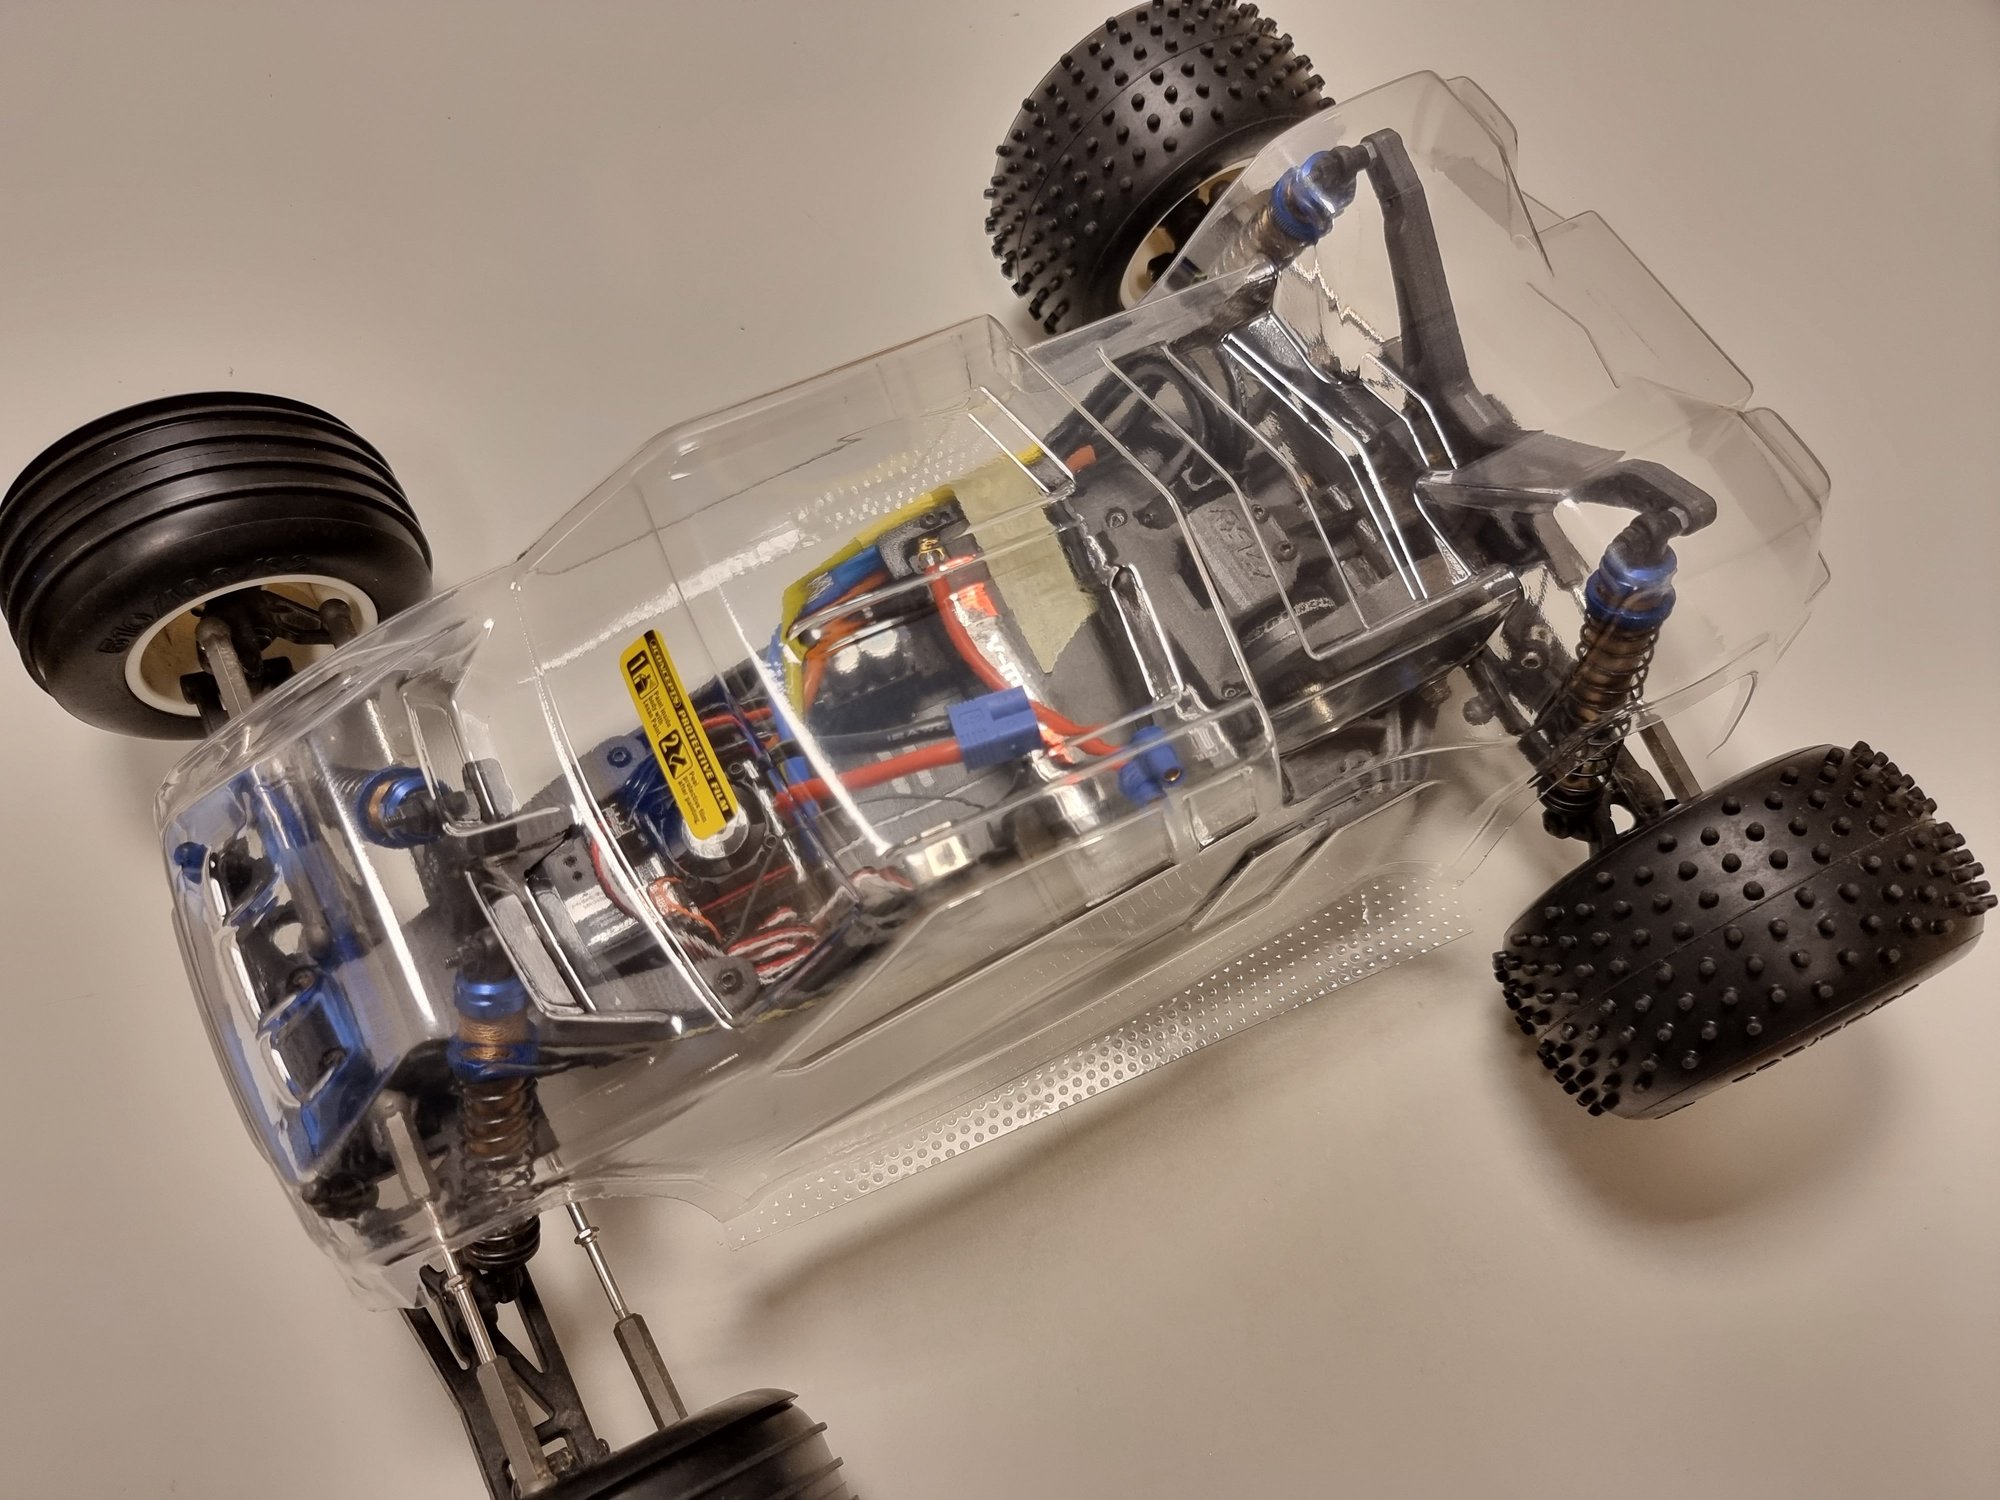
Car has been working great. I've been driving it around in laydown configuration on short grass and just been adjusting some stuff in design and adding missing parts. Main chassis is still the same as before. My thingiverse page has all the newest updates listed.
Im currently testing gull wing front arms from AE RC10T6.2. They are straight fit to bulkhead and C-hubs (only some spacers needed). Custom front shock tower for these gull wing arms is under development and testing. And so is the easy access gearbox. No ETA though.
Some pics (stock shock tower, not driveable with gull wing arms):

New body:
Some testing:
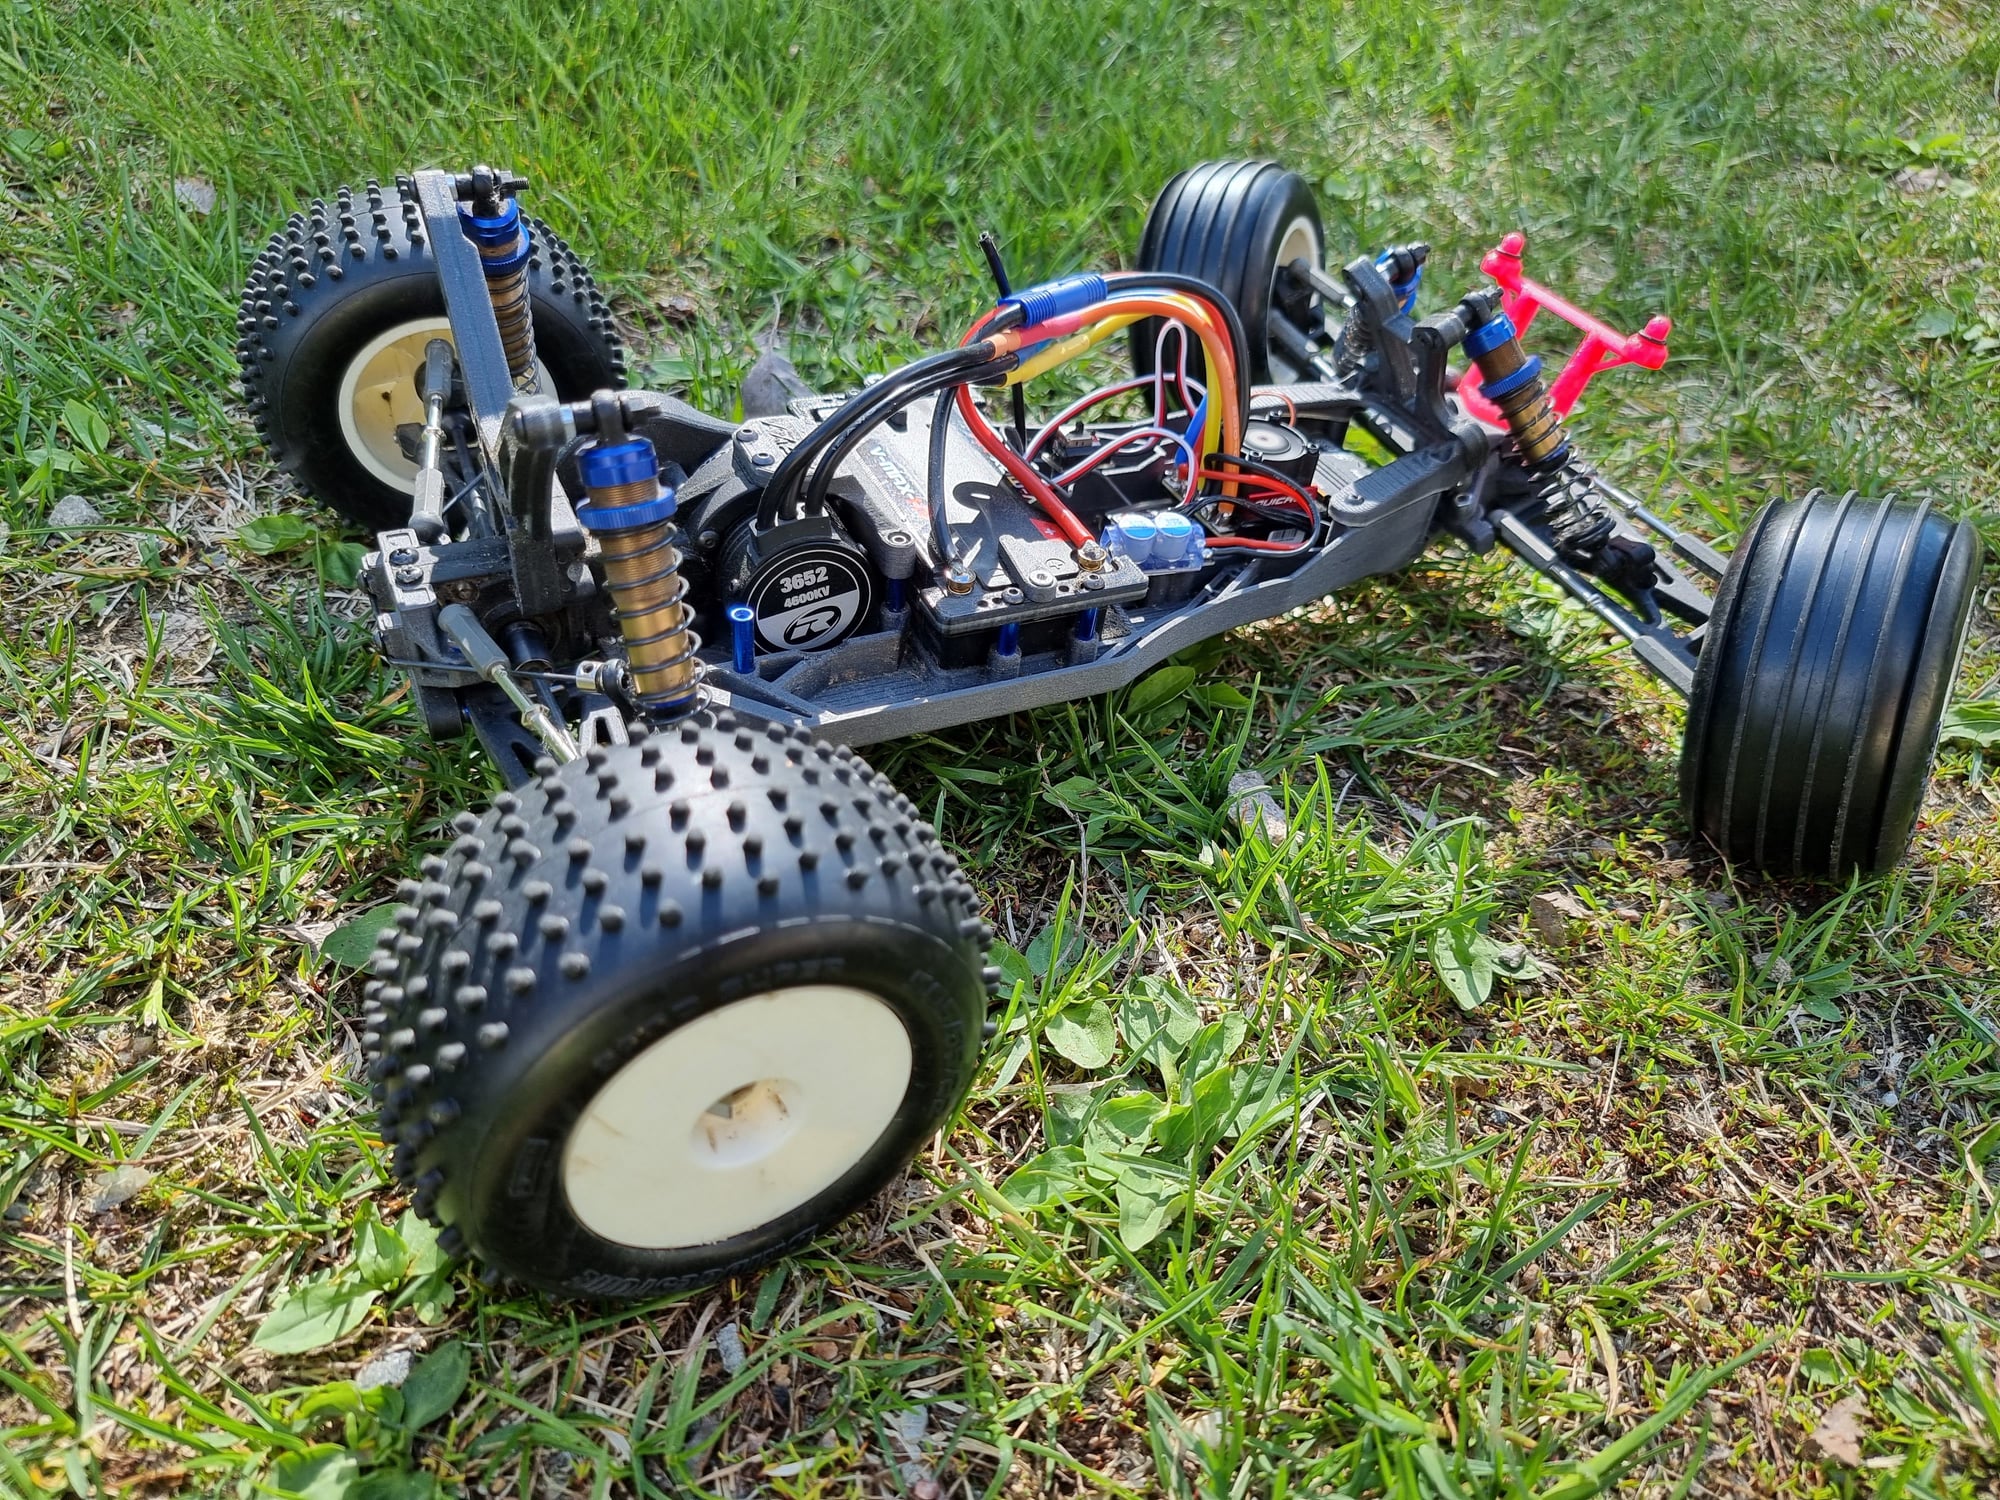
Im currently testing gull wing front arms from AE RC10T6.2. They are straight fit to bulkhead and C-hubs (only some spacers needed). Custom front shock tower for these gull wing arms is under development and testing. And so is the easy access gearbox. No ETA though.
Some pics (stock shock tower, not driveable with gull wing arms):
New body:
Some testing:
06-20-2022, 04:51 AM
#11
What a great build so far. Have you tried this on a track yet?
06-20-2022, 12:48 PM
#12
Thank you! I've been mostly just bashing/driving it hard on our big grass yard which has big and small jumps and tried to find some weak spots. We have planned the first track day with my friend to next month, but before that im going to print some extra spare parts and some experimental parts as well, so the track time can be used well. I also need different kind of tyres. (We have like 100km to our nearest track, so we need to be well prepared). 😅
Prototype front shock tower for Asso T6.2 gull wing front arms added to thingiverse page. Design might need some further work, but this is easy and cheap to print, so i released it so anyone can test it. Should also be compatible with stock RT5 front upper plate.
https://www.thingiverse.com/thing:5147467
Last edited by HiTec; 06-20-2022 at 12:53 PM. Reason: Added link to thingiverse page.
06-21-2022, 12:37 AM
#13
Impressive build ...if I may ask: What brand of filament is the PETG ?
06-21-2022, 12:55 AM
#14
Thanks!
It's FormFutura: https://www.formfutura.com/shop/prod...8?category=458
Its also a lot cheaper than Nylon CF. I actually swapped back to PETG/CF on my re-designed rear chassis plate and i havent had issues with it after i designed an integrated skid plate to the rear chassis plate (which also solved the cracking/screw hole chewing problem that the original design had).
06-21-2022, 11:33 AM
#15
No one hasnt asked about those blue aluminum body posts that i put on the rear of the chassis instead of heat pressed brass inserts (rear chassis plate attaches to those aluminum points from underneath.), so lets quickly talk about them.
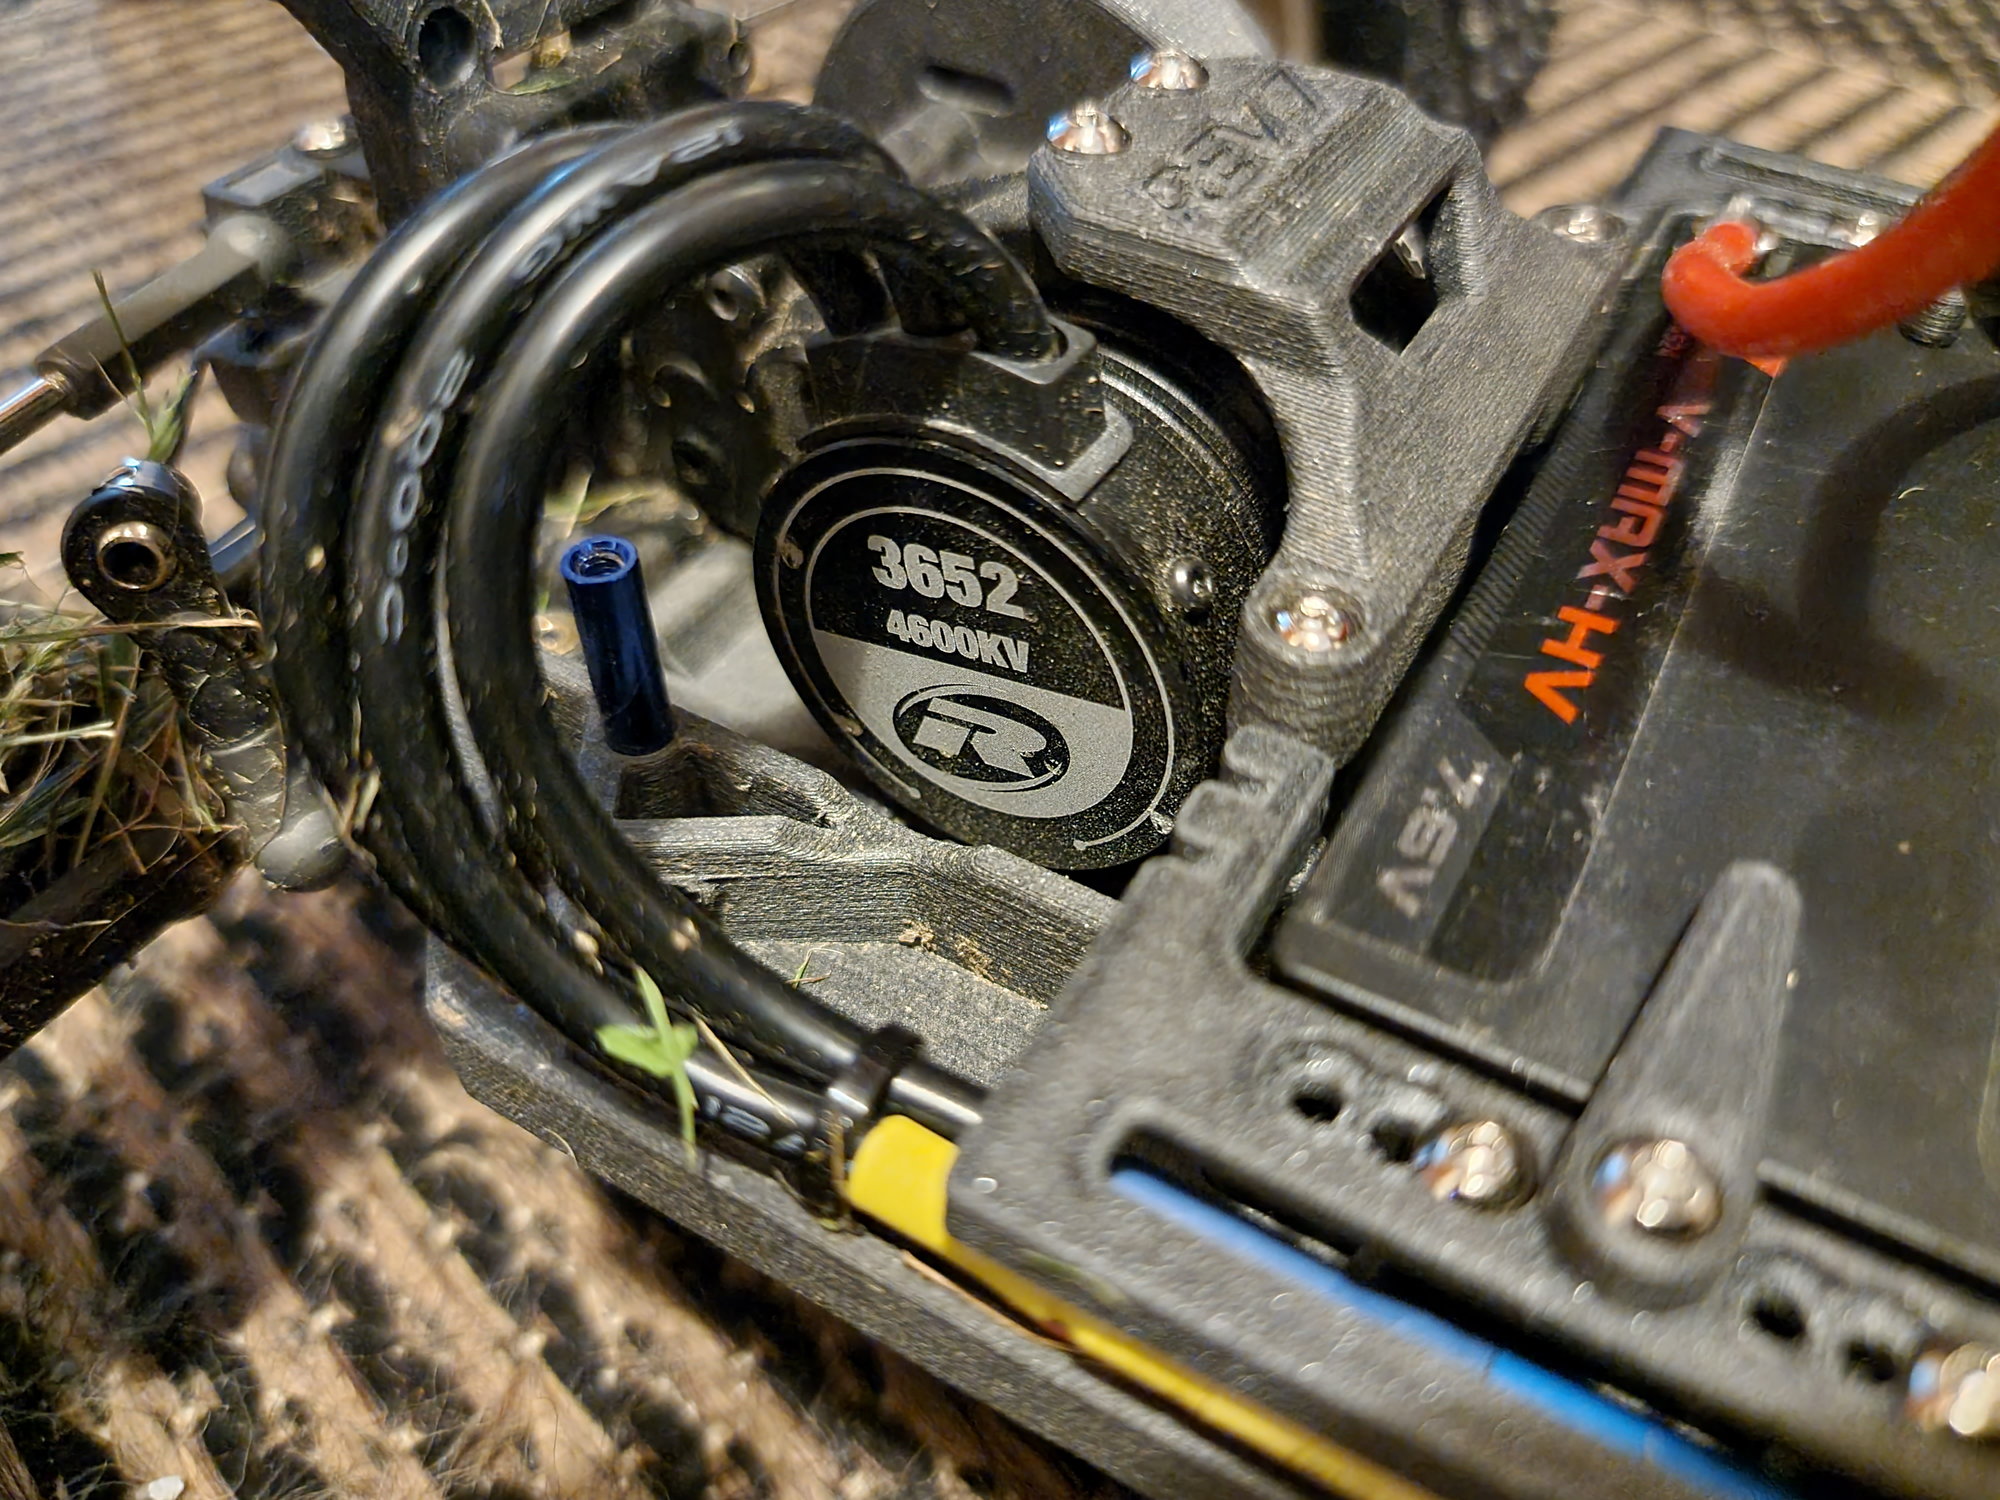
Those could be used for additional bracing as well, but the main cause and designed location is a neat attachment point for motor fan. I was finally able to get the fan i wanted (30mm aluminum red/black) as it came back to stock.
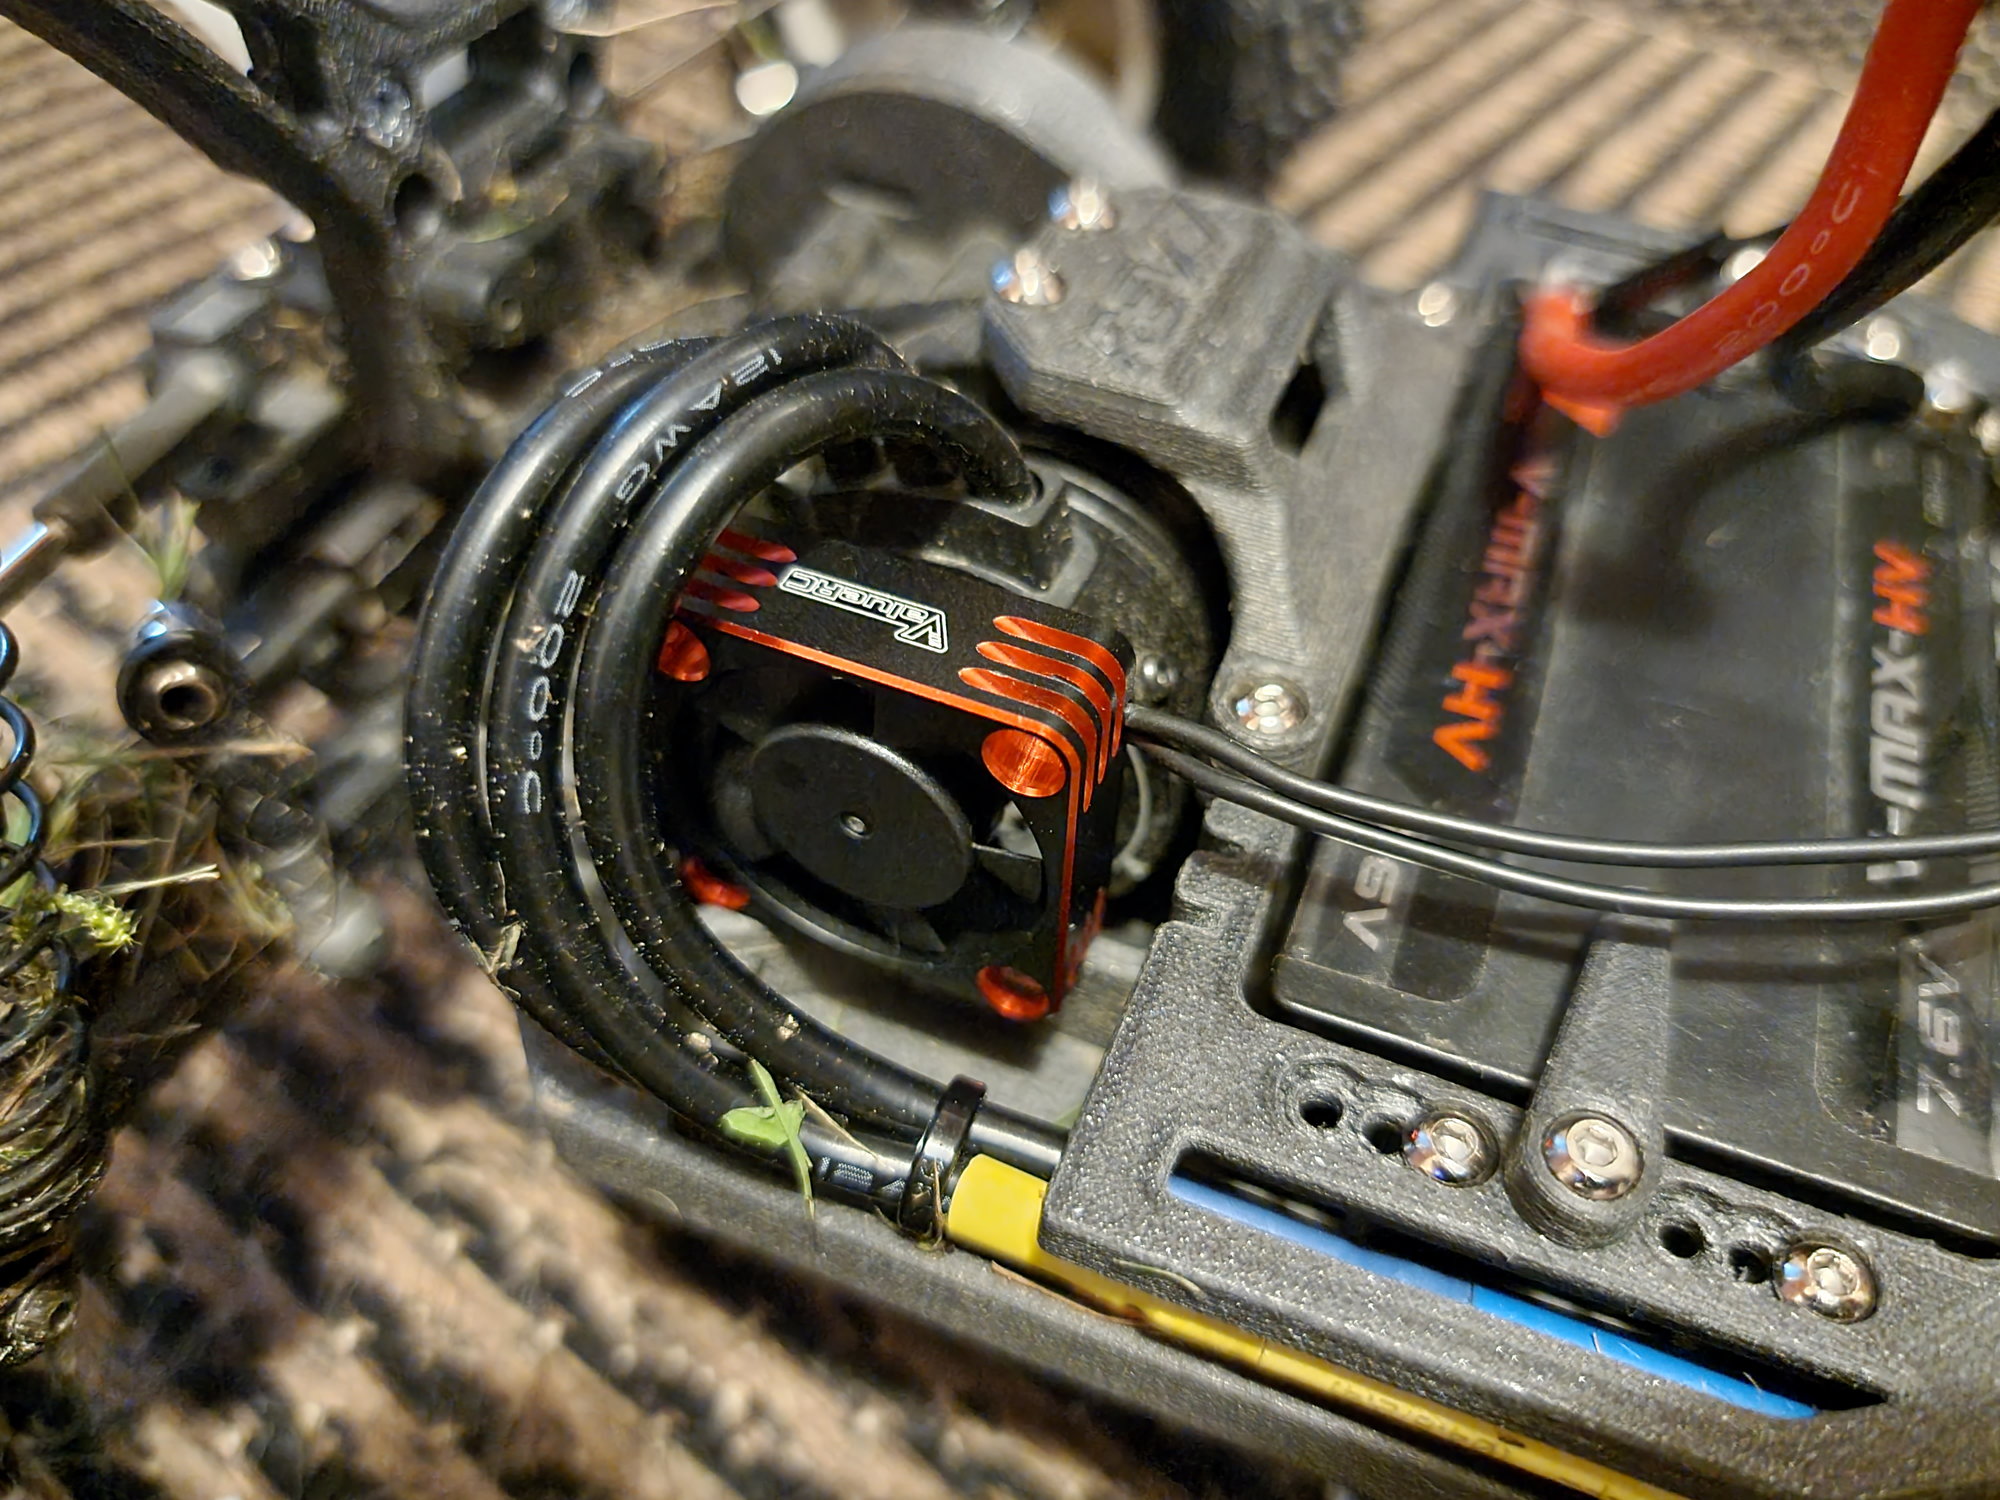
Thats just a quick mockup picture, as i havent designed the brackets for it yet. That might also not be the position how the fan will be pointing at the motor.
I've also thought about possibility to design another version waterfall brace that supports this same fan for those who would like to install the fan to waterfall brace (going to be a little bit tight, as the sideways shorty battery rearmost position is as close to the motor as possible. The third version of the waterfall brace is going to be one with the ball joint, for those who like to have little bit more flex on their chassis instead of the stock.
I've also fiddled around with idea of using stainless steel washers to provide a really cheap weight/balance adjustments. Not as pretty as those CNC machined weights, but who is going to look underneath the gearbox/battery/servo. But yea, that idea needs some more design work and also a full main chassis plate revision, so at least for now people need to just use stock brass weights.
Thats it for now. Just check the thingiverse page for newest updates/releases, as i wont probably be posting every minor thing here.
Those could be used for additional bracing as well, but the main cause and designed location is a neat attachment point for motor fan. I was finally able to get the fan i wanted (30mm aluminum red/black) as it came back to stock.
Thats just a quick mockup picture, as i havent designed the brackets for it yet. That might also not be the position how the fan will be pointing at the motor.
I've also thought about possibility to design another version waterfall brace that supports this same fan for those who would like to install the fan to waterfall brace (going to be a little bit tight, as the sideways shorty battery rearmost position is as close to the motor as possible. The third version of the waterfall brace is going to be one with the ball joint, for those who like to have little bit more flex on their chassis instead of the stock.
I've also fiddled around with idea of using stainless steel washers to provide a really cheap weight/balance adjustments. Not as pretty as those CNC machined weights, but who is going to look underneath the gearbox/battery/servo. But yea, that idea needs some more design work and also a full main chassis plate revision, so at least for now people need to just use stock brass weights.
Thats it for now. Just check the thingiverse page for newest updates/releases, as i wont probably be posting every minor thing here.