


 9Likes
Soze's UMG10 - 80's toy/cartoon theme build
 05-21-2019, 08:57 AM
#1
The UMG10 was intriguing enough for me to pick up another SCX10.2. Bonus that it came as a kit. As soon as I saw the driver included with the kit I knew what I what direction I wanted to go with it.
I mulled over how detailed to make this thread since the SCX10.2 is pretty well known at this point. Decided to go ahead and just document everything just in case there are newcomers to the hobby.
Follow this build on YouTube - https://www.youtube.com/playlist?lis...z6_PHerM8MMzUd
As an eBay Partner, I may be compensated if you make a purchase from the links below.
Build Details:
Axial SCX10 II UMG10 Kit
Boom Racing 25T Alloy Servo Horn
Electronics:
Hobbywing WP-1080 Brushed Crawler Esc (ebay)
Holmes Hobbies Trailmaster Sport 550 21T (ebay)
FlySky R6B 2.4GHz 6-Channel Receiver
FlySky GT-3C 2.4 GHz Radio
DS3218 20kg Servo (ebay)
Tools:
Versachem Brake Caliper Grease
Permatex Anti Seize Lubricant (ebay)
Tamiya Side Cutter
Protek RC Shock Pliers (available on eBay)
DEWALT DCF610S2R 12V MAX Cordless Lithium-Ion 1/4 in. Hex Chuck Screwdriver Kit
MIP Metric Speed Tip Set MIP9512
Associated 1656 FT 1/4 in Driver Handle
Duratrax Shock stand
Bob Smith Industries Blue Thread locker (available on eBay)
Multistar Rubber R/C Work mat
Paint:
Tamiya PS-4 Blue
Tamiya PS-23 Gunmetal
Tamiya PS-5 Black
Tamiya PS-55 Flat Clear
Tamiya XF-15 Flat Flesh
Tamiya 5mm Masking tape for Curves
Frog Tape (for general masking)
Last edited by soze; 04-18-2024 at 11:25 PM.
 05-21-2019, 08:57 AM
#2
Part 1: Axles
Let's get started!

We need parts from these bags.

Step 1 - diff gears


Step 2 - Going to give these 1 piece housings a try before I replace them.


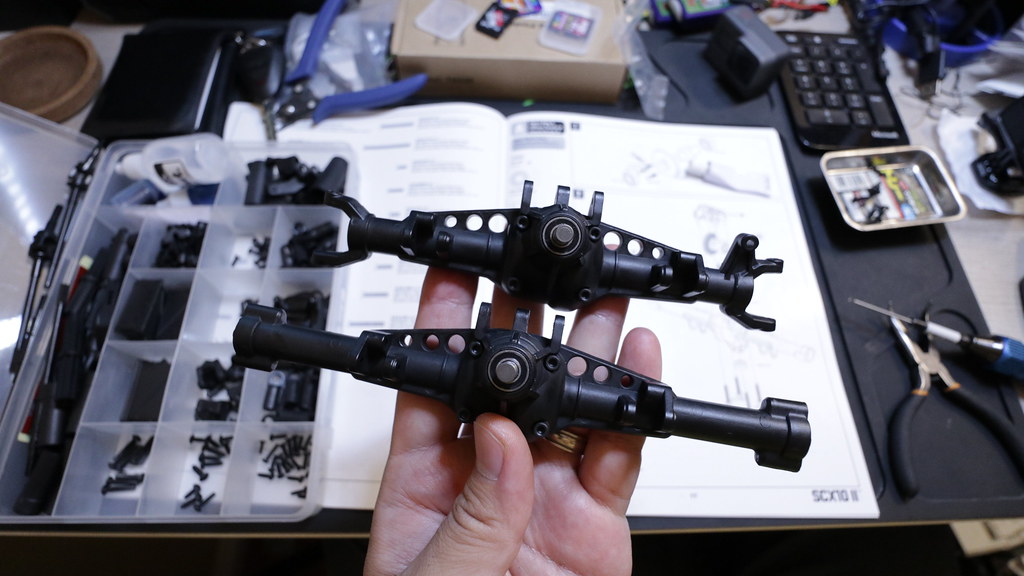
Step 3 - Front Axle


Step 4 - Rear Axle


Step 5


lockouts for multi-piece housing replaced with just screws for 1-piece housing.

Axles are complete!

Let's get started!
We need parts from these bags.
Step 1 - diff gears
Step 2 - Going to give these 1 piece housings a try before I replace them.
Step 3 - Front Axle
Step 4 - Rear Axle
Step 5
lockouts for multi-piece housing replaced with just screws for 1-piece housing.
Axles are complete!
05-21-2019, 08:58 AM
#3
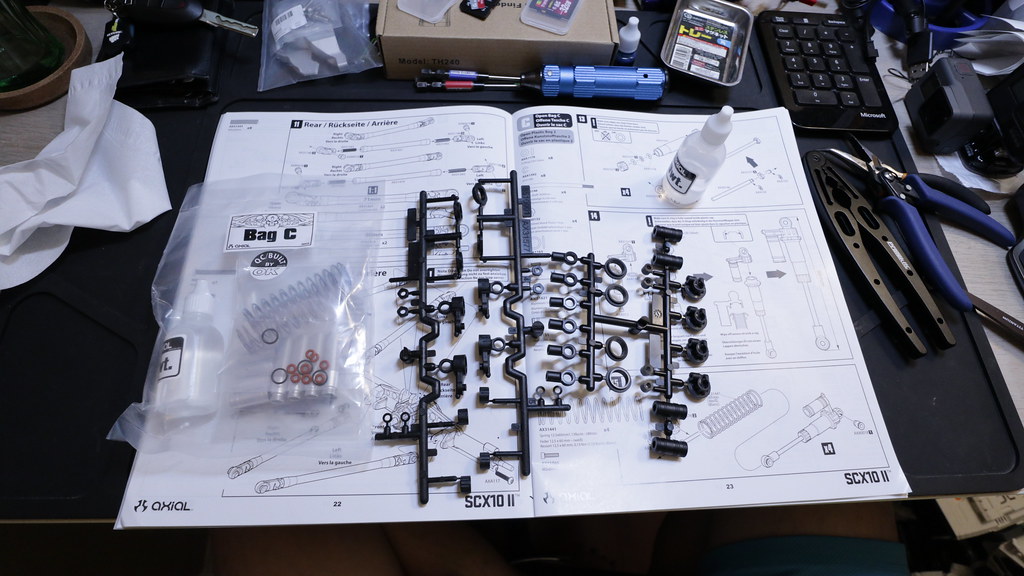
Part 2: Links and Shocks
These are needed for this section


Step 6 - Steering and Panhard Links


Step 7 - Attaching steering and panhard links


Step 8 - Front lower links


Step 9 - Front upper link
Forgot picture of completed link.
Step 10 - Mouting front links


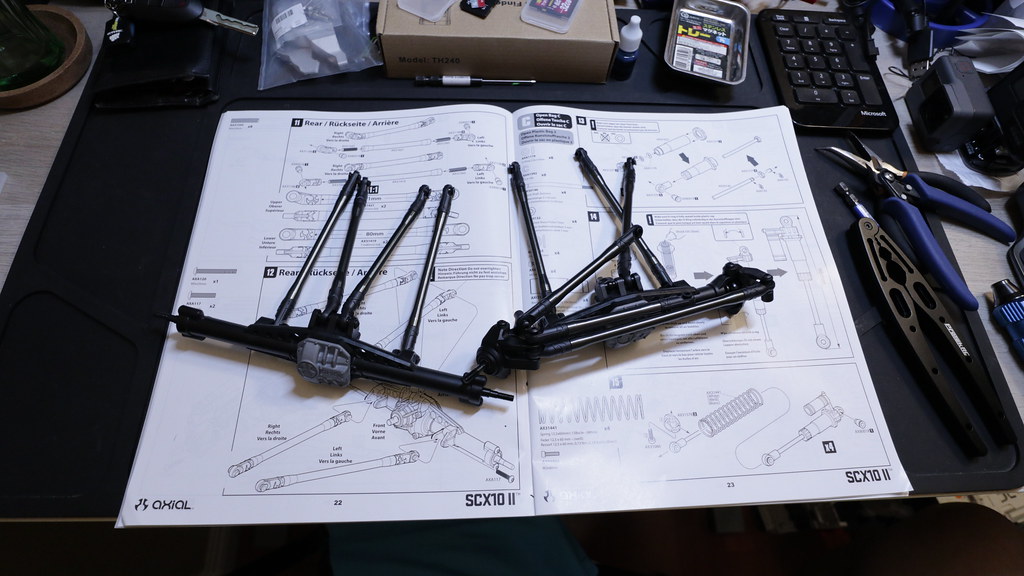
Step 11 - Rear Links


Step 12 - Mounting rear links


Links all mounted up.
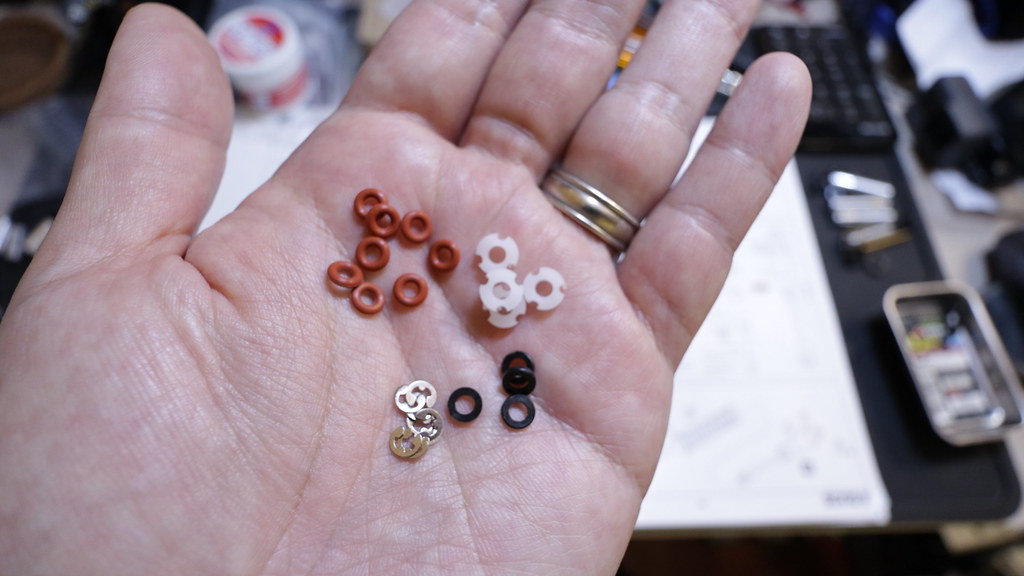
Need this stuff for the shocks
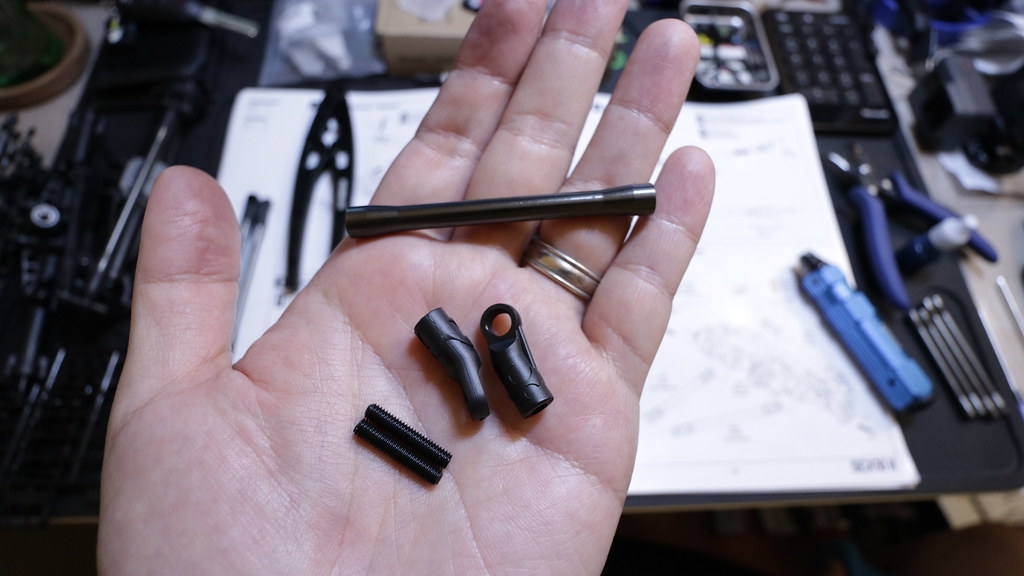
Step 13-15 - Shocks

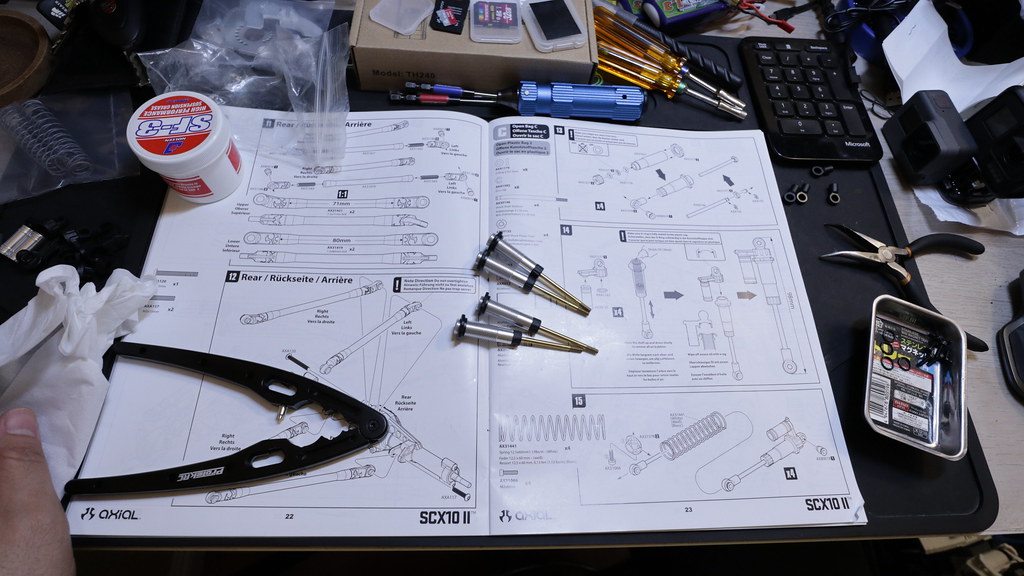
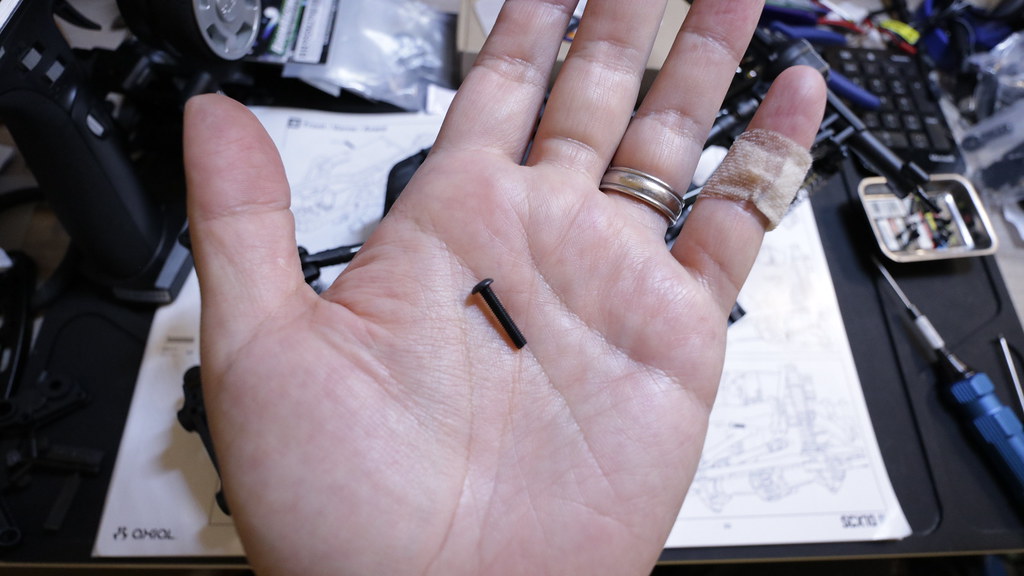
So my kit was missing all 4 pistons (Axial QC at it again). I had to steal them from a second SCX10.2 Cherokee kit I picked up. In the meantime I called up Axial to tell them that they were missing so that they could send me the pistons (AX30132).
UMG10 shock shafts on the left, Cherokee Kit shock shafts on the right.

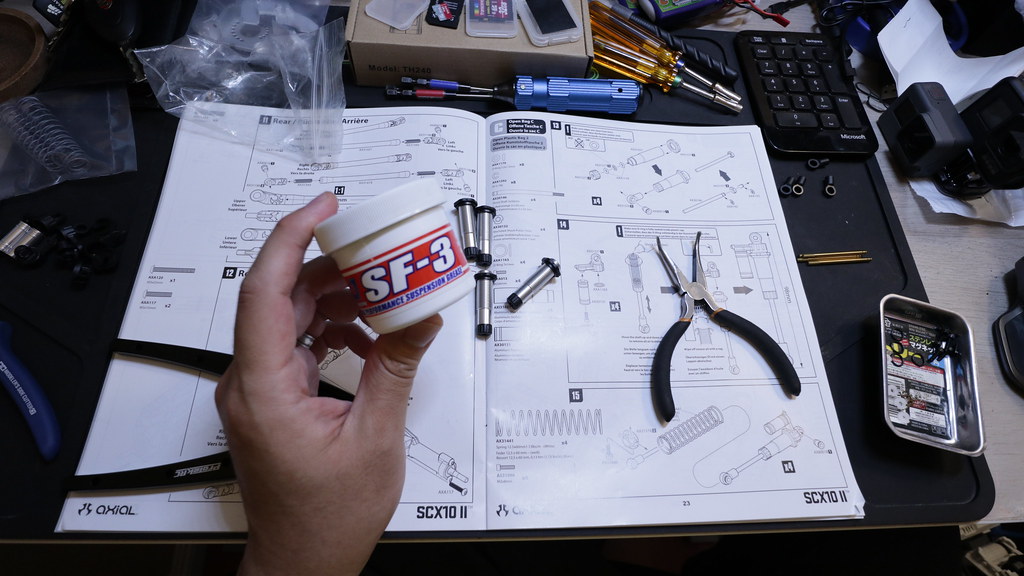
Good ol' Noleen SF3 Shock Grease


Filled oil with low pressure setup


Shocks all good to go.

Part 2 complete.

These are needed for this section
Step 6 - Steering and Panhard Links
Step 7 - Attaching steering and panhard links
Step 8 - Front lower links
Step 9 - Front upper link
Forgot picture of completed link.
Step 10 - Mouting front links
Step 11 - Rear Links
Step 12 - Mounting rear links
Links all mounted up.
Need this stuff for the shocks
Step 13-15 - Shocks
So my kit was missing all 4 pistons (Axial QC at it again). I had to steal them from a second SCX10.2 Cherokee kit I picked up. In the meantime I called up Axial to tell them that they were missing so that they could send me the pistons (AX30132).
UMG10 shock shafts on the left, Cherokee Kit shock shafts on the right.
Good ol' Noleen SF3 Shock Grease
Filled oil with low pressure setup
Shocks all good to go.
Part 2 complete.
05-21-2019, 08:58 AM
#4
Part 3: Drivetrain
Parts needed for this step. DON'T FORGET THE ADDENDUM PARTS & INSTRUCTIONS!. I almost forgot there was the addendum package. Not following it would have resulted in a 305mm wheelbase and apparently not molded quite correctly transfer case. (more on that later).

Step 16 - Transmission shafts


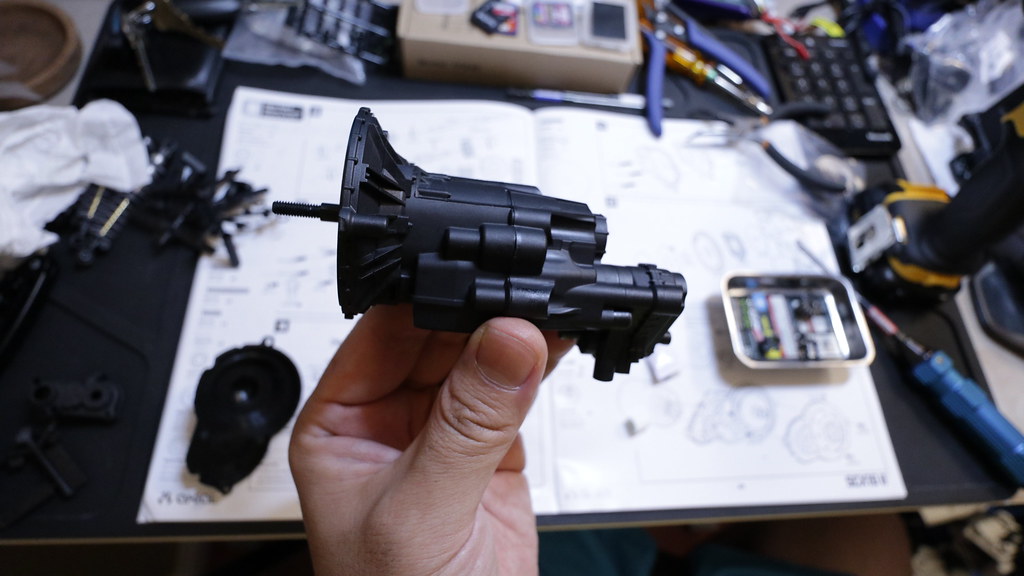
Step 17 - Transmission assembly

Yup, the top-shaft play is still there. It's ok, I've got a Vanquish Top Shaft for SCX10.2 (ebay) waiting in the wings...

Step 18 - Transfer case. Make sure you use the Addendum transfer case. I couldn't see any differences between the addendum piece and what was provided in the kit, but I ended up using the addendum piece out of caution. After asking around... apparently the original kit provided piece had some mold issues on the inside of the case. The Addendum piece supposedly has the insides molded correctly to prevent any binding of gears. I have not had a chance to open up the transmission case again to look at the differences in detail, but I will put pictures up if I dig into it again. The other confusing aspect of this step is that the addendum calls this part of the instructions "servo mount".


Step 19 - Motor mount plate.


Step 20 - Spur gear and slipper assembly


Step 21 - Motor and pinion
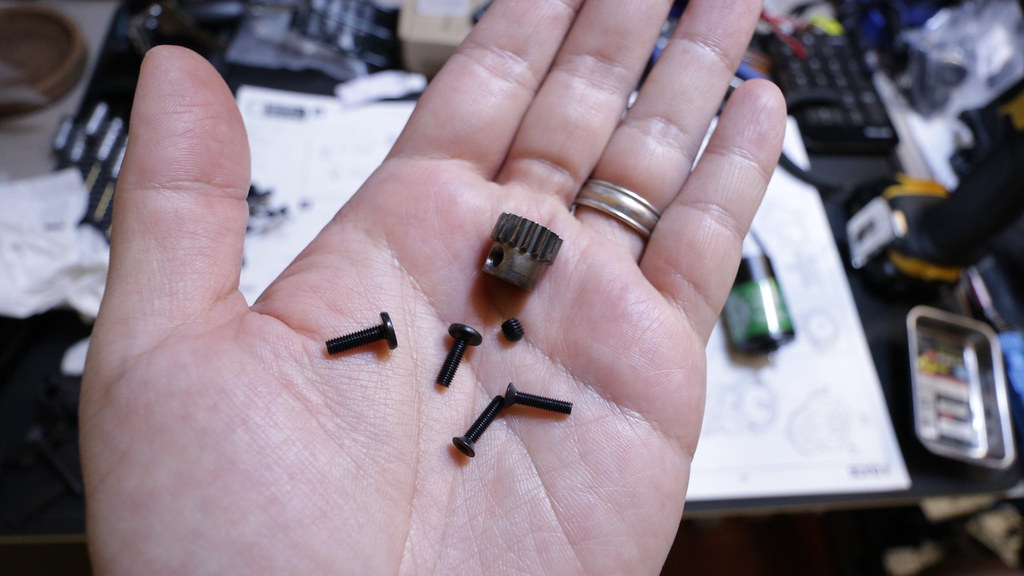
Holmes Hobbies Trailmaster Sport 550 21T


Onto the driveshafts

Step 22 - Front driveshaft


Step 23 - Rear driveshaft


Step 24 - Mounting the driveshafts.

I have the rear driveshaft on backwards in this picture... corrected later on.

Step 25 - Mounting transmission to skid

All done with part 3!
Parts needed for this step. DON'T FORGET THE ADDENDUM PARTS & INSTRUCTIONS!. I almost forgot there was the addendum package. Not following it would have resulted in a 305mm wheelbase and apparently not molded quite correctly transfer case. (more on that later).
Step 16 - Transmission shafts
Step 17 - Transmission assembly
Yup, the top-shaft play is still there. It's ok, I've got a Vanquish Top Shaft for SCX10.2 (ebay) waiting in the wings...
Step 18 - Transfer case. Make sure you use the Addendum transfer case. I couldn't see any differences between the addendum piece and what was provided in the kit, but I ended up using the addendum piece out of caution. After asking around... apparently the original kit provided piece had some mold issues on the inside of the case. The Addendum piece supposedly has the insides molded correctly to prevent any binding of gears. I have not had a chance to open up the transmission case again to look at the differences in detail, but I will put pictures up if I dig into it again. The other confusing aspect of this step is that the addendum calls this part of the instructions "servo mount".
Step 19 - Motor mount plate.
Step 20 - Spur gear and slipper assembly
Step 21 - Motor and pinion
Holmes Hobbies Trailmaster Sport 550 21T
Onto the driveshafts
Step 22 - Front driveshaft
Step 23 - Rear driveshaft
Step 24 - Mounting the driveshafts.
I have the rear driveshaft on backwards in this picture... corrected later on.
Step 25 - Mounting transmission to skid
All done with part 3!
05-21-2019, 08:58 AM
#5
Part 4: Chassis Assembly
Poaching stuff from these bags

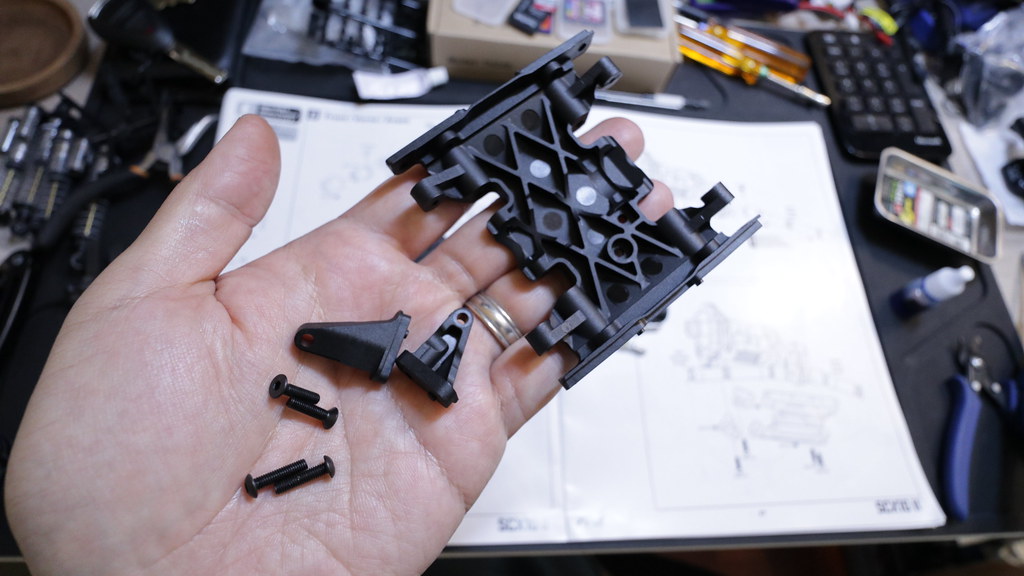
Step 26 - battery tray


Step 27 - Servo mount. It always amuses me how over-complicated this assembly seems to be.
Directions call for those 2 pieces under the battery tray, and for them to face in opposite directions. I don't know why or what they're for?

Step 28 - Mounting the servo

I ended up having some servo horn clearance issues with this particular servo. I had to use spacers for the time being, but I don't think this is the final servo I'll end up using... just what I have on hand.


Step 29


Step 30 from Addendum

MAKE SURE YOU USE THE ADDENDUM INSTRUCTIONS! This will give you the correct wheelbase.
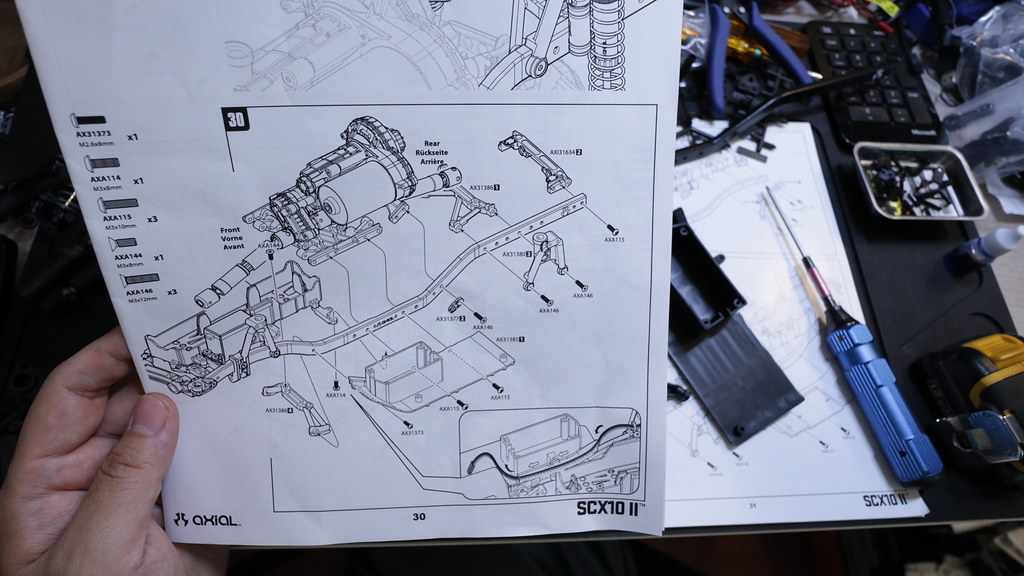


Step 31 from Addendum


Step 32 from Addendum


Step 33 from manual - Mount front axle assembly (Addendum instructions skip from Step 32 to 37... so be aware that you need to jump from Addendum Step 32 to Manuals Step 33-36... back to Addendum steps 37, 38 and 39).


Step 34 - Front shocks mounted


Step 35 - Servo Horn

Boom Racing low profile 25T servo horn


Step 36 from manual - Attaching panhard rod

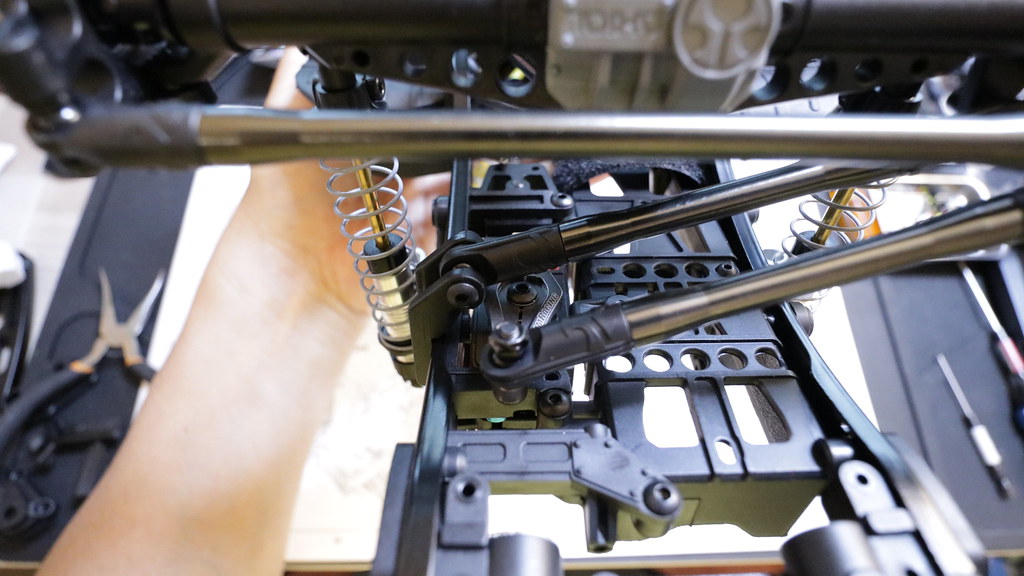
Step 37 from addendum - Rear links mounted.

Again, driveshaft backwards, but has since been corrected.

Step 38 from addendum- Rear shock mounting.

Done with part 4 update.
Poaching stuff from these bags
Step 26 - battery tray
Step 27 - Servo mount. It always amuses me how over-complicated this assembly seems to be.
Directions call for those 2 pieces under the battery tray, and for them to face in opposite directions. I don't know why or what they're for?
Step 28 - Mounting the servo
I ended up having some servo horn clearance issues with this particular servo. I had to use spacers for the time being, but I don't think this is the final servo I'll end up using... just what I have on hand.
Step 29
Step 30 from Addendum
MAKE SURE YOU USE THE ADDENDUM INSTRUCTIONS! This will give you the correct wheelbase.
Step 31 from Addendum
Step 32 from Addendum
Step 33 from manual - Mount front axle assembly (Addendum instructions skip from Step 32 to 37... so be aware that you need to jump from Addendum Step 32 to Manuals Step 33-36... back to Addendum steps 37, 38 and 39).
Step 34 - Front shocks mounted
Step 35 - Servo Horn
Boom Racing low profile 25T servo horn
Step 36 from manual - Attaching panhard rod
Step 37 from addendum - Rear links mounted.
Again, driveshaft backwards, but has since been corrected.
Step 38 from addendum- Rear shock mounting.
Done with part 4 update.
05-21-2019, 08:59 AM
#6
Part 5: Electronics, Bumper, Wheels/Tires
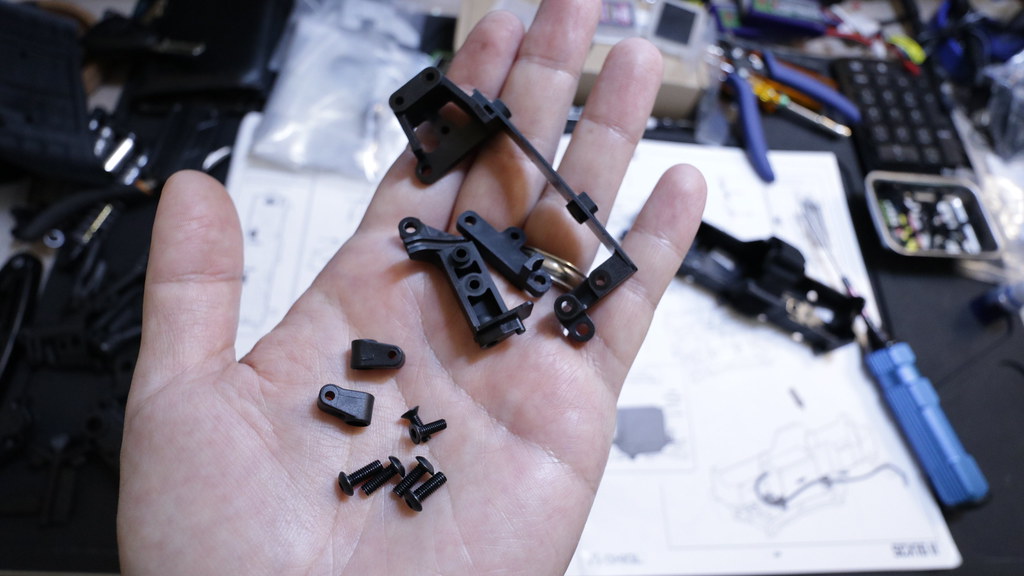
Step 39 from addendum - receiver box

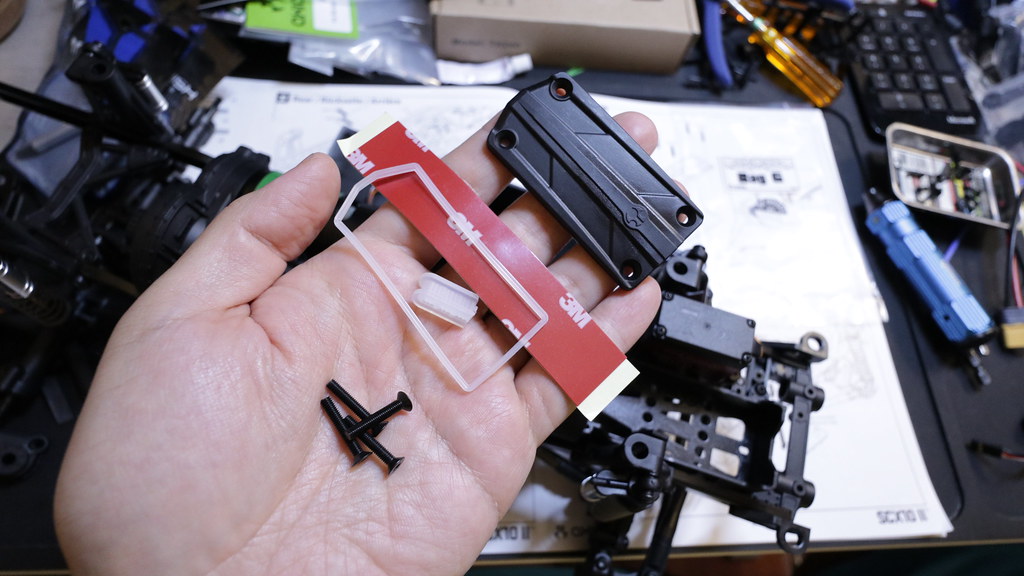
Decided to not fully assemble yet, since my electronics choices are still in flux. There is a good chance that I'll be switching up the servo mount + battery arrangement as well.

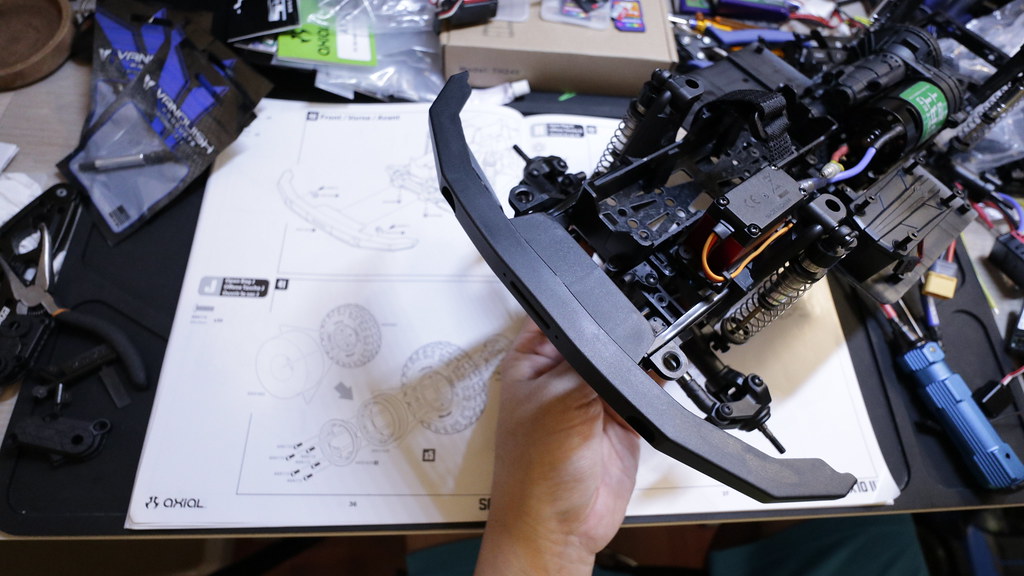
Step 40 - front bumper


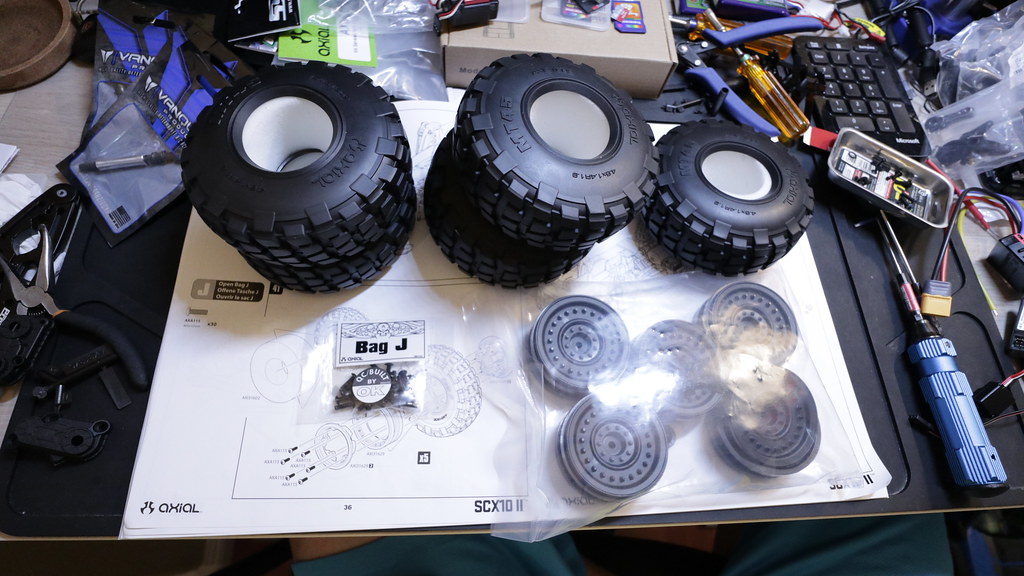
Step 41 - Mounting tires. I really like the way these tires look. I also like the plastic beadlocks wheels as well.


Step 42 - Mounting wheels onto chassis


Part 5 out of the way. Almost done!
Step 39 from addendum - receiver box
Decided to not fully assemble yet, since my electronics choices are still in flux. There is a good chance that I'll be switching up the servo mount + battery arrangement as well.
Step 40 - front bumper
Step 41 - Mounting tires. I really like the way these tires look. I also like the plastic beadlocks wheels as well.
Step 42 - Mounting wheels onto chassis
Part 5 out of the way. Almost done!
05-21-2019, 08:59 AM
#7
Part 6: Body and Rear Cage
COBRAAAAAAAAAA! Ok, you guys probably get what the title means now. I think it was brought up that the helmet style was an odd choice given the background of who used that type. I thought it was similar enough to a Cobra Trooper helmet to make it a less offensive/controversial choice to be able to stick with it.
Steps 43-45 - painting body and parts, applying decals. I decided not to black out the fenders or rear panels this time, as I felt I wanted a "fuller" body of color. I blacked out the inside of the lexan, and painted the blue and flat cleared the outside of the lexan.
Colors Used:
Tamiya PS-4 Blue
Tamiya PS-23 Gunmetal
Tamiya PS-5 Black
Tamiya PS-55 Flat Clear
Tamiya XF-15 Flat Flesh
Tamiya 5mm Masking tape for Curves
Frog Tape (for general masking)


I really really wish I had a vinyl cutter for the Cobra emblems.

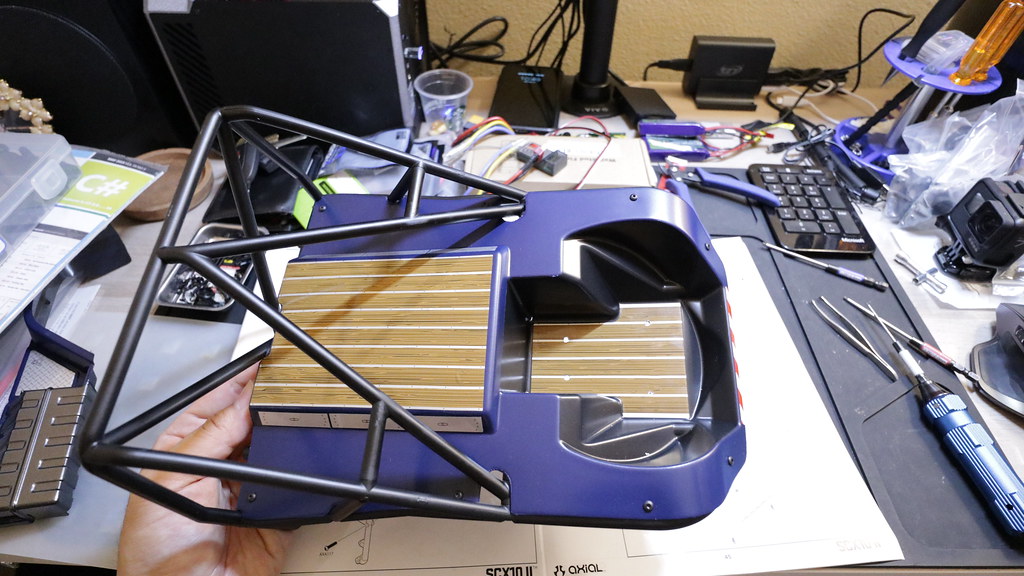
I'm glad this kit came with an interior. Real nice touch. I used the decal shift console at first, but later replaced it with the shifters from the parts tree.

Kudos to Axial for using reflective decals for the mirror. I don't know why non-reflective decals are still being used in some other kits.

Step 46 - Front grille assembly


Yup, Axial is at it again with that thin strip below the front grille. I think they're just trolling us at this point. However, I will say this one came out better and the grill seems to contour and grip the body much better when mounted.

Step 47 - Light lenses and buckets


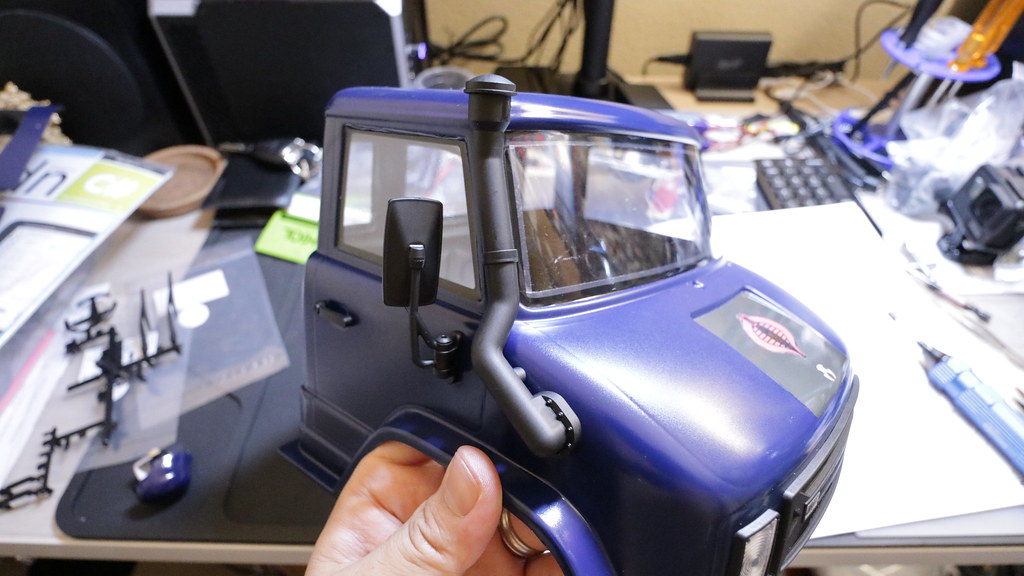
Step 48 - Mounting side mirrors.


Step 49 - Snorkel assembly

Step 50 - Interior


Step 51 - Mounting the interior


Step 52 - Starting the rear cage assembly


Step 53


Step 54

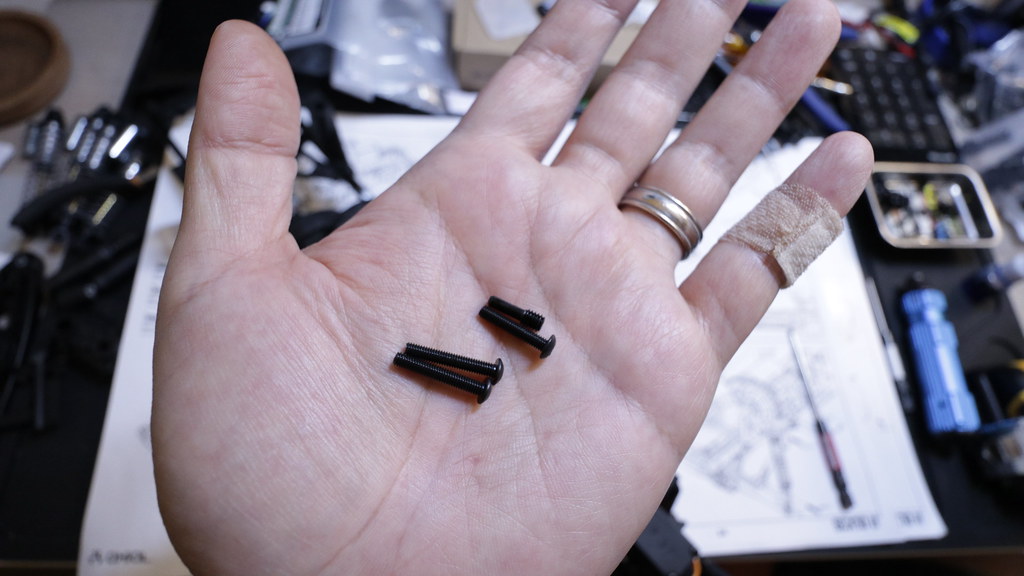
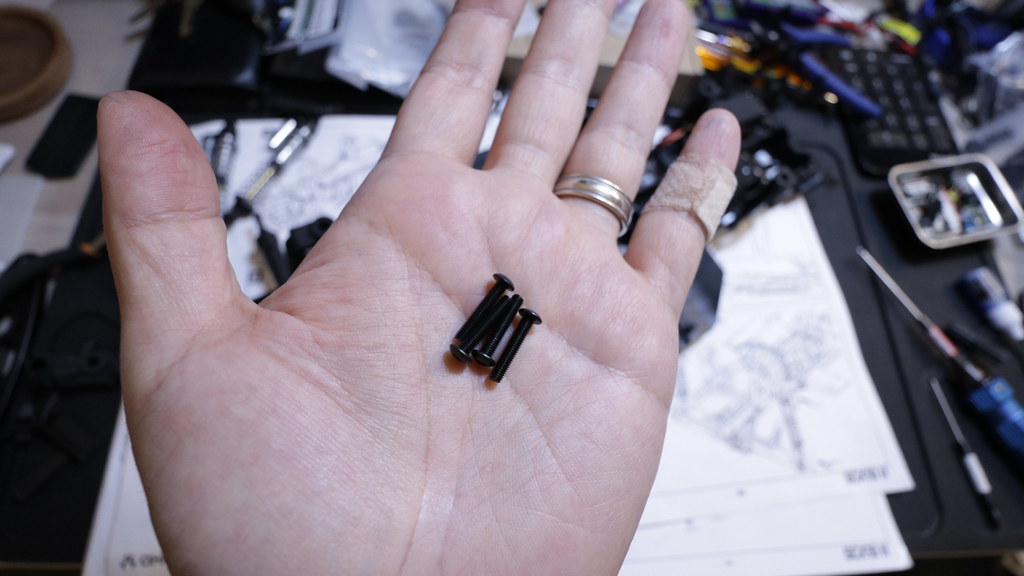
Step 55 - At this point I discovered that Axial QC has yet blessed me with a shortage of screws 2.6x6. And an overage of incorrect screws 2.6x10. I ended up having to use some extra 2.6x10s that were provided instead of 10 2.6x6 screws that I was supposed to use.


Step 56 - Spare tire mount


Step 57 - Mounting the cab to cage.

Made a hole at the top of the cab for extra screw to support mounting to the top of the cage lining up with existing cage screw joint.


Step 58 - Mounting body to chassis


Stock form build complete.
COBRAAAAAAAAAA! Ok, you guys probably get what the title means now. I think it was brought up that the helmet style was an odd choice given the background of who used that type. I thought it was similar enough to a Cobra Trooper helmet to make it a less offensive/controversial choice to be able to stick with it.
Steps 43-45 - painting body and parts, applying decals. I decided not to black out the fenders or rear panels this time, as I felt I wanted a "fuller" body of color. I blacked out the inside of the lexan, and painted the blue and flat cleared the outside of the lexan.
Colors Used:
Tamiya PS-4 Blue
Tamiya PS-23 Gunmetal
Tamiya PS-5 Black
Tamiya PS-55 Flat Clear
Tamiya XF-15 Flat Flesh
Tamiya 5mm Masking tape for Curves
Frog Tape (for general masking)
I really really wish I had a vinyl cutter for the Cobra emblems.
I'm glad this kit came with an interior. Real nice touch. I used the decal shift console at first, but later replaced it with the shifters from the parts tree.
Kudos to Axial for using reflective decals for the mirror. I don't know why non-reflective decals are still being used in some other kits.
Step 46 - Front grille assembly
Yup, Axial is at it again with that thin strip below the front grille. I think they're just trolling us at this point. However, I will say this one came out better and the grill seems to contour and grip the body much better when mounted.
Step 47 - Light lenses and buckets
Step 48 - Mounting side mirrors.
Step 49 - Snorkel assembly
Step 50 - Interior
Step 51 - Mounting the interior
Step 52 - Starting the rear cage assembly
Step 53
Step 54
Step 55 - At this point I discovered that Axial QC has yet blessed me with a shortage of screws 2.6x6. And an overage of incorrect screws 2.6x10. I ended up having to use some extra 2.6x10s that were provided instead of 10 2.6x6 screws that I was supposed to use.
Step 56 - Spare tire mount
Step 57 - Mounting the cab to cage.
Made a hole at the top of the cab for extra screw to support mounting to the top of the cage lining up with existing cage screw joint.
Step 58 - Mounting body to chassis
Stock form build complete.
Last edited by soze; 01-26-2020 at 11:34 PM.


 05-23-2019, 05:52 AM
#9
Tech Master
iTrader: (53)
Join Date: May 2011
Location: Wherever my alien friends take me.
Posts: 1,748
Trader Rating: 53 (100%+)
Soze, that is awesome! I almost bought one of those recently. Ended up getting TRX-4 Tactical for my wife to come out and play with. Next plan is to pick up a pair of TRX-4 Sports for my boys (7 & 5 years old) and then pick up this Axial for myself. Love how you did your 's. Nice job!
05-23-2019, 10:11 AM
#10
Soze, that is awesome! I almost bought one of those recently. Ended up getting TRX-4 Tactical for my wife to come out and play with. Next plan is to pick up a pair of TRX-4 Sports for my boys (7 & 5 years old) and then pick up this Axial for myself. Love how you did your 's. Nice job!
Appreciate it! TRX4s are nice. This one will be a more of a challenge to drive with its short wheelbase, but it adds to the variety of my rigs.
 05-28-2019, 10:20 AM
#13
ya they do awesome work. They did the sticker from a screen shot i sent them plus i had them do up a set of custom plates for it. Here is their web site http://www.krawlerkonceptz.com/ or you can msg them on rcc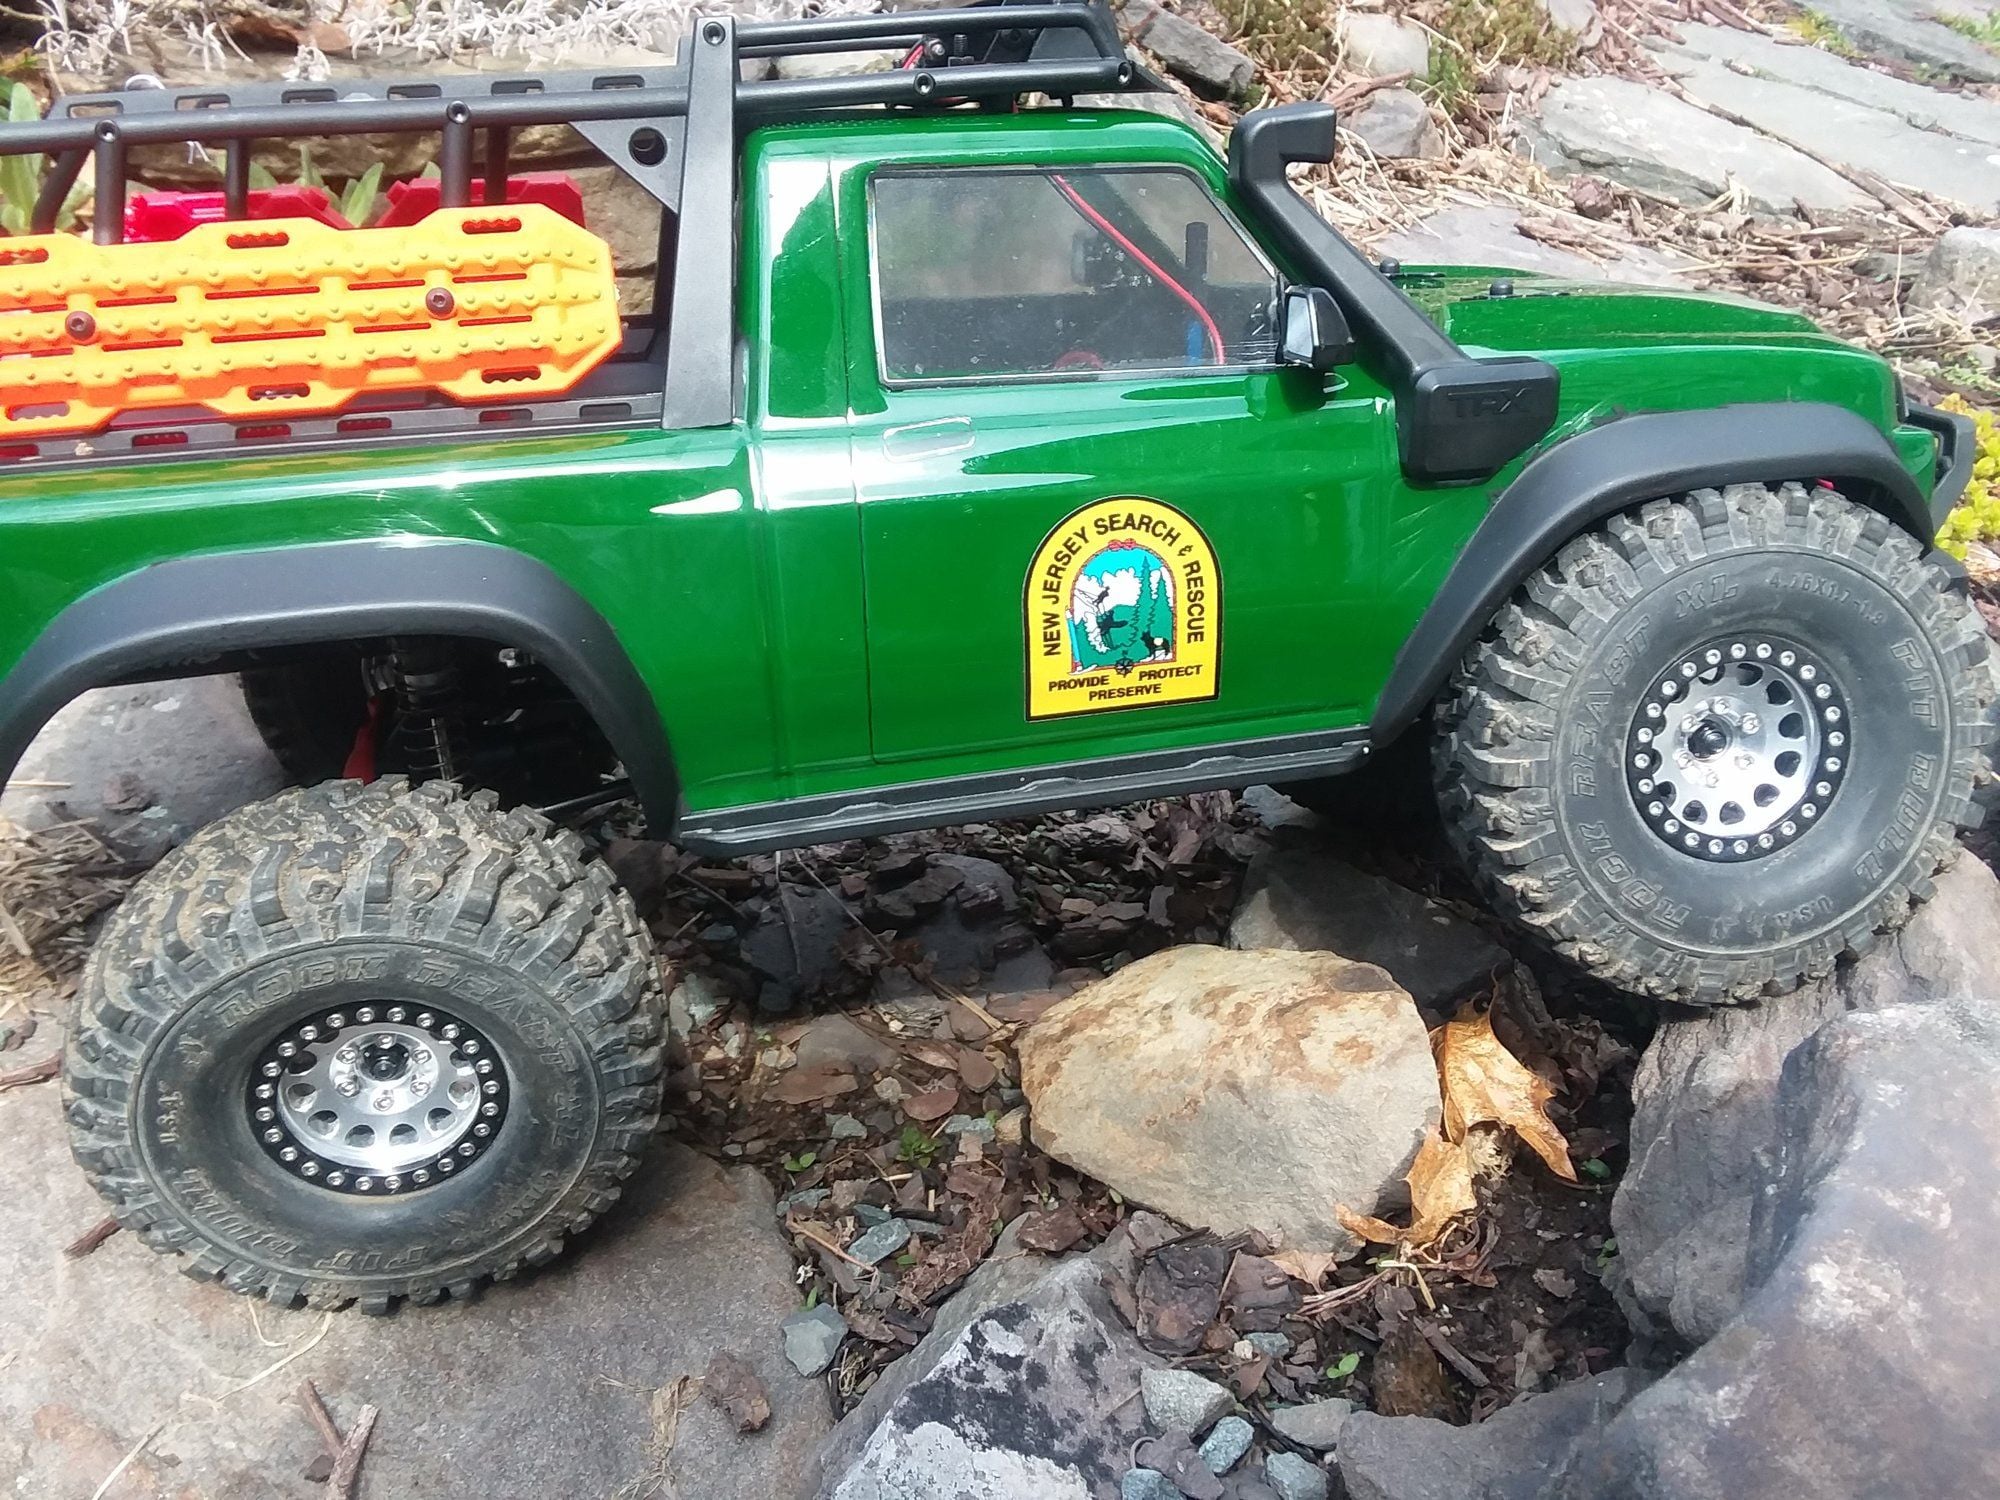
06-13-2019, 02:55 PM
#15
Tech Master
iTrader: (53)
Join Date: May 2011
Location: Wherever my alien friends take me.
Posts: 1,748
Trader Rating: 53 (100%+)
Soze, are you running this rig on 2s or 3s? Also, do you typically not run a BEC? I haven't run them and haven't had brown out issues. Just curious what your thoughts are. Thanks man!