


 167Likes
Tamiya XV-01
 04-01-2013, 03:54 PM
#211
 04-02-2013, 06:57 PM
#212

I got my kit today!
I just did like 2hrs of work in it. I'm so excited to get this chassis up and running.
I will post pics tomorrow!!
I just did like 2hrs of work in it. I'm so excited to get this chassis up and running.
I will post pics tomorrow!!
 04-03-2013, 03:28 AM
#214
I can't wait metalnut! Hopefully I will finish the build today.
So you said to run 70wt oil and use the longer shock ends?
So you said to run 70wt oil and use the longer shock ends?
04-03-2013, 09:27 AM
#216
Cool, thanks.
I'm going to do more work on it when I get home.
I will also post some pics!
I'm going to do more work on it when I get home.
I will also post some pics!
04-03-2013, 05:31 PM
#217
I finished my kit today and then took it for a quick spin! The kit went together very easily, didn't have any issues.
I also ordered a slipper clutch with my kit. I put one on my DF03ra awhile back and figured I'd grab one for the XV01 also. I got a Tamiya Team Arai Subaru I have to work on next for this chassis, still need to decide how I want to paint it. I kept my DF03ra's Subaru simple, just a plain metallic blue paint job (no rally stickers).
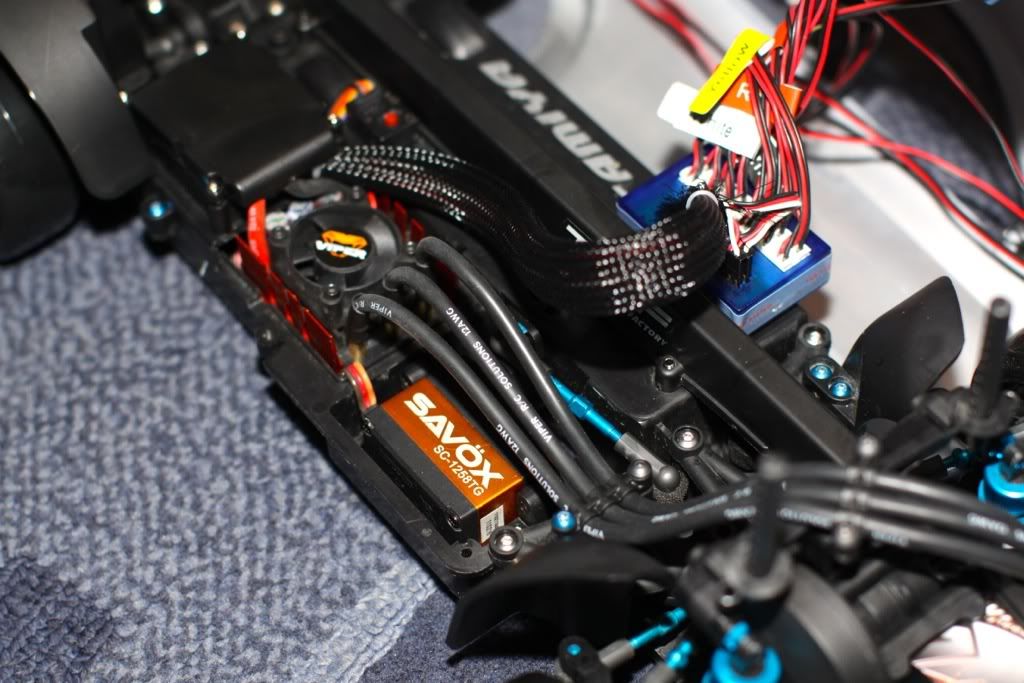
I love the chassis! The only negative would be the battery compartment. It takes a few minutes to arrange my battery wires so that they fit nicely and the door can go on. I don't like how the door requires 2 screws to be taken out to open the door. I like the battery door on my DF03ra better, just a body clip and pin. I do like how the ESC and receiver are in the box. I tucked all my wires around them and I also zip tied my capacitor to the top of the box.
Does anyone have any tips for this chassis? I want to find an easier way to arrange my battery wires and I also want to mount my switch somewhere other than on top of the servo. I definitely plan on ordering some clamp on wheel hubs. The plastic ones fell off my chassis twice while just sitting on my table. Any other hop ups you guys recommend?
Here are some pics:


I also ordered a slipper clutch with my kit. I put one on my DF03ra awhile back and figured I'd grab one for the XV01 also. I got a Tamiya Team Arai Subaru I have to work on next for this chassis, still need to decide how I want to paint it. I kept my DF03ra's Subaru simple, just a plain metallic blue paint job (no rally stickers).
I love the chassis! The only negative would be the battery compartment. It takes a few minutes to arrange my battery wires so that they fit nicely and the door can go on. I don't like how the door requires 2 screws to be taken out to open the door. I like the battery door on my DF03ra better, just a body clip and pin. I do like how the ESC and receiver are in the box. I tucked all my wires around them and I also zip tied my capacitor to the top of the box.
Does anyone have any tips for this chassis? I want to find an easier way to arrange my battery wires and I also want to mount my switch somewhere other than on top of the servo. I definitely plan on ordering some clamp on wheel hubs. The plastic ones fell off my chassis twice while just sitting on my table. Any other hop ups you guys recommend?
Here are some pics:
Last edited by SerpentCT4S; 04-03-2013 at 05:57 PM.
04-03-2013, 06:40 PM
#218
That looks really good! Nice job 
I've taped my power switch to the servo as well, but when I had to take the servo out I ended up just zip-tying the switch to the motor wires. That's how it is now, not great but it does the job. I've seen others dremel out the side of the electronics box to mount the switch. There is already a small hole there, they just expanded it, made it square, and popped the switch in. Looked good.
I hear you on the battery door issues. I already crushed/lost one of the little rubber o-rings that's supposed to keep the screw from falling out of the door, so my screws fall out. What I end up doing is flipping the car over on its shell, placing it on my track/tool bag, and just patiently getting the battery in. I really do hope someone comes up with a better solution, I'm all ears.
So how did you like the handling?
04-03-2013, 06:54 PM
#219
That looks really good! Nice job
I've taped my power switch to the servo as well, but when I had to take the servo out I ended up just zip-tying the switch to the motor wires. That's how it is now, not great but it does the job. I've seen others dremel out the side of the electronics box to mount the switch. There is already a small hole there, they just expanded it, made it square, and popped the switch in. Looked good.
I hear you on the battery door issues. I already crushed/lost one of the little rubber o-rings that's supposed to keep the screw from falling out of the door, so my screws fall out. What I end up doing is flipping the car over on its shell, placing it on my track/tool bag, and just patiently getting the battery in. I really do hope someone comes up with a better solution, I'm all ears.
So how did you like the handling?
The battery door seems to be the only problem. They should ahve designed some kind of quick release door instead. Oh well, I guess we're stuck taking out 2 screws every time.

I only ran it up and down my driveway because it was already dark out. I will run a full pack tomorrow and let you know. The Savox servo in there is nice though. I need to get one for my DF03ra now!
04-03-2013, 10:17 PM
#220
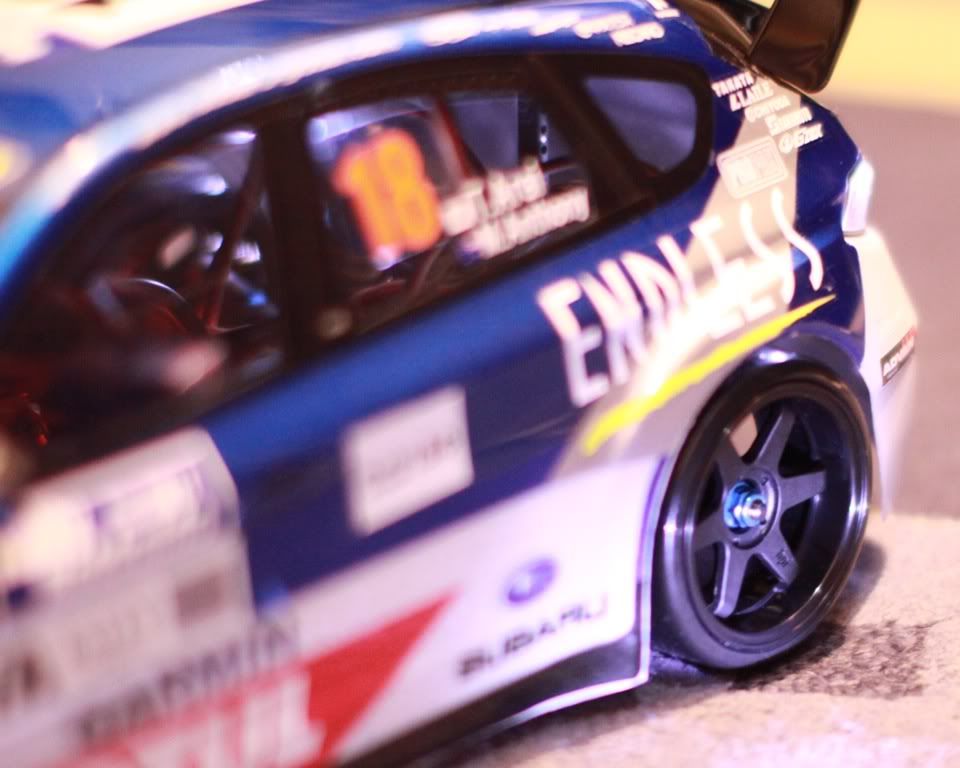
LEDs came in today - along with new wheels/tires. 3mm in the outer buckets, 5mm for the front headlights (white and blue) and 5mm in the rear (white and red). Wheels are +6mm offset all around on HPI t-drift tires. The XV-01 is really a versatile chassis, here it is in hoon mode :
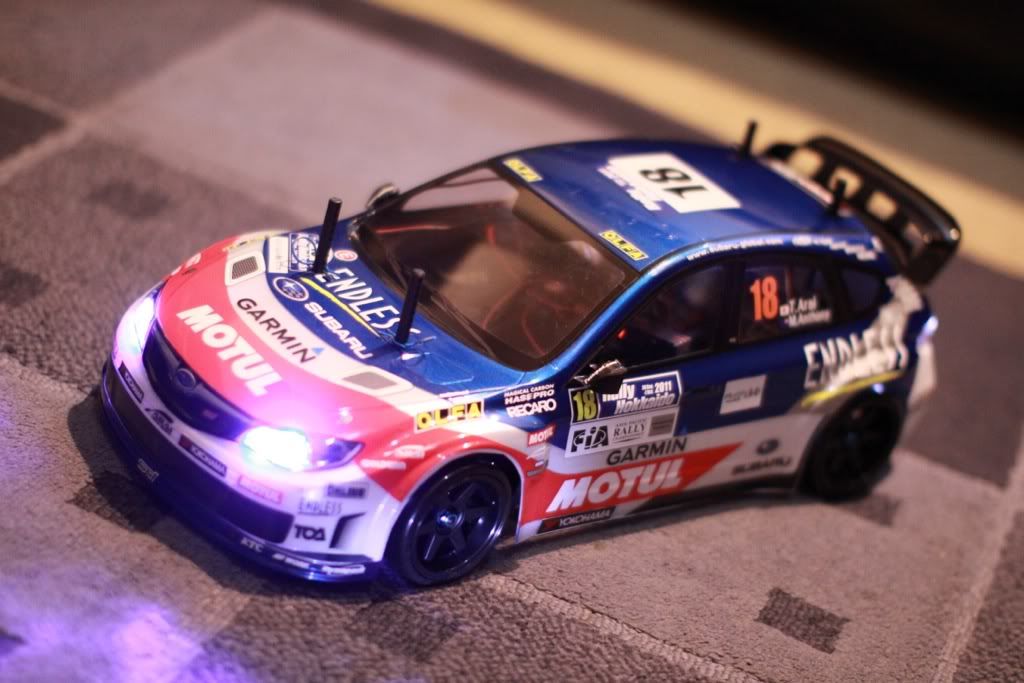

Switched the setup to white springs front, yellow springs rear and 80wt in the dampers all around. The car drives better with this setup and is easier to get a controlled drift (even on rubber tires), less prone to snap oversteer. Camber is set @ 1.5 all around.
I was in the same boat - as I needed the switch / v-port exposed and can't be contained in the Rx box. I cut a notch
on the top of the cover, just wide enough to run the flatwire over the ridge and attached the switch above the battery box
next to the belt guard:
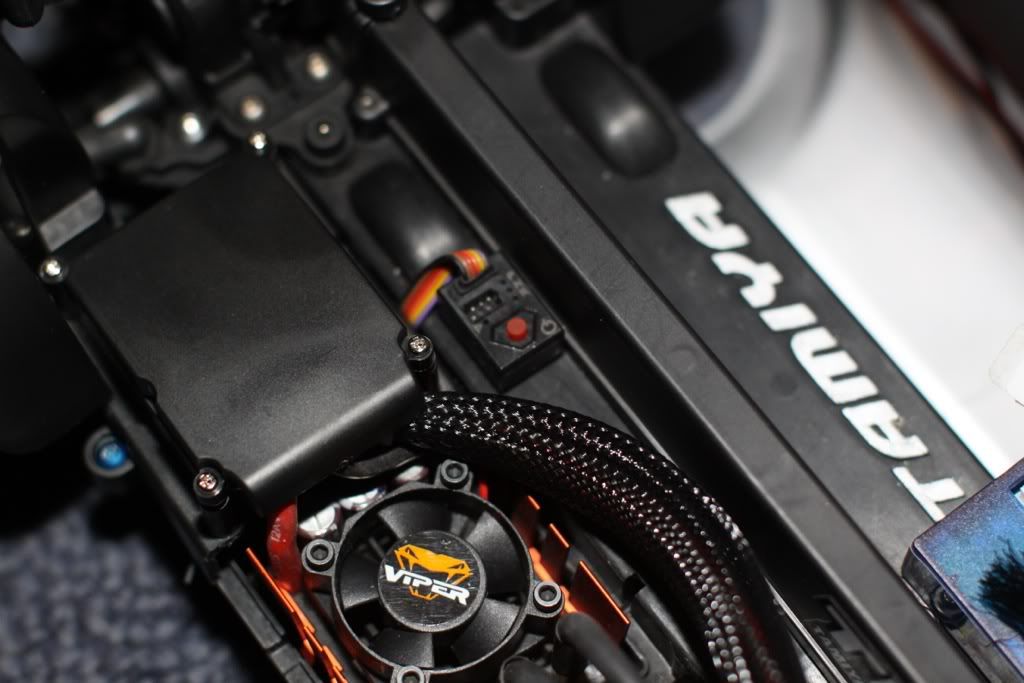
HTH
Switched the setup to white springs front, yellow springs rear and 80wt in the dampers all around. The car drives better with this setup and is easier to get a controlled drift (even on rubber tires), less prone to snap oversteer. Camber is set @ 1.5 all around.
on the top of the cover, just wide enough to run the flatwire over the ridge and attached the switch above the battery box
next to the belt guard:
HTH
Last edited by macavant; 04-03-2013 at 11:33 PM.
04-04-2013, 02:17 PM
#223
But you CAN get juts light buckets from Tamiya I think, and from some of the Hobby* websites too, you just may have to fit them.
04-04-2013, 03:35 PM
#224
I just ran a pack through my XV-01. This car is sweet! It's setup pretty nice as is. I might add a degree of camber and toe to it though.
The car handles very nicely, so much different than my DF03ra. I do have one issue with the steering though. My car turns turning radius is alot tighter to the left than the right. I centered my servo before installation and both of my EPA's are set the same as well. How can I balance this out?
I am still not sure what to do about the body. The instructions say to do some parts pearl white and some metallic blue. I will probably just do the whole body metallic blue and put on all of the decals (not pre-cut!).
I also found a new spot for my switch. I have it coming out with the motor wires, then I simply made a U-shape and mounted it onto the chassis. I will post a pic later tonight if I have a chance.
I will also be ordering a light kit for this body as well!
04-04-2013, 05:25 PM
#225
I just ran a pack through my XV-01. This car is sweet! It's setup pretty nice as is. I might add a degree of camber and toe to it though.
The car handles very nicely, so much different than my DF03ra. I do have one issue with the steering though. My car turns turning radius is alot tighter to the left than the right. I centered my servo before installation and both of my EPA's are set the same as well. How can I balance this out?
I am still not sure what to do about the body. The instructions say to do some parts pearl white and some metallic blue. I will probably just do the whole body metallic blue and put on all of the decals (not pre-cut!).
I also found a new spot for my switch. I have it coming out with the motor wires, then I simply made a U-shape and mounted it onto the chassis. I will post a pic later tonight if I have a chance.
I will also be ordering a light kit for this body as well!
The car handles very nicely, so much different than my DF03ra. I do have one issue with the steering though. My car turns turning radius is alot tighter to the left than the right. I centered my servo before installation and both of my EPA's are set the same as well. How can I balance this out?
I am still not sure what to do about the body. The instructions say to do some parts pearl white and some metallic blue. I will probably just do the whole body metallic blue and put on all of the decals (not pre-cut!).
I also found a new spot for my switch. I have it coming out with the motor wires, then I simply made a U-shape and mounted it onto the chassis. I will post a pic later tonight if I have a chance.
I will also be ordering a light kit for this body as well!
1. Is the servo horn hitting either side of the servo compartment? My comes pretty close to hitting the side closer to the electronics compartment, but stops just short of it.
2. If you detach the servo turnbuckle, can you get equal steering lock on both sides? While running once, I got a small rock jammed inside the chassis, which prevented the steering column from turning right as much as it turned left, because one of the pieces was hitting the rock prematurely. I'm basically asking if the steering is free side to side. If it is, then your servo is limiting the turning, if it's not, then look for obstructions.
Also check your subtrim