


 2Likes
Xray T3 2011
 12-20-2011, 08:35 PM
#3886

Have you tried sanding the bottom of the setscrews? It have a setscrew comming lose on my 1/8 e-buggy until I sanded the setscrew with a medium grid sandpaper. The surface should be rough and this will it grip better on the pins. And you might try to sand the flatspot also a little.
 12-20-2011, 09:46 PM
#3887
This has worked for me with many sets of CVDs, the normal ones and both xray original and aftermarket ECS shafts.
12-20-2011, 10:47 PM
#3888
I was told to drill my shock caps so they will bleed better and perform better as well. Where exactly do i need to drill and how big of a hole?
12-20-2011, 11:19 PM
#3889
Tech Regular
There is a hole already marked out on the plastic cap, just use the smallest drill bit you can, the idea of it is to make sure there is an air gap between the bladder and the cap.
12-21-2011, 04:38 AM
#3891
When doing maintenance (after about two or three race days) I disassemble and clean and reassemble with hudy grease and loctite the set screws in place and then heat shrink the joint. No matter what I do it always seems like the set screws are loose whenever I do take them apart. I always make sure the set screw is hitting the flat spot on the pin also. These ecs shafts have caused me several headaches before I got smart and heatshrinked the joint to keep the small parts in place and not all over the track! Am I missing something? Thanks
Take them apart and clean everything really good. Put it back together apply loctite and let it set. Then apply grease and never take it apart again. You can use a zacco blade tip to get the grease in the cup.
12-21-2011, 07:08 AM
#3892
I am runnin 3 degrees of toe in at the moment, I will reset the droop to 3 front and rear. One of the local guys was telling me he runs something like 9mm ORH front and 7mm ORH rear droop.
- The track we run on is very bumpy, even with 5.5 it scrubs and bottoms alot.
- I tried the front lower inner L1/L2 positions, didnt have a whole lot of effect, was still erratic. Putting anymore spacers on top of the camber link just makes the wheel rub on the screw
- I will try 450cst front and 350cst rear on the shocks maybe
- cant run 52mm drive shafts in the rear with the xray gear diff. XRAY lie when they say you can, you cant, I have tried and everyone at our club has tried. Unless you cut down the blades or shim the arms out, at 3 degrees rear toe in 52mm doesnt fit.
- Tried the -75 rear roll center holders. Fixes the traction and locks the rear, but then the car runs REALLY SLOWLY though the corners and loses corner speed compared to the normal ones. I will try the other suggestions first.
I suspect it is the droop setting combined with the front diff, as it wasnt doing it with front spool before
That much droop over ride height... I don't even think that is possible to achieve unless you greatly lengthen the shocks. Maybe if you are running in very low traction, you might try over 3mm, but you should experiment with 2-3mm of droop to see if it helps your erratic problem.
Also, if the -0.75mm roll centers locked the rear in too much, you can do that and then try some things to help loosen the rear or add more steering. You could add 1-2mm extra shims on the camberl ink, outside rear hub. Switch to a 2.8 rear spring (stiffer) if you have enough traction overall, or switch to a 2.8 front spring (softer) if you need more traction overall. It sounds that something like this might be your solution.
12-21-2011, 10:55 AM
#3893
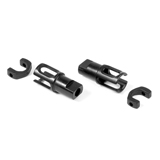
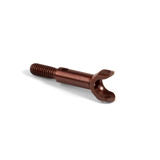
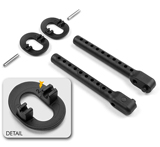
XRAY Steel Solid Axle Driveshaft Adapter
12-23-2011, 04:02 AM
#3894
I got my T3 11 second hand and I'm sure its not setup correctly, it doesn't handle anywhere near as good as my brothers T2. Does anybody have a link to setup sheet for a T3 11 thats stock or a basic setup.
Cheers,
Cheers,
12-23-2011, 05:03 AM
#3895
http://forum.teamxray.com/xsheets.php
If you have the Instruction Manual, that is the kit "setup". Lots of downloads available for the T3 2011 on Xray's site.
http://www.teamxray.com/teamxray/pro...202011%20Specs
12-23-2011, 08:59 AM
#3896
If anyone is interested I have a set of Tamiya shocks set up for the T2-T3 listed here.
http://www.rctech.net/forum/r-c-item...l#post10074099
http://www.rctech.net/forum/r-c-item...l#post10074099
12-24-2011, 04:59 PM
#3897
T3 Xray parts are re-stocked at TQ, Click Here
Please, visit T3 Parts Store.
FYI, thanks and Merry Christmas.
Please, visit T3 Parts Store.
FYI, thanks and Merry Christmas.
12-25-2011, 03:18 AM
#3898
T3 Xray parts are re-stocked at TQ, Click Here
Please, visit T3 Parts Store.
FYI, thanks and Merry Christmas.
Please, visit T3 Parts Store.
FYI, thanks and Merry Christmas.
01-05-2012, 02:36 AM
#3900
Has anyone tried installing a Futaba BLS551 servo on the 2011 model and have any problems? Purchased my car second hand and it didn't have the 25 tooth adapter for a Futaba servo so I purchased a generic servo saver that is roughly similar.
I'm finding the servo saver won't fit between the gap in the top deck and is instead sitting under it. I managed to shave the top part of the servo saver off but its left less than a mm of plastic for the screw to go into.
Have an xray servo saver on the way but I'm not convinced it's going to fit out far enough to clear one side of the top deck either. I can put some spacers on the servo posts to push the servo further inward but it's very nearly hitting the steering posts as is.
I'll have to take a picture to better explain my problem.