


Cleaning a nitro engine
 09-26-2011, 10:27 AM
#1
I've got a new engine that has sat in a box for several years. It was oiled, but the oil appears to has shellacked a bit. I have disassembled it and it's clean and rust free, but it has this staining / residue on it.
What's the best way to clean this before reassembly? I was thinking of soaking it in lacquer thinner or anti-freeze. It's a Novarossi ABC motor.
Thanks in advance.
What's the best way to clean this before reassembly? I was thinking of soaking it in lacquer thinner or anti-freeze. It's a Novarossi ABC motor.
Thanks in advance.
 09-26-2011, 06:52 PM
#2
I've got a new engine that has sat in a box for several years. It was oiled, but the oil appears to has shellacked a bit. I have disassembled it and it's clean and rust free, but it has this staining / residue on it.
What's the best way to clean this before reassembly? I was thinking of soaking it in lacquer thinner or anti-freeze. It's a Novarossi ABC motor.
Thanks in advance.
What's the best way to clean this before reassembly? I was thinking of soaking it in lacquer thinner or anti-freeze. It's a Novarossi ABC motor.
Thanks in advance.
09-28-2011, 11:48 AM
#3
Spray it with a Carb cleaner. Let dry or use a hair dryer. Lube the bearings and friction surface.
09-28-2011, 03:45 PM
#4

Alchohol is for drinking,
Petrol is for cleaning,
Nitro is for racing.
Unless you are prepared to remove bearings and all rubber seals etc, I'd give it a quick flush with petrol or kerosene.
Petrol is for cleaning,
Nitro is for racing.
Unless you are prepared to remove bearings and all rubber seals etc, I'd give it a quick flush with petrol or kerosene.
01-27-2013, 10:55 PM
#5
Tech Apprentice
5-Step for Cleaning a nitro engine:
1) DE-GUNK IT!
First, remove your engine from your Vehicle, and then use an old toothbrush or a stiff-bristle paintbrush to rub away as much grime as you can. Aerosol nitro cleaners work well as long as the gunk buildup hasn't been left for so long that it's baked onto the engine like armor.
2) CLEAN GLOW-PLUG AREA. Before you remove the glow plug from the cooling head, you must thoroughly clean the area around it with motor spray. If you don't, you risk allowing the dirt that has collected around the glow plug to drop into the combustion chamber.
3) REBUILD THE CARBURETOR. If your engine still has good compression, your carb's 0-rings may be causing the problem. These small, rubber 0-rings on the needle valves serve a dual purpose: they seal the needles against air and fuel leaks, and they provide the resistance against their housings that's required to keep the needle-valve settings stable while you drive the car.
4) SEAL IT. After you've cleaned your engine thoroughly (or you'll contaminate inner areas) and replaced any worn carb parts, seal certain areas to further protect it. Sealing takes only a few minutes, and it can save you hours of frustration later.
5) REPLACE THE FUEL TUBING REGULARLY. This is yet another relatively cheap, easy-to-replace item that is often overlooked. Over time, fuel tubing is likely to crack or develop tiny puncture holes, and most bashers will run it until it fails.
Regards,
Berry Martin
01-28-2013, 03:52 PM
#6
I've got a new engine that has sat in a box for several years. It was oiled, but the oil appears to has shellacked a bit. I have disassembled it and it's clean and rust free, but it has this staining / residue on it.
What's the best way to clean this before reassembly? I was thinking of soaking it in lacquer thinner or anti-freeze. It's a Novarossi ABC motor.
Thanks in advance.
What's the best way to clean this before reassembly? I was thinking of soaking it in lacquer thinner or anti-freeze. It's a Novarossi ABC motor.
Thanks in advance.
The airplane guys have used this stuff for years with great success. It is called Z-Best and your local hobby store should be able to get it for you

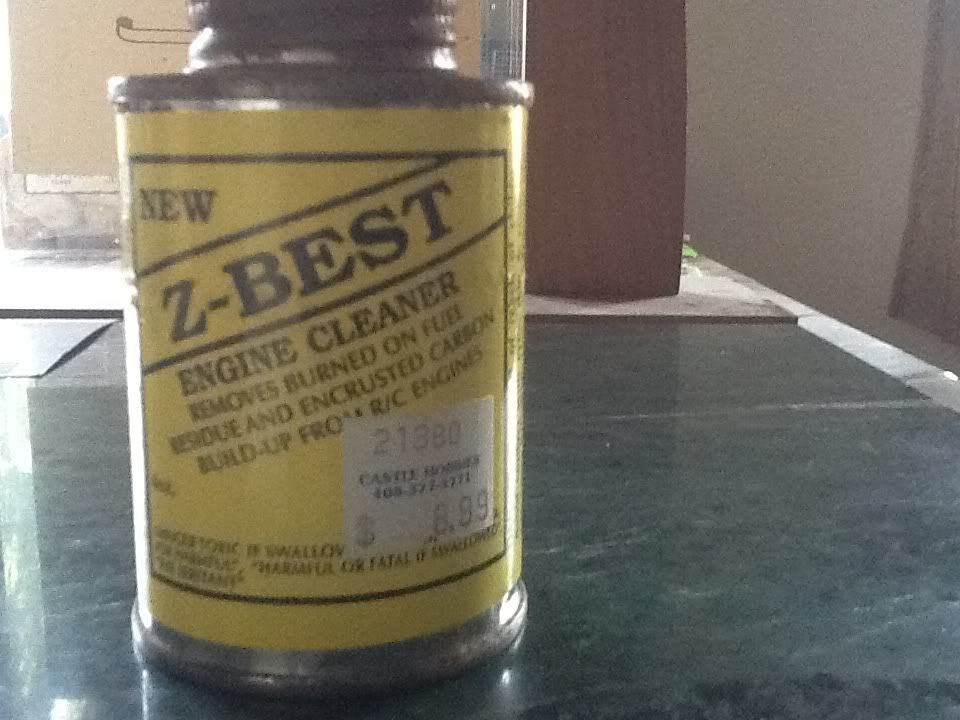
Good luck,
-Rich
Currently Active Users Viewing This Thread: 1 (0 members and 1 guests)
