


2.2 Pimp Cane Crawler
 02-01-2007, 12:15 PM
#1
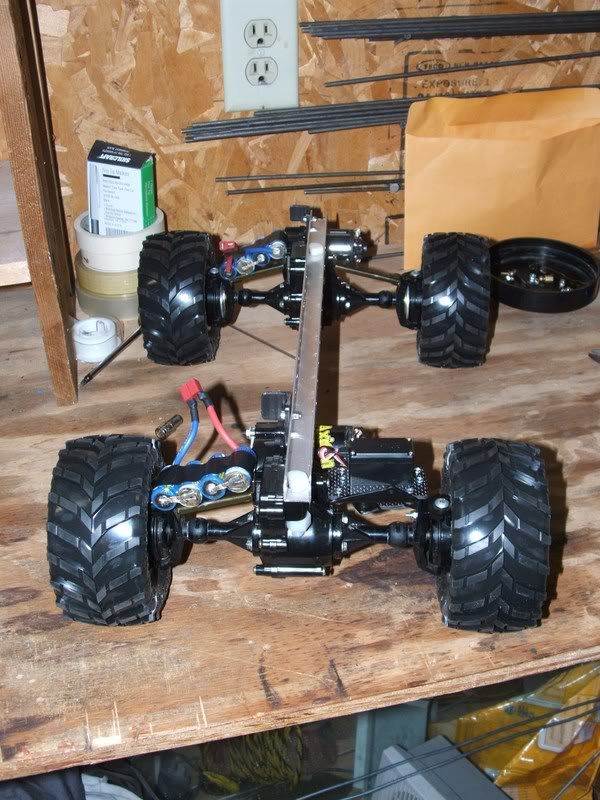
Alright. Just about have everything to start on my new 2.2 Comp Crawler. It's going to have my 2.2 Pimp Cane chassis. (of Course) My buddy just won a big comp using this chassis. If you have never heard of the Pimp Cane chassis. Its a torsion style chassis. That means no link and no shocks. It's the lights chassis on the market. The strongest. It as the lowest COG also. In the last comp it was put up agaist Benders SW2, a Stick chassis and many others. And he beat them all. The Pimp Cane is becoming the best Comp chassis of the Clod. No lie. Here are the Specs of mine.
Axles: Clods, lcoked
Motors: two 65T Axiom
ESC: XL-5
Radio gear: TQ3
Chassis: 12.5in Pimp Cane
Servo: Tower Pro MG995 190oz of torque
Front burn Servo: Stock Stampede Servo
Tires: Masher 2ks, filled with Airsoft BB's
Wheels: RD400 Beadlocks
Body: HPI Bug
Pinions: 9t Front, 8t Rear
Battery Pack: 8 cell IB1200 4 cells on each axle
and more just can't think of it.
I will have pic's in the next few days.
All uner $500 bucks. Not bad for a great Comp Rig
I will finish this one before the 17in Super Class Pimp Cane
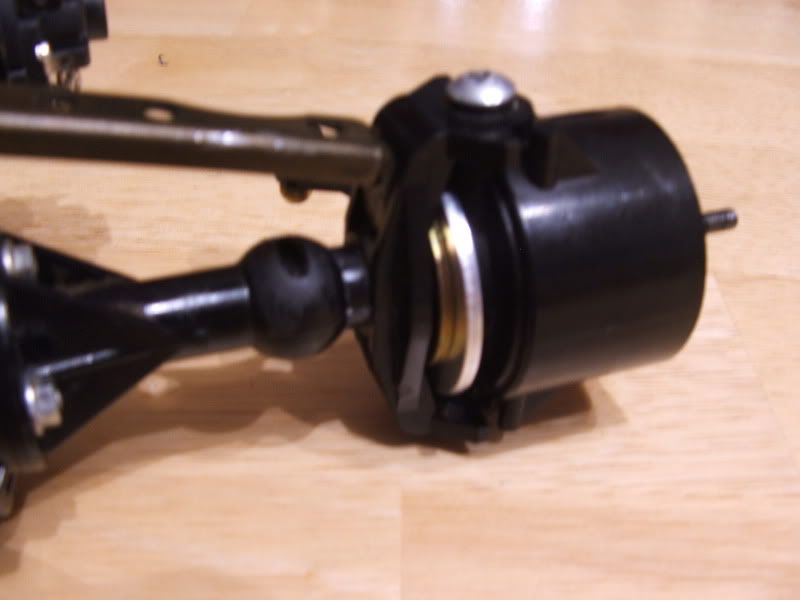
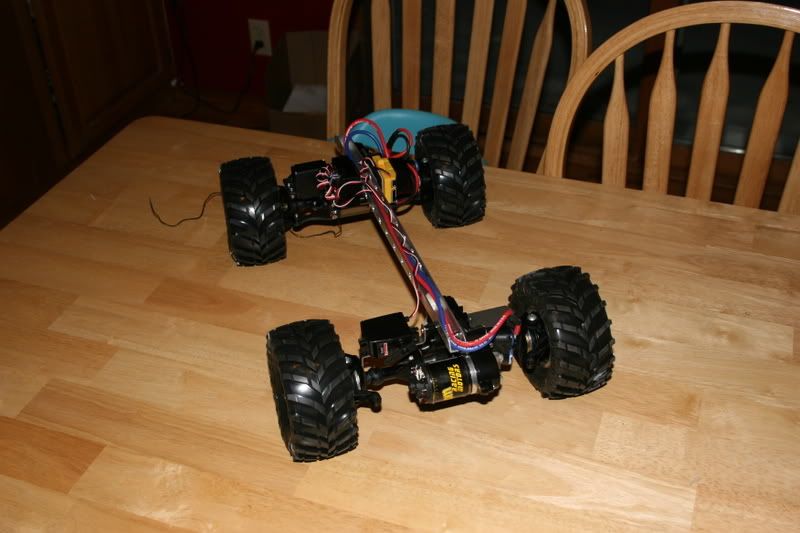
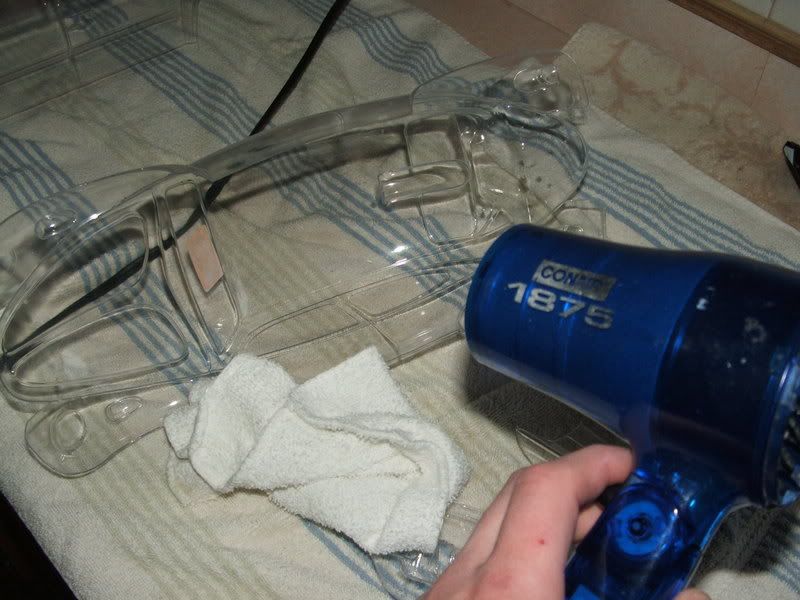
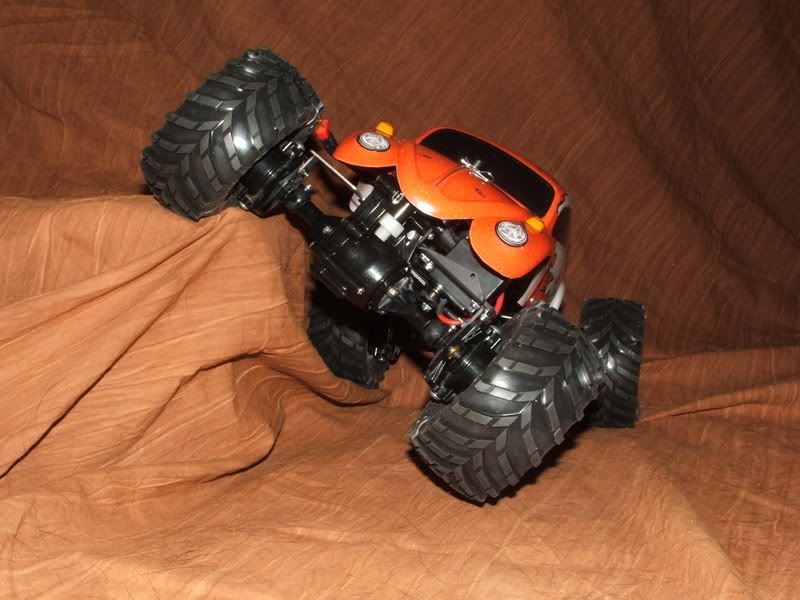
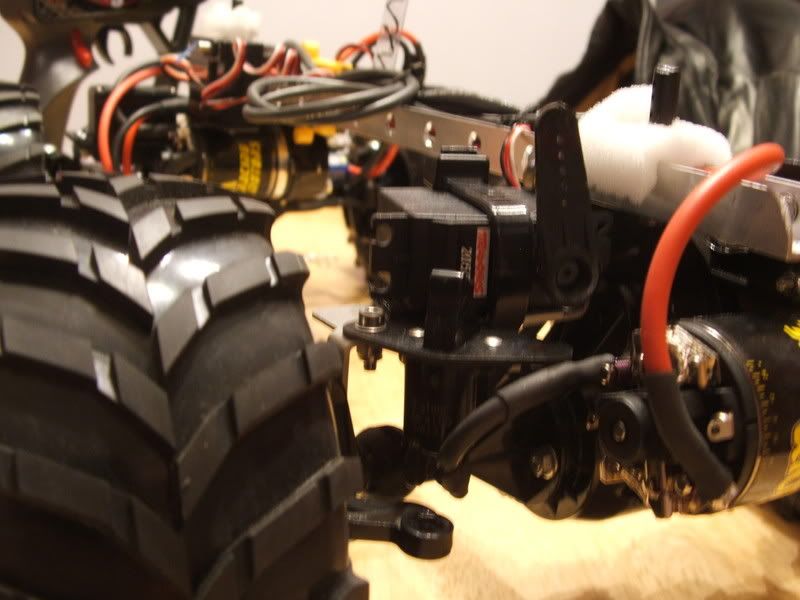
Here is what I got done today. I spun the rear axle around backwards. this alllow the tires more room to hit the rocks and adds 1/2in in the backbone. In return that 1/2 will give more flex. I locked the rear steer out with two 1/2in washers. I will cut off and smooth the knuckle down. You won't beable to tell it was ever a knuckle. If you noticed I drill holes in these chassis. Not one hole is stright across from each other. They are set 1/2in off. This allows more flex and still keeps it's strength. I'm sure theres more. If you have any questions just ask. Now on to the Pic's.
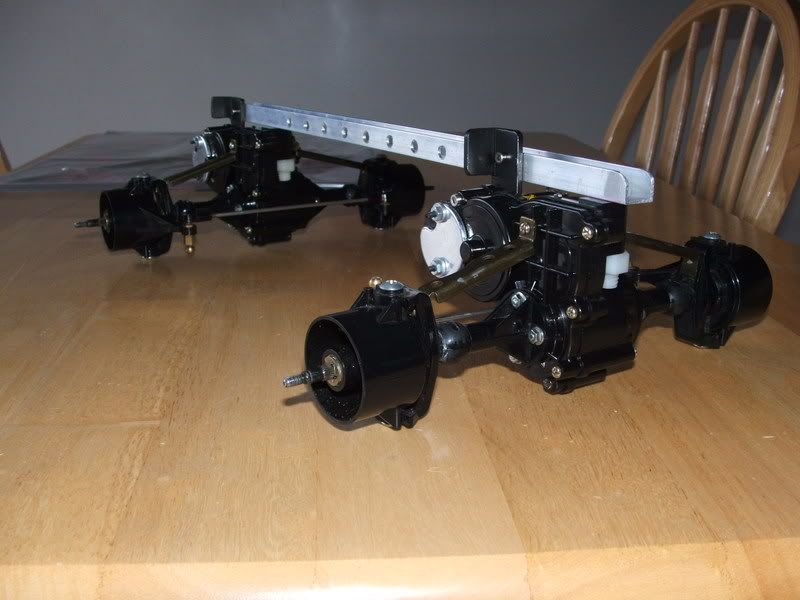
This is how I locked out the rear Steer.
Axles: Clods, lcoked
Motors: two 65T Axiom
ESC: XL-5
Radio gear: TQ3
Chassis: 12.5in Pimp Cane
Servo: Tower Pro MG995 190oz of torque
Front burn Servo: Stock Stampede Servo
Tires: Masher 2ks, filled with Airsoft BB's
Wheels: RD400 Beadlocks
Body: HPI Bug
Pinions: 9t Front, 8t Rear
Battery Pack: 8 cell IB1200 4 cells on each axle
and more just can't think of it.
I will have pic's in the next few days.
All uner $500 bucks. Not bad for a great Comp Rig
I will finish this one before the 17in Super Class Pimp Cane
Here is what I got done today. I spun the rear axle around backwards. this alllow the tires more room to hit the rocks and adds 1/2in in the backbone. In return that 1/2 will give more flex. I locked the rear steer out with two 1/2in washers. I will cut off and smooth the knuckle down. You won't beable to tell it was ever a knuckle. If you noticed I drill holes in these chassis. Not one hole is stright across from each other. They are set 1/2in off. This allows more flex and still keeps it's strength. I'm sure theres more. If you have any questions just ask. Now on to the Pic's.
This is how I locked out the rear Steer.
 02-01-2007, 12:16 PM
#2
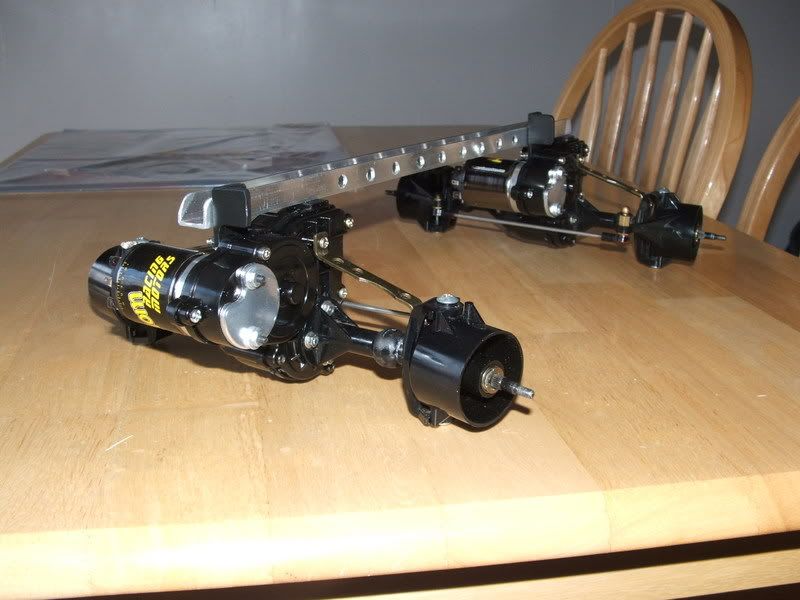
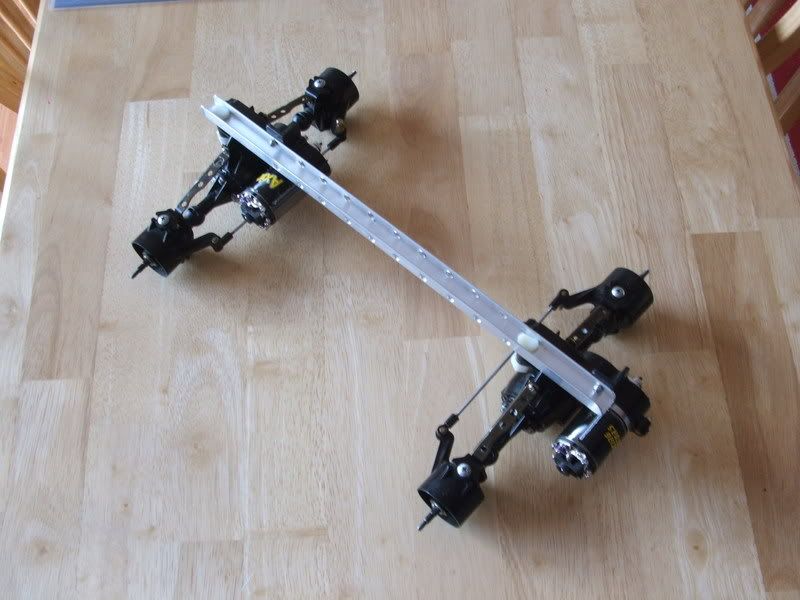
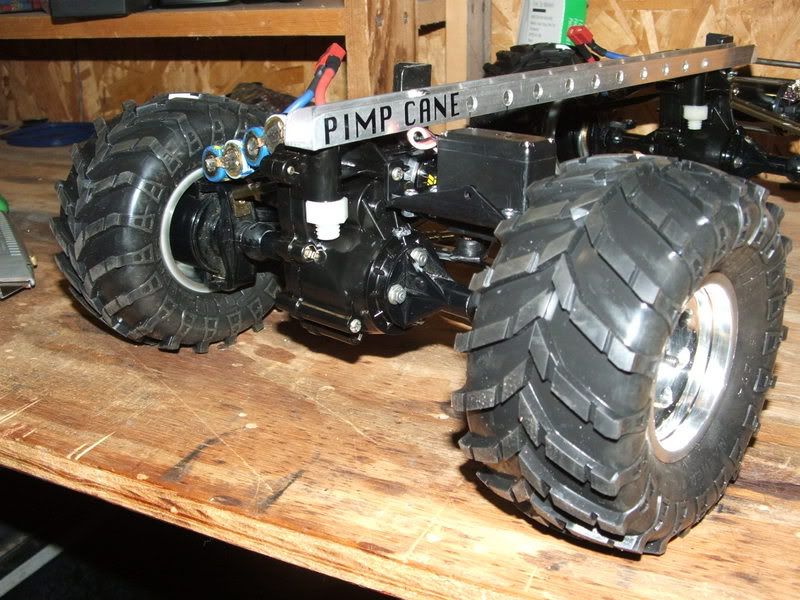
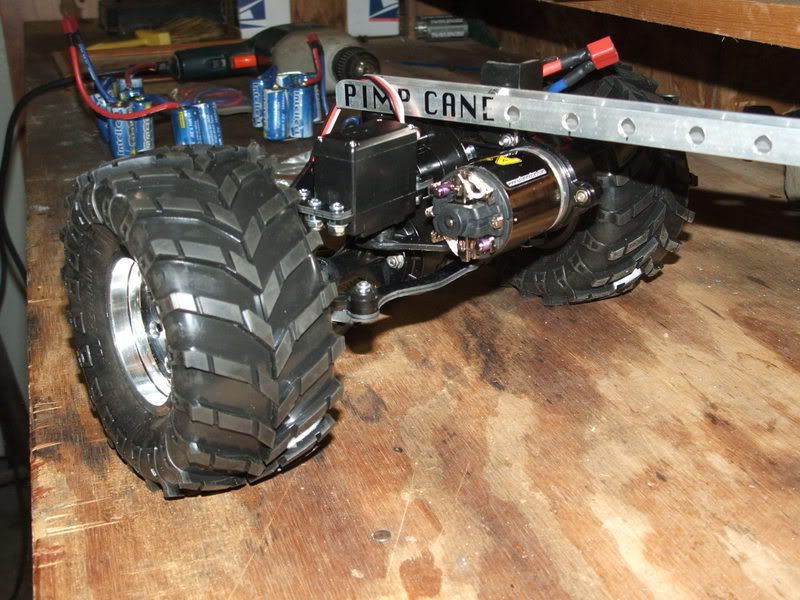
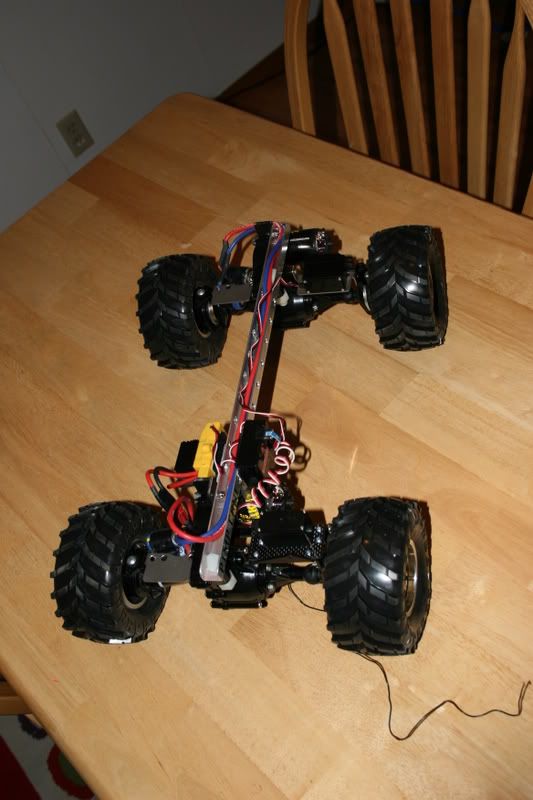
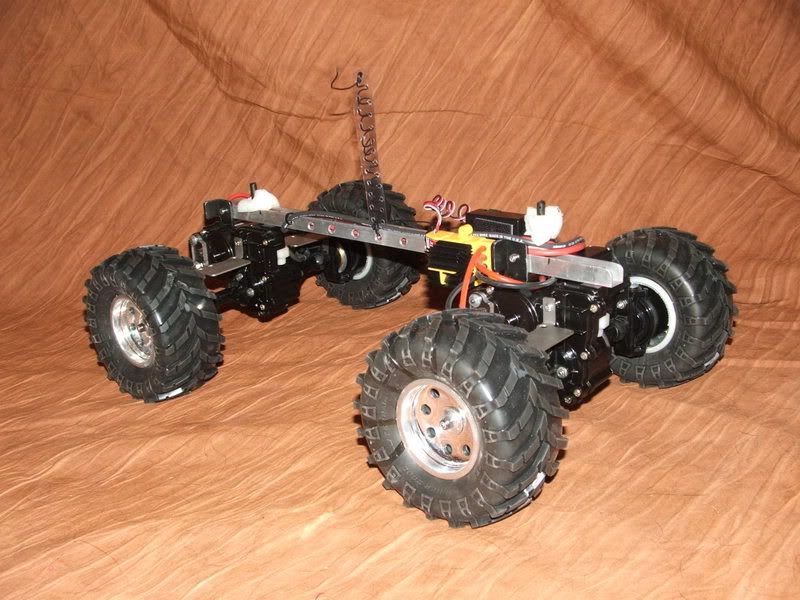
Got alittle done today. I changed my Gear covers to clear ones. 100% better to set your gears with. I also changed to a 10 and 9t instead of 9 and 8t. I got by BTA on, wheels and tires also. The Batteries are going under my new axles stays. (Not Shown) Putting the Battery packs under the axle stays will lower my COG alittle more. Well here are the pic's before the axle stays and batteries were mounted.
Some more done.
Some more done.
02-01-2007, 12:17 PM
#3
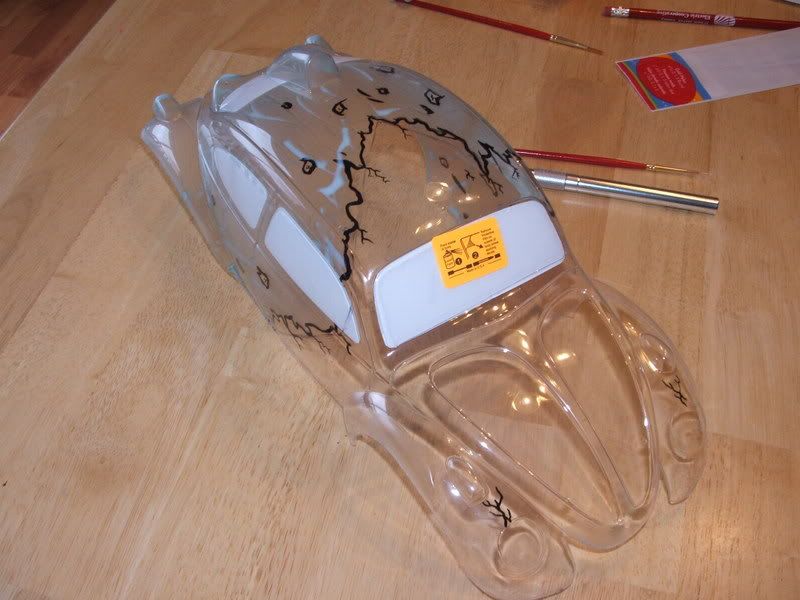
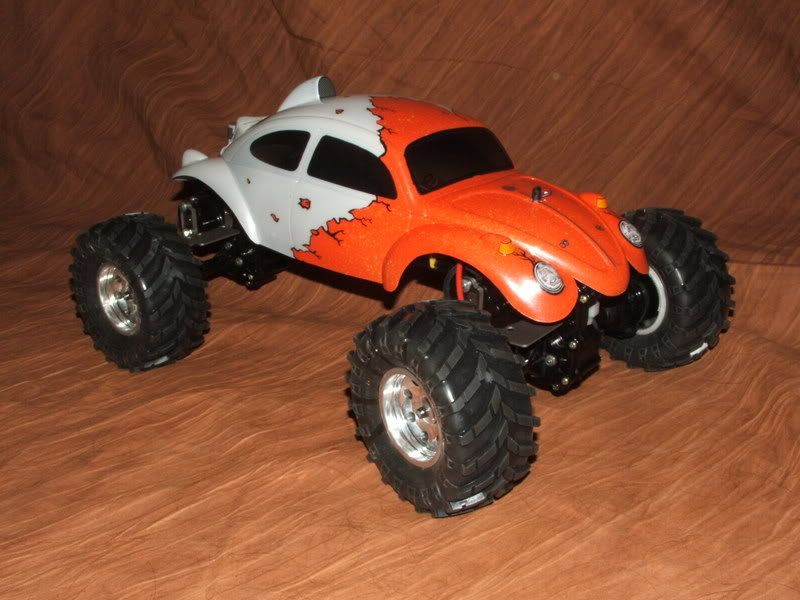
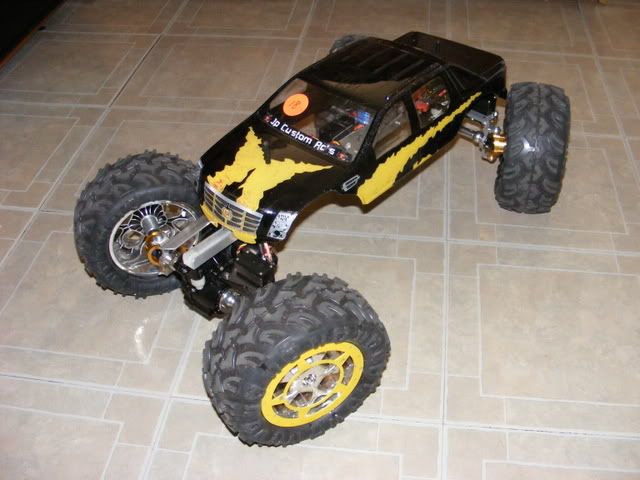
Well I got the body painted. I took some pic's as I went. I would like to say this is only the 2nd time I have used more then one color and only my 4th body I have ever painted.
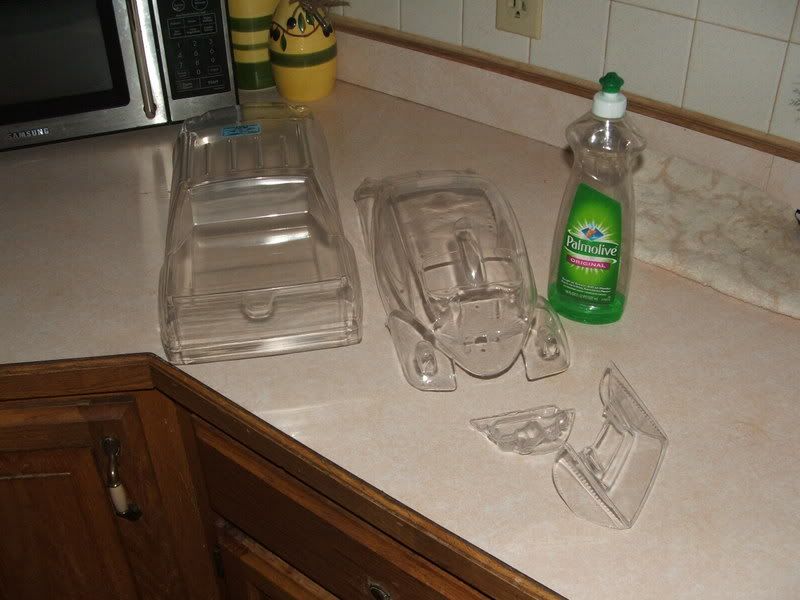
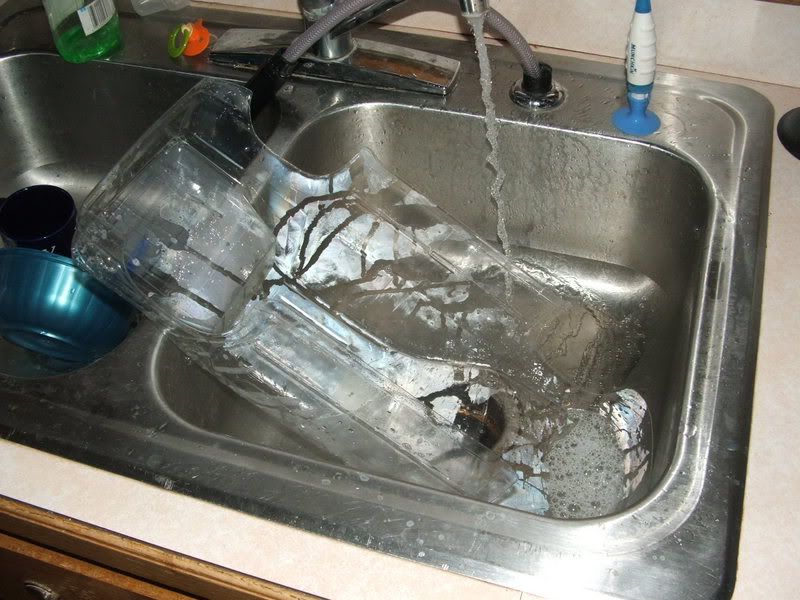
Step one: Cut and trim the body on the factory lines. Some poeple do this after it's painted, but I like to do this first. Then wash the body with dish soap and water. Rinse the body clean.
Step two: You can either let it dry over night or use a rag blow dryer to speed things up.
Step three: Apply window mask and liquid masking. I used a brush to apply it.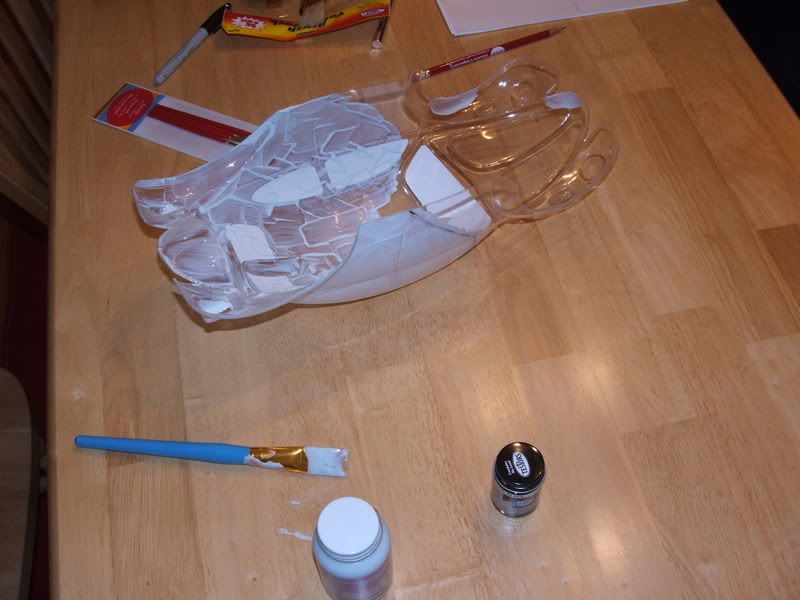
Step four: With a marker draw your design on the outside of the body. Make sure your body comes with an overspray film.
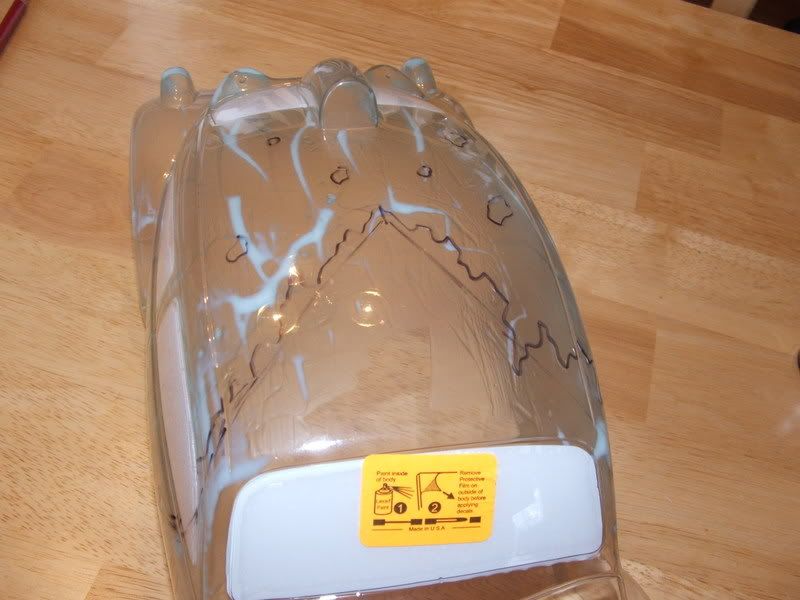
Step five: Cut out your design with a hobby knife. Don't press to hard or you will leave a groove in the lexan.
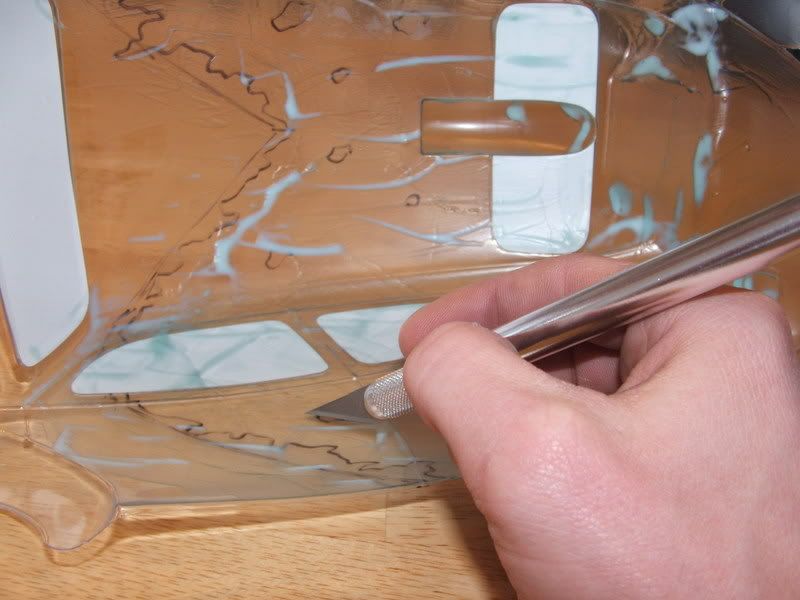
Step six: Peel the front part of the masking off and get it ready for paint. I outlined the design with some black paint by hand.
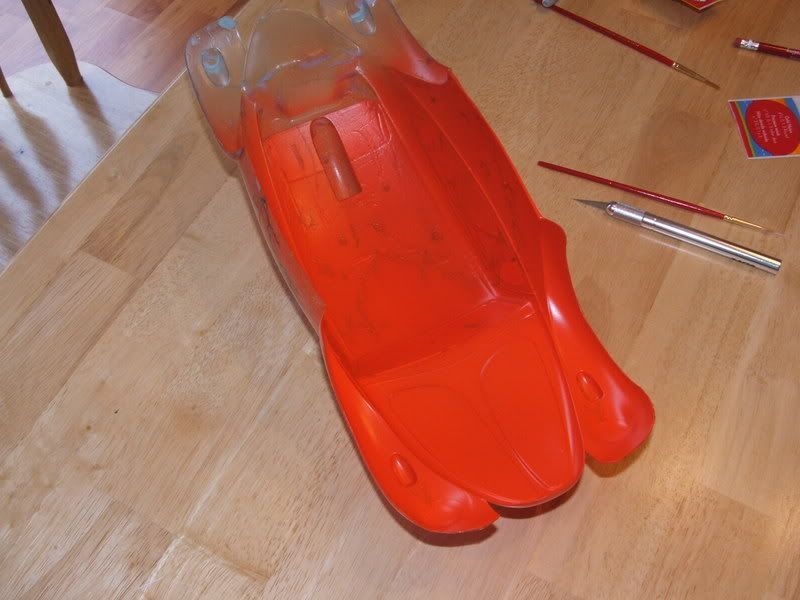
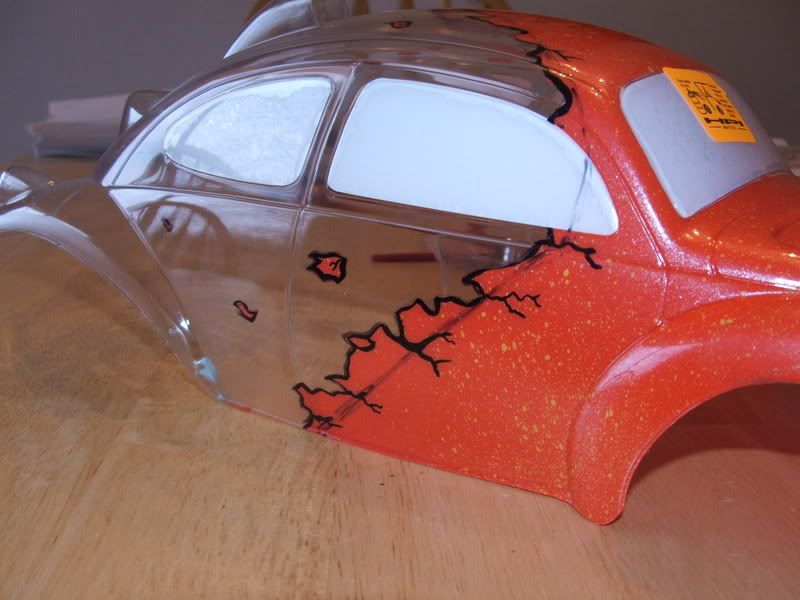
Step seven: After I outlined the cracks. I then sprayed two thin layers of white pearl. I took a tooth brush and some yellow paint. Dipped the tooth brush in the yellow and used my thumb to spray spots all over the front.l Then I backed all that up with orange.
Step one: Cut and trim the body on the factory lines. Some poeple do this after it's painted, but I like to do this first. Then wash the body with dish soap and water. Rinse the body clean.
Step two: You can either let it dry over night or use a rag blow dryer to speed things up.
Step three: Apply window mask and liquid masking. I used a brush to apply it.
Step four: With a marker draw your design on the outside of the body. Make sure your body comes with an overspray film.
Step five: Cut out your design with a hobby knife. Don't press to hard or you will leave a groove in the lexan.
Step six: Peel the front part of the masking off and get it ready for paint. I outlined the design with some black paint by hand.
Step seven: After I outlined the cracks. I then sprayed two thin layers of white pearl. I took a tooth brush and some yellow paint. Dipped the tooth brush in the yellow and used my thumb to spray spots all over the front.l Then I backed all that up with orange.
02-01-2007, 12:18 PM
#4
Well I have pretty much done. All that is left is to Mount the rear servo for digs. Got everything wired and ready to go. Battery was pretty dead so I was having some steering issues. But I think it was from the battery. Any here is a few pic's.

Short Vid Showing the Front Digs.
Short Vid Showing the Front Digs.
02-01-2007, 12:18 PM
#5
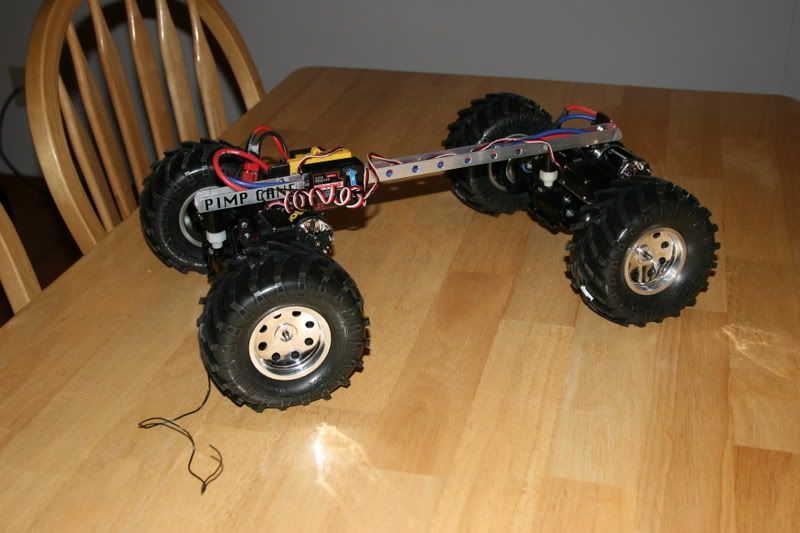
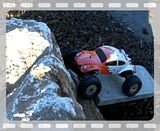
Here is a few shots of how everything is layed out. I have the batteries under the axle stays.
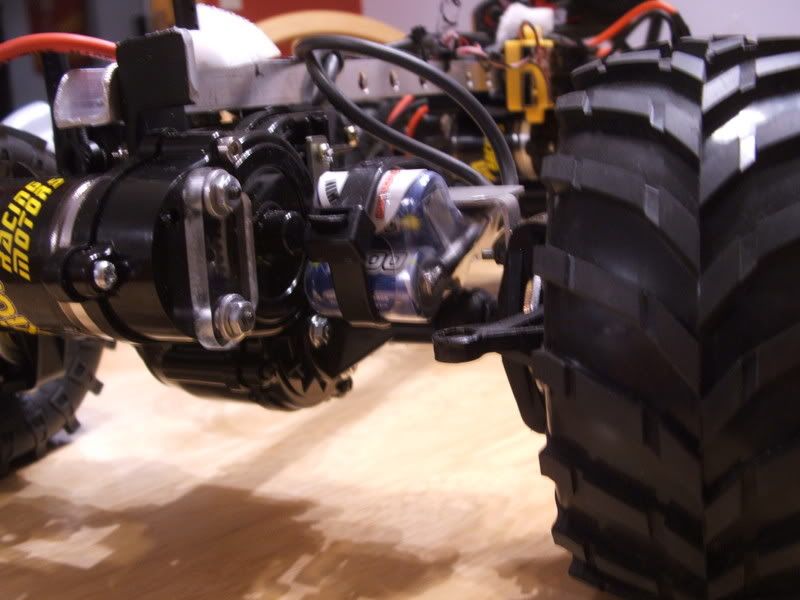
A shot of the rear Servo for the front Digs.

Well here is a really short vid climbing a ledge on my Test Rocks. I had to use my rear digs to even crest the top. I drove to the edge. Hit the rear digs and let the front suck down and get traction. Once it pulled it self up undid the rear digs to power the rest of the way up. The video really doesn't do it justice as they never do. But still very impressive for it's first run off the carpet.
A shot of the rear Servo for the front Digs.
Well here is a really short vid climbing a ledge on my Test Rocks. I had to use my rear digs to even crest the top. I drove to the edge. Hit the rear digs and let the front suck down and get traction. Once it pulled it self up undid the rear digs to power the rest of the way up. The video really doesn't do it justice as they never do. But still very impressive for it's first run off the carpet.
02-01-2007, 12:20 PM
#6
Got board at work and made a short video again.

Well I got my New Motors in today...
Axiom's New V10 60t Crawler Motors...

Well I got my New Motors in today...
Axiom's New V10 60t Crawler Motors...
02-01-2007, 12:54 PM
#7
Interesting stuff, I don't know much about hardcore crawlers but I feel like I know more now.
02-01-2007, 03:41 PM
#8
Tech Regular
dude that thing is sweet is it all custum made by you cause if it is im coming to your house.
02-01-2007, 03:43 PM
#9
Pretty much. I made the chassis. (Thats what I Do) Everything else was bought and pieced together to work as one.
02-02-2007, 09:25 AM
#10
Well I just ordered CVD's for the front and a Special Gear Reduction Drop unit for the rear. ( Portals )...Trying something that hasn't been done on a 2.2...Keep an eye on this. 
 02-08-2007, 07:32 PM
#14
Thanks...I'm glad you like it.
02-08-2007, 07:52 PM
#15
thats awsome. how did you get the axles to stay stable without suspension and links holding them? and how does it flex so much without suspension? also, how much did you put into that?