


 1Likes
Losi Mini 8ight-T Build - Leopard Motor 4S
 07-06-2014, 06:28 PM
#1
Updated 12/25/14 - I've compiled a lot of info all into this 1st post so it's easier for others to find.
Size
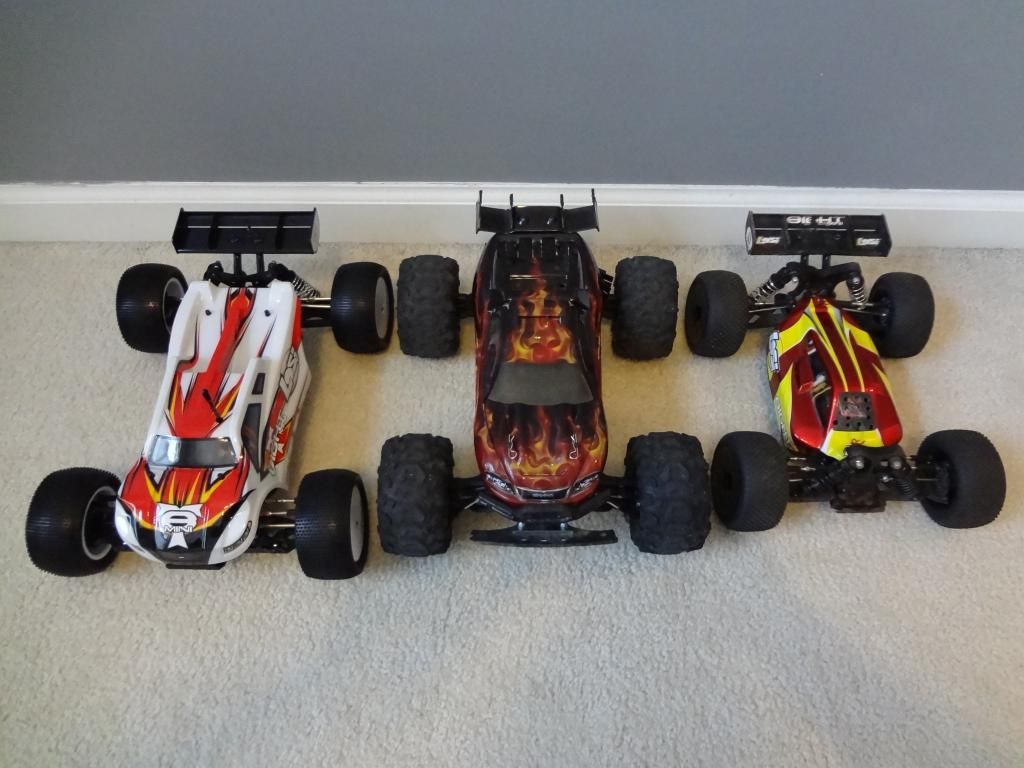
This truggy is more like a 1/12 scale vehicle. It's quite a bit larger than the buggy and you can really feel the handing difference off road. It's easier to work on and move things around because there's more space. I weighed my buggy and truggy fully assembled except a battery.
Buggy, 2.04 lbs
Truggy, 2.63 lbs (29% heavier)
Tools
1.5, 2.0, 2.5 mm hex drivers
5.5 mm nut driver for the wheels
4 mm turnbuckle wrench
Mini screwdriver for the differentials
Motors
The stock 24 mm Losi motor worked ok in the buggy for a RTR model, but it's way too small for this truggy. Not only does it not provide enough power, but it also gets very hot very quickly. Even the racer only guys that don't want power still need a cool running motor. I started with the Traxxas Velineon 28 mm motor on 3S and it was "ok". I started with 12/60 gearing and it was way too under geared. I switched to 16/60 gearing and it picked up a lot more acceleration, but it still just felt weak compared to that same motor in the buggy. It didn't have the acceleration I was looking for.
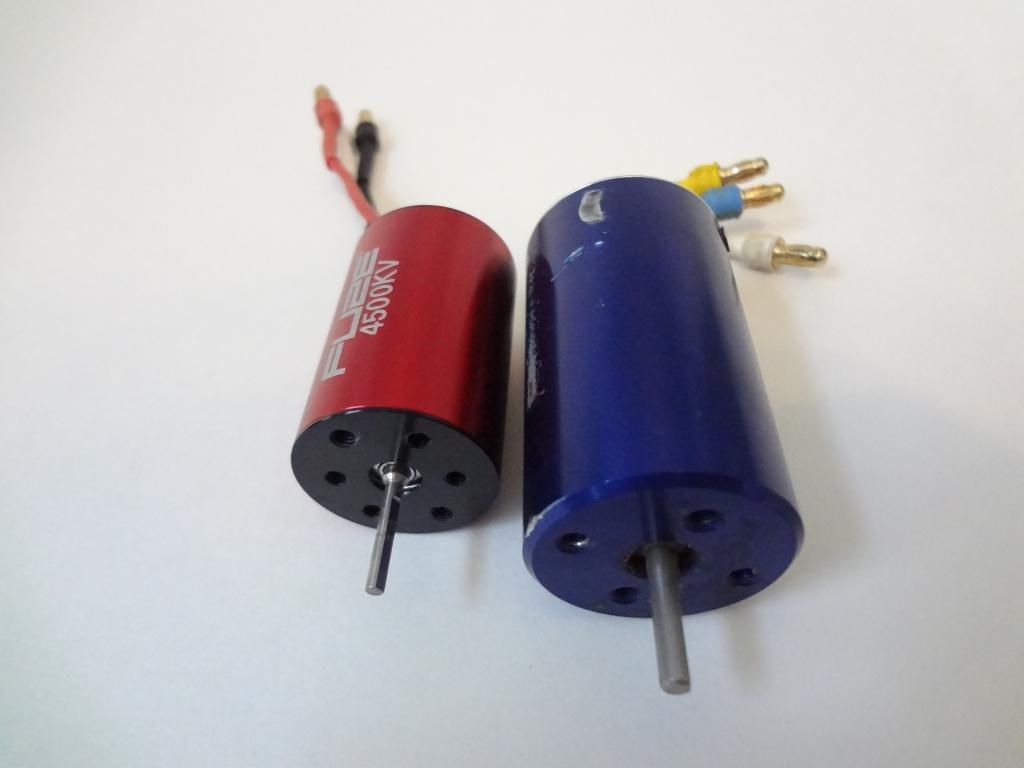
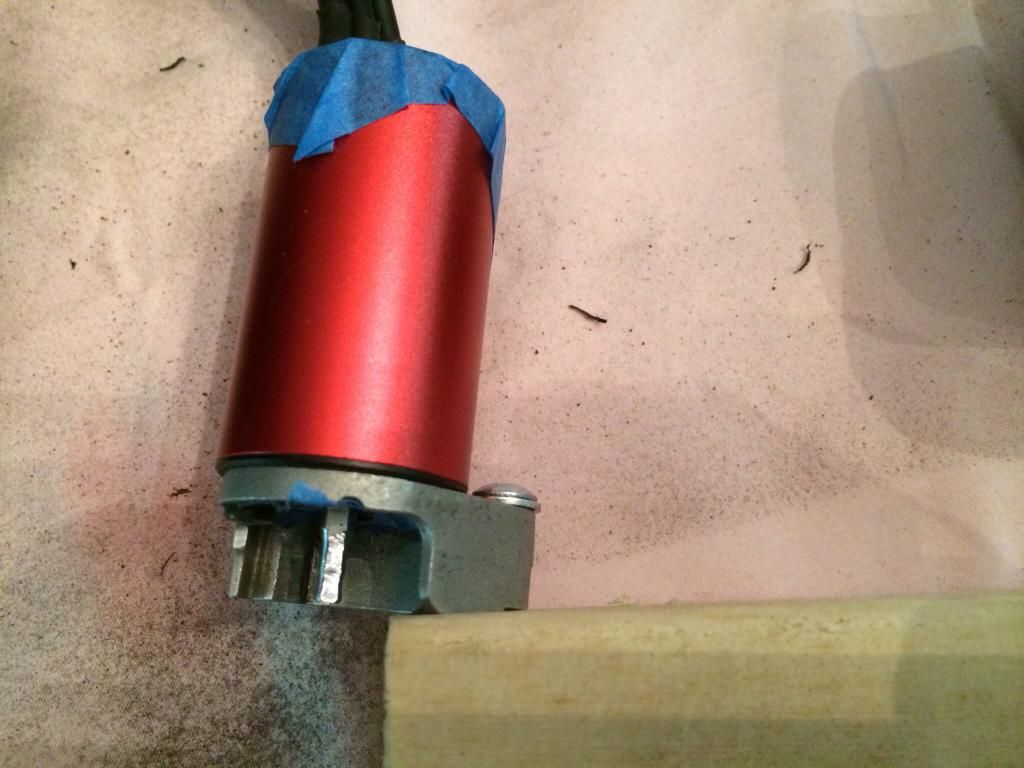
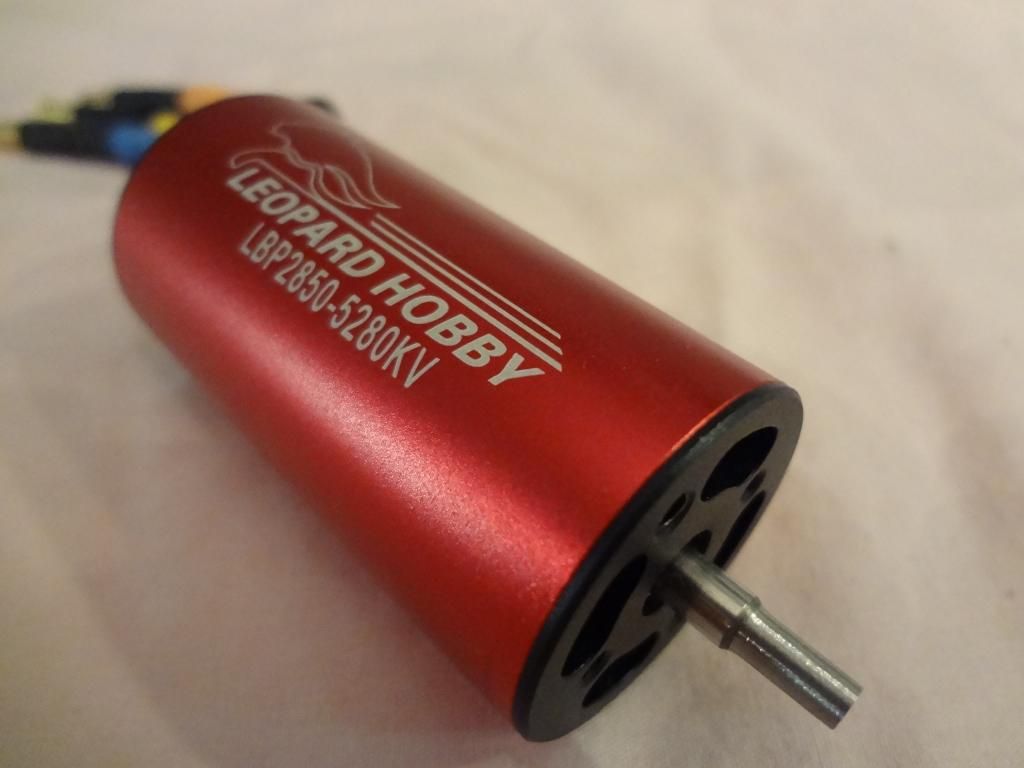
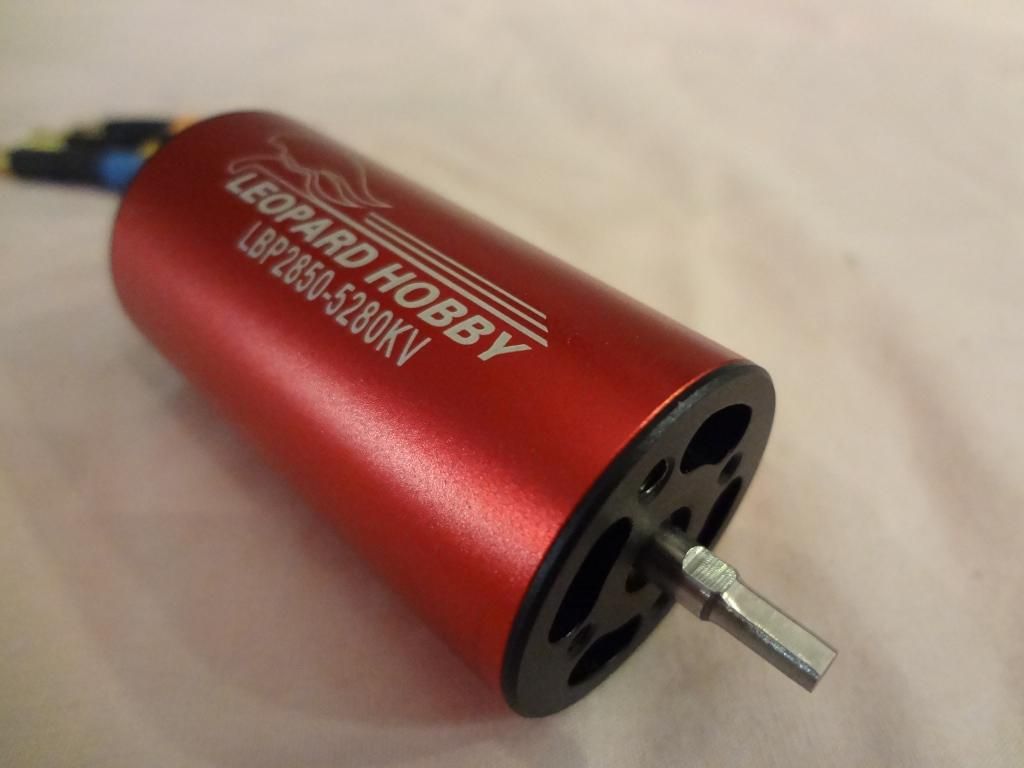
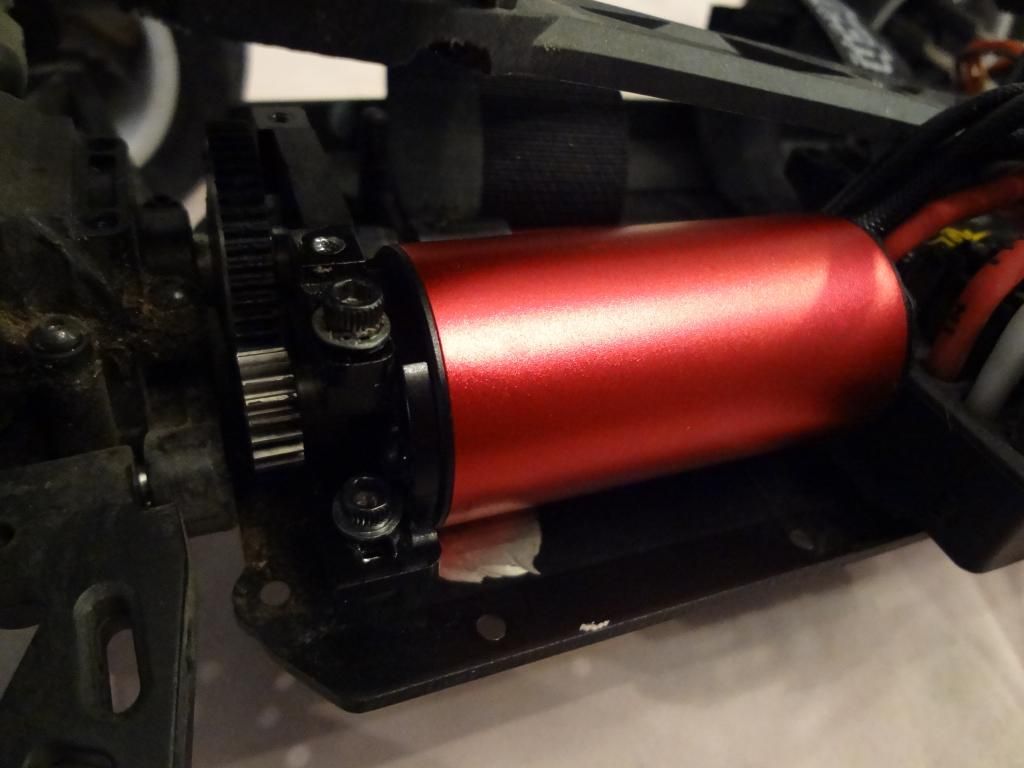
I wanted to try a few different Leopard motors. I first went with a 2845 Series 4 Pole 3300 kv motor (800 W) and ran it on 4S. It performed great and was a nice improvement over the Velineon. I wanted to go one step up while still keeping the MMP ESC in the stock location, so I then went with a 2850 Series 4 Pole 5280 kv motor (1000 W) and ran it on 3S. This motor performs even better and I'm really happy with it. It produces a lot of power and stays cool. The only negative thing about the Leopard motor is the shaft size is 4 mm and it needs to be 3.17 mm. I had never reduced a motor shaft size before so I was a little nervous about messing it up. What I did was put the Leopard motor on an old Traxxas Mini E-Revo motor mount and then mounted it to a piece of wood so it wouldn't move. I preferred this method over a vice because it is low to the surface on a table and I can keep a steady hand much better. Then I just kept the throttle on at a low speed with a zip tie on the trigger. Then I took a dremel and used a standard grinding disc to go back and forth on the shaft a little at a time until it was trimmed down to the right size. It did not take long to remove the material. So for anyone doing this, stop and take your time and measure. Then I shaved down a flat spot on the shaft for the set screw. It turned out to be really easy, so if anyone is on the fence for a Leopard motor, do it. All of the 28 mm/380 motors that I have used on the buggy and truggy required trimming less than 1 mm off the chassis where the rear of the motor sits. The front of the motor doesn't touch the chassis, there's a hair of clearance there. I also trimmed the top plate a tiny bit for clearance.
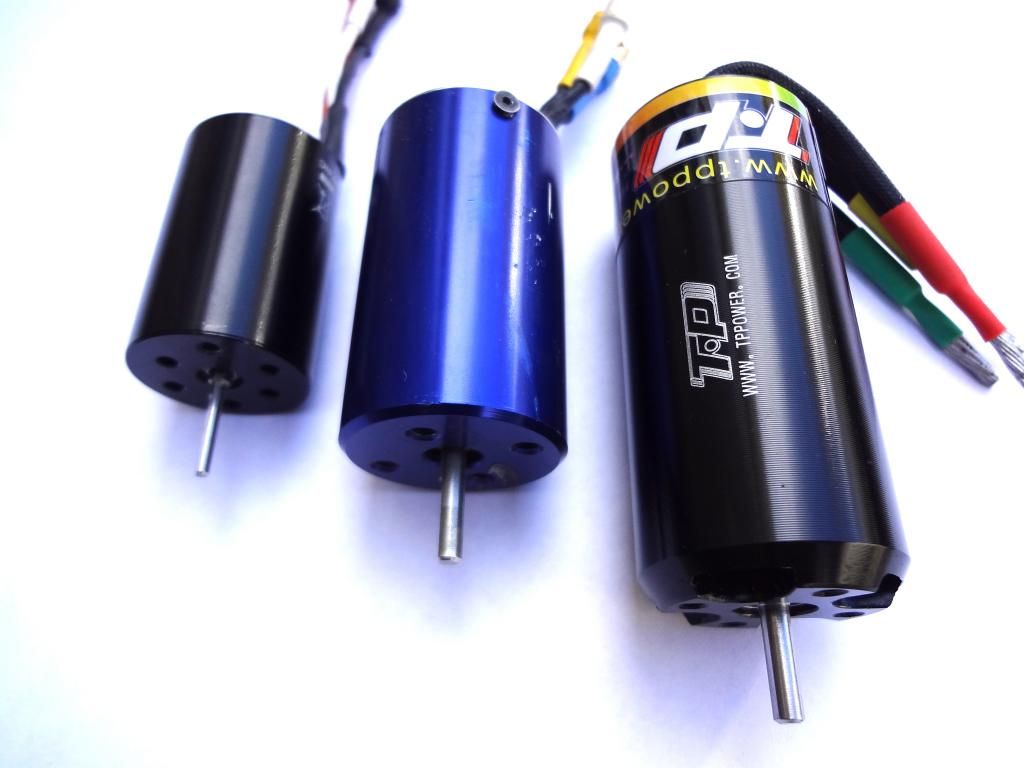
Stock Losi 24mm Motor, 72g
Leopard 2845 28mm Motor, 127g
Traxxas Velineon 28mm Motor, 139g
Leopard 2850 28mm Motor, 141g
TP 2940 29mm Motor, 184g
Quick little video of the 2850
Losi vs Velineon
Marking the spot for the cut
Cut made
Cutting the motor shaft (first attempt on the 2845)
Shaft ground down to 3.17mm
Flat spot
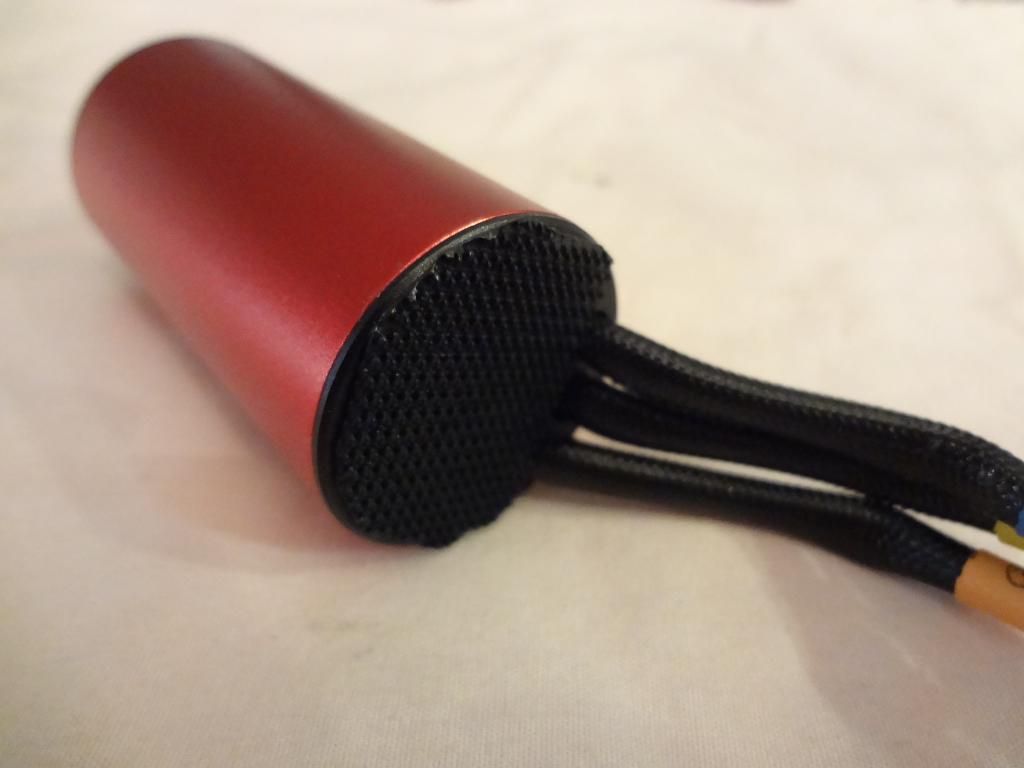
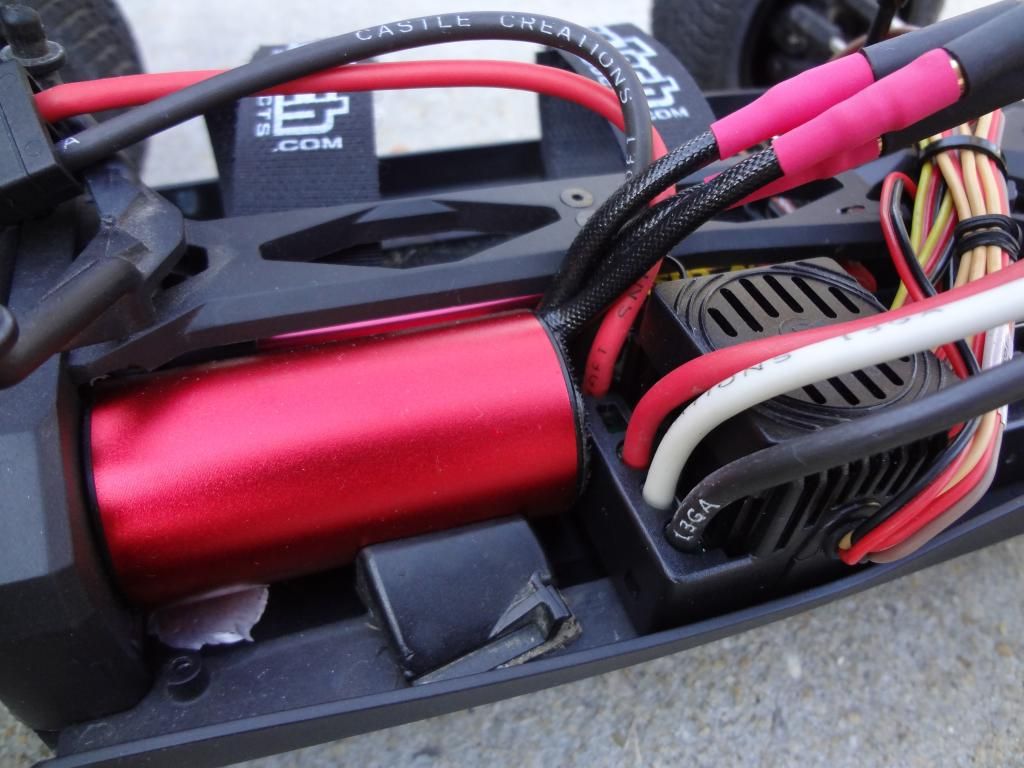
Velcro to cover the vent holes
Motor in
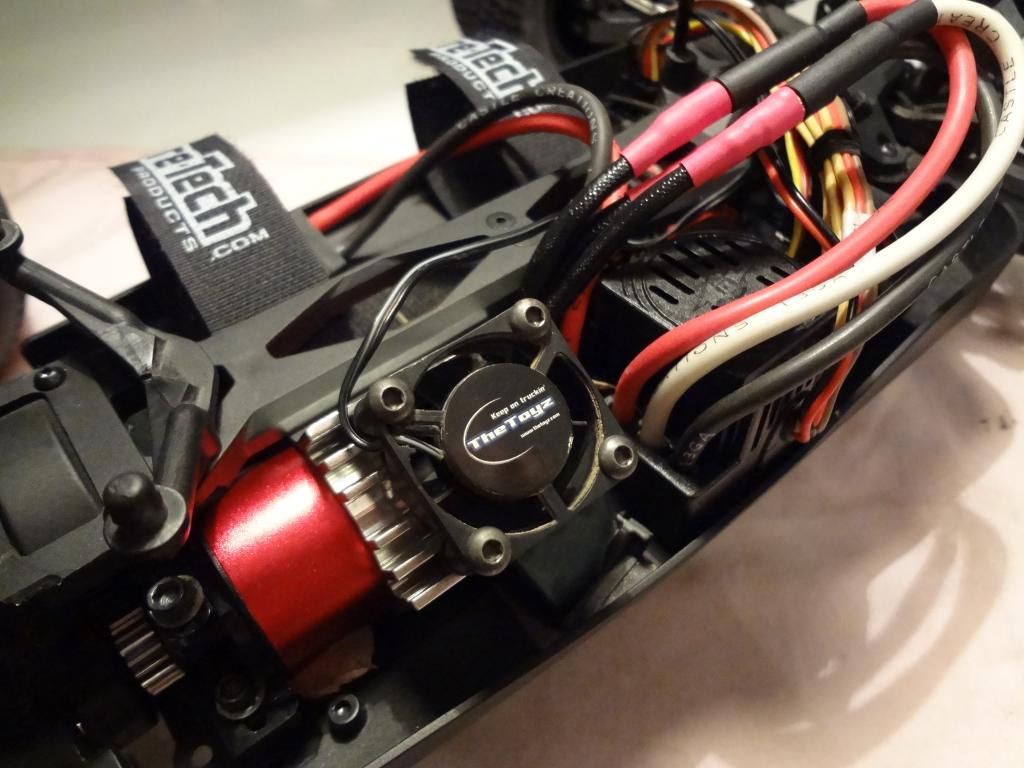
Thanks to The Toyz for the heat sink and fan combo. Since clearance is limited, I had to cut off part of the heat sink that would normally go under the motor.
Buggy Build
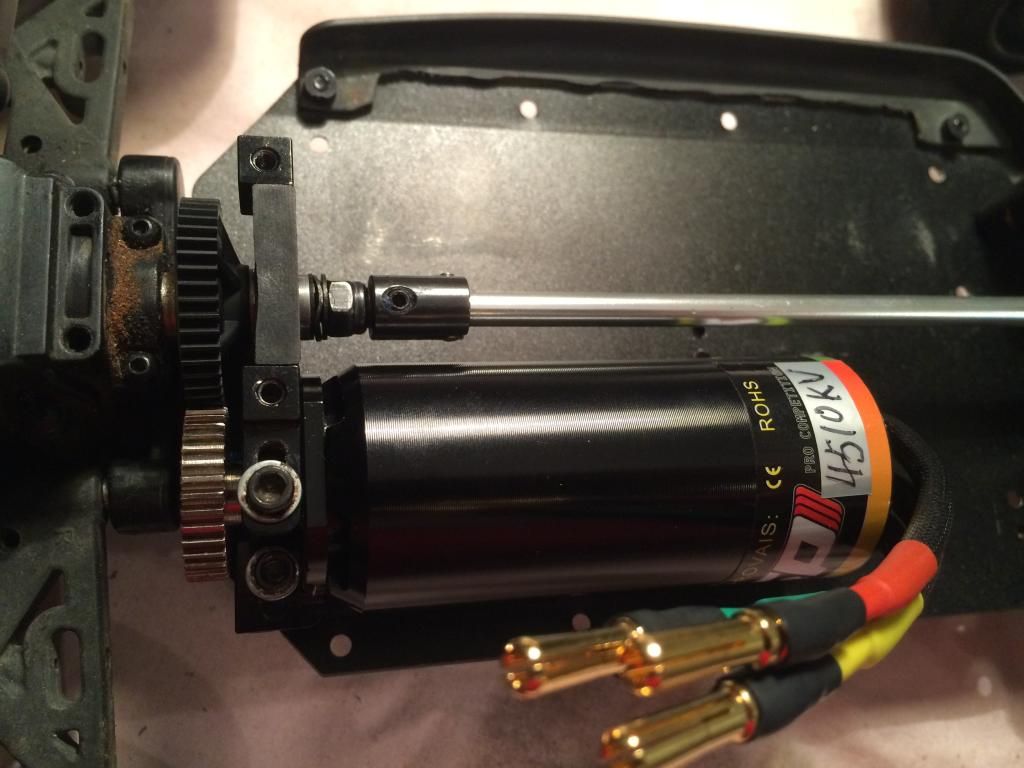
On my buggy I'm running the TP2940 motor (1600 W), which is 29x68 mm. This motor required quite a bit more work to fit, which included cutting a hole out of the chassis and opening up the slot in the motor mount since the screw spacing is 19 mm.
80.7 mph speed run
Losi vs Velineon vs TP 2940
Hole in chassis
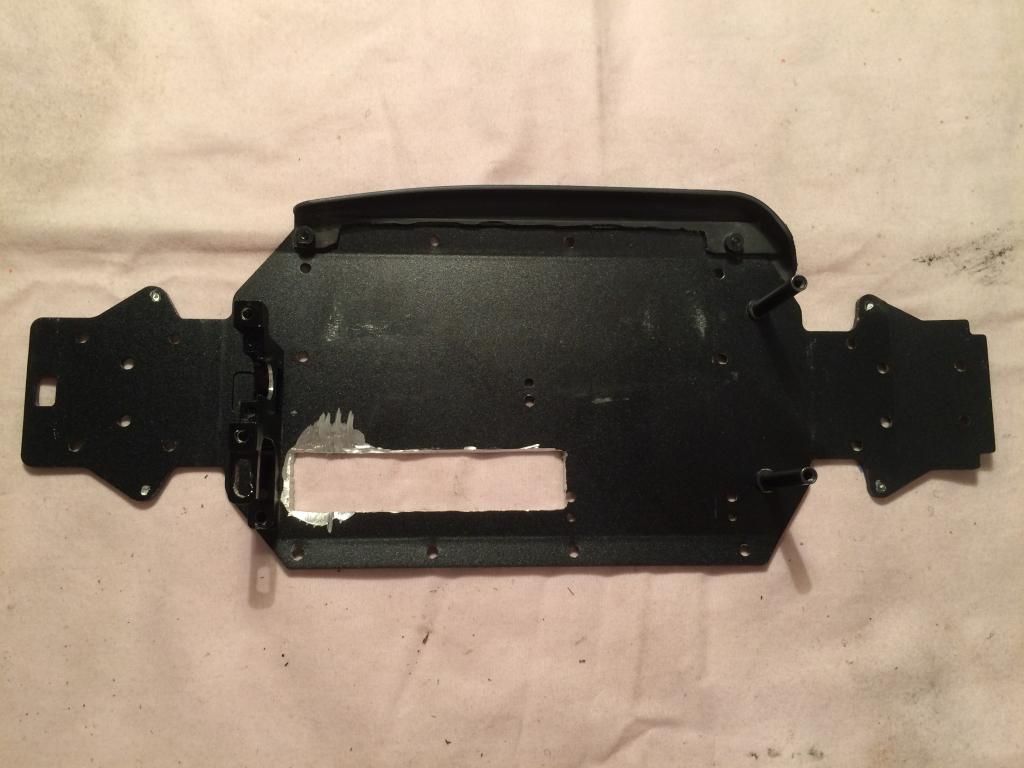
Opened up the slot to fit the screw
Motor mount on, with loctite
35T Pinion
45T Spur
Motor Mount
The motor mount isn't designed to support a larger & heavier 28mm motor. Traxxas and LC Racing both use 28mm motors in their 1/14-1/16 vehicles, why didn't Losi? I really wish a company would make a properly engineered motor mount for this platform.
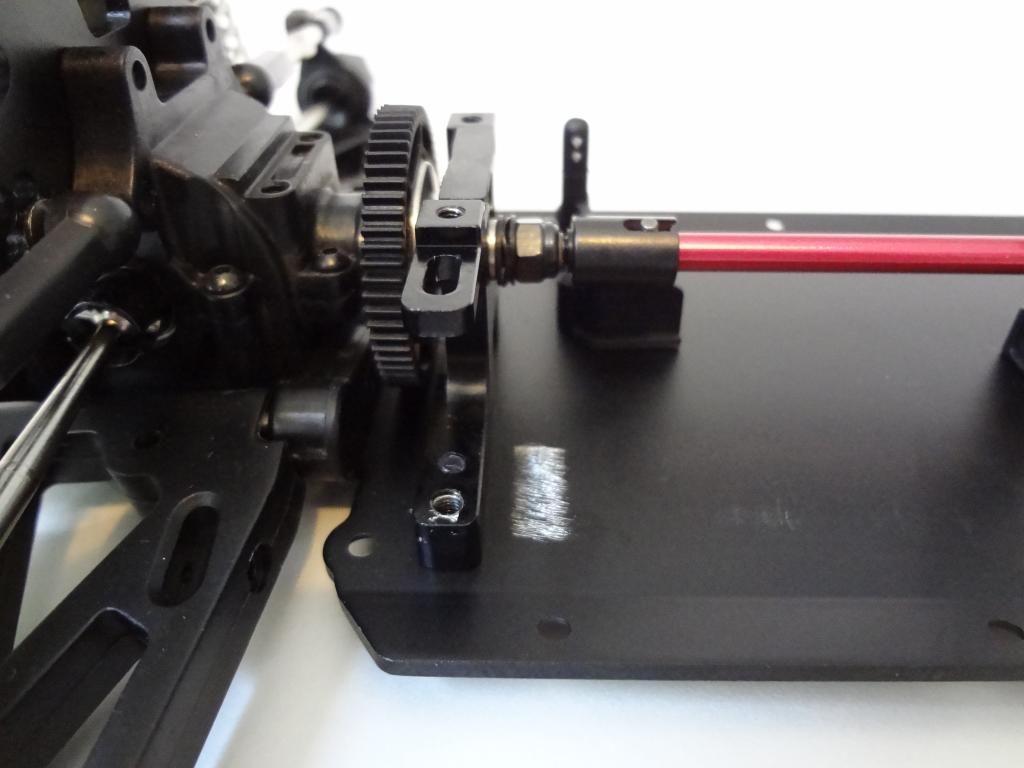
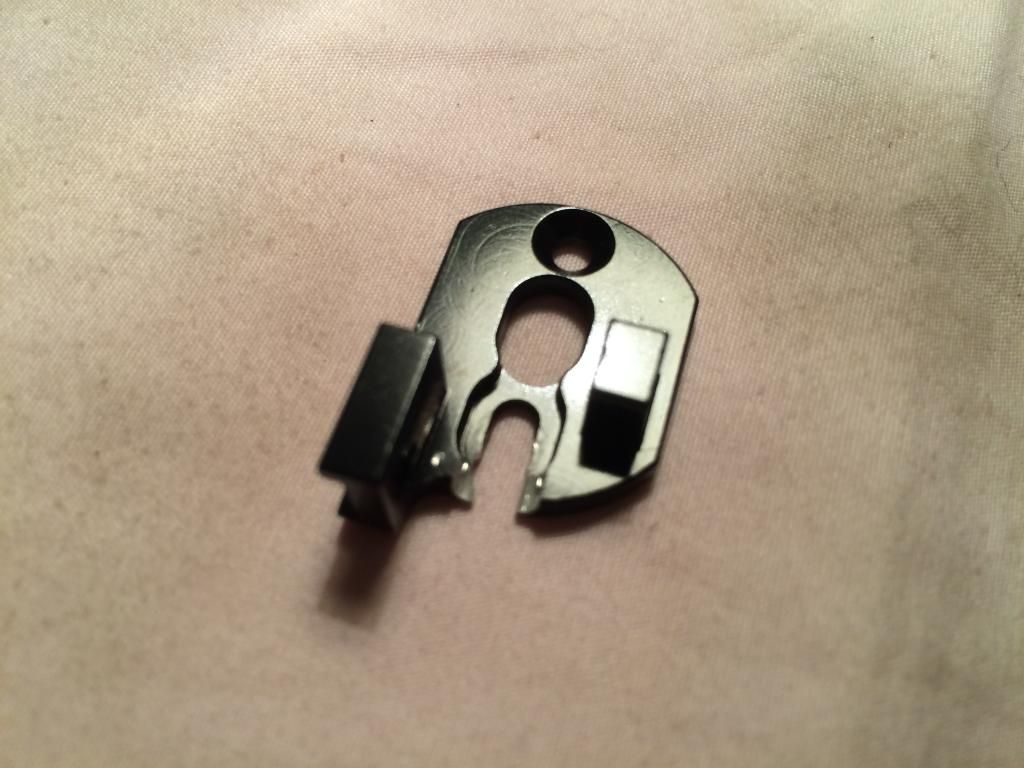
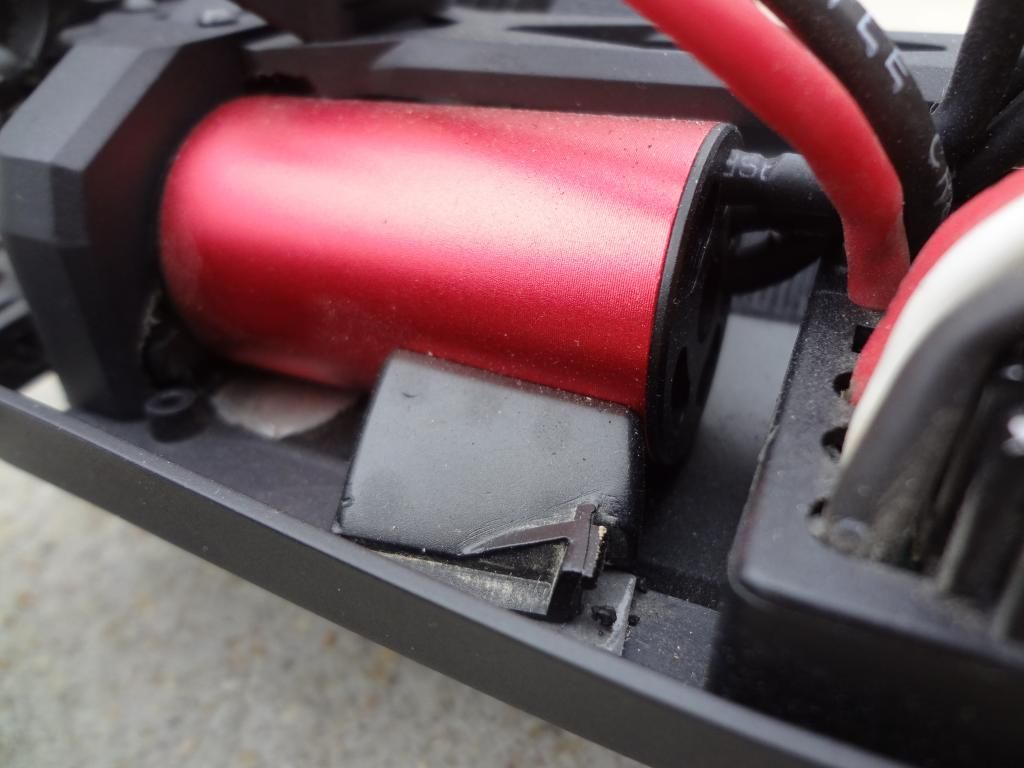
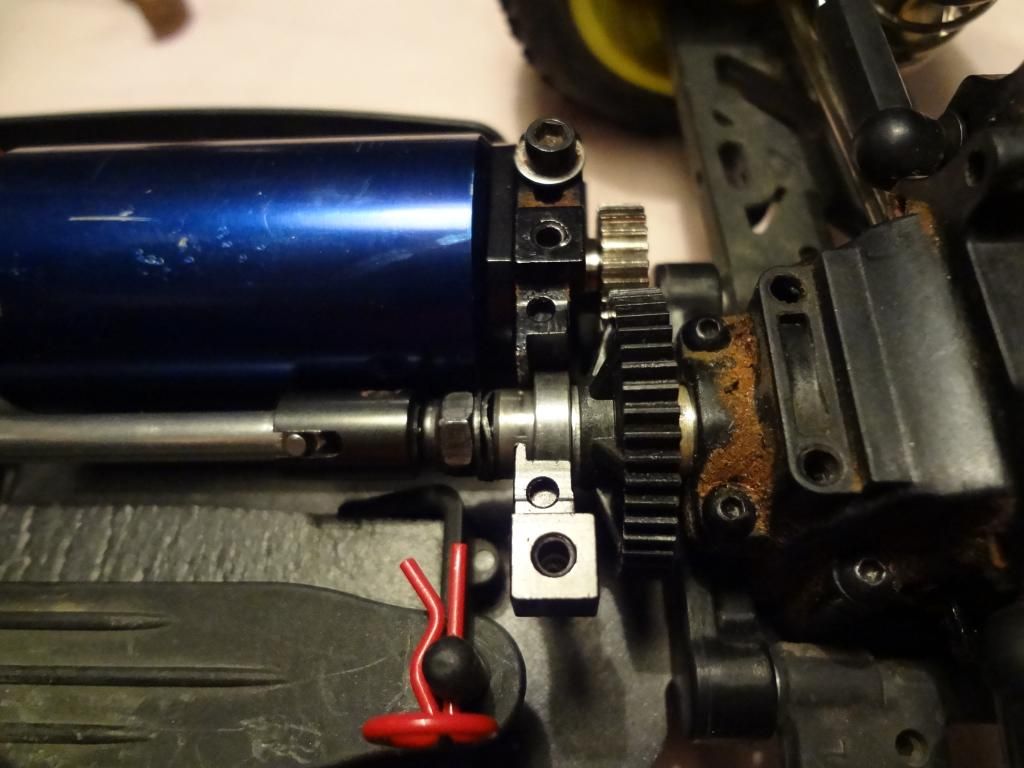
So what I do is place a motor support piece by the front of the motor to keep it from shifting to the side when you land or crash from a large jump. I used to strip the spur gear in the past but now with the motor support, I haven't stripped a spur gear once. The old motor mount on my buggy was bent from not having a motor support. Whenever you need to remove the motor all you have to do is remove the side guard. The part I'm using is a Traxxas vent #7026, along with 3M super strong double sided tape. That's just what I had laying around and it works great.
Motor support (2845 motor shown)
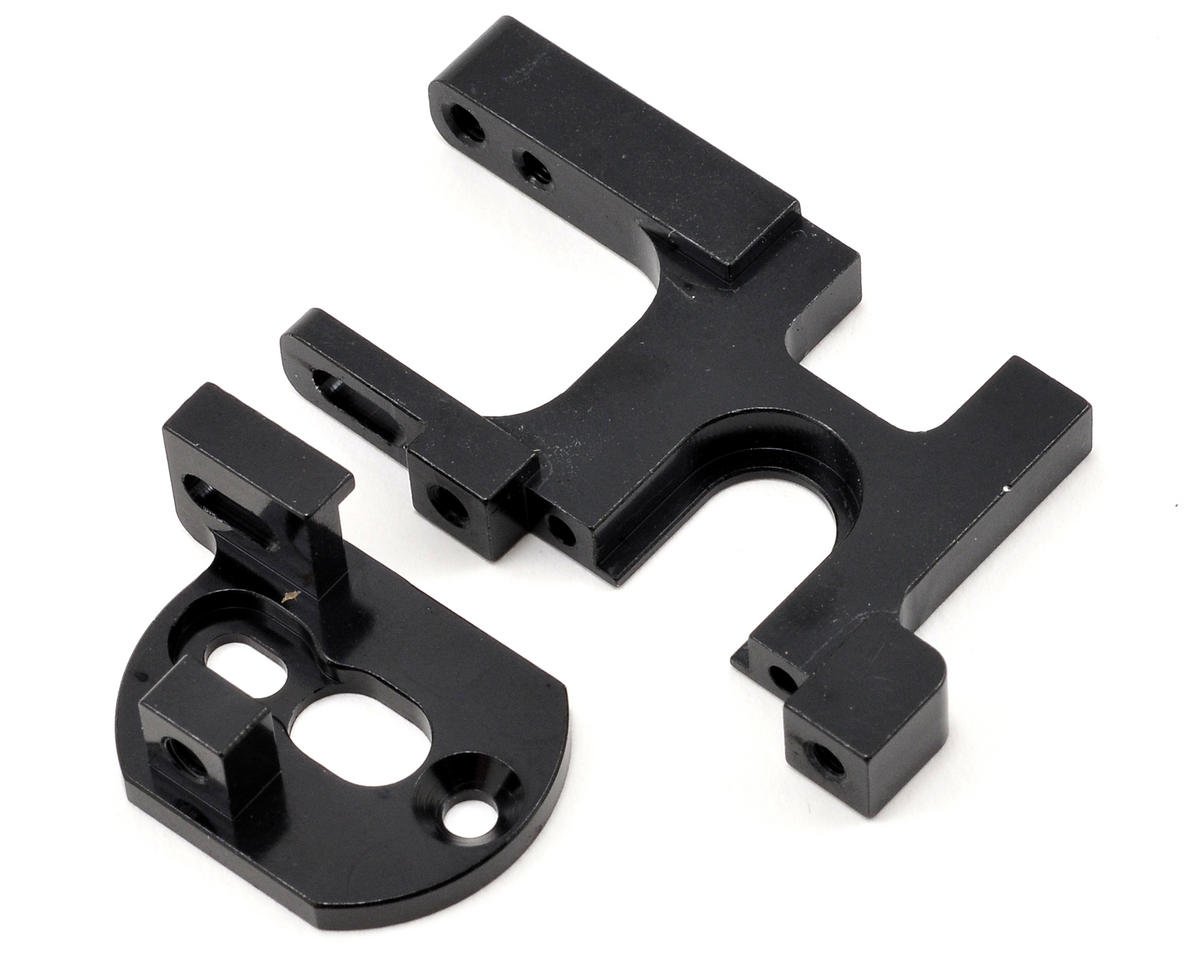
GPM made a motor mount for this, but I don't see a reason for it.
1. They didn't raise it up 1-2mm where the motor sits, in fact it actually makes the motor sit 0.2mm lower than the Losi mount. They made the base shorter. This is unbelievable. FAIL
2. The little wedge piece that goes on top is aluminum on the GPM mount, Losi uses plastic. This GPM piece does fit on the Losi mount.
3. Nobody lists the alloy used so who knows which one is stonger.
GPM
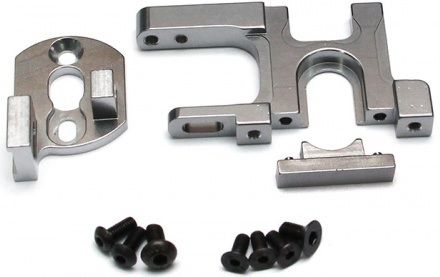
Losi
Slipper
The slipper is very sensitive. I tighten the slipper all the way down and then back it up 1/8" of a turn. If you set it too loose it will squeal pretty bad.
Gearing
The largest gearing that will fit without modification is around 19/58. I'm running 19/55 on my truggy and it stays pretty cool. On my buggy, I've opened the slots on the motor mount and it fits 35/45.
Traxxas 48P Spur Gear Conversion
All of the 28mm motors use or are best used with a 48P pinion gear. So it makes sense to use a 48P spur gear. The Losi spur is .5 mod and you can use it with the 48P pinion, but the mesh is better with a 48P spur. The conversion to the Traxxas spur is a direct swap, with no modifications needed. You do not need to cut anything like in that YouTube video. There's multiple ways of doing it, this is just how I do it and it works very well. The plastic/nylon spurs are available in 45T, 50T, and 55T. This is everything you need.
Traxxas 48P Spur Gear 55T, 7047R
Traxxas Slipper Pad, 7152
Traxxas Bearings 4x8x3 (2), 7019
Washer from hardware store
In order from right to left. Losi pressure plate, Traxxas slipper pad, Traxxas spur gear, Traxxas bearing, washer, Losi small bearing inside of Losi large bearing, Traxxas bearing, 3 Losi washers, Losi nut.
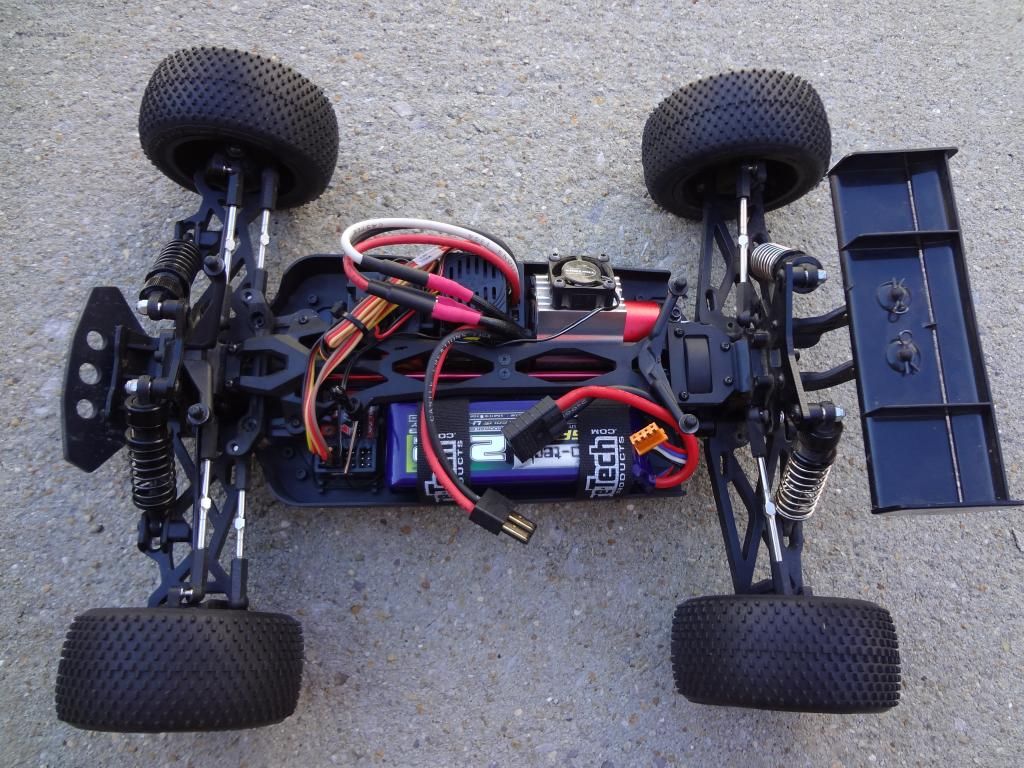
ESC
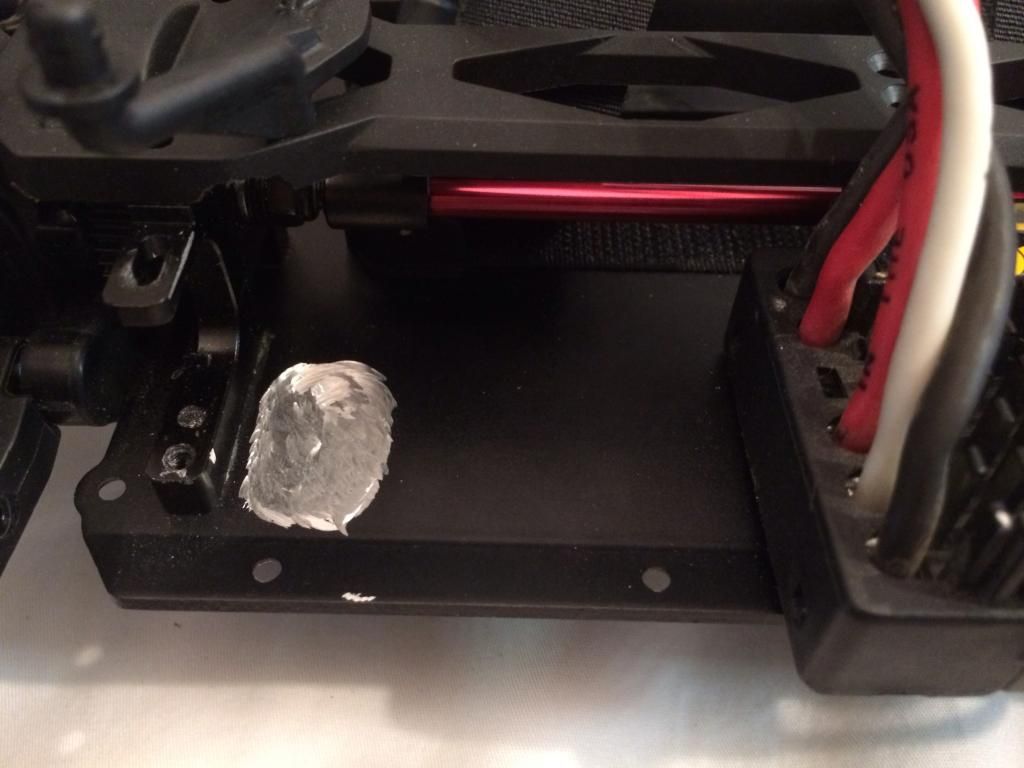
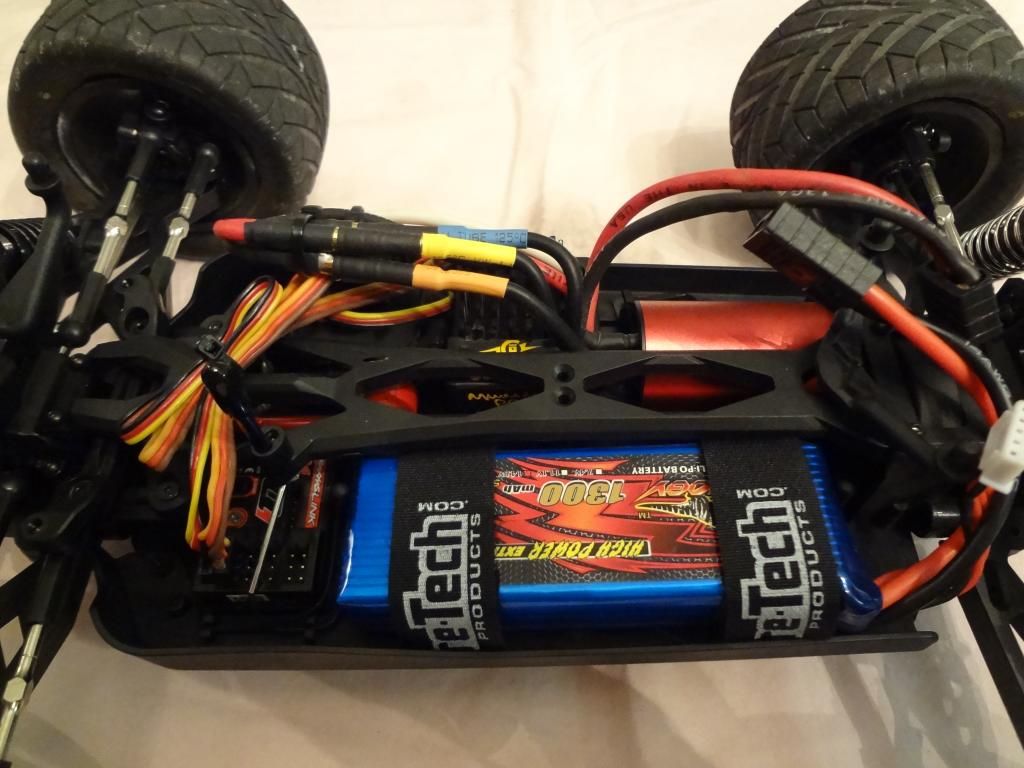
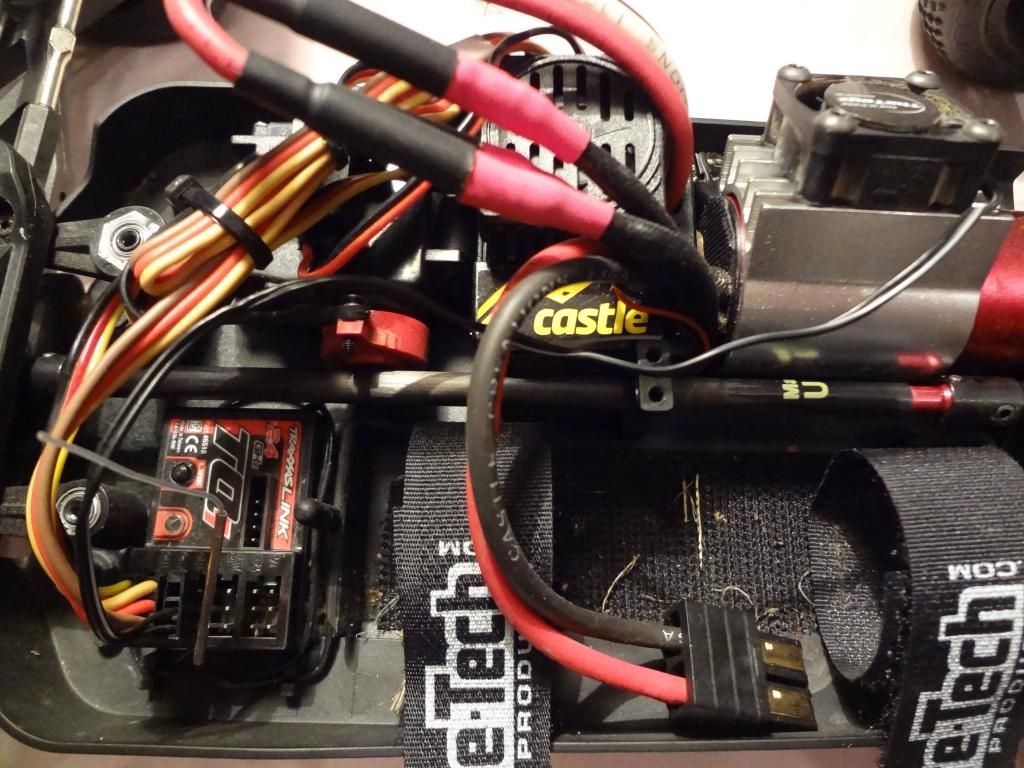
In order to handle this power system, not overheat, and have awesome programming, I went with the proven Castle Mamba Max Pro 1/10 ESC. I've used this ESC for years and it's a beast. This ESC fits great in the stock location. All I had to do was use 3 layers of 3M double sided tape to raise it up enough to make it lay flat across the side guard. The brakes are way too powerful on the default 50% setting, I changed them to 10%.
Servo
I went with the Hitec HS-225MG servo. It's metal geared and has ball bearings. I used this servo in my buggy and it works great. I also used the Kimbrough servo saver #KIM131. This required a little bit of trimming on the top plate for clearance. I'm not using the stock AVC receiver, so if you are, you'll need a digital servo if you want to keep the AVC functionality.
Battery straps
Do yourself a favor and get a set of the Pure-Tech Xtreme Double PSA Straps #PUR022-BK. This is a wonderful item. It sticks right on to the chassis and then you just strap the battery in. There's no need to remove the battery side guards, just trim one of them and you can run any 1300-2500 mah battery you want with ease.
Batteries
The Turnigy Nano-Tech batteries work very well for me. Here's a few examples that I weighed.
Turnigy Nano-Tech 2S 2250 65/130C, 144g
Turnigy Nano-Tech 3S 1400 40/80C, 116g
Turnigy Nano-Tech 3S 2200 65/130C, 200g
Dinogy Nano-Tech 4S 1300 65C, 150g
Ball Cups
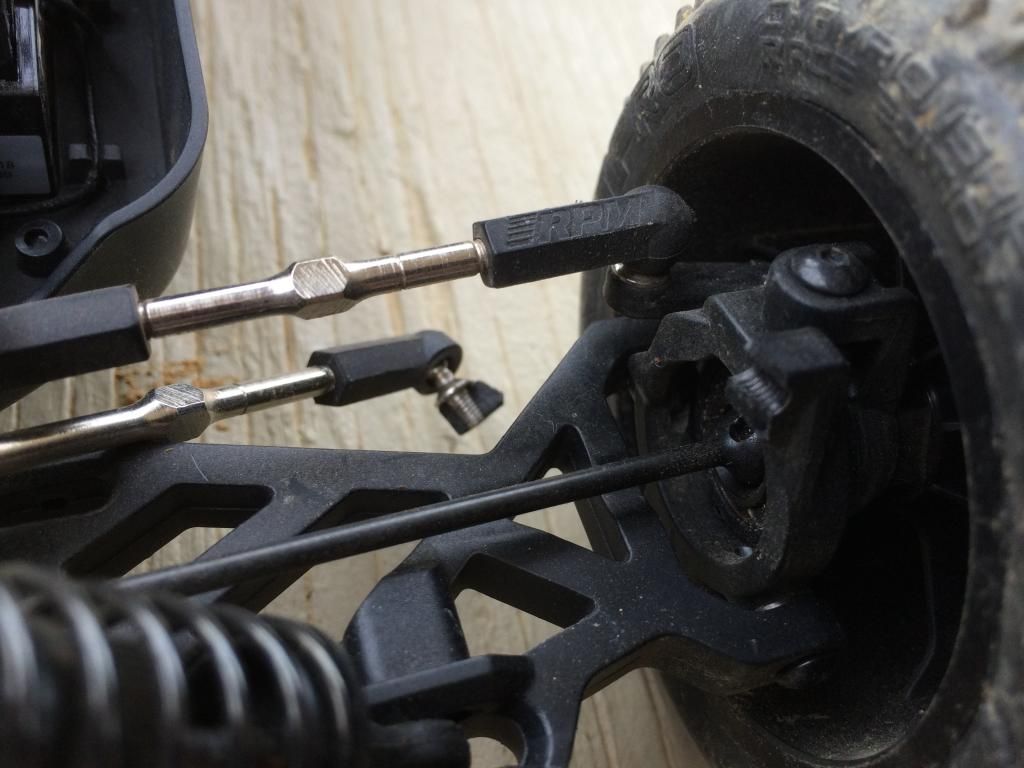
The most common complaint I heard about this Truggy was the ball cups popping off. So before I even ran it, I went ahead and upgraded to the RPM Heavy Duty 4-40 Rod Ends #RPM73372. I've never had one come off. I measured the length of the turnbuckles and ball cups in stock form.
LF Top, 74.95 mm
RF Top, 74.60 mm
LF Bottom, NA
RF Bottom, 67.00 mm
LR, 81.00 mm
RR, 81.60 mm
Shocks
Just by dropping the truggy a few feet from the air, it was bottoming out and hitting the chassis on the ground. I switched to Losi 50wt shock oil and that solved the problem.
Suspension
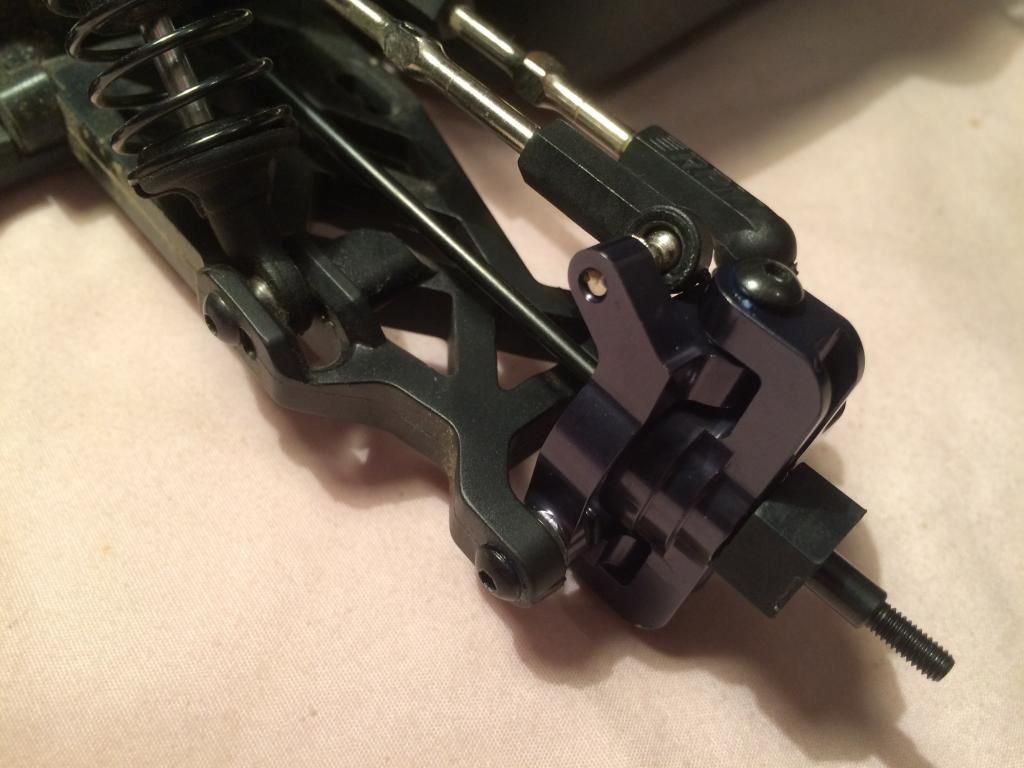
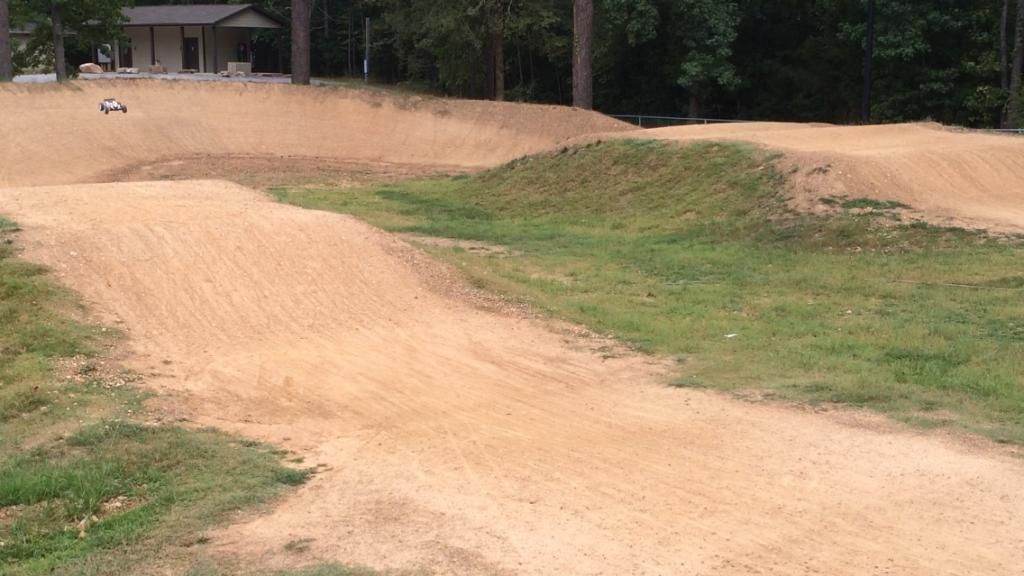
I had my first suspension part failure at the bmx track. Losi makes aluminum carriers & spindles. The stock plastic spindles DO NOT work with the aluminum carriers as you won't be able to turn the wheel left or right because the spindle is too big and the carrier is too small.

Dogbones
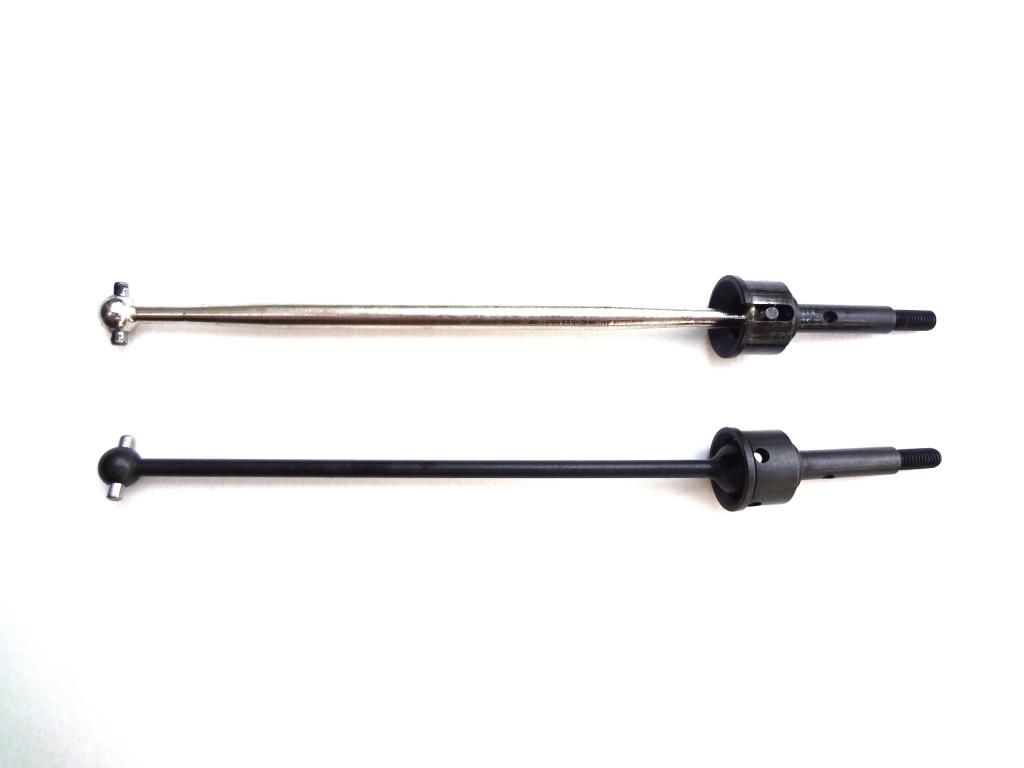
Another common complaint I heard about was the aluminum dogbones bending. Before I took it off road I upgraded to the steel Losi CV Driveshafts. They work very well. The fronts are a bit too short, but I've never had one come out.
Front #LOS312000
Rear #LOS312001
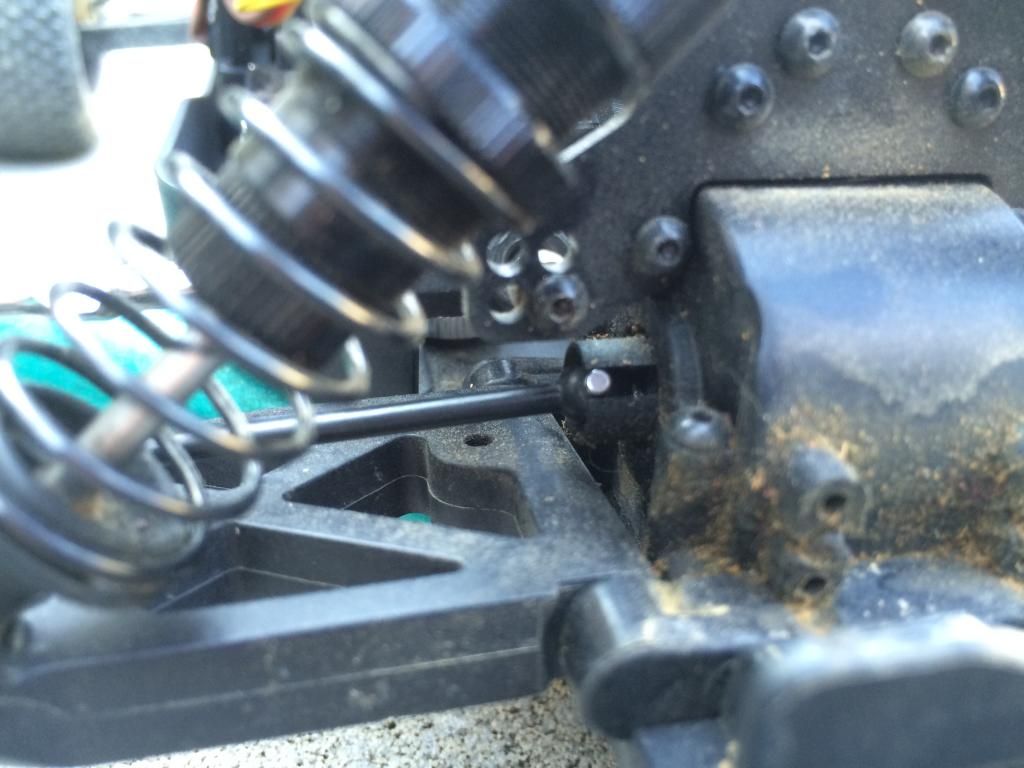
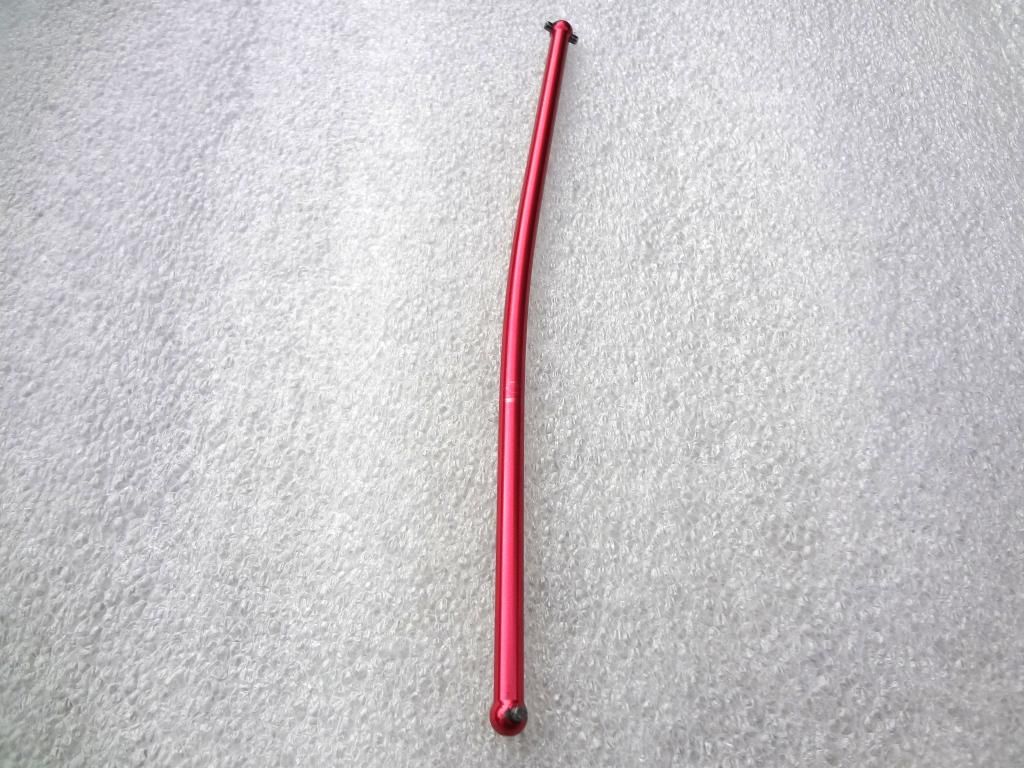
Center Drive Shaft
This
Equals this
The problem is that the shaft was made too long and only has around 0.5mm of free play between the front and rear drive cups, which is not much at all. I consider this to be a bad design flaw. When you have a bad crash and the chassis flexes, the shaft can bottom out and that leads to a bent shaft, which happened to me. I checked the free play on the buggy and it has around 2mm of free play, which is much better, and I've never bent the shaft on it.
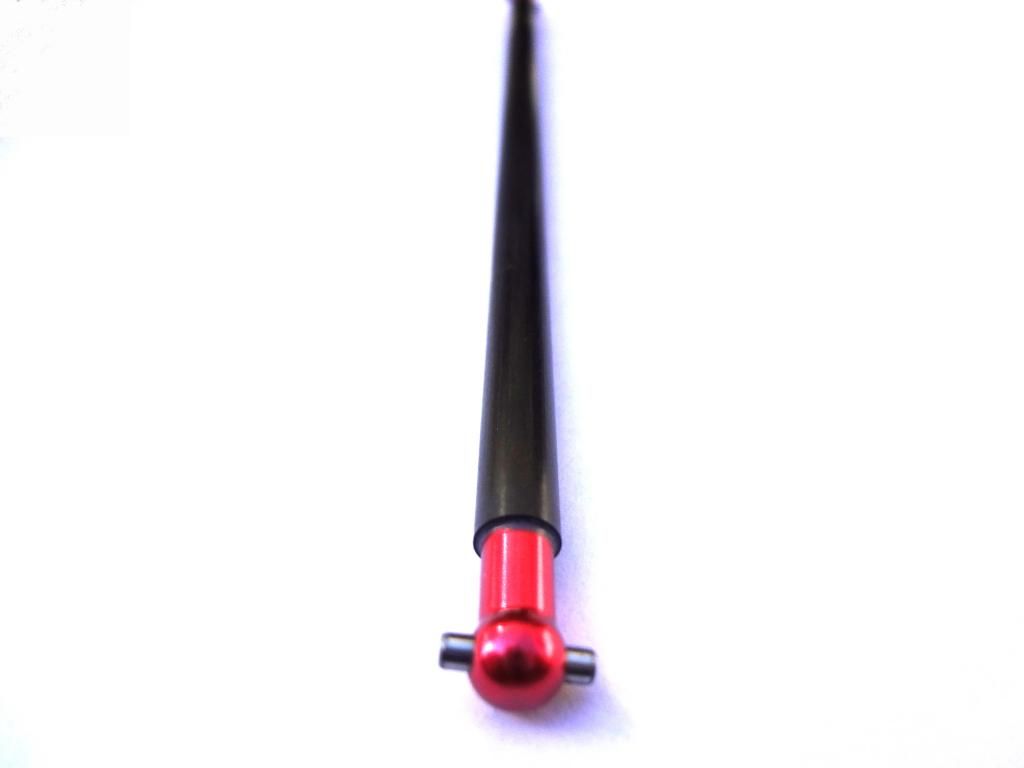
So I found a guy who makes custom carbon fiber drive shafts. I had this one built 1.5mm shorter than stock to give it some more free play. So with the increase of strength and stiffness and more free play, this should be another bullet proof modification. It's also 2g lighter. The diameter is 1mm larger, so I trimmed the center post just a little bit so it wouldn't rub. It was $28 shipped and I sent him the stock shaft. It needs to be 150.5mm in length.
http://home.comcast.net/~ewippler/cf_shafts.html
Differential
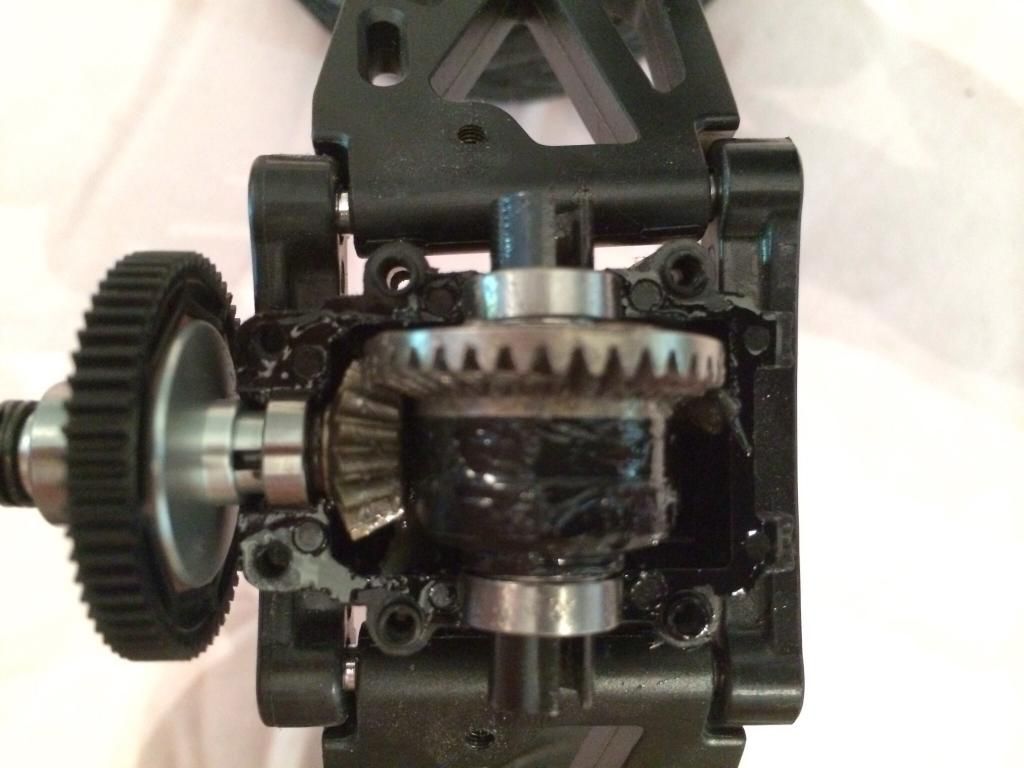
After hearing about a few people stripping their ring & pinion gears, I wanted to take a look. I never had a problem with them in my buggy, the drivetrain was indestructible. I opened up the gearbox and noticed about .020" of side to side play in the ring gear for both the front and rear diffs. So to make it nice and tight I used 3 shims on each side of the diff, 6 total for 1 diff. Fast forward several months of use and I have not had any issues whatsoever with my diffs. The diffs are not sealed, so you need grease instead of oil.
I used Team Associated Differential Shim Set .324x.409x.005" (4).
#21141

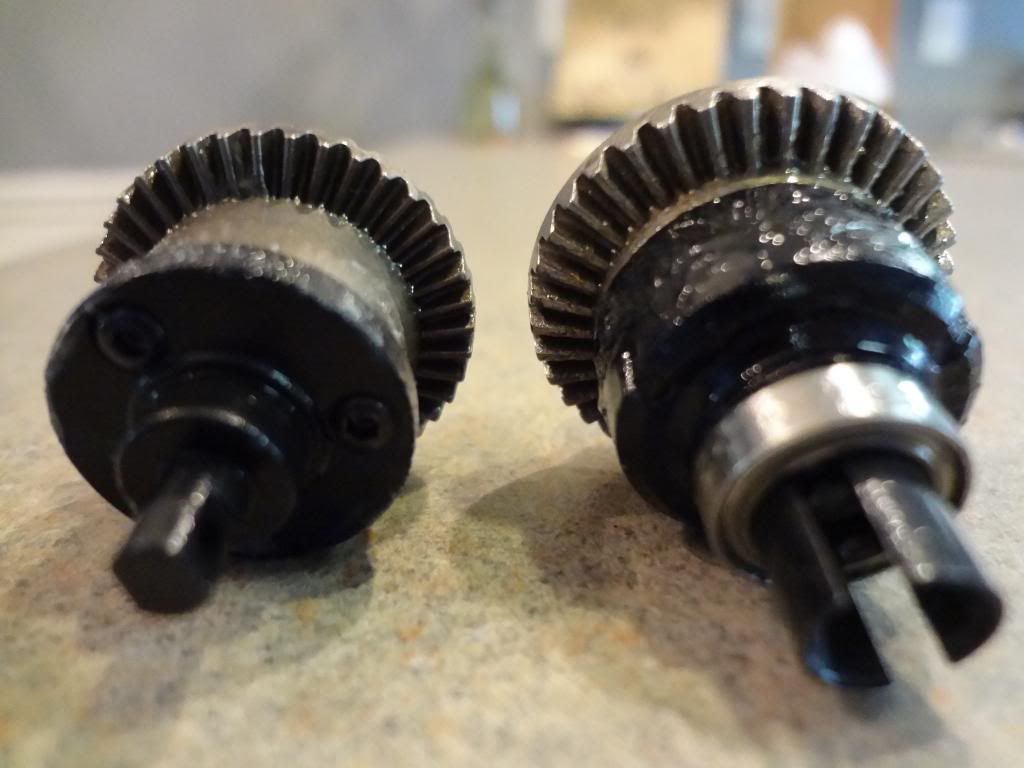
On a side note.
Losi Mini 8ight ring gear on the right (26.6 mm)
Traxxas Mini E-Revo ring gear on the left (23.6 mm)
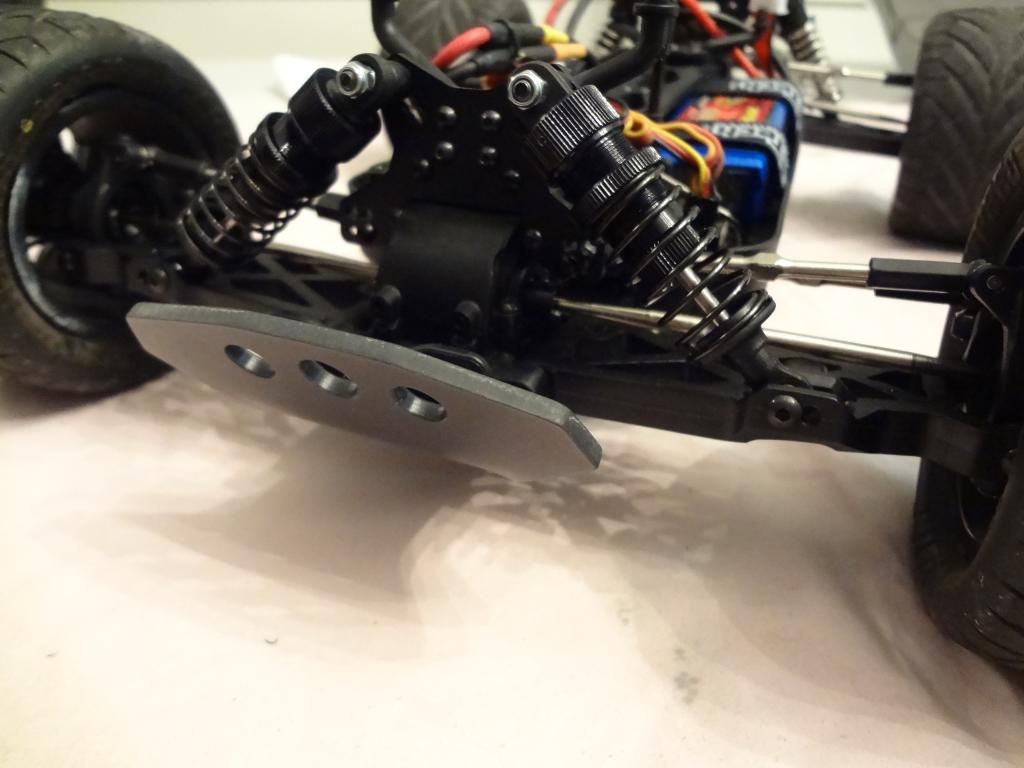
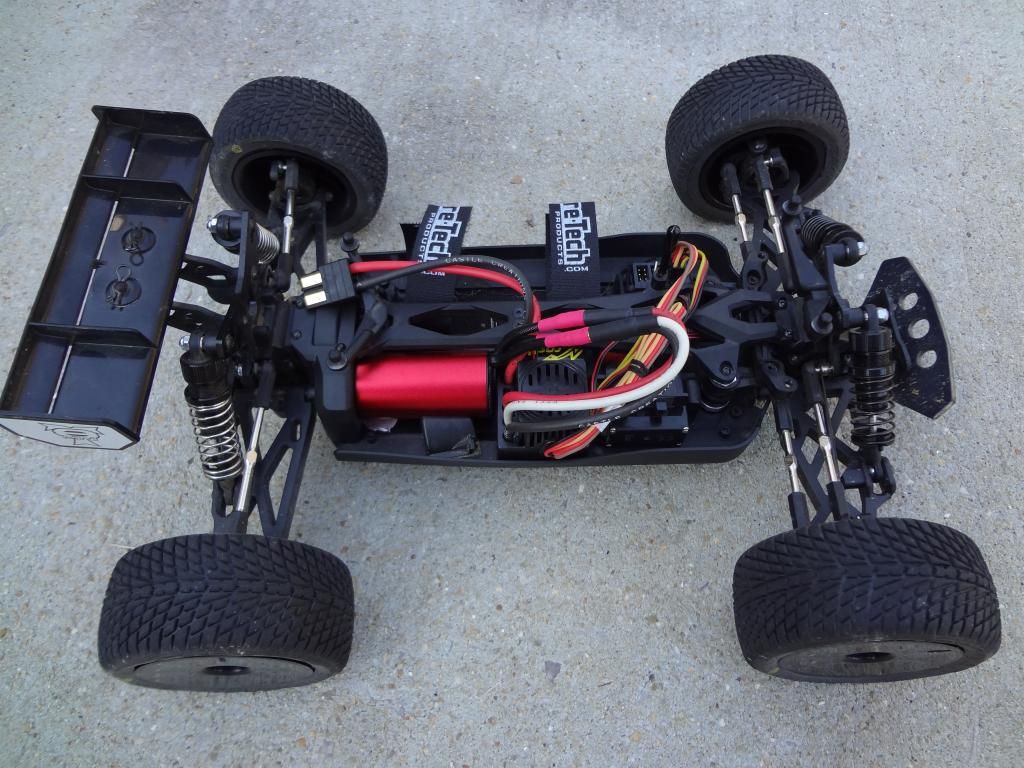
Bumpers
I went with the T-Bone Racing Pro Front Bumper. They make a few different versions for the front. These are worth their weight in gold.
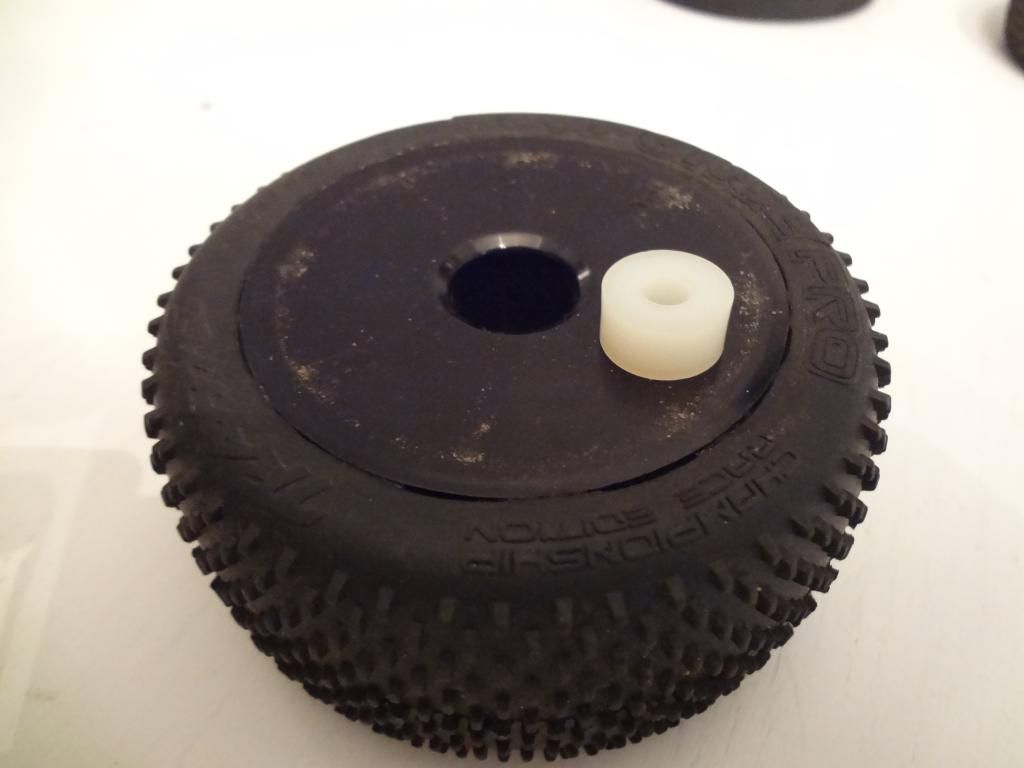
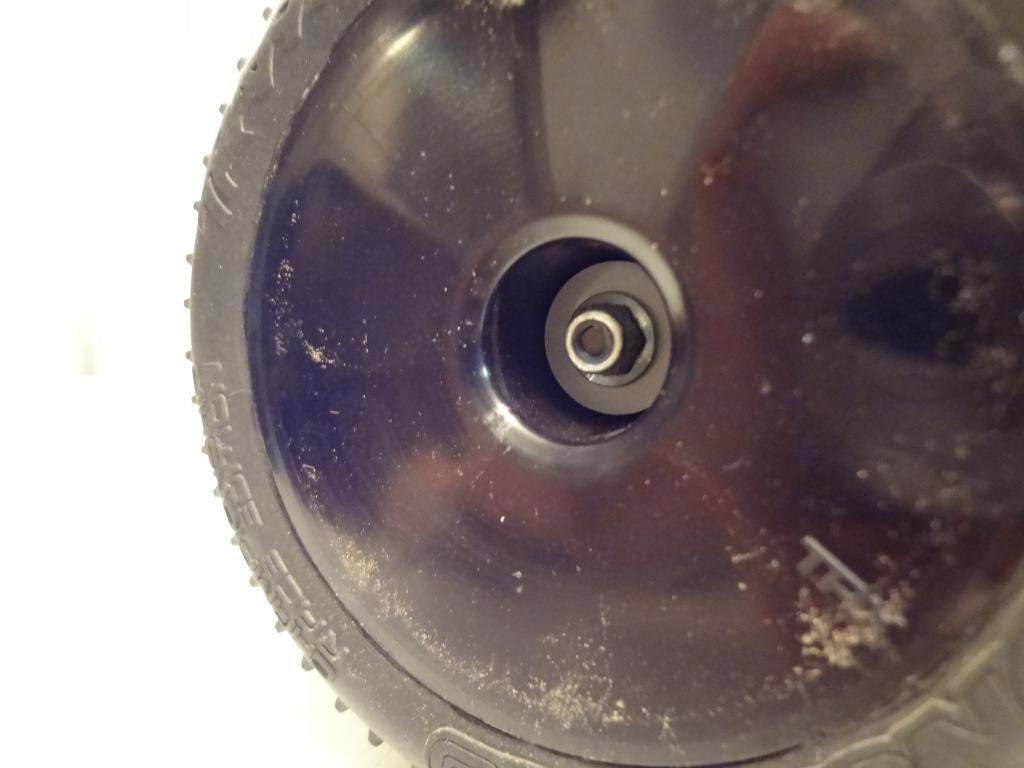
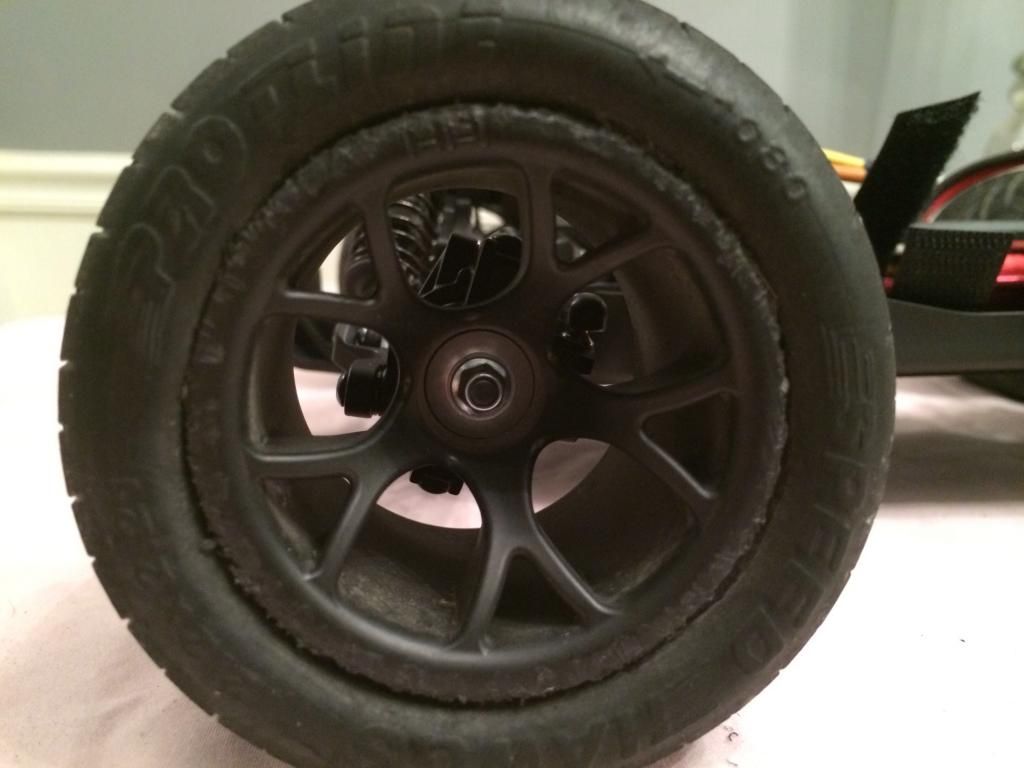
Wheels/Tires
This truggy uses a 12mm hex like most other vehicles this size, so there's a ton of different wheel combinations you can go with. For proper fitment, the Traxxas Dish wheels require a 1/4" long nylon spacer. The Traxxas Dish wheels & Traxxas Response Pro tires are 100g lighter than the stock Losi wheels & tires! That's a lot of rotational weight removed.
Traxxas Dish Wheel & Traxxas Response Pro Tire, 58g
Traxxas Dish Wheel & Proline Road Rage Tire, 69g
Stock Losi Wheel & Tire, 83g
HPI MT Mesh Wheel & Proline Speed Hawg II Tire, 92g
HPI MT Mesh Wheel & Traxxas Canyon AT Tire, 98g
Traxxas Dish Wheel & Traxxas Response Pro Tire
Traxxas Dish Wheel & Proline Road Rage Tire
Size
This truggy is more like a 1/12 scale vehicle. It's quite a bit larger than the buggy and you can really feel the handing difference off road. It's easier to work on and move things around because there's more space. I weighed my buggy and truggy fully assembled except a battery.
Buggy, 2.04 lbs
Truggy, 2.63 lbs (29% heavier)
Tools
1.5, 2.0, 2.5 mm hex drivers
5.5 mm nut driver for the wheels
4 mm turnbuckle wrench
Mini screwdriver for the differentials
Motors
The stock 24 mm Losi motor worked ok in the buggy for a RTR model, but it's way too small for this truggy. Not only does it not provide enough power, but it also gets very hot very quickly. Even the racer only guys that don't want power still need a cool running motor. I started with the Traxxas Velineon 28 mm motor on 3S and it was "ok". I started with 12/60 gearing and it was way too under geared. I switched to 16/60 gearing and it picked up a lot more acceleration, but it still just felt weak compared to that same motor in the buggy. It didn't have the acceleration I was looking for.
I wanted to try a few different Leopard motors. I first went with a 2845 Series 4 Pole 3300 kv motor (800 W) and ran it on 4S. It performed great and was a nice improvement over the Velineon. I wanted to go one step up while still keeping the MMP ESC in the stock location, so I then went with a 2850 Series 4 Pole 5280 kv motor (1000 W) and ran it on 3S. This motor performs even better and I'm really happy with it. It produces a lot of power and stays cool. The only negative thing about the Leopard motor is the shaft size is 4 mm and it needs to be 3.17 mm. I had never reduced a motor shaft size before so I was a little nervous about messing it up. What I did was put the Leopard motor on an old Traxxas Mini E-Revo motor mount and then mounted it to a piece of wood so it wouldn't move. I preferred this method over a vice because it is low to the surface on a table and I can keep a steady hand much better. Then I just kept the throttle on at a low speed with a zip tie on the trigger. Then I took a dremel and used a standard grinding disc to go back and forth on the shaft a little at a time until it was trimmed down to the right size. It did not take long to remove the material. So for anyone doing this, stop and take your time and measure. Then I shaved down a flat spot on the shaft for the set screw. It turned out to be really easy, so if anyone is on the fence for a Leopard motor, do it. All of the 28 mm/380 motors that I have used on the buggy and truggy required trimming less than 1 mm off the chassis where the rear of the motor sits. The front of the motor doesn't touch the chassis, there's a hair of clearance there. I also trimmed the top plate a tiny bit for clearance.
Stock Losi 24mm Motor, 72g
Leopard 2845 28mm Motor, 127g
Traxxas Velineon 28mm Motor, 139g
Leopard 2850 28mm Motor, 141g
TP 2940 29mm Motor, 184g
Quick little video of the 2850
| + YouTube Video | |
Losi vs Velineon
Marking the spot for the cut
Cut made
Cutting the motor shaft (first attempt on the 2845)
Shaft ground down to 3.17mm
Flat spot
Velcro to cover the vent holes
Motor in
Thanks to The Toyz for the heat sink and fan combo. Since clearance is limited, I had to cut off part of the heat sink that would normally go under the motor.
Buggy Build
On my buggy I'm running the TP2940 motor (1600 W), which is 29x68 mm. This motor required quite a bit more work to fit, which included cutting a hole out of the chassis and opening up the slot in the motor mount since the screw spacing is 19 mm.
80.7 mph speed run
| + YouTube Video | |
Losi vs Velineon vs TP 2940
Hole in chassis
Opened up the slot to fit the screw
Motor mount on, with loctite
35T Pinion
45T Spur
Motor Mount
The motor mount isn't designed to support a larger & heavier 28mm motor. Traxxas and LC Racing both use 28mm motors in their 1/14-1/16 vehicles, why didn't Losi? I really wish a company would make a properly engineered motor mount for this platform.
So what I do is place a motor support piece by the front of the motor to keep it from shifting to the side when you land or crash from a large jump. I used to strip the spur gear in the past but now with the motor support, I haven't stripped a spur gear once. The old motor mount on my buggy was bent from not having a motor support. Whenever you need to remove the motor all you have to do is remove the side guard. The part I'm using is a Traxxas vent #7026, along with 3M super strong double sided tape. That's just what I had laying around and it works great.
Motor support (2845 motor shown)
GPM made a motor mount for this, but I don't see a reason for it.
1. They didn't raise it up 1-2mm where the motor sits, in fact it actually makes the motor sit 0.2mm lower than the Losi mount. They made the base shorter. This is unbelievable. FAIL
2. The little wedge piece that goes on top is aluminum on the GPM mount, Losi uses plastic. This GPM piece does fit on the Losi mount.
3. Nobody lists the alloy used so who knows which one is stonger.
GPM
Losi
Slipper
The slipper is very sensitive. I tighten the slipper all the way down and then back it up 1/8" of a turn. If you set it too loose it will squeal pretty bad.
Gearing
The largest gearing that will fit without modification is around 19/58. I'm running 19/55 on my truggy and it stays pretty cool. On my buggy, I've opened the slots on the motor mount and it fits 35/45.
Traxxas 48P Spur Gear Conversion
All of the 28mm motors use or are best used with a 48P pinion gear. So it makes sense to use a 48P spur gear. The Losi spur is .5 mod and you can use it with the 48P pinion, but the mesh is better with a 48P spur. The conversion to the Traxxas spur is a direct swap, with no modifications needed. You do not need to cut anything like in that YouTube video. There's multiple ways of doing it, this is just how I do it and it works very well. The plastic/nylon spurs are available in 45T, 50T, and 55T. This is everything you need.
Traxxas 48P Spur Gear 55T, 7047R
Traxxas Slipper Pad, 7152
Traxxas Bearings 4x8x3 (2), 7019
Washer from hardware store
In order from right to left. Losi pressure plate, Traxxas slipper pad, Traxxas spur gear, Traxxas bearing, washer, Losi small bearing inside of Losi large bearing, Traxxas bearing, 3 Losi washers, Losi nut.
ESC
In order to handle this power system, not overheat, and have awesome programming, I went with the proven Castle Mamba Max Pro 1/10 ESC. I've used this ESC for years and it's a beast. This ESC fits great in the stock location. All I had to do was use 3 layers of 3M double sided tape to raise it up enough to make it lay flat across the side guard. The brakes are way too powerful on the default 50% setting, I changed them to 10%.
Servo
I went with the Hitec HS-225MG servo. It's metal geared and has ball bearings. I used this servo in my buggy and it works great. I also used the Kimbrough servo saver #KIM131. This required a little bit of trimming on the top plate for clearance. I'm not using the stock AVC receiver, so if you are, you'll need a digital servo if you want to keep the AVC functionality.
Battery straps
Do yourself a favor and get a set of the Pure-Tech Xtreme Double PSA Straps #PUR022-BK. This is a wonderful item. It sticks right on to the chassis and then you just strap the battery in. There's no need to remove the battery side guards, just trim one of them and you can run any 1300-2500 mah battery you want with ease.
Batteries
The Turnigy Nano-Tech batteries work very well for me. Here's a few examples that I weighed.
Turnigy Nano-Tech 2S 2250 65/130C, 144g
Turnigy Nano-Tech 3S 1400 40/80C, 116g
Turnigy Nano-Tech 3S 2200 65/130C, 200g
Dinogy Nano-Tech 4S 1300 65C, 150g
Ball Cups
The most common complaint I heard about this Truggy was the ball cups popping off. So before I even ran it, I went ahead and upgraded to the RPM Heavy Duty 4-40 Rod Ends #RPM73372. I've never had one come off. I measured the length of the turnbuckles and ball cups in stock form.
LF Top, 74.95 mm
RF Top, 74.60 mm
LF Bottom, NA
RF Bottom, 67.00 mm
LR, 81.00 mm
RR, 81.60 mm
Shocks
Just by dropping the truggy a few feet from the air, it was bottoming out and hitting the chassis on the ground. I switched to Losi 50wt shock oil and that solved the problem.
Suspension
I had my first suspension part failure at the bmx track. Losi makes aluminum carriers & spindles. The stock plastic spindles DO NOT work with the aluminum carriers as you won't be able to turn the wheel left or right because the spindle is too big and the carrier is too small.
Dogbones
Another common complaint I heard about was the aluminum dogbones bending. Before I took it off road I upgraded to the steel Losi CV Driveshafts. They work very well. The fronts are a bit too short, but I've never had one come out.
Front #LOS312000
Rear #LOS312001
Center Drive Shaft
This
Equals this
The problem is that the shaft was made too long and only has around 0.5mm of free play between the front and rear drive cups, which is not much at all. I consider this to be a bad design flaw. When you have a bad crash and the chassis flexes, the shaft can bottom out and that leads to a bent shaft, which happened to me. I checked the free play on the buggy and it has around 2mm of free play, which is much better, and I've never bent the shaft on it.
So I found a guy who makes custom carbon fiber drive shafts. I had this one built 1.5mm shorter than stock to give it some more free play. So with the increase of strength and stiffness and more free play, this should be another bullet proof modification. It's also 2g lighter. The diameter is 1mm larger, so I trimmed the center post just a little bit so it wouldn't rub. It was $28 shipped and I sent him the stock shaft. It needs to be 150.5mm in length.
http://home.comcast.net/~ewippler/cf_shafts.html
Differential
After hearing about a few people stripping their ring & pinion gears, I wanted to take a look. I never had a problem with them in my buggy, the drivetrain was indestructible. I opened up the gearbox and noticed about .020" of side to side play in the ring gear for both the front and rear diffs. So to make it nice and tight I used 3 shims on each side of the diff, 6 total for 1 diff. Fast forward several months of use and I have not had any issues whatsoever with my diffs. The diffs are not sealed, so you need grease instead of oil.
I used Team Associated Differential Shim Set .324x.409x.005" (4).
#21141
On a side note.
Losi Mini 8ight ring gear on the right (26.6 mm)
Traxxas Mini E-Revo ring gear on the left (23.6 mm)
Bumpers
I went with the T-Bone Racing Pro Front Bumper. They make a few different versions for the front. These are worth their weight in gold.
Wheels/Tires
This truggy uses a 12mm hex like most other vehicles this size, so there's a ton of different wheel combinations you can go with. For proper fitment, the Traxxas Dish wheels require a 1/4" long nylon spacer. The Traxxas Dish wheels & Traxxas Response Pro tires are 100g lighter than the stock Losi wheels & tires! That's a lot of rotational weight removed.
Traxxas Dish Wheel & Traxxas Response Pro Tire, 58g
Traxxas Dish Wheel & Proline Road Rage Tire, 69g
Stock Losi Wheel & Tire, 83g
HPI MT Mesh Wheel & Proline Speed Hawg II Tire, 92g
HPI MT Mesh Wheel & Traxxas Canyon AT Tire, 98g
Traxxas Dish Wheel & Traxxas Response Pro Tire
Traxxas Dish Wheel & Proline Road Rage Tire
Last edited by 0verkill; 12-27-2014 at 10:04 AM.
 07-06-2014, 09:59 PM
#2
Tech Apprentice
Nice to know about the Losi Mini in a great detail,it helps me a lot in my new projects and your batter detail is really awesome so i would take it with a new style in my project so its battery strength seems to be good.Thanks for sharing this useful information.
07-07-2014, 12:39 PM
#3

| + YouTube Video | |
| + YouTube Video | |
| + YouTube Video | |

That's what all i have to say....
Make a video....
From whom you took the 4s ideia on a mini?

Right on the money on the 19T pinion, seens like the mini8. With a little dremel on motor mount you can fit a 21T fine.
I used 23T on 50T spur with merv mod and run all pack day long with no heat issues whatsover. Probably could gear 2 teeth more... and used 28T 50T for a while but on those times i had ESC problems (NOT related to gearing but with software and was a nightmare to find out)
And finally have the insane gearing but with a tornado fan at the back of the motor doing only speed runs/speed bashing....


One thing i didn't understand was this:
"The wheels come with 1 washer per wheel but I ended up needing 2 washers per wheel for proper fitment"
What washer goes where? Pic will help....
Maybe i will get a Mini8-T and step up the game....
Last edited by targetingxmod; 07-07-2014 at 12:58 PM.
07-07-2014, 07:31 PM
#4
targetingxmod-
How much of the chassis needs to be removed to fit the 29mm neu?
How much of the chassis needs to be removed to fit the 29mm neu?
07-08-2014, 01:14 AM
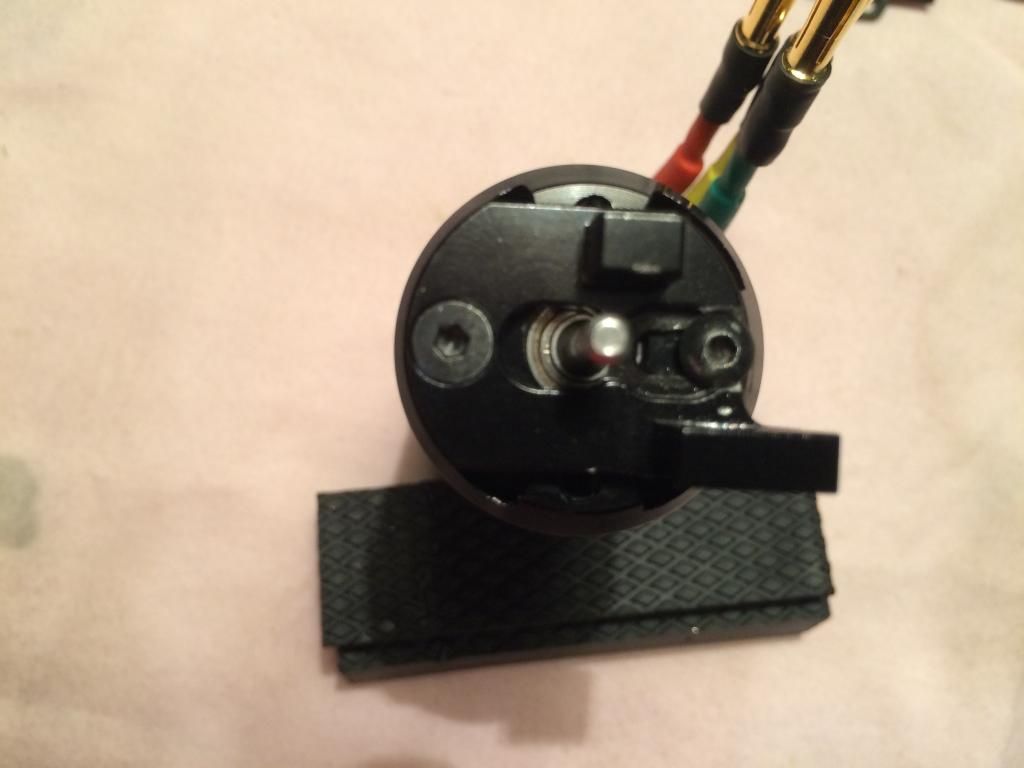
#5

-See those endbell screws? Need to remove that screw head size on the chassis. It could be done with a flat screwdriver... but is faster with a dremel tool!

-This pic will help, right?
07-08-2014, 03:03 AM
#6
That's what all i have to say....
Make a video....
From whom you took the 4s ideia on a mini?
Right on the money on the 19T pinion, seens like the mini8. With a little dremel on motor mount you can fit a 21T fine.
I used 23T on 50T spur with merv mod and run all pack day long with no heat issues whatsover. Probably could gear 2 teeth more... and used 28T 50T for a while but on those times i had ESC problems (NOT related to gearing but with software and was a nightmare to find out)
And finally have the insane gearing but with a tornado fan at the back of the motor doing only speed runs/speed bashing....
One thing i didn't understand was this:
"The wheels come with 1 washer per wheel but I ended up needing 2 washers per wheel for proper fitment"
What washer goes where? Pic will help....
Maybe i will get a Mini8-T and step up the game....
The washers go right behind the wheel nut. Without having 2 washers, the wheel nut would reach the end of the thread and the wheel would be loose.
 07-08-2014, 07:31 AM
#7
Thanks! Great posts and awesome informative pics!
I own a neu proton for one of my micros and it is amazing. I've spent a lot on upgrades, but the neu motor was just mind-blowing.
But�.the Leopard is 1/3 the cost. Tough choice.
I notice that everyone is running Mamba ESCs. Could the Sidewinder3 do the job? Or the Hobbywing 60A? Not sure what is needed for 4 pole?
07-08-2014, 04:24 PM
#8
Thanks! Great posts and awesome informative pics!
I own a neu proton for one of my micros and it is amazing. I've spent a lot on upgrades, but the neu motor was just mind-blowing.
But�.the Leopard is 1/3 the cost. Tough choice.
I notice that everyone is running Mamba ESCs. Could the Sidewinder3 do the job? Or the Hobbywing 60A? Not sure what is needed for 4 pole?
I own a neu proton for one of my micros and it is amazing. I've spent a lot on upgrades, but the neu motor was just mind-blowing.
But�.the Leopard is 1/3 the cost. Tough choice.
I notice that everyone is running Mamba ESCs. Could the Sidewinder3 do the job? Or the Hobbywing 60A? Not sure what is needed for 4 pole?
07-09-2014, 12:48 PM
#9
Gearing
I'm currently running 19/58 gearing. That's about the largest pinion gear that will fit without modification. The stock Losi plastic spur gears work great for me, I've never had a reason to go with metal.
So what pinion are you using? A .5 mod 3.2 diameter pinion to match to stock spurs or a .48 traxxas pinion with the .5 spur?
Is ther a .5 mod 3.2 diameter pinion out there?
07-09-2014, 02:37 PM
#10
http://www.aircraft-world.com/shopexd.asp?id=5537
up to 16T is the largest .5 mod 1/8" bore pinion I could find. I believe these are Hyperion branded. Novak also makes aluminum pinions, but I wouldn't trust aluminum gears under this motor's power.
I think the better option sounds like getting a HotRacing 48p steel spur gear, and then using whatever tooth count 1/10 scale 48p hardened steel pinion you want.
07-09-2014, 07:16 PM
#11
Thanks! Great posts and awesome informative pics!
I own a neu proton for one of my micros and it is amazing. I've spent a lot on upgrades, but the neu motor was just mind-blowing.
But�.the Leopard is 1/3 the cost. Tough choice.
I notice that everyone is running Mamba ESCs. Could the Sidewinder3 do the job? Or the Hobbywing 60A? Not sure what is needed for 4 pole?
I own a neu proton for one of my micros and it is amazing. I've spent a lot on upgrades, but the neu motor was just mind-blowing.
But�.the Leopard is 1/3 the cost. Tough choice.
I notice that everyone is running Mamba ESCs. Could the Sidewinder3 do the job? Or the Hobbywing 60A? Not sure what is needed for 4 pole?
Gearing
I'm currently running 19/58 gearing. That's about the largest pinion gear that will fit without modification. The stock Losi plastic spur gears work great for me, I've never had a reason to go with metal.
So what pinion are you using? A .5 mod 3.2 diameter pinion to match to stock spurs or a .48 traxxas pinion with the .5 spur?
Is ther a .5 mod 3.2 diameter pinion out there?
I'm currently running 19/58 gearing. That's about the largest pinion gear that will fit without modification. The stock Losi plastic spur gears work great for me, I've never had a reason to go with metal.
So what pinion are you using? A .5 mod 3.2 diameter pinion to match to stock spurs or a .48 traxxas pinion with the .5 spur?
Is ther a .5 mod 3.2 diameter pinion out there?
07-09-2014, 07:58 PM
#12
After hearing about a few people stripping their ring & pinion gears, I wanted to take a look. I never had a problem with them in my Buggy, the drivetrain was indestructible. I opened up the gearbox and noticed about .020" of side to side play in the ring gear for both the front and rear diffs. So to make it nice and tight I used 3 shims on each side of the diff, 6 total for 1 diff.
I used Team Associated Differential Shim Set .324x.409x.005" (4).
#21141
I used Team Associated Differential Shim Set .324x.409x.005" (4).
#21141
07-10-2014, 01:17 AM
#13
Is that the same shims for the merv (traxxas e-revo 1/16)?