


 164Likes
Tamiya TB Evo 6
 09-09-2014, 09:41 PM
#736

I built another transmission tonight, in an effort to come up with why I haven't been having the problems other users have. I think I came up with something, I got one to bind. Let's talk about what isn't the problem first.
The case halfs were slightly warped (bowed in the middle) by 0.15mm per side, but so were all the other cases I put together and all the other one I had handy by to measure (a had five or six). IMO that's not the problem.
My bearing surfaces cast into the cases were round and true. The bearings do press fit into the case, but you want that because the last thing you want with a gear drive train is stuff lashing around. IMO that's not the problem.
Usually I tap all the holes before I assemble the parts, especially on the carbon rein stuff. I didn't do that on these, and had to hand drive the case half screws in.
And then I had the problem. We are over torquing the cases. I had to do it to get the screws in.
After I disassembled the trans, tapped the holes, and re tightened at a reasonable torque (the spec for this screw in like 9 inch pounds) the problem went away. The friction from the plastic is supposed to hold these case halfs together anyway.
Also, I have continued to measure pinion lash and it's always 0.3mm too loose. Add a 0.3mm shim on the input shaft, followed by the rest of the parts per the manual build. If your tolerances are off, you won't be able to put the roll pin in, so you may need to reduce to 0.2 or so.
So, lesson #1, use one of these:
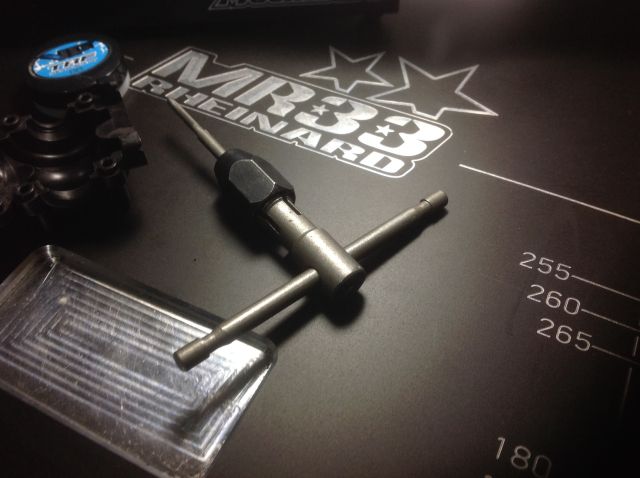
lesson #2, don't over torque those case halfs. Snug is enough.
Lesson #3, add extra shims to the shaft before you put bearings on. If you can easily get the roll pin in, add more! If you can't get it in, take some out. So far, mine have taken an extra 0.3mm to get right.
Questions? Comments?
The case halfs were slightly warped (bowed in the middle) by 0.15mm per side, but so were all the other cases I put together and all the other one I had handy by to measure (a had five or six). IMO that's not the problem.
My bearing surfaces cast into the cases were round and true. The bearings do press fit into the case, but you want that because the last thing you want with a gear drive train is stuff lashing around. IMO that's not the problem.
Usually I tap all the holes before I assemble the parts, especially on the carbon rein stuff. I didn't do that on these, and had to hand drive the case half screws in.
And then I had the problem. We are over torquing the cases. I had to do it to get the screws in.
After I disassembled the trans, tapped the holes, and re tightened at a reasonable torque (the spec for this screw in like 9 inch pounds) the problem went away. The friction from the plastic is supposed to hold these case halfs together anyway.
Also, I have continued to measure pinion lash and it's always 0.3mm too loose. Add a 0.3mm shim on the input shaft, followed by the rest of the parts per the manual build. If your tolerances are off, you won't be able to put the roll pin in, so you may need to reduce to 0.2 or so.
So, lesson #1, use one of these:
lesson #2, don't over torque those case halfs. Snug is enough.
Lesson #3, add extra shims to the shaft before you put bearings on. If you can easily get the roll pin in, add more! If you can't get it in, take some out. So far, mine have taken an extra 0.3mm to get right.
Questions? Comments?
Last edited by CraigMBA; 09-09-2014 at 09:43 PM. Reason: Lose isn't loose
 09-09-2014, 10:04 PM
#737
Thank you for the write-up. Not to toss a stick into your spokes, but I tapped every single thread on my cases to begin with. I don't like forcing a screw into plastic, so I always tap. I have the screws holding the cases very loose, we're talking two finger tips on a hex driver, and it still binds noticeably. But on my cases you can see them unwarping as I tighten then, even lightly.
I'm going to take them apart and re-shim per your instructions, but they won't be smooth. I'll recheck them after the first race night.
I'm going to take them apart and re-shim per your instructions, but they won't be smooth. I'll recheck them after the first race night.
09-09-2014, 10:05 PM
#738
Oh, another but separate question. I got the TRF belt tensioner mentioned a page or two back to keep the battery from sliding forward. That's a no go, Houston. Even with a screw coming out of it, it doesn't really stop the battery movement much. Plus, the battery can still slide to the rear.
Are you guys using any type of thin rubber feet/pads under the battery, the anti-slip kind?
Are you guys using any type of thin rubber feet/pads under the battery, the anti-slip kind?
09-09-2014, 10:14 PM
#739
I had similar problems with the gears mashing/binding against each other. I couldn't figure out what to do. I ended up placing two gaskets on top of each other and the problem has gone away. 
The extra gasket has given that tiny little bit of room for the gears to mesh up correctly.
The extra gasket has given that tiny little bit of room for the gears to mesh up correctly.
09-09-2014, 10:45 PM
#740
Oh, another but separate question. I got the TRF belt tensioner mentioned a page or two back to keep the battery from sliding forward. That's a no go, Houston. Even with a screw coming out of it, it doesn't really stop the battery movement much. Plus, the battery can still slide to the rear.
Are you guys using any type of thin rubber feet/pads under the battery, the anti-slip kind?
Are you guys using any type of thin rubber feet/pads under the battery, the anti-slip kind?
09-10-2014, 07:50 AM
#742
You just take a small piece and flatten it out like playing with playdoo you can make it as thick or as thin as you want it. I usually take a small ball of it about 1/4 inch in diameter, and roll it into a long piece about 1/2 inch long and put it on each end of the battery. Then push it flat on the battery. Install the pack into the car and push it down at both ends so your pack doesnt feel like it has any rock to it (could be a slightly buldged pack) and tape it down. You can reuse the tack several times before it has too much lint in it, then just redo the process with new tack. I should mention that I will peel the tack off the pack each time and redo the process just to make sure it stays fresh and sticky side down.
09-10-2014, 08:14 AM
#743
I had similar problems with the gears mashing/binding against each other. I couldn't figure out what to do. I ended up placing two gaskets on top of each other and the problem has gone away.
The extra gasket has given that tiny little bit of room for the gears to mesh up correctly.
The extra gasket has given that tiny little bit of room for the gears to mesh up correctly.
09-10-2014, 08:30 AM
#744
Any thoughts on this issue? Re-shim with thinner shims, different o-rings?
09-10-2014, 08:58 AM
#745
Thank you for the write-up. Not to toss a stick into your spokes, but I tapped every single thread on my cases to begin with. I don't like forcing a screw into plastic, so I always tap. I have the screws holding the cases very loose, we're talking two finger tips on a hex driver, and it still binds noticeably. But on my cases you can see them unwarping as I tighten then, even lightly.
I'm going to take them apart and re-shim per your instructions, but they won't be smooth. I'll recheck them after the first race night.
I'm going to take them apart and re-shim per your instructions, but they won't be smooth. I'll recheck them after the first race night.
The screws that caused the most trouble on mine were the two that are on the end of the case opposing the pinion. I could cinch down the other four (the two around the pinion and the two in the middle of the case) and everything was fine.
09-10-2014, 08:59 AM
#746
I noticed something about my rear gear diff (with 2K AE diff fluid in it). I built it with metal gears and gear shafts right away and used a single 0.3mm shim on each side (per instructions), but I used red TRF o-rings and bearings instead of bushings. The diff came out butter smooth. However, 3 weeks later, sitting on a shelf, the gear diff is now grindy as if I used too thick shims. My guess is that the orange o-rings swelled up and pushed the shims up, thus forcing the gears together more.
Any thoughts on this issue? Re-shim with thinner shims, different o-rings?
Any thoughts on this issue? Re-shim with thinner shims, different o-rings?
If you run less shims, the outdrive moves side to side. No bueno.
09-10-2014, 09:06 AM
#747
In that extreme case, I would do what Juan suggested, and add a 0.1mm shim to each of the six case screws.
The screws that caused the most trouble on mine were the two that are on the end of the case opposing the pinion. I could cinch down the other four (the two around the pinion and the two in the middle of the case) and everything was fine.
The screws that caused the most trouble on mine were the two that are on the end of the case opposing the pinion. I could cinch down the other four (the two around the pinion and the two in the middle of the case) and everything was fine.
Metal gears seat?
09-11-2014, 03:00 AM
#749
I noticed something about my rear gear diff (with 2K AE diff fluid in it). I built it with metal gears and gear shafts right away and used a single 0.3mm shim on each side (per instructions), but I used red TRF o-rings and bearings instead of bushings. The diff came out butter smooth. However, 3 weeks later, sitting on a shelf, the gear diff is now grindy as if I used too thick shims. My guess is that the orange o-rings swelled up and pushed the shims up, thus forcing the gears together more.
Any thoughts on this issue? Re-shim with thinner shims, different o-rings?
Any thoughts on this issue? Re-shim with thinner shims, different o-rings?