


 3Likes
3Racing Sakura D5MR drift build
 03-05-2022, 02:46 PM
#1
Tech Initiate
Thread Starter
I never thought I’d get into RC drift. But a friend got a car, and I saw it, and thought hey, I got a RWD on road RC, let me throw some plastic tires on there and see what happens… It was fun, but … Well, what happened was that I ended up researching drift RC platforms a few days after figuring out how to drive it and realizing it would never be able to drift like the proper RC drift setups… then finding the Sakura D5 series, and the D5MR which was cheap and looked awesome. Reviews seemed good, and I found one online locally (in my state) for a decent price. So I went for it. I basically had electronics on hand that I could use for it. I’ve built a half dozen kits at this point, but as a new-to-RC drift kit building (cause that was different!), here are my impressions:
Big bummer of my build involved a DOA Onisiki Gyro (one of the few pieces I had to get for this build). Followed the instructions and the thing just never worked. Luckily my RX has a gyro, so I can at least test a bit while I wait for a replacement.
For the electronics, I’m using a HW 10.5T Quicrun, with the sensored 10BL60 ESC, a Savox 1252MG low profile servo, and a FlySky BS6 receiver paired to a GT5 transmitter. When the replacement arrives, I’ll install the Onisiki 2801 gyro. Also, have a killerbodies light kit, but not gonna install that til I can confidently navigate a track, and am settled on a body. Currently running my TT02’s old body (a Supra GR), and it’s pretty dinged up, which doesn’t really work for drift, but it's what I got to work with until I settle on the body that I want.
- The instructions are wrong-ish, or at least very hard to read. Do not trust the paper copy. Watch the youtube animation videos cause even simple things are confusing cause the manual is printed poorly and you cannot see the details on the orientation of parts, or which holes you’re supposed to use, and there are lots of holes everywhere. Download the digital pdf and use a large bright screen and zoom in on parts where seeing the definition and orientation matter - like the front shock tower bridge on page 7.
- The tools are in BAG 8. Open bag 8 first. There’s one of those ball-end wrench things in there! Wish I had that on, like, Bag 3!
- There are no 1:1 drawings in the manual, so make sure to measure your tie rods and whatnot. That may look like a 1:1, but it isn’t. I measured.
- What is up with these weird hexes? I plan to replace them with standard D5 hexes that use regular wheel nuts rather than this odd screw in setup. FWIW they seem to be good enough to get started.
- Other than that, this kit is awesome! Would 100% build another 3Racing Sakura kit based on this experience.
- While MR Kit says the width is 208mm, a standard Tamiya 190mm width body seems to fit nicely. Maybe it’s cause of that drift stance. Not sure the chassis is really that wide. Will measure and report back. [Measured. It is 208mm up front! That drift stance is forgiving. I'm sure people with more exacting standards would say the 190mm Tamiya body I'm using doesn't fit cause the wheels stick out, but I like it, for now.]
- It comes with standard body posts in addition to the magnet ones, so if you’re like me and like the posts sticking through your body, BONUS! (Yes, I like how it looks).
Big bummer of my build involved a DOA Onisiki Gyro (one of the few pieces I had to get for this build). Followed the instructions and the thing just never worked. Luckily my RX has a gyro, so I can at least test a bit while I wait for a replacement.
For the electronics, I’m using a HW 10.5T Quicrun, with the sensored 10BL60 ESC, a Savox 1252MG low profile servo, and a FlySky BS6 receiver paired to a GT5 transmitter. When the replacement arrives, I’ll install the Onisiki 2801 gyro. Also, have a killerbodies light kit, but not gonna install that til I can confidently navigate a track, and am settled on a body. Currently running my TT02’s old body (a Supra GR), and it’s pretty dinged up, which doesn’t really work for drift, but it's what I got to work with until I settle on the body that I want.
Last edited by Gyosho; 03-10-2022 at 06:44 PM. Reason: updated #6 above with measurements and comment in [ ].
 03-10-2022, 07:24 AM
#2
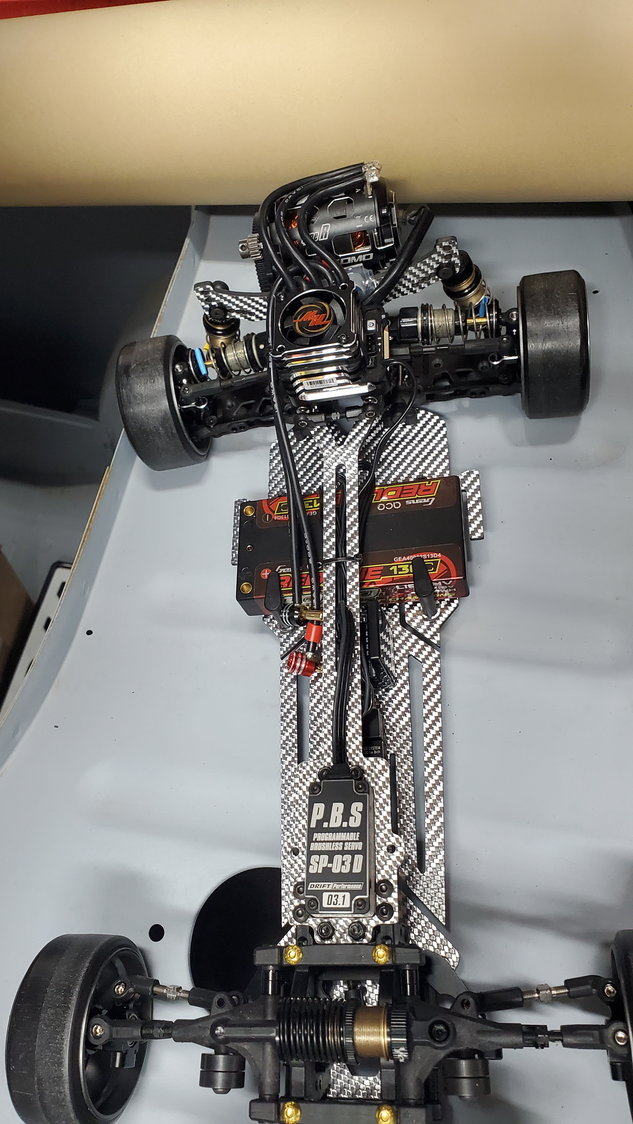
Here's a picture of my D5 MR with outbreak chassis. Chassis drifts amazing.
03-10-2022, 06:42 PM
#3
Tech Initiate
Thread Starter
Dang! Psychotikcow That looks good! That's a fancy looking chassis. What is this Outbreak chassis??? Can you tell me about your set up?
I'll post up some pics of my base D5 MR after I do some cable management. Just got the replacement gyro in today and wired it up for testing... it works! But I'm still new to drift, so still learning, but having a blast! I think the stock wheels that came with the kit make contact with the front lower arm when the gyro sends the wheels full turn. I have a higher offset wheel I'm going to try.
I'll post up some pics of my base D5 MR after I do some cable management. Just got the replacement gyro in today and wired it up for testing... it works! But I'm still new to drift, so still learning, but having a blast! I think the stock wheels that came with the kit make contact with the front lower arm when the gyro sends the wheels full turn. I have a higher offset wheel I'm going to try.
03-11-2022, 10:07 PM
#4
Tech Initiate
Thread Starter
Update: Higher offset wheels work great. The MST adjustable offset wheels set at 9mm solved the issue of the front wheels rubbing against the lower front arm.
Unfortunately, the 190mm body no longer works with the higher offset wheels. What I said in the initial post about the width is probably way off, I clearly have no idea what I'm talking about LOL
Drifters, send help
Unfortunately, the 190mm body no longer works with the higher offset wheels. What I said in the initial post about the width is probably way off, I clearly have no idea what I'm talking about LOL
Drifters, send help
03-12-2022, 06:31 PM
#5
 04-04-2024, 11:29 PM
#6
Tech Initiate
Hi,
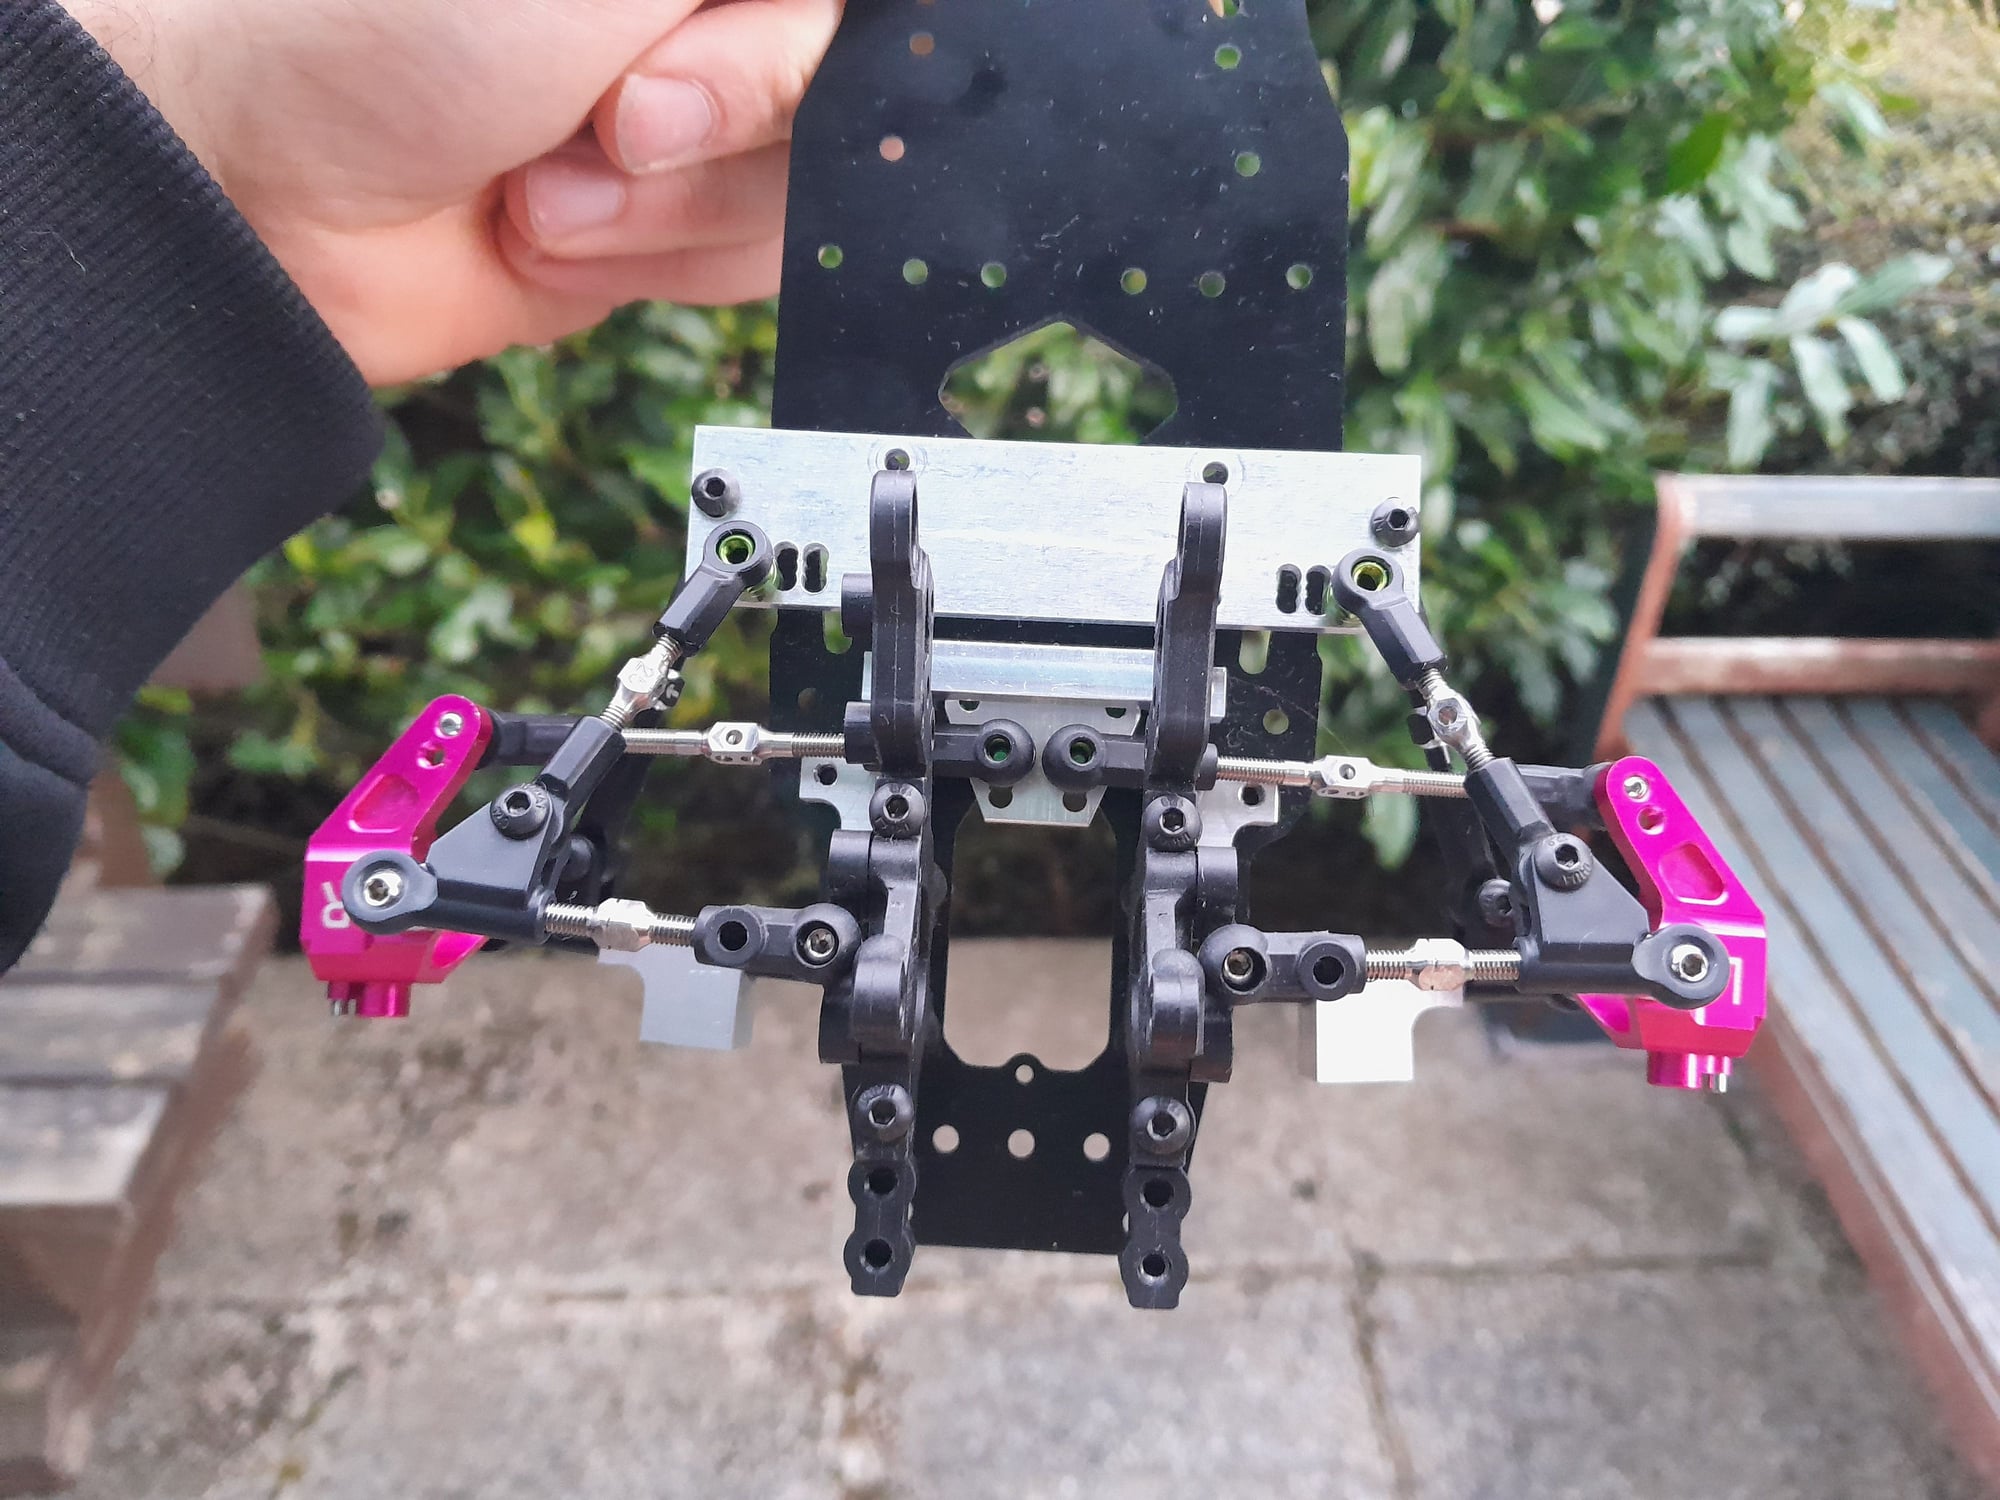
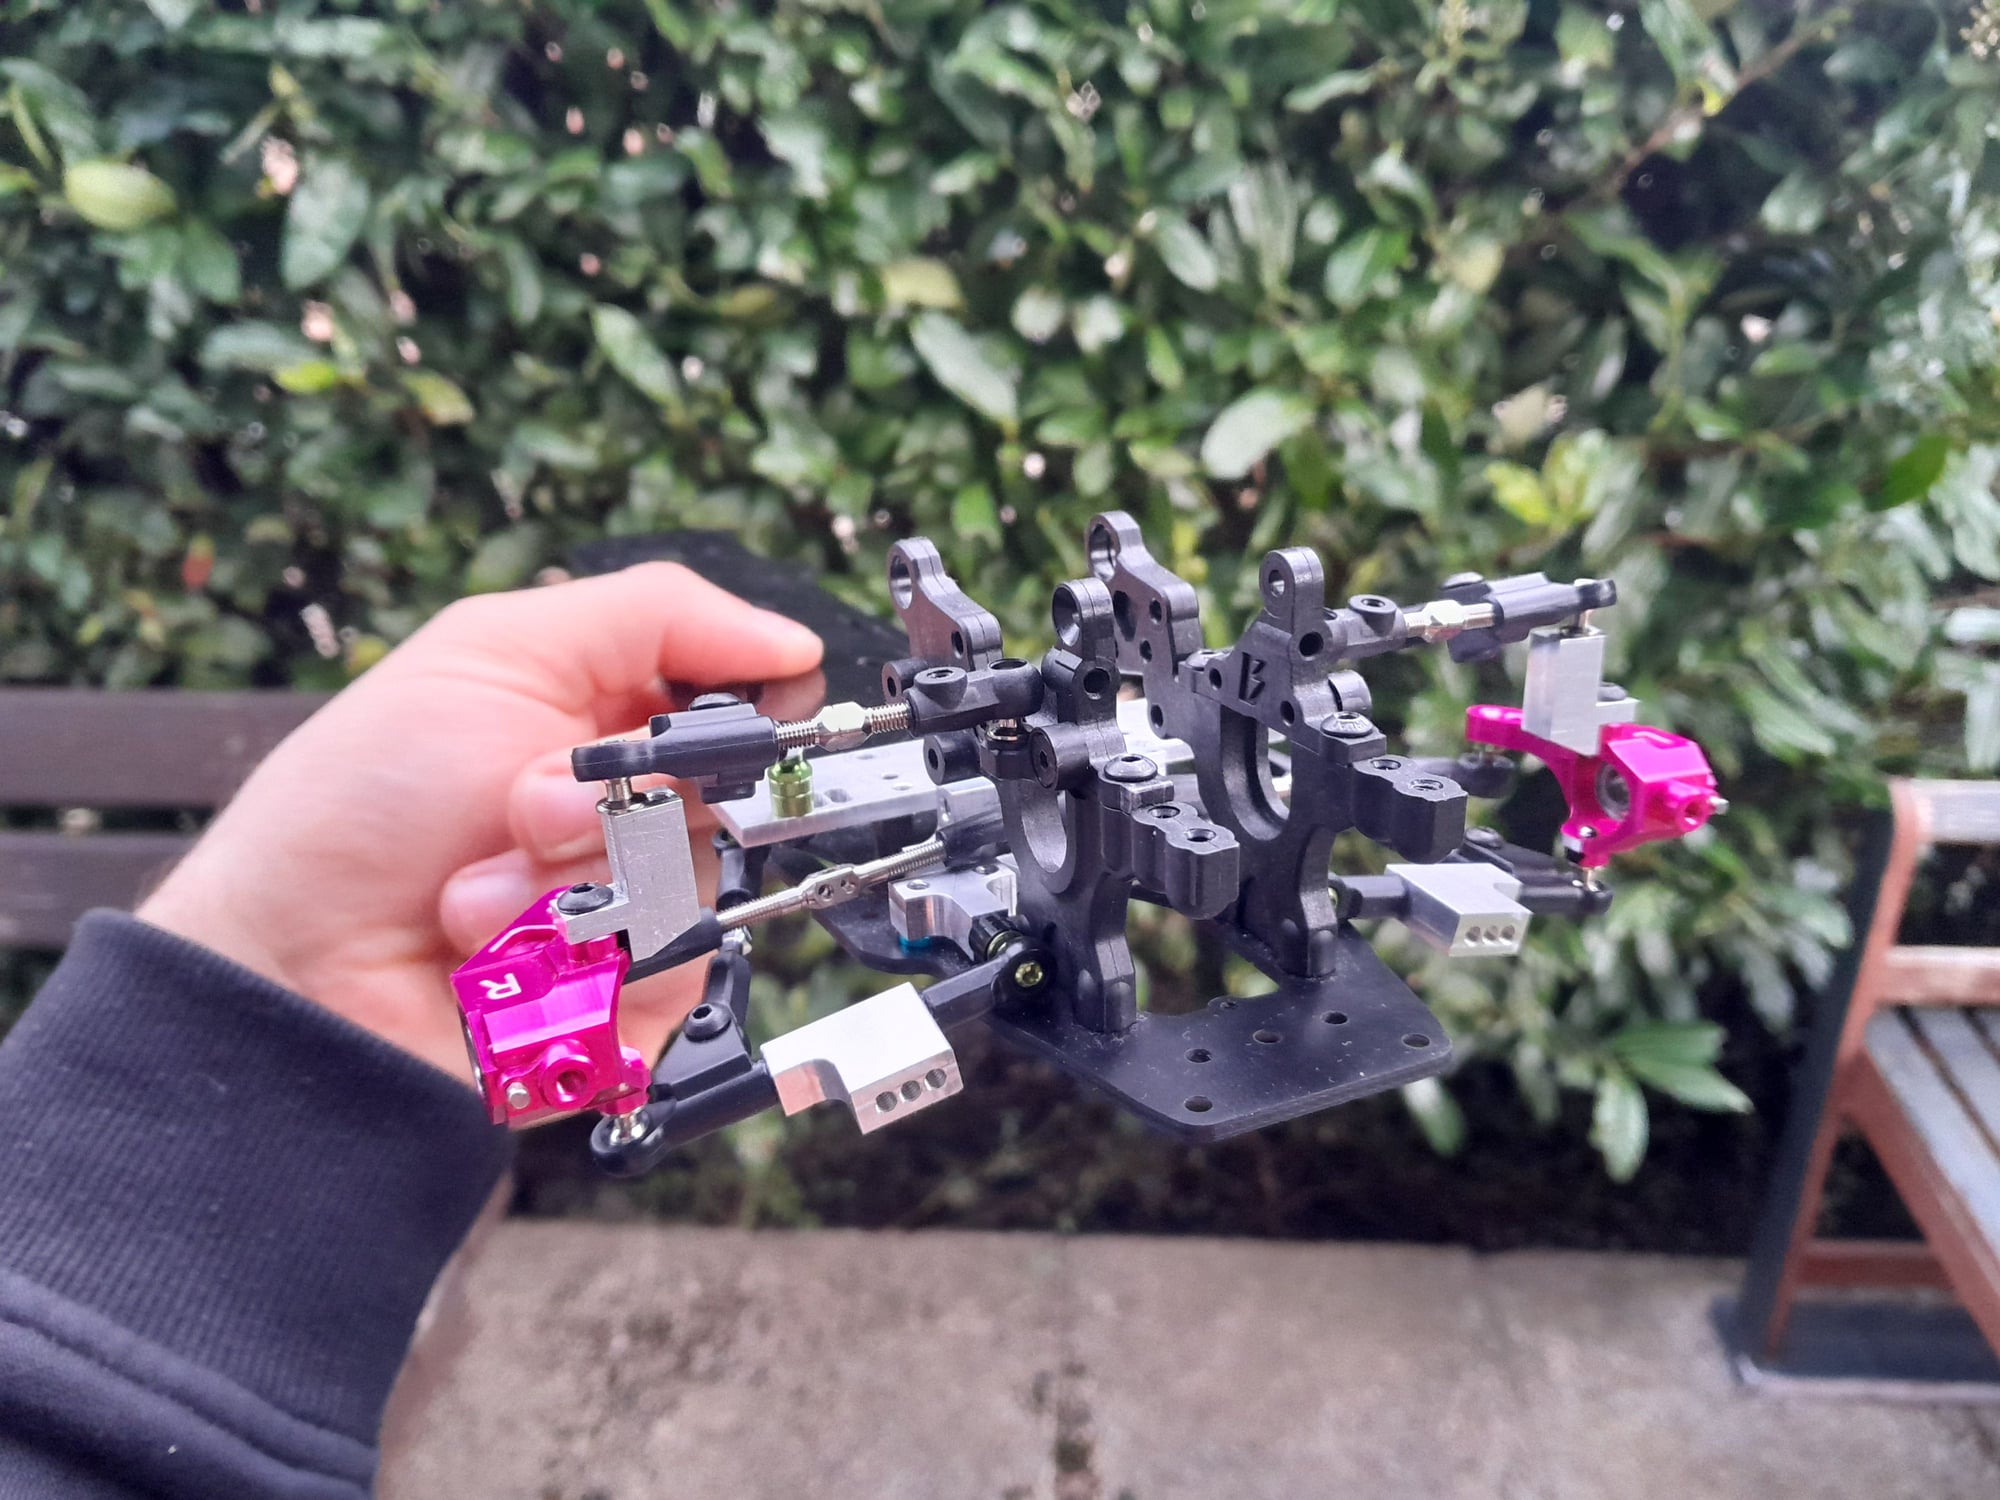
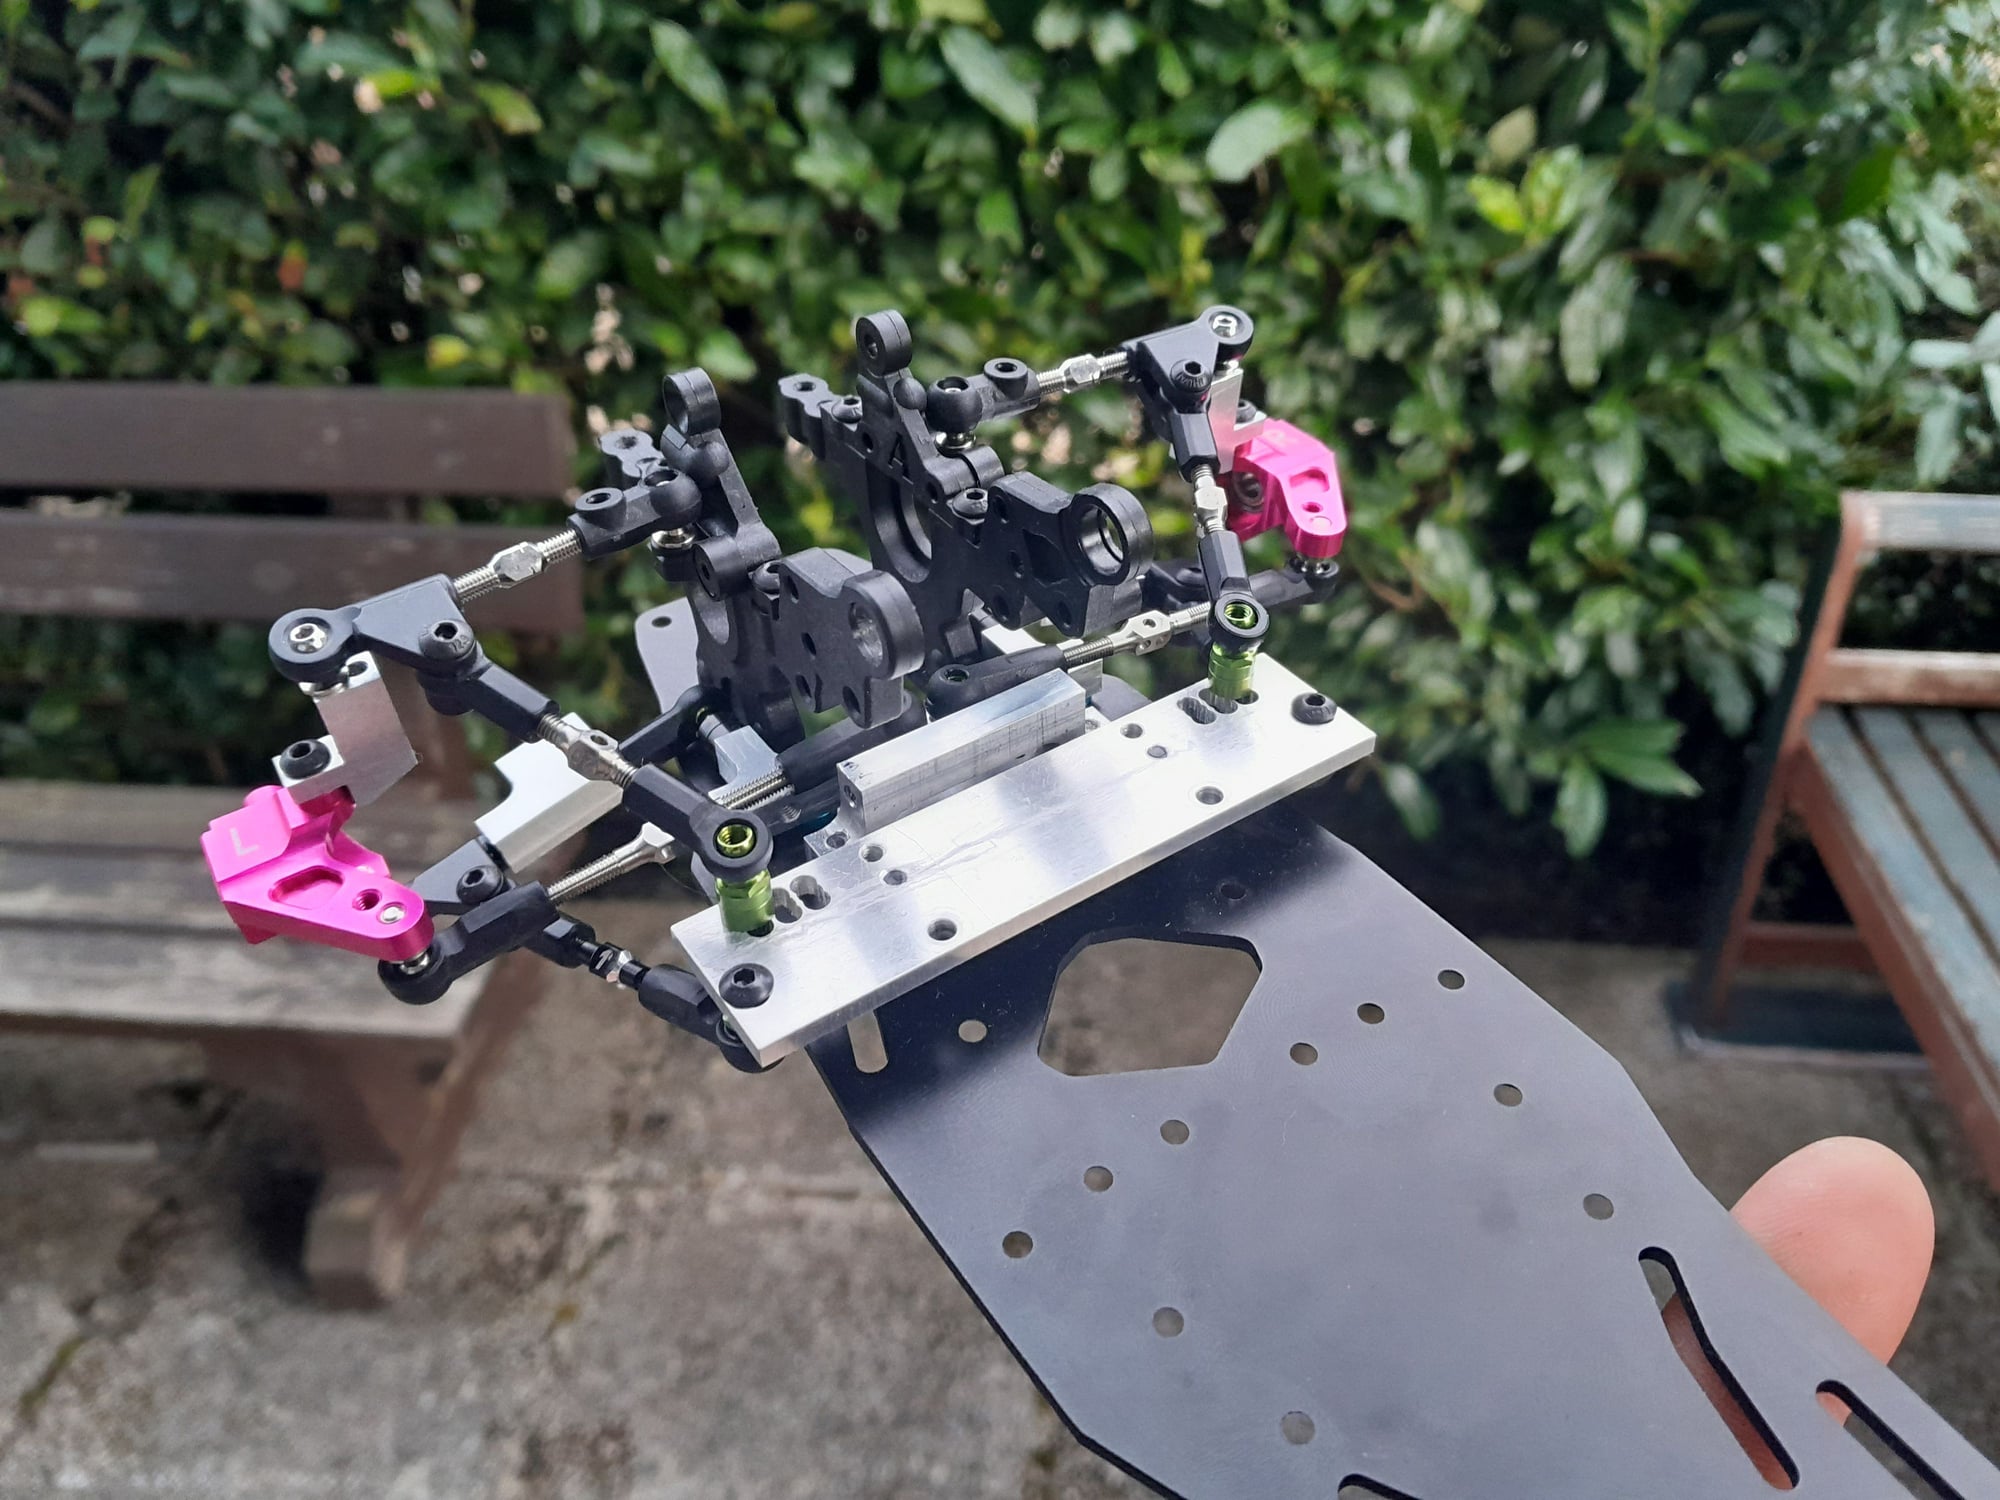
here is a little side project I did over the winter. A multi-link suspension like de D-Like RE-R Hybird has it, just for the Sakura D5. Goal was to keep the toe as stable as possible and create a massive caster increase over suspension travel. Knuckles are used from the D3 and only slightly modified. The bridge-part is for the MR-version to get the fixing points of the upper decks back. The base plate is kept simple for now, to mill in new attachment points if needed. I will make a pretty version when I dial in the attachmend points for the upper linkage. Cant wait to test it out now.
Any comments or improvment thoughts?
BR
Currently Active Users Viewing This Thread: 1 (0 members and 1 guests)
