4Likes
Speed Passion F1 car - The SP1
 10-31-2013, 01:54 AM
#676
Tech Initiate

 11-03-2013, 12:00 AM
#678
Tech Rookie
and spur gear 48 pitch?
11-03-2013, 12:24 AM
#679
That is true for any ball diff. Ball diffs rely on friction to not slip. Friction is generated in 2 ways...one being tension and the other being surface area. The more diff balls you have the more surface area you have so the less tension you need...thus resulting in a smoother differential. So more diff balls not only means a smoother diff...but one that lasts longer as well.
11-03-2013, 01:33 AM
#680
That is true for any ball diff. Ball diffs rely on friction to not slip. Friction is generated in 2 ways...one being tension and the other being surface area. The more diff balls you have the more surface area you have so the less tension you need...thus resulting in a smoother differential. So more diff balls not only means a smoother diff...but one that lasts longer as well.
11-03-2013, 08:10 AM
#681
A nice win for the Speed Passion SP1 at the first round of the ETS.
https://www.facebook.com/media/set/?...1130100&type=1
https://www.facebook.com/media/set/?...1130100&type=1
11-03-2013, 09:39 AM
#682
| + YouTube Video | |
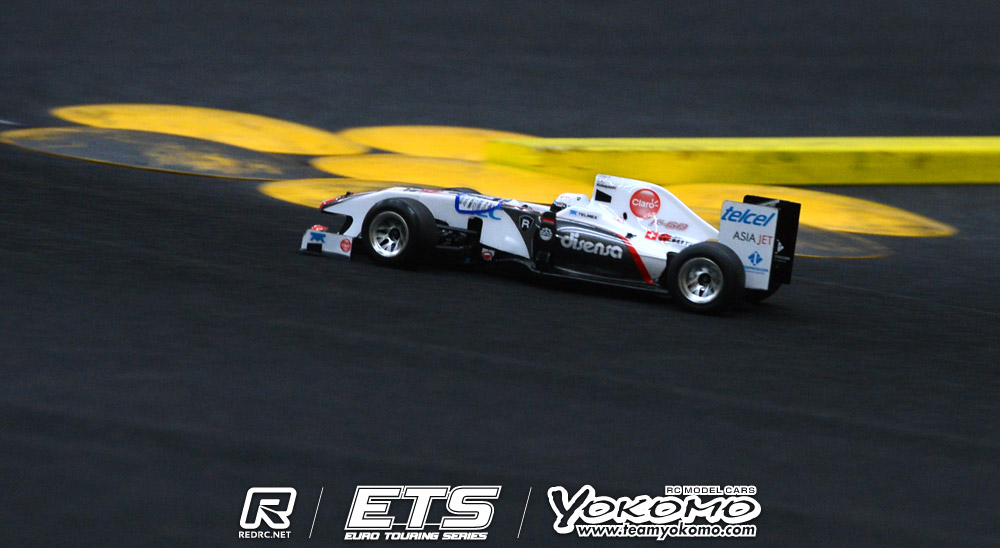
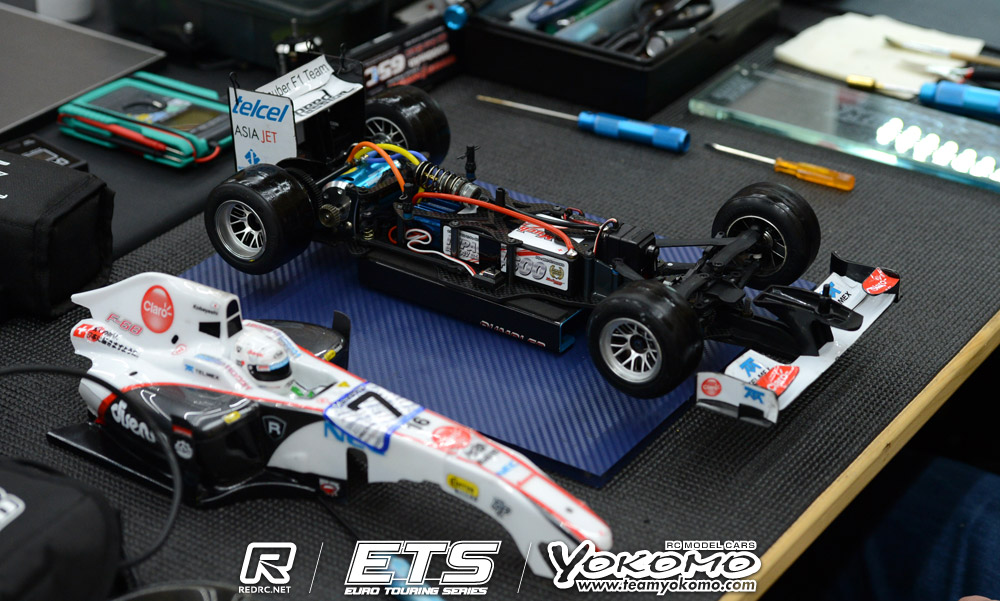
That is one heck of a racing...challenged by both TOP and SERPENT drivers, one of each for at least 4-5 times in a 5 minutes race....crazy. Great 1st round win from the 5th spot and overall 3rd place for the box stock SP1 that he received last Friday......he did not even practice with the car until Thursday. He finished the car by Wednesday and was waiting for the RIDE tires to deliver....he is using the Speed Passion F68 body.
I will acquire his setup and will post here....
11-03-2013, 10:52 AM
#684
Well, I had another interesting night with my SP-1 yesterday. Since I had to rebuild my car after being t-boned 2 weeks ago, I changed the setup to use Tamiya silver side springs (can't buy the SP springs, apparently). While doing that, I realized that I'm a goof and had used black diff grease in my side damper, not knowing any better. So, I ordered and used CRC 30K grease, per someone's recommendation. Well... that resulted in a LOT of rear grip, giving me some understeer and causing the rear tires to get filthy about 2/3rds into the race. That in turn made me loose rear grip and corner power, so first qualifier wasn't too good.
So... I then switched the damper to just 10K Associated diff fluid. MUCH better. The car was back to being balanced and handled really nicely. Second qualifier was much better, and I qualified 5th overall in a field of 7, if I recall (I'm still new ).
).
The mains, as always, were a "try not to tangle up with another guy" strategy. There were a number of pile ups and entanglements between the other drives, but I got lucky (or maybe it was skill? :-p) and got around them. Being able to drive clean and consistent got me 2nd place, my first podium finish in any class! Woohoo!
Thank you Speed Passion, love the car!
HOWEVER... and I should have known better, word of warning. I'm running a shorty pack with the wires plugging in by the servo side. I didn't realize that the little carbon fiber brace (servo plate brace) could conduct electricity (duh!), so I didn't worry when my + and - banana plugs were neatly resting against it when plugged in. Well, guess what? NOT GOOD. Luckily last night I noticed that my Exotek hold-down screws, which I use to hold down the brace, were HOT to the touch! Everyone around me informed me of my issue and I quickly removed the brace. No more short. For now I'll run without the brace, but as soon as I get my new Fantom shorty I should be able to flip it around and run the wires shorter, on the motor end of the chassis. Glad I got that figured out in time!
So... I then switched the damper to just 10K Associated diff fluid. MUCH better. The car was back to being balanced and handled really nicely. Second qualifier was much better, and I qualified 5th overall in a field of 7, if I recall (I'm still new
).The mains, as always, were a "try not to tangle up with another guy" strategy. There were a number of pile ups and entanglements between the other drives, but I got lucky (or maybe it was skill? :-p) and got around them. Being able to drive clean and consistent got me 2nd place, my first podium finish in any class! Woohoo!
Thank you Speed Passion, love the car!
HOWEVER... and I should have known better, word of warning. I'm running a shorty pack with the wires plugging in by the servo side. I didn't realize that the little carbon fiber brace (servo plate brace) could conduct electricity (duh!), so I didn't worry when my + and - banana plugs were neatly resting against it when plugged in. Well, guess what? NOT GOOD. Luckily last night I noticed that my Exotek hold-down screws, which I use to hold down the brace, were HOT to the touch! Everyone around me informed me of my issue and I quickly removed the brace. No more short. For now I'll run without the brace, but as soon as I get my new Fantom shorty I should be able to flip it around and run the wires shorter, on the motor end of the chassis. Glad I got that figured out in time!
11-06-2013, 09:32 PM
#687
Tech Rookie
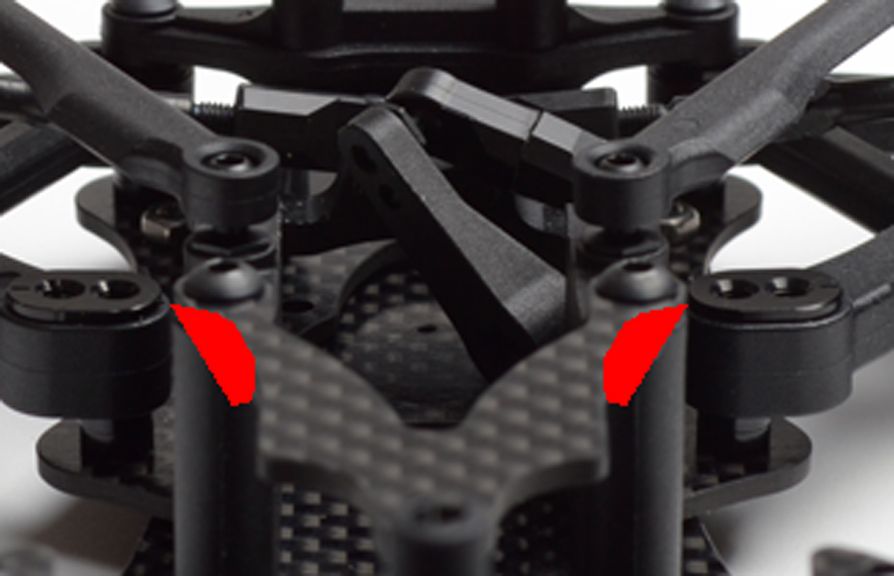
When assembling mine the Left Front pod screw hole stripped before screw even bottomed out on chassis. This is hole where the screw hole for the fan mount is. Hole for fan screw goes all the way into hole for pod mount. This is not all that uncommon, but also were clearance slot for motor in pod is the aluminum broke away and hole is exposed there also. Has any one else run across this. The manual calls for 3x8 mm screw but hole is tapped deep enough so I could get 3x10 mm in hole and it seams to be tight now.
11-07-2013, 12:48 AM
#688
When assembling mine the Left Front pod screw hole stripped before screw even bottomed out on chassis. This is hole where the screw hole for the fan mount is. Hole for fan screw goes all the way into hole for pod mount. This is not all that uncommon, but also were clearance slot for motor in pod is the aluminum broke away and hole is exposed there also. Has any one else run across this. The manual calls for 3x8 mm screw but hole is tapped deep enough so I could get 3x10 mm in hole and it seams to be tight now.
 11-07-2013, 10:07 AM
#689
How are you guys setting the front ride height? It's easy to adjust the rear, but what about the front? Most of the setup sheets I've seen list a ride height of 4mm front and rear. I built the car per the instructions using 1mm shims under the Lower Arm Plate and 2mm spacers under the Lower Arms. I'm running Shimizu tires on Tamiya wheels and my front ride height is 6.5mm. If I add shims under the Lower Arm Plate I'll have to cut the L and R servo mount. If I shim under the lower arms then the steering geometry is changed. What are you guys doing?
BTW, non of the setup sheets I've seen list the shim settings for front ride height either.
Thanks,
Jim
BTW, non of the setup sheets I've seen list the shim settings for front ride height either.
Thanks,
Jim
11-07-2013, 10:31 AM
#690
HOWEVER... and I should have known better, word of warning. I'm running a shorty pack with the wires plugging in by the servo side. I didn't realize that the little carbon fiber brace (servo plate brace) could conduct electricity (duh!), so I didn't worry when my + and - banana plugs were neatly resting against it when plugged in. Well, guess what? NOT GOOD. Luckily last night I noticed that my Exotek hold-down screws, which I use to hold down the brace, were HOT to the touch! Everyone around me informed me of my issue and I quickly removed the brace. No more short. For now I'll run without the brace, but as soon as I get my new Fantom shorty I should be able to flip it around and run the wires shorter, on the motor end of the chassis. Glad I got that figured out in time!
Lesson learned...I guess.