


1/12th Scale Wiring...(1S)
 11-26-2009, 07:36 AM
#46

Here's another. Spent some time with the wiring, and it could be better, but I was more interested in getting the car on the track than looking pretty.
 11-26-2009, 07:54 AM
#48
")
 11-26-2009, 11:26 AM
#51
You do need to have a good crimping tool, not all of them are created equal. Some tools don't fold the tangs of the connecter over on themselves. You can see this easily if you look at the part of the tool that crimps the bare wire portion of the connecter, it will have a double flute. Here is the tool I use:
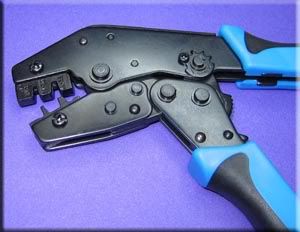
It's available from Hansen Hobbies: http://www.hansenhobbies.com/
They also have an economy version much like the one from the website that Tim posted that works well. Their prices on the connecters themselves are great also, and they have lots of good information on the website such as a crimping how-to video

 11-27-2009, 09:31 AM
#53
No need to solder after crimping. As I said before, a good crimp is as good or better than a solder joint.
You do need to have a good crimping tool, not all of them are created equal. Some tools don't fold the tangs of the connecter over on themselves. You can see this easily if you look at the part of the tool that crimps the bare wire portion of the connecter, it will have a double flute. Here is the tool I use:
It's available from Hansen Hobbies: http://www.hansenhobbies.com/
They also have an economy version much like the one from the website that Tim posted that works well. Their prices on the connecters themselves are great also, and they have lots of good information on the website such as a crimping how-to video
tommy
Last edited by TommyBlazin; 11-27-2009 at 10:13 AM.
11-27-2009, 10:00 AM
#54
11-27-2009, 12:09 PM
#55
make sure you get the one that OD posted. I don't like the econo version. it just does not seam to crimp as well. I got a similar one. since I do computer network stuff, i had the frame and just needed to find the die.
11-28-2009, 07:26 AM
#57
This is a pic of my BMI DB12RRL. I shortened the wires and soldered the deas plug derectly to the post on the Tekin RS.
 11-29-2009, 05:45 PM
#59
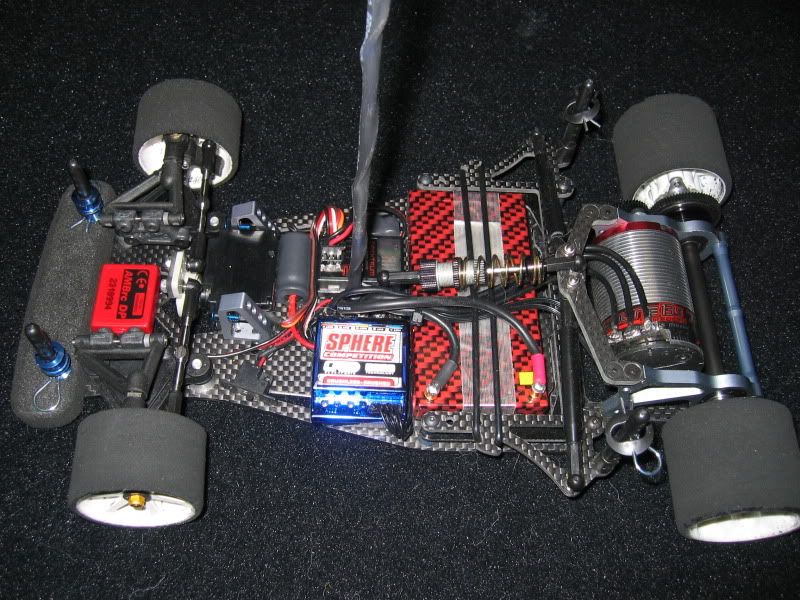
Here is a picture of my previous ride. BMI DB12RR. This was perfectly balanced on the pins with no added weight. All the excess wires are under the steering servo. I just removed the electronics and taped them down in the 12r5.1. Again perfect balance with no added weight. 730g with light weight body and "full size" tyres. We are running a 750g limit in Australia next year so add a transponder and i will be spot on.
Another little trick is the rear shock ball cup has been replaced with a quick change one. Makes changing the battery so simple.
Another little trick is the rear shock ball cup has been replaced with a quick change one. Makes changing the battery so simple.
11-30-2009, 03:01 AM
#60
They are made by
http://www.sullivanproducts.com
You will need model S905 (they have 3 types)
I purchased mine from Hobbycity. I was supprised that they had them been a US product in HK.
http://www.sullivanproducts.com
You will need model S905 (they have 3 types)
I purchased mine from Hobbycity. I was supprised that they had them been a US product in HK.