


 2895Likes
1/10 R/C F1's...Pics, Discussions, Whatever...
 11-21-2008, 04:36 PM
#121
In an attempt to try help new people running their F103, I’ve put together a basic setup, a starting point if you will, for a car that isn’t as easy to drive as it is to build. I’ve known quite a few people over the years that buy one these because they look cool, but sell them soon after because of the difficulty to drive and set up.
This isn’t the end all set up for an F103. This is what worked (with limited success) for me. It’s also important to note that this is a NIMH set up, not Lipo. I only recently acquired some Lipo’s and haven’t had a chance to run them in the car. So the setup I’ve described below may vary for the lighter weight battery packs. I’m sure many will disagree with what I’ve written below, that’s fine, everyone’s different and entitled to their own opinion. If you have a better baseline set up, please feel free to share it. If you’re worried about sharing your magic formula and getting beat, you shouldn’t be. It still takes skill behind the wheel to get these cars around the track.
With all that being said here we go…
FRONT END:
I like to use the original style F103 front A-arms. I’m not at all knocked out by the link type. I use the inline axels, black springs, and a small amount Tamiya Hard Grease on the kingpin. This ads a small amount of dampening to the limitted front suspension. I also like to secure the axel to the king pin using a set screw. The back of the axel is already threaded so there’s no problem with getting the set screw in. This allows me to lock the axel down and remove the lower e-clip under the axel. This lowers the front of the car small amount.
DIFF:
Once the front end is done I move to the rear. I like using the 93 tooth, .04 pitch, spur gear, to this I add the carbide diff balls and rings. As I mentioned in an earlier post I put diff grease in the holes, then insert the diff balls, then apply a small amount of grease of the dry side of the diff balls. I also smear a small amount of diff grease on the rings and the diff joint. I use a diff grease from back in the day that you can’t even find anymore. It works great but when it’s out it’s time to find another. I would suggest using Associated’s red labeled diff grease. It works pretty well and is easily obtainable in most hobby shops. For that small thrust assembly that goes in the rear wheel I like to use a harder grease, like the Associated black grease. When the car is fully assembled and ready to go I do a quick test to make sure the diff is set correctly. For me, I like the diff to slip just a little from a standing start. By a little I mean about two to three inches. The diff setup is pretty crucial and care should be given when adjusting. If you run the car with the diff too loose it won’t accelerate out of the turns properly. If the diff is too tight the car will want to spin out on initial acceleration.
T-PLATE:
There are quite a few different T-plates on the market to choose from. I’ve always stuck the Tamiya brand. They offer two different choices the stock one (supplied in the kit) and an “S” for soft type. I’ve found the soft T-plate works very well with foam tires while the stock works well with rubber. I also use the O-ring setup instead of the pivot ball. I think the O-ring offers a more consistent feel to the car, while the pivot ball sort of slowly loads up then rolls all the over and then cars breaks loose. I know a few carpet guys that swear by the pivot ball system. I would suggest trying both out to see what works for you.
I adjust my T-plate by first tightening the front screw. I snug this down fairly tight. The rear screw gets tightened in small amounts and checked frequently. I tighten this up until the T-plate can’t move side to side and stop. I check the front the same way after the rear has been adjusted. I think this is really a crucial area most people over look when dialing their car in. It’s really a fine line between set and missed. If you over tighten the T-plate it makes the car to stiff and the car will want to spin out as if it was on ice. If it’s too loose the car won’t settle to take a turn. If I’m going out with a fresh car this is one of the first things I adjust or check.
Keep in mind if you’re using the O-ring set up this well wear out and oblong the holes in your T-plate after some use. The T-plate will need to be replaced periodically, it’s a wear item.
REAR DAMPER PLATE & SHOCK
As I mentioned before I use a small amount of the hard grease on the shaft bolted to the upper deck. This takes out some of the slop and allows the damper plate to react more quickly (at least I think it does). Once I’ve done this I drop the threaded damper post over the top, followed by the lower spring (I use the gold spring it’s a little more firm than the silver one and works well for my driving. I had to crank the silver one down really far to get the car to handle the way I drive. The gold one didn’t have to be tightened as much and made the car feel a little more planted),
Then I mount the damper disk. I generally use the black plastic ones. I’ve used the white teflon disks before and found they warp over time or wear unevenly. Since I use damper grease I didn’t see any advantages to using the teflon disk and the black ones are included in the kit. For damper grease I pretty much only use the Tamiya damper grease. They make (or made) a set of soft, medium and hard greases. I typically stick to the hard grease, if it’s really cold outside I’d go to a softer grease to try and get that same left to right feeling. The reason I use it is for dampening the rear suspension. It helps control the roll of the rear T-plate. I’ve noticed if you don’t use it or use too light of grease the car acts a little squirrelly. By adding a small amount of grease to the damper disks that flighty/unstable feeling is settled down.
With the damper lubed up and everything in place I put on the damper nut. I usually measure this with some calipers so my starting point is always the same. I run the nut down about 6mm. This is further adjusted once I’m at the track and the car has been run to get a basic feel.
The shock, for years I used the standard F103 Aluminum Shock. It works well and shouldn’t be tossed aside for a newer version unless it really needs to be replaced or you have access to a stock room full of the new ones. With that being said I will use the newer type of shock for this write up. I assemble the shock just like the instruction say, accept I the final e-clip that is used to secure the piston to the shock shaft, I give this a little bend. This removes that small amount of play end to end. Does it help? Not sure but it can’t hurt. You can also use a small shim to get the same effect. When assembling the end of the shock with the O-ring and spacers I use a small amount of Associated’s Green Slime. This keeps the shock from weeping any oil by providing a better seal for the O-rings and spacers and allows the shock shaft to move very smoothly on the car. I use the three hole piston with 25-30 weight oil. I also use the lightweight aluminum spring retainer end with that is 1mm lower than the standard spring retainer, the reason is the aluminum collar (the ring that screws onto the shock body) that ads or subtracts pressure to the spring is pretty thick. I like the run the car with very little tension on the spring. I’ve found when I use the stand spring retainer and the aluminum collar it bows the center of the car because of the extra load on the spring. When the shock is built and mounted to the car put the battery in it, check it from the side to see if the chassis is sagging or drooping in the center. You can adjust this out by preloading the spring, but it should be pretty flat as is.
CHASSIS:
Make sure your car is flat when bolting on the upper deck. Because there are two separate decks it’s very possible to assemble them tweeked or twisted. You may need to ask a buddy to push down on the center of the upper deck while you tighten the screws. I tighten them up like you would lug nuts on a wheel, alternating corners until each one is tightened down. Also check your damper plate to make sure it’s straight. This piece is made with a slight gap in the screw holes so they don’t bind when assembling. This gap can allow the damper plate to be mounted off center. Again, not sure if it helps, but it certainly can’t hurt.
As I said before, I’m not saying this is the “end all be all” set up, I’m simply trying to help others get there cars set up for a starting point. I would suggest talking to others you run with to see what there doing and don’t be afraid to try things, you can always put the car back to the way it was. I hope this helps someone and good luck!
 11-22-2008, 05:15 AM
#122
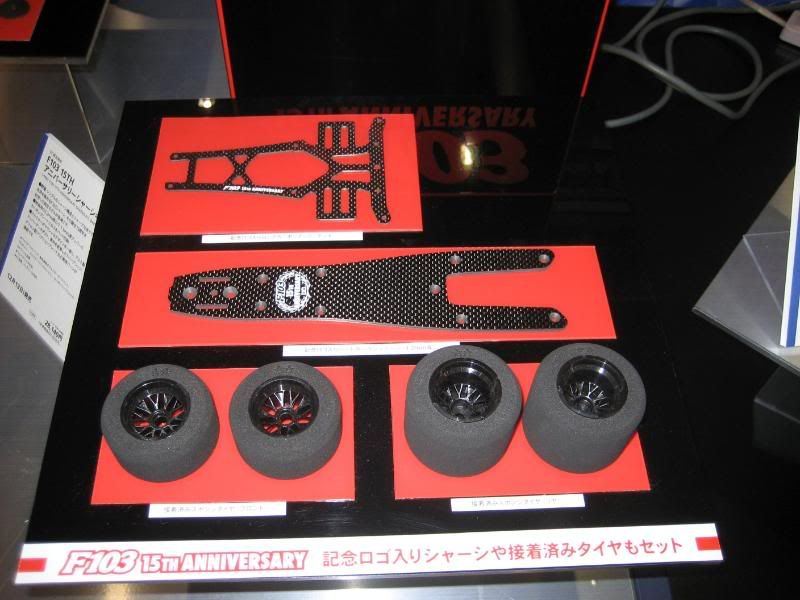
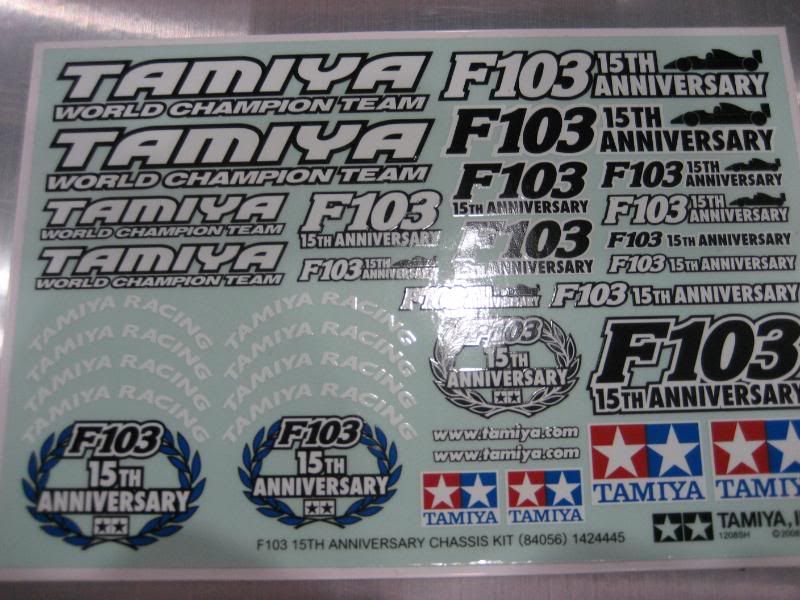
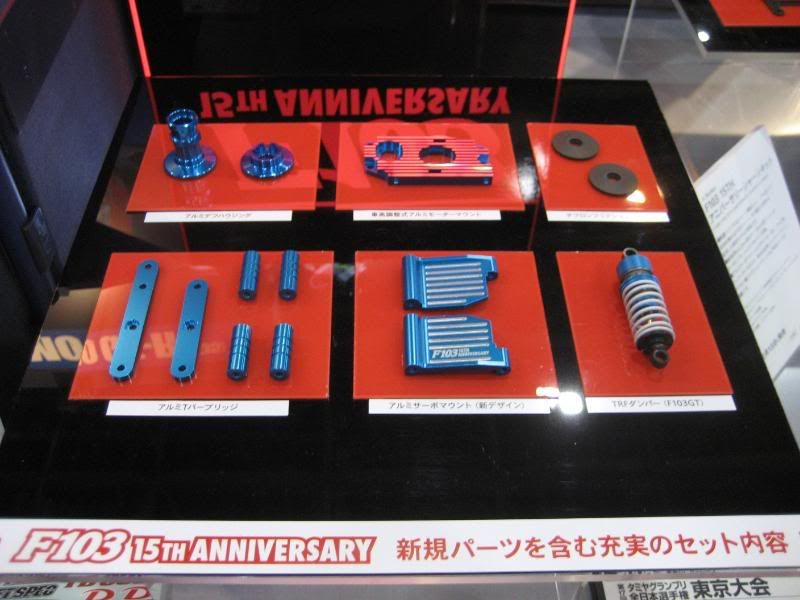
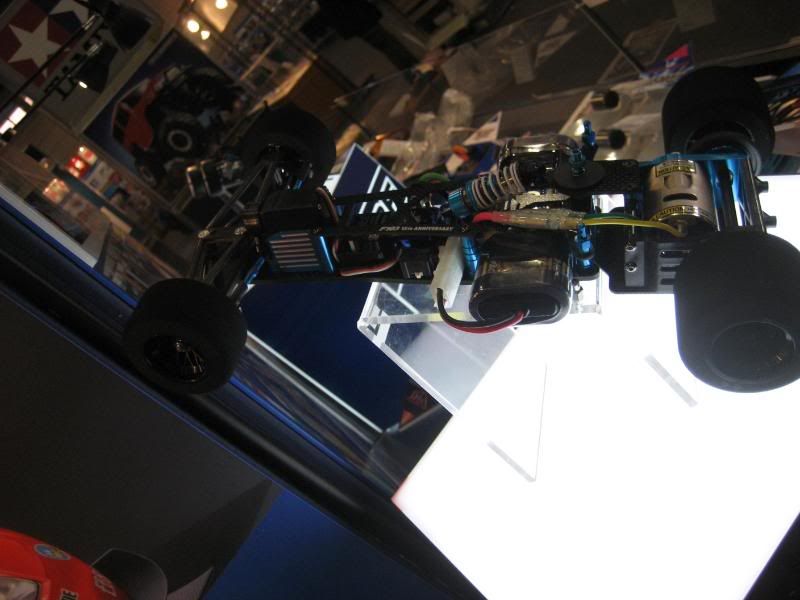
Some goodies from Tamiya Fair
 11-22-2008, 03:59 PM
#124
robk, that car could be a pebble beach winner next to what I raced last year. For some reason everyone would dogpile on my car after every main. I hope that tradition is over.
11-23-2008, 07:18 PM
#125
I ran my old kyosho today against two f103s today and did pretty good. I managed to chew up a spur though. The diff parts off the duratrax Delphi look identical, so I will order a set of those up in the meantime. Can someone post an exploded view of an f103 axle? I am considering putting one on my car.
Charlie
Charlie
11-23-2008, 09:13 PM
#126
11-23-2008, 09:44 PM
#127
Thanks for the link. Looks like I will just need a rightside drive hub and the gear parts bag and some misc. bearings diff balls. Are the f103 spurs metric pitch? does anyone make a 64 pitch spur for the f103? I hate how noisy metric/48 pitch is.
11-24-2008, 06:23 AM
#129
gto0209, get your silver can too! The Snowman bought the last F103 in stock, so 3 more next weekend. The little guy took out his front control arm in the last heat race. His F1 is sidelined until I can get a front end for him. I have one on order, but have to wait for shipping. Good racing yesterday though.
11-26-2008, 08:53 AM
#131
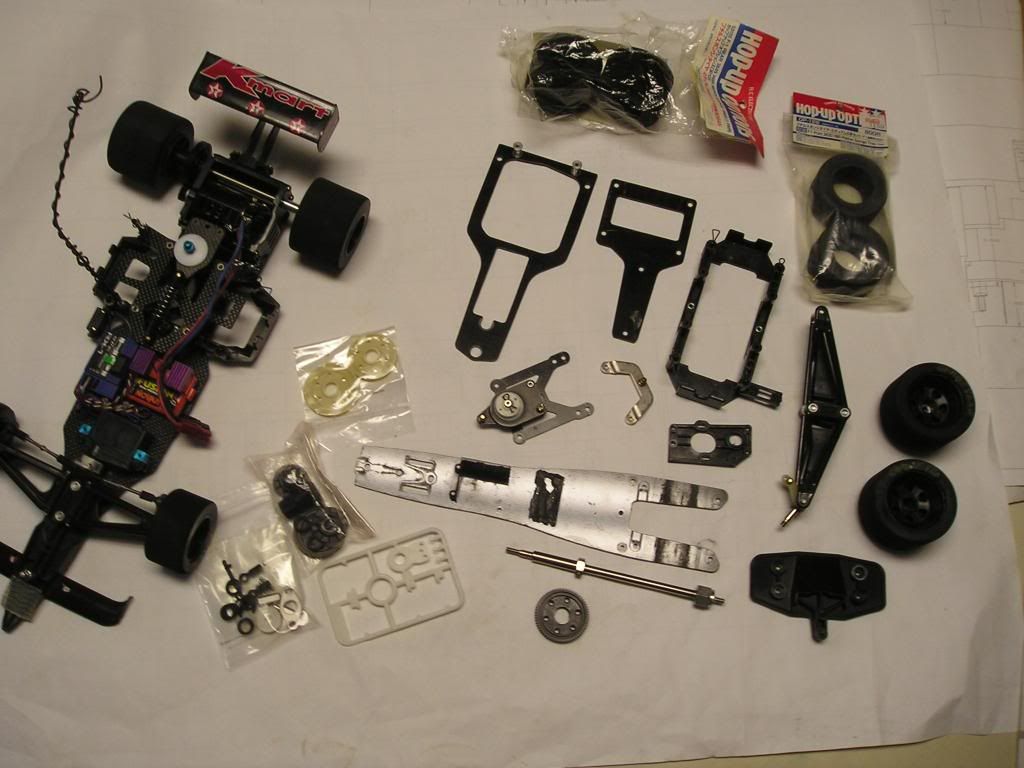
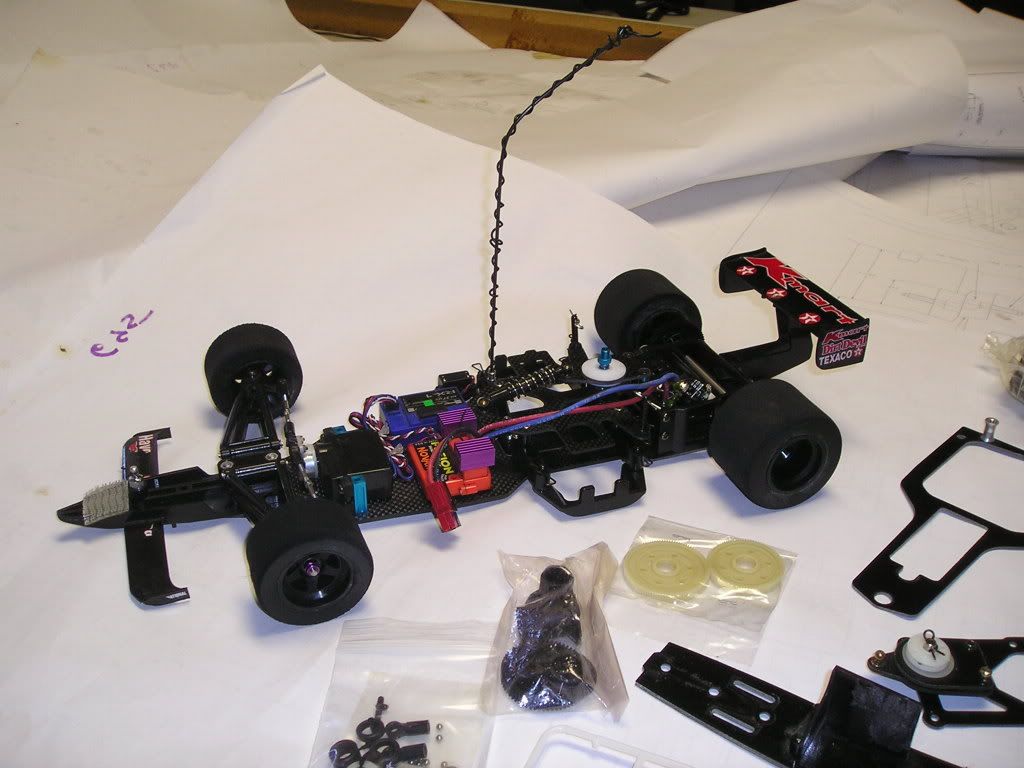
Tech Rookie
here are some pics of the F103 I just got. I am new to rc cars and this is a work in progress.
 11-26-2008, 11:24 AM
#133
11-26-2008, 01:39 PM
#134
Tech Rookie
this is my soon to be sauber c12, I own a graphics company for real racecars,
So i figured Id fool around and make the car i love. Due to the huge
shortage of wings available I made a temp front wing, It fits and still uses
the same one screw mount. The endplates will be going on next , but havent figured out what type of cement to join them on with yet. The angle of attack will be adjustable when its complete.
The sauber will get paint soon, will post picks when the project is complete.
The next decal package im working on is the Footwork Arrows FA14 Mugen Honda.
If you need stuff I can produce diecut decals only at the moment. Its too bad tamiya didnt release decals , but im more than happy to produce them if needed. I want to see a grid of all scale looking F1's
11-27-2008, 07:53 AM
#135
I know this isnt the for sale thread, but i figured id post it here where all the F1 fans live!
F102, bought it off ebay i think and it went straight on the shelf. The car is in excellent condition. If you require any more info, please let me know! Looking for around $100 US plus postage.
F102, bought it off ebay i think and it went straight on the shelf. The car is in excellent condition. If you require any more info, please let me know! Looking for around $100 US plus postage.