


 52Likes
Team Losi JRXS Type-R
 08-18-2008, 06:13 AM
#7846

Yes, you still use the thrust bearing and the spring. It goes together like the diff except you lock it down for no movement at all. Don't go too nuts on tightening it or you can strip the outdrive.
 08-19-2008, 10:42 AM
#7848
I just use the ones that came with the car and never had a tightness issue at all. I do have standard long ball cups on the rear of my car to get a long camber link but I am using the Losi grey ball cups for that. I just have those in my box from my offroad stuff. They are not tight on the ballstud either.
08-19-2008, 02:49 PM
#7850
I just use the ones that came with the car and never had a tightness issue at all. I do have standard long ball cups on the rear of my car to get a long camber link but I am using the Losi grey ball cups for that. I just have those in my box from my offroad stuff. They are not tight on the ballstud either.
Once they are poped on, use some plyer to squish them over the ball stud...
I usualy do that 3-4 times and they become free enough.
I usualy do that 3-4 times and they become free enough.
08-20-2008, 07:12 PM
#7851
I just use the ones that came with the car and never had a tightness issue at all. I do have standard long ball cups on the rear of my car to get a long camber link but I am using the Losi grey ball cups for that. I just have those in my box from my offroad stuff. They are not tight on the ballstud either.
08-20-2008, 08:33 PM
#7852
Here all the Losi's ball cups:
http://www.losipartshouse.com/servlet/Categories
Sorry no dimensions.
http://www.losipartshouse.com/servlet/Categories
Sorry no dimensions.
08-20-2008, 09:35 PM
#7853
Here is the stock kit ones: http://www.losipartshouse.com/servle...aptured/Detail
Here is the ones I used for the long camber link in the rear: http://www.losipartshouse.com/servle...id-Ball/Detail
I was not sure which ones you were asking about.
Here is the ones I used for the long camber link in the rear: http://www.losipartshouse.com/servle...id-Ball/Detail
I was not sure which ones you were asking about.
08-22-2008, 07:32 AM
#7854
Here is the stock kit ones: http://www.losipartshouse.com/servle...aptured/Detail
Here is the ones I used for the long camber link in the rear: http://www.losipartshouse.com/servle...id-Ball/Detail
I was not sure which ones you were asking about.
Here is the ones I used for the long camber link in the rear: http://www.losipartshouse.com/servle...id-Ball/Detail
I was not sure which ones you were asking about.
Thanks
08-22-2008, 08:58 AM
#7855
the part # 6016 is what I was looking for. I too have tried making the link longer with the standard size cups that come with the kit, but I find that if you hit the wall it is a little fragile. The inside part of the cup doesn't seem to hold well. Largely due to the titanium rod beeing a little on the short side.
Thanks
Thanks
When Larry and I switched to using the long link in the rear, as in hole 4 on the tower and B on the hub, we replaced the small titanium tierod with a 1" Lunsford tierod. The 1" tierod is thicker and longer eliminating ball cup issues. Ever since switching to that, we never broke another rear ball cup or even had them pop off. For anyone running a longer rear link, get yourself a pair of the 1" lunsfords.
08-22-2008, 11:49 AM
#7857
 08-22-2008, 06:39 PM
#7858
Schreff, thanks for the tip.. I was thinking of doing something like this also, as I was looking at an associated tierod, length was 0.825".
Seeing that you use the 1", I will make my way and pick a set up.
Also, for those who are curious, I got my Platinum Two's today.. Fit in the Type R with no mods, using both the plastic lipo tray and with the losi weighted lipo tray.
Will post picks later..
Seeing that you use the 1", I will make my way and pick a set up.
Also, for those who are curious, I got my Platinum Two's today.. Fit in the Type R with no mods, using both the plastic lipo tray and with the losi weighted lipo tray.
Will post picks later..
08-23-2008, 04:51 AM
#7859
In a quest for a little more tarmac capability I am conducting a little test next time out.
Them posts on the top deck are maintaining masses of chassis stiffness but this eliminates some of the tuning potential that the Xrays, Hotbodies etc can offer with regards to flex. Sooo off they come!
I had to dig around my parts box to see what I could use instead of the posts to keep the battery plate securely fastened. After a few minutes thinking and tinkering I found that some old XXXS shock towers would do the trick. I hacksawed off the camber link mounting holes and screwed them onto the chassis, the holes are perfectly placed.
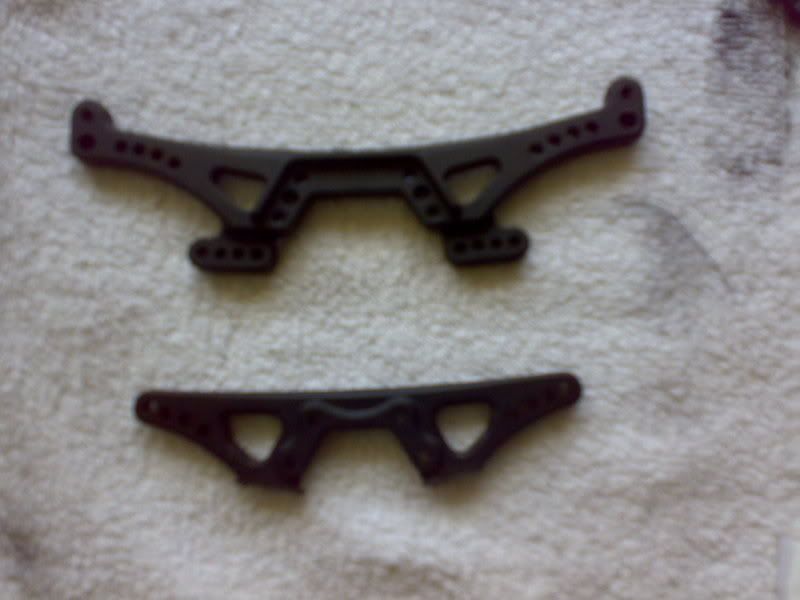
You can see in the image what I have removed.
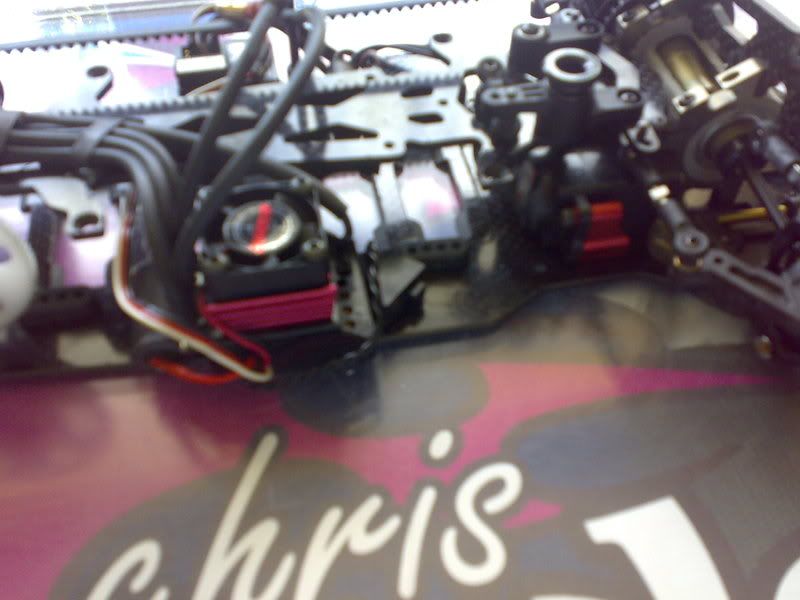
This is what the chassis looks like with them in place
(Apologies for the blur! Taken on my mobile!)
With the new bits on the chassis still resists tweak but offers a lot more flex.
Lets see how it goes!
Them posts on the top deck are maintaining masses of chassis stiffness but this eliminates some of the tuning potential that the Xrays, Hotbodies etc can offer with regards to flex. Sooo off they come!
I had to dig around my parts box to see what I could use instead of the posts to keep the battery plate securely fastened. After a few minutes thinking and tinkering I found that some old XXXS shock towers would do the trick. I hacksawed off the camber link mounting holes and screwed them onto the chassis, the holes are perfectly placed.
You can see in the image what I have removed.
This is what the chassis looks like with them in place
(Apologies for the blur! Taken on my mobile!)
With the new bits on the chassis still resists tweak but offers a lot more flex.
Lets see how it goes!
08-23-2008, 05:58 AM
#7860
Are you running in a low bite situation in that you felt you needed flex for traction? I run on low bite as well but have a setup on the car that is planted and my post are still in the car. I think you need to look at your setup more rather then messing with chassis tweak by removing the post. There is no reason to remove them to get the car to handle. I am sure Schreff and Fairtrace would back me on this. Since they don't feel it is necessary to remove them either.