


 136Likes
Team Associated RC10 B5m Mid-Motor Thread

 04-22-2024, 12:09 PM - Wikipost
|
|||
|
|||
 12-26-2013, 09:43 AM
#1

| + YouTube Video | |
Update:
Build Tips: TURNBUCKLES - consider using either a 7/64 drill bit to remove just a tiny bit of material from ball cups to make threading the turnbuckles in a bunch easier......or grease the threads using chapstick...
Build Tips: - FRONT AXLES - some people have had problems destroying front axles......it looks like the crush tube is just a bit too narrow. a 5 x 7 .2mm shim should fix this issue...Please check the B5 Nation Facebook group and see Chad Dues' Post.
A few quick UPDATES:
1. The B5 will be using the same turnbuckles as the B4.2 although the ball cups and ball studs will be different.
2. Both Mid and Rear Motor Buggies will use all METRIC hardware
3. Saddles, Shorty and Square Batteries WILL fit! Original long stick packs WILL NOT fit.
As soon as aftermarket parts, set up sheets, videos and manuals are available they will be posted here.
Updated Set Up-Sheets:
1. Brent Thielke JConcepts Winter Indoor Nationals 02/09/2014
Indoors, clay, high grip, smooth, tight
2. Tanner Denney JConcepts Winter Indoor Nationals 02/09/2014
Indoors, clay, high grip, smooth, tight
3. Steven Hartson Club Racing / Testing 02/05/2014
Indoors, clay, damp, high grip
4. Chad Due Club Racing / Testing 02/02/2014
Indoors, clay, damp, medium grip
5. Brandon Rohde Club Racing / Testing 02/02/2014
Indoors, clay, high grip, smooth, tight
6. Team Club Racing / Testing 01/30/2014
Indoors, clay, dry, smooth, hard packed
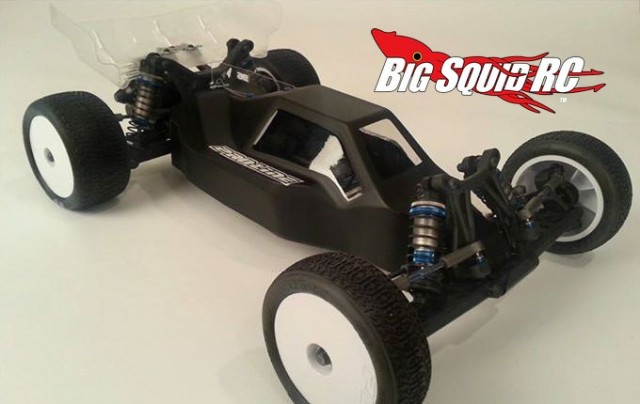
New Bodies Coming Out for the B5 RM!
| + YouTube Video | |


Kit information:
90001 B5 Team Kit: $239.97
Last edited by Jason Snyder; 03-10-2014 at 12:10 PM.
 12-26-2013, 09:43 AM
#2


RC10B5M Team Kit
1:10 scale 2WD off road has been Team Associated's signature racing class since the release of the original RC10 in 1984. The Team Associated RC10 buggy series has won eleven I.F.M.A.R. World Championships since the class began in 1985.
Use the right tool for the job.
The engineers in Team Associated's Area 51 designed the RC10B5M to specifically address the demands of racing on high-speed, high-grip tracks where the mid-motor chassis is at its best. The new suspension and chassis adjustments allow the platform to be tuned for both dirt and multi-surface while maintaining the forgiving driving style racers have become accustomed to with Team Associated vehicles.
No-compromise design.
The RC10B5M Team Kit utilizes a dedicated mid-motor chassis configuration, but still shares nearly 90% of the same parts as the rear-motor B5 Team Kit. The aluminum, hard-anodized chassis, gull wing front suspension arm geometry, Factory Team V2 threaded shocks, and Factory Team VTS slipper clutch are all standard features and give the RC10B5M the ultimate in performance.
Making the best even better.
The RC10B5M has all the makings of a champion, and with the proven performance from Team Associated, you're assured of support no matter where you go. If high-speed, high-grip tracks are your game, the B5M has what it takes to give you the winning advantage.
Features
- Narrowed hard anodized aluminum chassis with centralized mass and mid-motor position for improved handling on high grip off road tracks
- Chassis accepts R.O.A.R.-approved 2S saddle packs and 2S short packs using the additional foam insert
- Factory Team V2 12mm Big Bore threaded aluminum shocks with 3mm shock shafts and updated O-rings for improved smoothness
- Factory Team VTS (Variable Torque multi-plate Slipper) with three drive surfaces and high-resolution spring
- New transmission has stronger gears, precision ball bearings, and a 14 carbide ball differential for increased life and torque capacity
- Adjustable front suspension mount angle (kick-up) options of 25 deg. and 30 deg.
- New gull wing front suspension features heavy-duty steering and caster blocks, while the insert system allows for easy caster and trailing axle adjustments
- One-piece front axle/hex adapter and larger front wheel bearing for added durability
- Updated full bearing steering system with horizontal ball studs for finer Ackermann adjustments
- Heavy-duty ball cups and ball studs allow for maximum suspension travel while reducing binding and friction
- Rear hubs feature larger bearings as well as the quick and easy insert system to adjust camber link position and rear toe-in
- B5M clear body and wing included


MANUAL:
B5M Manual
Arm insert supplement:
Arm Mount Supplemental Instructions
Gear Diff Supplement:
Gear Diff Supplemental Instructions
Aluminum Rear Hub Supplement:
Aluminum Rear Hub Supplemental Instructions

RC10B5M Factory Lite
Team Associated's RC10B5 and RC10B5M have been met with wild success by racers around the globe at both the club level and at major racing events. Always looking for a challenge, Team Associated's Area 51 engineers took it upon themselves to make the best RC10 to date even better! A version of the B5M that would optimize the platform to excel in classes requiring spec motors and for certain track conditions that allow the racer to take full advantage of the performance offered from reduced weight.
Enter the RC10B5M Factory Lite Kit. Shedding over 75 grams of weight, the RC10B5M Factory Lite includes a 3-gear transmission for lower rotational mass, a lightened hard-anodized aluminum chassis, titanium turnbuckles, and aluminum front axles.
Features
- Lightweight, hard-anodized aluminum chassis with centralized mass and mid-motor position for improved handling on high-grip offroad tracks
- Chassis fits R.O.A.R.-approved 2S saddle packs and 2S short packs using optional foam insert
- V2 12mm “Big Bore” threaded aluminum shocks with 3mm shafts and updated O-rings for improved smoothness
- Aluminum rear ball stud mount for added strength
- New 3-gear transmission for lower rotating mass and extra acceleration, with lightweight V2 aluminum top shaft included
- Heavy-duty rear axle for added strength
- Lightweight aluminum front axle/hex adapter and larger front wheel bearing for added durability
- Factory Team upgraded ball bearing kit and titanium turnbuckles included
- Aluminum rear clamping hex with laser etching
- Heavy-duty ball cups and ball studs allow for maximum suspension travel while reducing binding and friction
- Rear hubs feature larger bearings and the easy-insert system to adjust camber link position and rear toe-in
- Team Associated B5M clear body and wing included


Manual - B5M Lite
B5M Lite Manual

RC10B5M CHAMPIONS EDITION
Team Associated's signature racing class has been 1:10 scale 2WD off road ever since the release of the original RC10 in 1984. In fact, the Team Associated RC10 buggy series has won 12 of the 16 I.F.M.A.R. 2WD Off Road World Championships held, with the first contested in 1985.
Team Associated's drivers race on many types of tracks around the world and they need to be ready for all of them. And they are. Spencer Rivkin, the 2015 1:10 2WD I.F.M.A.R. World Champion, and Ryan Cavalieri, the only racer to have won five R.O.A.R. Nationals in one year, both rely on having a wide tuning window and the best technology to be competitive wherever the next race brings them. Now, you can benefit from their experience at your track.
The new B5M Champions Edition includes the most popular tuning options available. By including parts for both 3- and 4-gear transmissions, flat and gullwing front suspension arms, and V2 and VTS slipper solutions, this is the most tunable car Team Associated has ever made. Strength, longevity and style have also been improved by including carefully selected Factory Team option parts like: FOX� Shock Bodies with Genuine Kashima� Coat, titanium turnbuckles, blue shield ball bearings, aluminum front axles, and an aluminum rear ball stud mount.
With so many options packed into one kit, the value of this kit is unparalleled. Parts are already available at most hobby dealers. This is a LIMITED PRODUCTION vehicle available while supplies last.
Features
- Factory Team FOX� shocks with Genuine Kashima� Coat provide the smoothest piston/shock body fit, allowing the vehicle to land solidly
- Both 3- AND 4-gear transmission parts are included to allow tuning of chassis pitch for different grip conditions
- Both flat front suspension arms AND gullwing suspension arms allow for steering feel and stability adjustments
- JConcepts™ Finnisher B5M front wing for additional stability at high speed
- Factory Team aluminum rear ball stud mount for added strength
- Heavy-duty rear axles for added strength
- Both V2 AND a VTS (Variable Torque multi-plate Slipper) slipper configurations provide options for feel and rotating mass
- Aluminum rear clamping hex with laser etching provide tight wheel to axle fit
- Narrowed hard-anodized aluminum chassis with centralized mass and mid-motor position for improved handling on high-grip offroad tracks
- Factory Team lightweight aluminum front axle/hex adapter and large front wheel bearing for added durability
- Factory Team titanium turnbuckles provide strength and weight savings
- Team Associated B5M clear body and wing included


SET-UP SHEETS (both cars):
Official AE Setup Sheets:
B5M Setup Sheets
B5M Lite Setup Sheets
Petitrc.com Setup Sheets:
PetitRC Setup Sheets
FACTORY TEAM PARTS:
All Factory Team Parts can be found here:
AE Factory Team Parts
TIPS and TRICKS:
How to free up your ball cups:
http://www.youtube.com/watch?v=cH22wIvDMTg
http://www.youtube.com/watch?v=gUzAutNtMtI
OTHER RESOURCES
Petit RC Page - Very Comprehensive guide for the B5 and B5M
Tuning with Camber Links - Long read, and a different way to tune your car, but it can make more sense for some.
Razathorn's Camber Link Tuning Guide
Darcness's Tuning Guide
Martin Crisp's Car Tuning Guide - Onroad oriented, but very informative.
Learnsetup.com - App based setup sheets. Also by Martin Crisp, $10/year subscription.
Anti Squat article
How to set your slipper, rebuild your diff and adjust your ball diff (courtesy of Racer53):
http://www.youtube.com/watch?v=IIYPo..._order&list=UL
http://www.youtube.com/watch?v=Ct1CU...eature=related
http://www.youtube.com/watch?v=hKpW9..._order&list=UL
http://www.youtube.com/watch?v=_XZCp..._order&list=UL
How to build your ball diff (via Team Associated's youtube channel):
http://www.youtube.com/watch?v=AB7-q...sdtQb2fzebdyog
How to build and bleed your shocks (via Team Associated's youtube channel):
http://www.youtube.com/watch?v=-hU6B...sdtQb2fzebdyog
Other Diff building videos:
https://www.youtube.com/watch?v=uI0MbCcWdBA
https://www.youtube.com/watch?v=M_u9yKV2TPM
https://www.youtube.com/watch?v=VMobqSS3JkI
https://www.youtube.com/watch?v=Uf0do3YArfM
https://www.youtube.com/watch?v=EToj2yX76NU
https://www.youtube.com/watch?v=oh8_YrZ-gbI
AFTERMARKET PARTS:
Gearbox Spacers (via Shapeways)
Gearbox spacers
WWHD Machined Delrin Laydown Transmission:
WWHD Laydown transmission
Red Workshop "Low CG" transmission for carpet and astro turf:
Red Workshop Facebook Page
Xfactory:
Infinity Graphite Chassis Conversion
Bezerk RC (out of Australia):
Battery strap
Graphite Chassis
Graphite Lyte Chassis
Aluminum Chassis Lightning Service
Graphite front shock tower, narrow
Graphite front shock tower, wide
RC Promask:
RC Promask Parts
Plan B Racing:
Plan B Racing Parts - Graphite chassis, carbon fiber front shock towers, carbon fiber motor plate for 3 gear transmission and more
McKune R/C:
Slipper pads
B5M Battery Brace
Inline Battery Brace
T-Work's R/C:
Offset caster block bushings
Aluminum shock bushings
Factory R/C:
Carbon Fiber Battery Brace (Eliminates the battery foam)
Carbon Fiber Lockout for Schelle slipper
30mm fan mount and waterfall
Ceramic Bearing Kit
CB Custom's Cut Gears:
Custom Cut Gears
WillS's Fan Mount:
3D Printed Fan Mount
Alton Design Innovations Fan mount (replaces stock waterfall)
ADI Fan Mount
Fan Mount by xMOx on shapeways:
Shapeways fan mount
Fan mount #2
30mm Fan Mount
Fan Mount by ebrewste on shapeways:
Ebrewste Shapeways fan mount
ebrewste fan mount on shapeways (soft mount)
New front axles with 5* of kingpin inclination by Elvo on shapeways:
Inner bearing insert
Outer bearing insert
"Low Rider" low CG transmission for Carpet and astro turf by AC RC Gear on Shapeways:
Left Gear Box Half
Right Gear Box Half
Vision Racing Products
X Pistons
Carbon Fiber Battery Brace
Carbon Fiber Wing Brace
Slipper pads
Hot Racing:
Aluminum Front Axles
Vented Twin Slipper Clutch
Aluminum Diff Halves
Aluminum Servo Mounts
Aluminum Caster Blocks
Aluminum Steering Blocks
Aluminum Rear Hubs
Graphite Link Mounts (replacement)
Boom Racing:
Aluminum Rear Arms
Aluminum Front Arms (Flat)
Aluminum Front C-Hubs
Alluminum Rear Hubs
Aluminum Front Shock Tower (Flat Arms)
Aluminum Front Steering Knuckles
PSM R/C:
Aluminum Shock Standoff
Aluminum Caster Block Insert
-1mm Offset Front Axles
+1mm Offset Front Axles
0 Offset Front Axles
Aluminum Rear CVA Axles
5mm Carbon Front Shock Tower
Casper R/C Ceramic Caged Thrust Bearing for Diff:
Casper R/C
Imbue R/C:
12mm Brass pistons
Aluminum Front Axles
Carbon Fiber Motor Plate
Carbon Front Shock Tower
Stiky Liks Racing Concepts:
Stik Liks Milled Chassis
JConcepts:
Honeycomb Chassis
Spring Steel CVA's
Spring Steel CVD's
Aluminum Servo Mount
Narrow Front wing
Wide front wing
Milled Motor Plate
4 Hole Rear Camber Mount
Aluminum Steering Rack
Aluminum wing mounts
Aluminum Wing Shim
Aluminum Steering Bellcranks
Aluminum Motor Mount
Aluminum Front Suspension Brace
Titanium Front Axle
Aluminum Rear Hexes
Aluminum Front Hexes
Carbon Fiber Battery Brace
Chassis Protector
Fin Titanium Turnbuckles
Pre-trimmed rear wing
Tsunami R/C (Carbon fiber motor plates and battery braces):
Tsunami R/C Store
RDRP:
Low Profile Wing Mounts[/url
Battery Thumb Nuts
Aluminum Bellcranks
Spur Gears
Aluminum VTS Slipper Parts (use with AE slipper pads)
Aluminum Shock Cups
Aluminum Shock Mounts
Aluminum Steering Rack
Aluminum Motor Plate
Brass Front Bulkhead
Aluminum front bulkhead
Sumo-Racing (Both B5 and B5m battery braces):
Sumo Racing Carbon Battery Braces
SNR Graphite:
SNR Battery Brace
Diggity R/C:
Diggity Carbon Fiber Battery Brace
Stick-it1 Graphics (custom name decals)
Stick-it1 Graphics
Epic1Designs:
Chassis Protectors
TBoneRacing:
Nylon Rear Skid Plate
RCShox:
2-Stage shock pistons
Garodisc Slipper Pads - new style
Garodisc Slipper Pads - old style
Proline:
Graphite Front Shock Tower (Flat Arm)
Graphite Front Shock Tower (Gull Wing)
Exotek Racing:
Aluminum Servo Horn
B5M/B5 3 gear Flight motor plate
Alloy Rear Hanger with shims
Front Hinge Pin Brace
3-Gear Aluminum Vented Motor Plate
B5/B5M Vented Flight Motor Plate
Aluminum Rear Camber Mount
Titanium Front Axles
Aluminum Topshaft
Carbon Fiber Front Shock Tower (Flat Arm)
Carbon Fiber Front Shock Tower (Gull Wing)
Aluminum Rear Clamping Hex
Slipper Eliminator
Carbon Fiber Battery Brace
Aluminum Rear Wing Mount
Aluminum Wing Buttons
STRC:
Aluminum Front Bulkhead
Aluminum Steering Bellcranks
Aluminum Front Suspension Brace
Aluminum Front Castor Block
Aluminum Rear Hubs
Aluminum Finned Motor Plate
Aluminum Shock Mounts
Aluminum Rear Camber Link
Carbon Fiber Battery Brace
Titanium Screw and Aluminum Locknut Kit
Protek:
Blue chassis protector
Black Chassis Protector
Titanium Screw Kit
Pan Car Sized 2S pack for stock racing
Titanium Rear CVA Axle
RzHobby:
Stainless Steel Screw Kit
Titanium Screw Kit
Fastener-Express:
Fastener Express Screws in Bulk
Bfast R/C (Diff rings, Diff Balls, Thrust Balls and more):
Bfast R/C
TKO Competition:
TKO Flat diff rings
Carbon Fiber Slipper pads
Bearing Lube
Gearbox Lube
Low Drag Bearing kit 3 gear
B5M wheel and hub kit
Slick Diffz (no longer available, see TKO and Bfast):
Flat diff rings
Flat diff rings with carbide balls
Diff rings, carbide balls, ceramic thrust (caged)
MIP:
Aluminum T nut with insert
5 n 1 Gear box
All in One top shaft (works with 3 and 4 gear)
3 Gear transmission with Aluminum Gear Case
Puck Drive System with Shiney CVD's - For Mod
Puck Drive System with Bi-metal CVD's - For Stock
Bypass Shock Valve System
Aluminum Top Shaft
Lunsford:
Titanium Turnbuckles
Titanium Front Axles
Titanium Shock Mounts
Titanium Screw Kit
Titanium Ball Stud Kit
Avid:
Shock Collars and lower shock caps
Ceramic Caged Thrust Bearing for Diff
Carbide Caged Thrust Bearing for Diff
Shock Standoffs
Triad Evo Slipper Clutch
New Triad Plates
Aluminum Wing Buttons
De-Shielded Transmission Bearing Kit
Titanium Ball Stud Kit
Aluminum Spring Cups
Hate kit bearings? Build your own here:
Custom Bearing Builder
Aluminum Battery Thumb Screws
Vented Motor Plate
Schelle Racing:
4 gear vented motor plate
3 gear vented motor plate
Shock Tower Plugs
Rear Pull Hinge Pin
C Mounts
V2 Pistons
Centering Kit
Aluminum Rear Hubs
B5/B5M hub replacement bearings
Ceramic Bearing set for 3 gear transmission
One piece ceramic thrust and tungsten carbide diff balls
Titanium Screw Kit
B5 Steering Bushing Set
Aluminum Shock Standoffs
Carbon Battery Strap
Chassis Protector
Aluminum Top Shaft
Ceramic Bearings - Transmission
4mm Aluminum Serrated Wheel Nuts
Nova Slipper Clutch
Nova Lockout Plate
64 Pitch 88 tooth Spur
64 Pitch 96 tooth Spur
Aluminum Rear Arm mount
Other Links
Mcpappy Pinion Carrier:
Pinion Tree, 64 pitch, but you could probably fit 48 pitch ones.
Stiky Kicks Tire Sauce:
Sticky Kicks
AFTERMARKET BODIES:
Sweep Racing:
Muzzle Body
FTW:
B5M Reactor Body
Jconcepts:
Finnisher Body
Silencer Body
Warrier LW body
S2 World's Body; light weight
S2 Body
S2 World's Body regular weight
S2 B5M FL Body
B5M Warrior Body FL
Proline:
Phantom Body
Predator Body
RCPromask:
RC Promask Body
TeamAzarashi:
Team Azarashi
Penguin:
Penguin Body
Frequently asked Questions and Answers
Q: I'm missing parts or parts are not manufactured properly. Who can I contact?
A: Contact AE: http://teamassociated.com/contact/
Q: When is the Factory Team version coming out?
A: THERE IS NO OFFICIAL FACTORY TEAM KIT. BUT there is a new kit for stock racers though! And now a Champions Edition kit!
Q: How much weight do some of the lightweight transmission pieces save? Do they make a difference?
A: Here's a fantastic article on lightning your B5m courtesy of zeakemedia: http://www.prolineracing.com/blog/20...nd/#more-32666
Any lightweight topshaft, diff halves or cut gears will go to helping your transmission spin up faster, which is a real advantage in stock.
Q: I'm getting binding/grinding in my front wheel bearings, how can I fix this issue?
A: There was/is an issue with the crush washer that resides between the two front wheel bearings. AE has addressed the issue with a running change. To fix the issue, simply get a new crush tube, buy better quality bearings (plenty of places sell bearings by the pack) or monitor the bearing inserts for molding issues. Also try a clamping hex with axle in the front (best solution).
Q: Should I buy a B5R or a B5M?
A: If you can afford it, buy both. If your local track is generally high bite, go with MM. If you race on a variety of track surfaces, having two cars is the best way to go.
Q: What do I gain by cutting into the rear waterfall?
A: More flex in the rear of the car, which can affect traction.
Q: What Batteries Fit the B5M?
A: All "Shorty", "Saddle" and "Square" packs will fit. If you run stock, you may want to try a 2s pan car pack like this.
Q: How do I convert the VTS to a two-pad system?
A: The best way is to get a second #9603 pad and use the #7495 Vented V2 Slipper Hubs to make a true two-pad slipper. If you don't want to spend the extra cash, just eliminate one of the #91177 pads and the #91178 VTS Plate. To be honest, the Avid Triad and Schelle Nova are good, more consistent replacements for the stock slipper system.
Q: I just bought the aluminum steering bellcranks. Where does this little washer go?
A: It goes between the bearings. It acts as a crush washer.
Q: Do I need to lube the gears in the transmission?
A: This is a strictly personal preference, but a little grease doesn't hurt anything. We are talking about a small dab of grease, in one spot, on each gear. What kind of grease you ask? Black or clear AE grease work, shock oil works; just about anything that will provide a little lubrication.
Q: What gearing do I start with?
A: This question is very track dependent, but for Stock, start off with a 66, 69 or 72 spur and 28-34 pinion. For Mod, follow the chart in the manual to start. Always gear for temperature, and check after every practice run to ensure you are not building up too much heat.
Q: My turnbuckles keep popping off when I try to adjust them, how do I fix them?
A: Make sure you have greased the threads with either black grease or chapstick. You may want to use a drill to "work" each turnbuckle into the cups (picture coming soon). This will cut and work the threads into the ballcups making it easier to make adjustments.
Q: How can I free up my ball cups? They are too tight!
A: See this or this video. Also try to polish and/or sand (with high grit sandpaper) the stock ball studs. Lunsford and Avid both offer titanium ball studs which should have better tolerances. See above parts listing for each.
Q: What hop-ups should I get for my new kit?
A: (If I had a dollar for every time this question comes up in a thread)
 Here's a list of popular upgrades:
- Clamping Front and Rear Hexes
- FT Rear Aluminum Hub Carriers
- AE X-Rings
- Avid Triad or Schelle Nova Slipper Clutch
- Ceramic Ball Bearings
- Aluminum Rear Camber mount
- Carbon Fiber Battery Brace
- Aluminum Top Shaft
- Ceramic Thrust Balls
- One piece Ceramic Thrust Bearing
- Carbide Diff Balls
- Bfast or TKO Diff Rings
- Gear Diff
- Titanium or Aluminum Screws
- Aluminum Front Arm Brace
- Aluminum A and D mounts
- Brass A and D mounts
- Schelle or Avid Shock Bushings/Mounts
- Exotek Rear Wing Mounts
- Aluminum Wing Buttons
- Aluminum Steering Rack
- Titanium Turnbuckles
- Titanium Ball Studs
Q: I just bought the aluminum rear hubs. Which sway do I mount them?
A: B5M = etching to the rear. B5R = etching to the front
Q: What does adding the B5's rear arms do for handling?
A: Adding the B5's rear arms shortens the wheelbase of the B5M. There are two things to remember when adjusting the wheelbase of your car. The first point is that the shorter the wheel base, the easier it is for the car to "rotate" in the corner, which can translate into a looser car than a long wheel base scenario. The second point is that as you adjust the wheelbase, you are adjusting where the center balancing point of the car is relative to the front and rear of the car. In other words, you are moving the "static weight" of the car either to the front or the rear of the car. This affects the way the car will react while turning. For more information on how to adjust your car, see the above tuning links.
Q: What does adding the flat front arms and tower do for the car?
A: This is one of the better answers to this question:
Draw it out on paper and watch how the arc of the shock is different between the two when going from full extension to full compression. Starting from full extension you can see that the lower shock pivot moves toward the centerline of the car quicker (thereby less leverage) with the flat arms. In short the progression of the shock and spring are different. The tower is used to correct the droop when using the flat arms. I liked the improvement of the flat arms and tower though, I found it easier to drive regardless of the physics.
Q: Do the AE X-Rings make a difference in the shocks?
A: Yes! They are expensive, but work better than stock, IMHO.
Q: My B5M seems heavy. What hop-ups do I need to lighten it up for Stock racing?
A: Here's a full list of items that will lighten up the car and make it a stock champion:
- Xfinity carbon chassis by Xfactory, carbon chassis from PlanB or Bezerk or Stiky Liks milled chassis, or AE's B5MFL chassis
- Tsunami RC or Plan B Carbon Motor Plate
- Cut Gears from Speedy's RC, CB Custom or RCShox
- MIP, Schelle, AE or Exotek Aluminum top shaft
- MIP Bi-Metal Puck System
- Protek Titanium Axles
- Avid, Schelle or Acer Ceramic bearings for the transmission (optional)
- Exotek or Schelle Slipper Eliminators
- Avid Triad or Schelle Nova Slipper Clutches
- Titanium or Aluminum screw kits (or a mix of both)
- Carbon Fiber Battery Brace
- Low profile servo
- Titanium turnbuckles
- 14-16 guage wire
- Protek 2s Pan car pack
Q: I see both AE and MIP offer a 3 gear transmission; is it better than a 4 gear?
A: See this:
It changes the direction the motor rotates/torques against the chassis. In a RM car, you want the motor's rotation direction to put pressure on the front tires, so the dang thing can turn, because there is so much weight out back. It gives the car a balanced feeling. RM car's accomplish this with a 3 gear trans.
In a MM car, because all of the weight of the car is inside the rear axle, the balance sits the other way. On-throttle, they CAN lack REAR bite, instead of front bite. So you run a 4gear trans, so that the rotation of the motor torques the chassis to put pressure on the rear tires instead. If you run a 3 gear trans in a MM car, you have the potential to really limit weight shift to the rear of the car.
This is stuff I learned 20 years ago, and still have modern day experience with when I was running the DEX and Cougar (which only had 4gear option). It's published info you can go look-up yourself. As a matter of fact, Durango has a GREAT little graphical diagram that teaches the whole thing.
I will venture to say that MOST tracks, the 4gear will be better. On SOME tracks that have high enough traction... the 3 gear will be better. Either way, releasing the truck stock with a 3 gear would be a mistake, as it certainly won't be the way to go for most tracks. So in conclusion, it is my opinion that it will be a tuning option for those that want the most amount of on-throttle steering as possible, which will usually only be tracks with the highest levels of traction.
Kurt Wenger A quick lesson on 3-gear...here we go. I personally believe the difference in drag is nothing compared to the difference in car handling. 3-gear won't give you the feeling of more power.
There are 2 things the gearbox (and thus the motor orientation) change on the handling:
1) torque effect: When you hit the gas, with a 4-gear, the motor pitches the car to the rear, adding grip on power. The 3-gear orientation pitches the car towards the front, resisting weight transfer. The opposite is true on decelleration/brakes. 3-gear makes the motor forces resist the natural direction of weight transfer
2) gyro effect: When you turn, the 4-gear orientation makes the motor add to the lean of the car, while the 3-gear orientation resists lean.
Thus, when you drive the 3-gear, the car feels less reactive/more mellow, with less on-power traction. This is generally good for extremely high grip tracks, or drivers that want the car to stay flat in the turns....3-gear generally stabilizes the car but you need to make a few changes to get enough rear grip. I wouldn't recommend it on a loose or low-grip track.

The rotation of the motor is in the same direction as the rotation of the wheels. The torque of the motor is in opposition to the rotation of the motor and is ‘aimed’ between the motor and the contact patch of the tyre. This causes the rear end to squat under acceleration aiding forward traction whilst keeping wheelies to minimum.

The rotation of the motor is in the opposite direction to the rotation of the wheels. The torque of the motor is in opposition to the rotation of the motor and is ‘aimed’ in front of the motor. This causes the rear end to squat very little under acceleration and provides very little mechanical grip unless there is already sufficient grip from the tyres. Thus forward traction is not as high as MM4.
Here's Frank Root's (TLR designer) take on 3 gear vs 4 gear:
| + https://youtu.be/HkthhHMhebk?t=474" title="View this video at YouTube in a new window or tab" target="_blank">YouTube Video | |
Ultimately, it comes down to personal preference, as *I* like the 4 gear (feels more natural to me) but a 3 gear can work for you, you really just have to try both out to see what works.
Q: What is the "inline" setup I keep reading about?
A: AKA, "The Tacompton Setup" the inline setup is an electronics configuration that puts the shorty lipo and the Esc inline on the chassis
Here's another inline layout, but with the ESC behind the servo (photo by splking1):
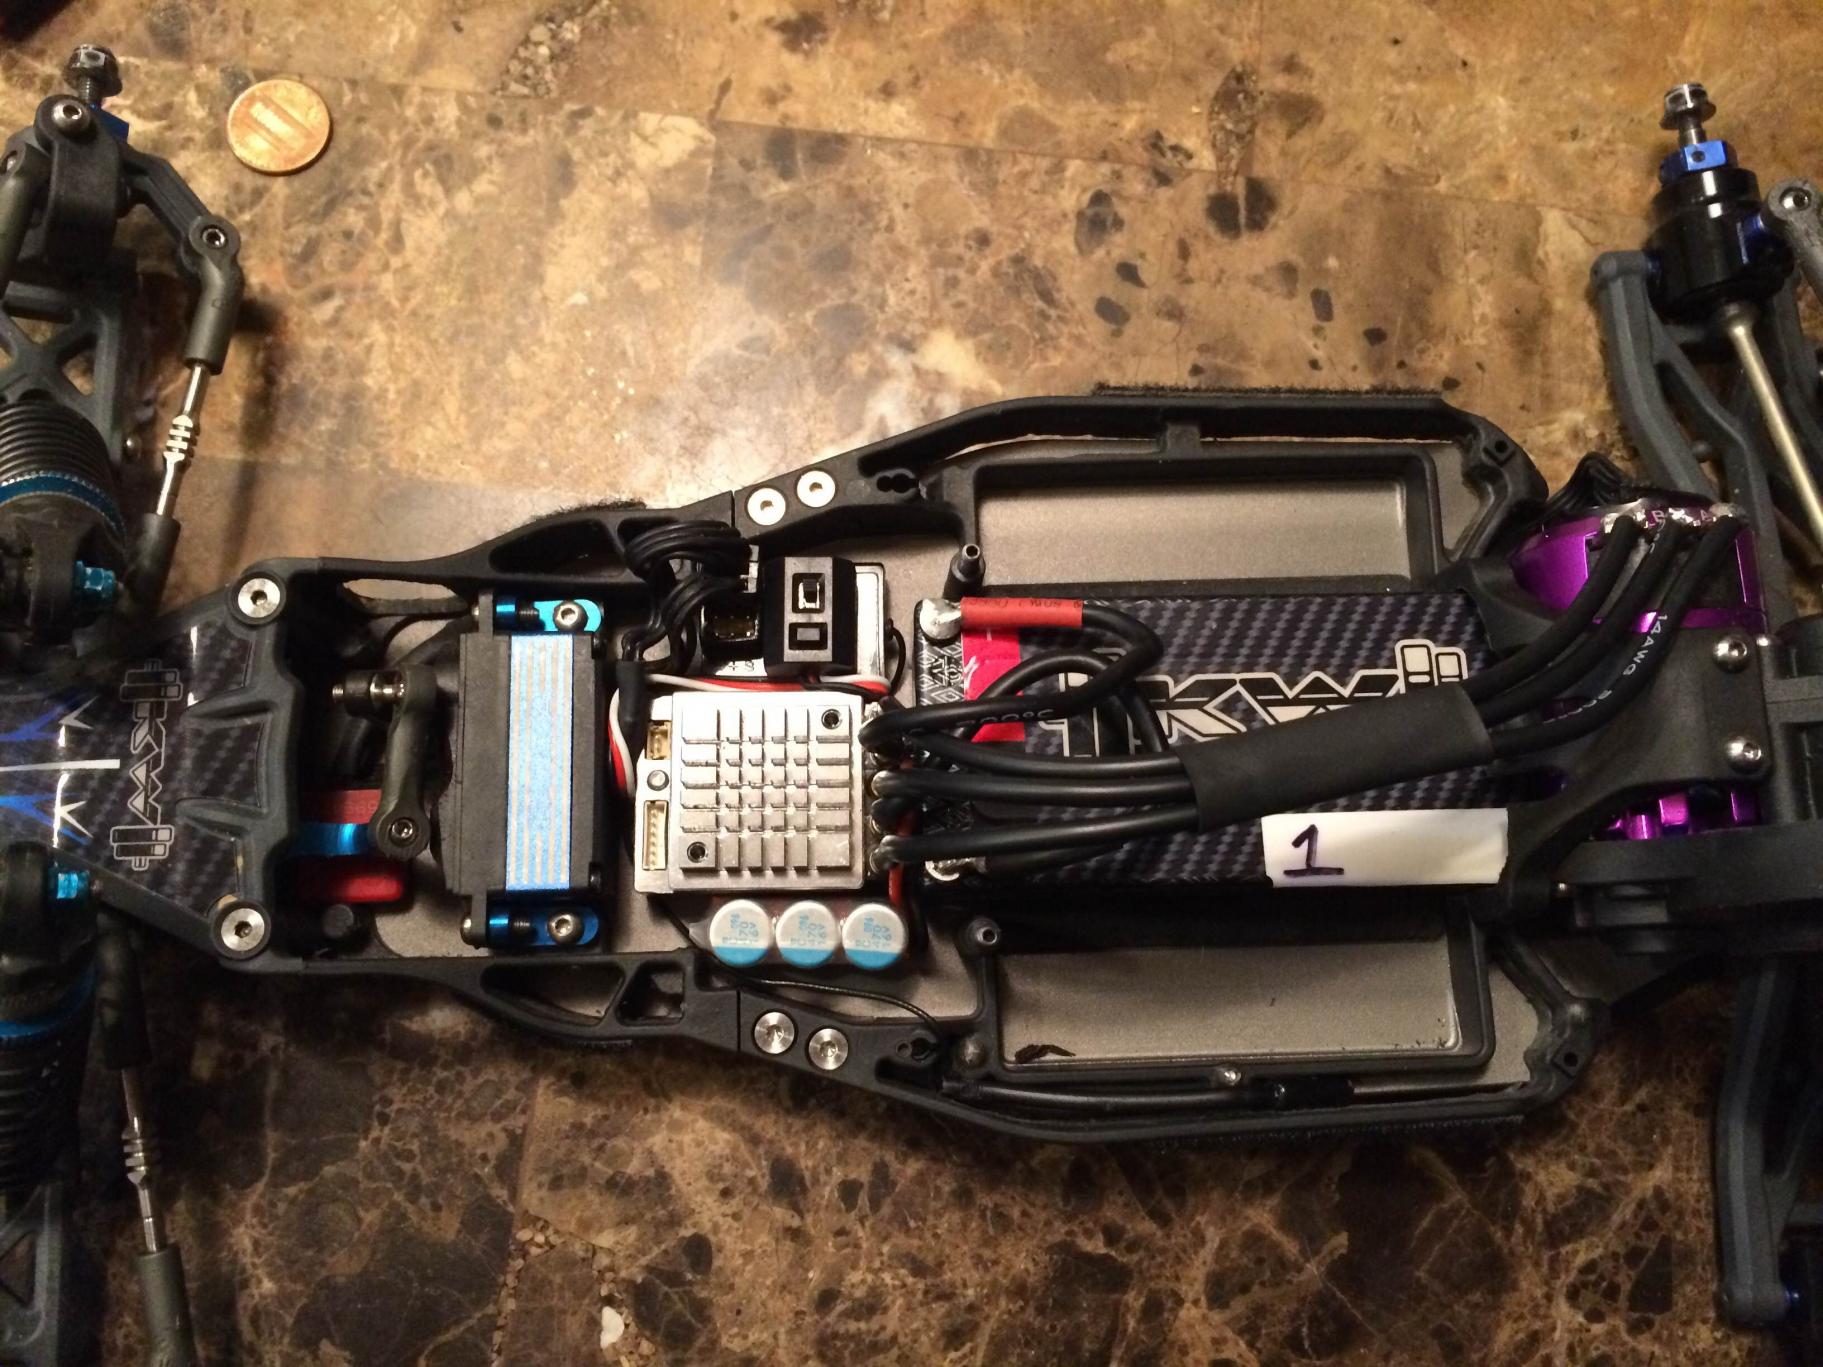
Here's yet another inline setup (photo by Wild Cherry):

Q: How can I cool my B5M motor?
A: You can get this fan mount or this fan mount or you can mount your fan in like in these pictures:
Note: The pictures I had in this section have been moved or deleted. I will add new ones soon.
**Don't forget to add holes in the body to allow for airflow for the fan!**
Q: How do I make the VTS Slipper work?
A:
Answer courtesy of Razathorn:
Those of you who had/have problems with the kit slipper, let me offer you my experience/advice on it for whatever it is worth.
First and foremost, I definitely noticed it was super grabby when the pads were new, and once it heated up, it would slip a lot more than when it was cold on the bench. My experience was I could hardly put the nut even on the top shaft before it would lock up and my car would do a back flip when holding the rear wheels, but after it would start slipping it wouldn't lift the wheels. Then if I let it cool a bit, it would lock solid again. It was pretty frustrating, at first.
The above being said, that is how my slipper acted when brand new, with pads that had a brand new surface on them. That's not how my slipper acts today at all. It's really consistent and I don't ever even adjust the thing. It's always, week after week, front wheels lift off the table a bit when I test it by holding the rear wheels. Serious.
The point here is this: BREAK IN and proper adjustment. It's different than the old two pad slippers, and the new VTS slippers really shine when you let the pads glaze up and the whole system becomes nearly maintenance free! Please do not take this as an insult if you had problems and went to another slipper and found better results. To each his own, I'm not here to judge, just to tell you what worked for me.
Some AE slipper history
It used to be that we constantly maintained the slipper by breaking the glaze off the pads and plates with sandpaper, scotchbrite, or even just an xacto blade scrape. On my old T4, I was doing this 1-2 times a night to keep the slipper from glazing over and being worthless. Every race I had to re-adjust and tighten the slipper, and by the end of the race it had faded a bit more and needed tightening. Then the VTS came out and what a difference that made. You had to stay on top of it on fresh pads, but once they glazed, it was set it and forget it.
VTS Secret
As I gained VTS experience, I developed a break-in and adjustment method that really worked well. The basic idea is this: Squish that spring good with pliers. Glaze your pads in well. Set the slipper when its warm. Details are below.
Glaze The Pads In
Set your slipper loose and let it slip on the bench for 3-5 seconds. Then, carefully avoiding the motor plate as it will be quite hot, hold the car in the air and run at partial to full throttle (whatever doesn't make your tires balloon into orbit) for 10 seconds to cool down the slipper clutch assembly for the next cycle. I suggest keeping the gear cover off for this to facilitate cooling. Repeat this cycle of slipping and cooling a few times to glaze the pads in, fully breaking them in to be consistent after adjustment. You'll know if you're fully broken in by how it accepts adjustment when you attempt it. After a few break in cycles, really run the car good in the air to cool it down for adjustment, or just let it sit for 10 minutes.
Proper Adjustment
You will want to adjust the slipper with it heated up and gear cover on. After proper break in and adjustment, the first cold slips on the bench should be ignored. Hold the rear tires down and roll on the throttle, don't jab it, to get the thing slipping--like the car would experience on the track. This will let the car either slip, or want to do a back flip, all without barking the diff instantly. If you find that it refuses to slip when cold after a good final adjustment, it was likely not glazed in all the way to begin with. In any case, the first slips on the bench when cold will be stickier but once it breaks free and gets a little heat in it, it should be consistent and adjustable. The adjustment process after the first few slips that get heat into the slipper is to run the tires in the air for around 5 seconds to cool it a bit, then put it right back on the table and check/adjust it by holding the rear tires and rolling onto full throttle. Repeat this process, slipping it and then cooling it down and checking/adjusting until it behaves as you want it. What you are doing is getting it warmed up to stable track temperature range on the bench and adjusting it there. When you check it cold on the bench the next time, after the first few "stickier cold slips", it should go right back to the behavior you had set when warmed up.
Bottom Line
The VTS slippers need to be set when warmed up to track conditions and retain their warm adjustment with pads that are fully broken in. The pads take some effort to break in initially. The process outlined above is actually pretty fast and second nature once you've done it. All you're doing is transition from holding the car's rear tires and slipping to holding it in the air and running it. You should really be doing this on ANY slipper clutch to accurately set it, stock or aftermarket.
Hope that helps.
Wayne
A: General consensus on this forum is that Carbide diff balls and Ceramic thrust balls make the best diff. I have used ceramic diff balls before, but it does require a tighter setting. I would suggest using the carbide/ceramic combo mentioned above, but make sure you follow a break-in procedure as outlined in the above links further up in this post.
Q:
A:
Last edited by RCBuddha; 07-10-2016 at 06:51 AM.
12-28-2013, 02:10 PM
#5
Updating Now
12-28-2013, 02:13 PM
#6
To the member who posted the 25 off coupon code at tower, I tried to preorder it, and I am not sure the code works for the B5.
Also, I saw somebody mention that super saver club members get it for around 200. Super saver is only 10 bucks to join right now, can anyone confirm the price of the B5 for super savers?
Also, I saw somebody mention that super saver club members get it for around 200. Super saver is only 10 bucks to join right now, can anyone confirm the price of the B5 for super savers?
12-28-2013, 02:14 PM
#7
Glad the mods picked you Jason... Your videos on YouTube are always informative.
12-28-2013, 02:15 PM
#8
Glad the mods picked you Jason... Your videos on YouTube are always informative.
12-28-2013, 02:17 PM
#9
It seems like associated took all the best things out of certain cars and designed the b5 series.
Last edited by Potoczak; 02-10-2014 at 04:51 PM.
12-28-2013, 02:22 PM
#11
12-28-2013, 02:24 PM
#12
hey racer mod I on a fixs in come ade sell toys off to get a new b 5m kit on layaway at lhs they don't know price yet to new and I told them I need a losi 22 4 but I get this kit now ill have a way to buy on line just need all the money up front. and they cant hook up esc and motor to well. my friend fixts to of there jobs
12-28-2013, 02:43 PM
#15