


RCCA Prize Tekno EB48 build...
 11-20-2012, 06:21 AM
#1
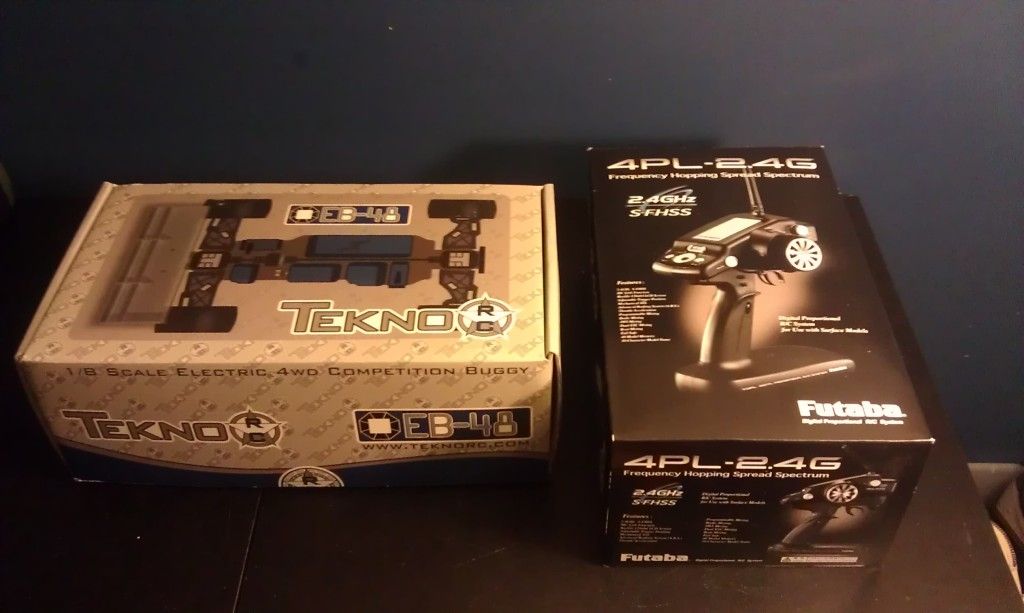
Hey guys started my Tekno Buggy build thread and wanted to share my build process with you guys...I won this thru a Facebook giveaway by RC Car Action magazine. I feel very honored to have one this and wanted to thank Tekno and RCCA for the opportunity.
This is my first NON-Monster Truck kit I am putting together. Im going to try to do a step by step build with lots of pics..This is my FIRST attempt at a true build thread so please bare with me lol...I know most of you all have already built it.
Ive been on here researching and asking questions about the build process and electronics and setups...Great guys over here and I learned alot in the past weeks.
If you guys have any advice PLEASE chime in during the build..I value all of your opinions!
Last edited by Kingclod27; 11-20-2012 at 06:52 AM.
 11-20-2012, 06:22 AM
#2
Finally started on the Buggy tonite while I was watching football.
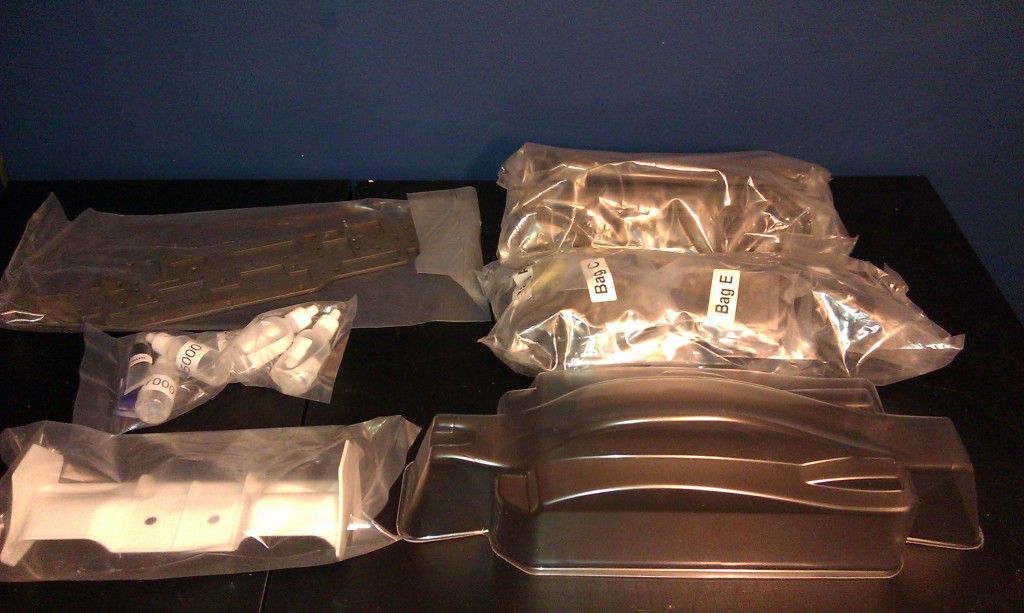
Started with the Center Diff Bag "A"
The updated directions stated I did not need the 4 shims on the spider gears for all 3 Diff gears. So tossed those to the side and gathered everything from Bag "A"....
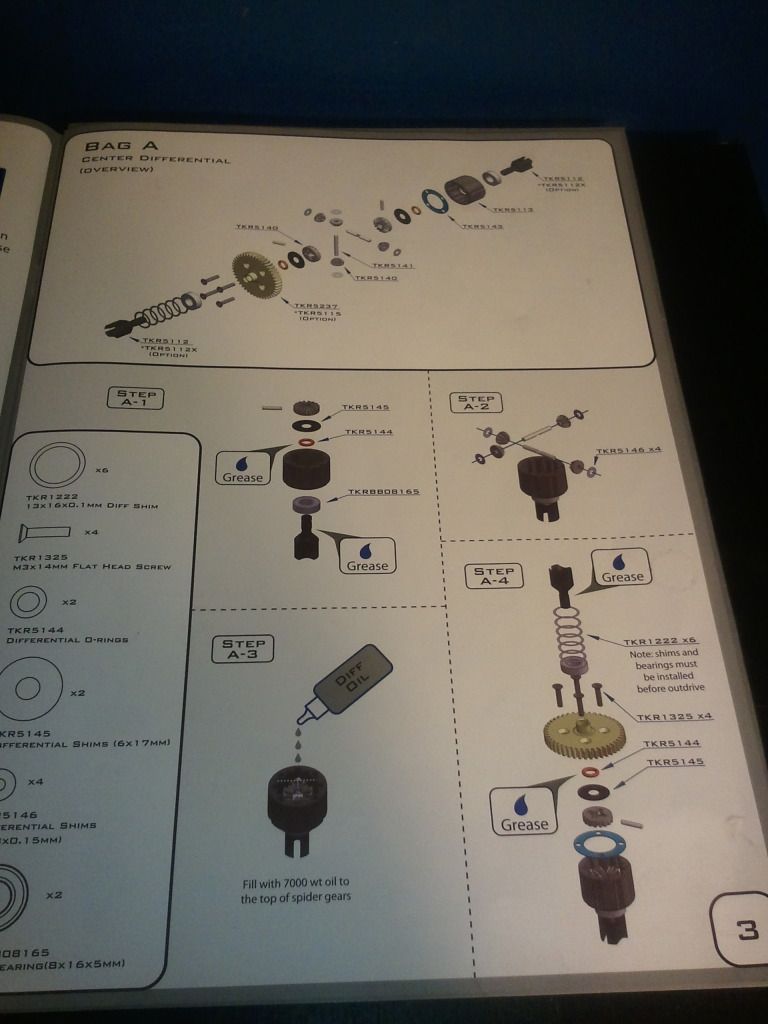
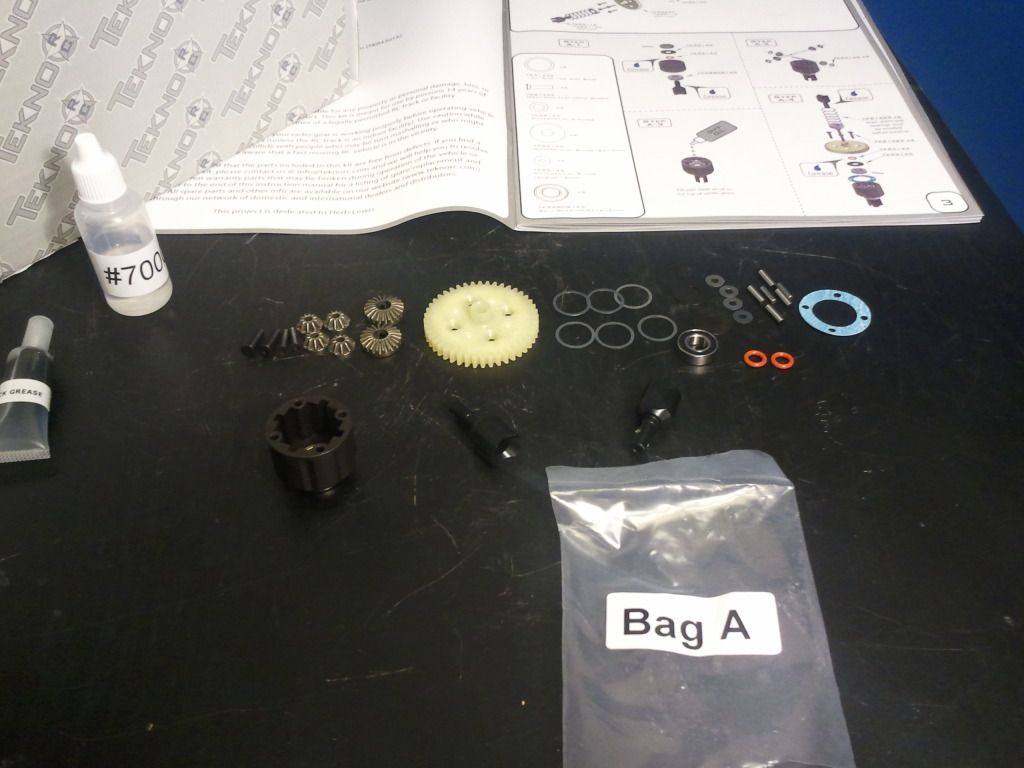
Assemble the diff up to the spider gear step and added the oil (#7000) up to the top of the gears.

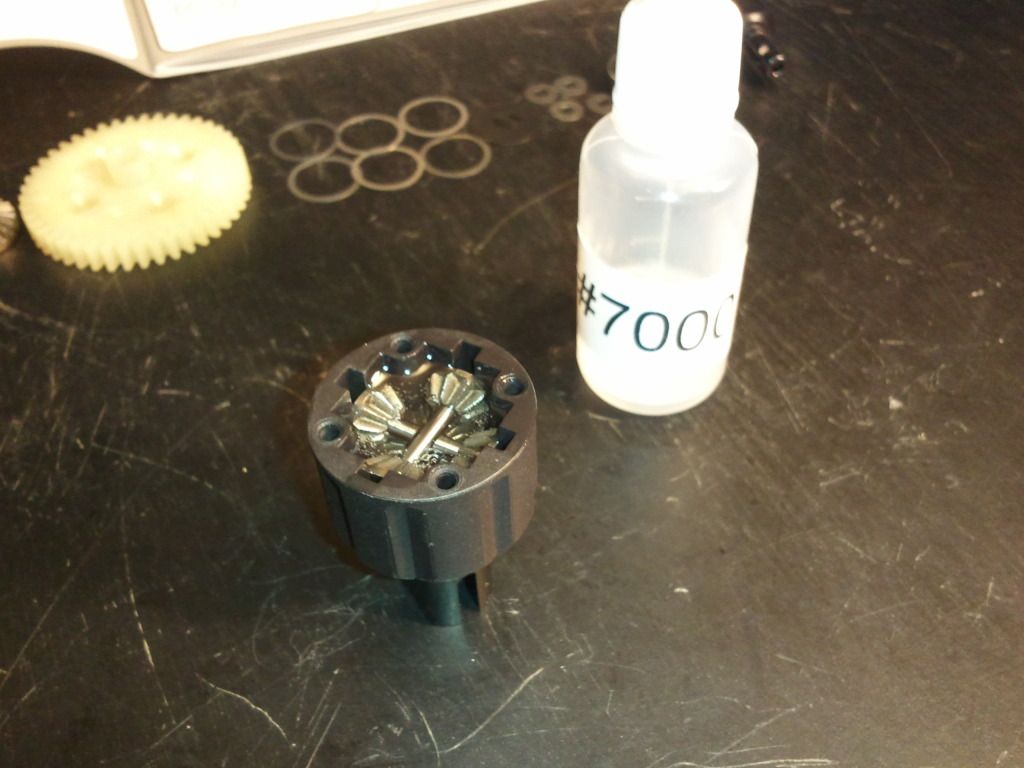
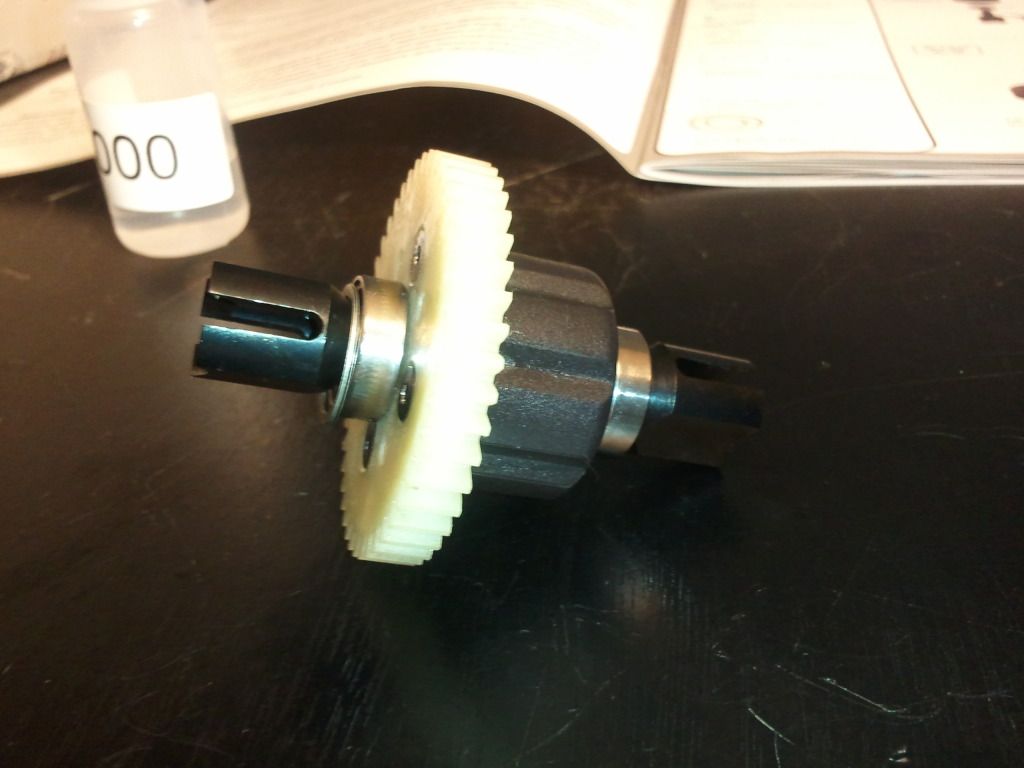
Completely assembled...
Started with the Center Diff Bag "A"
The updated directions stated I did not need the 4 shims on the spider gears for all 3 Diff gears. So tossed those to the side and gathered everything from Bag "A"....
Assemble the diff up to the spider gear step and added the oil (#7000) up to the top of the gears.
Completely assembled...
11-20-2012, 06:25 AM
#3
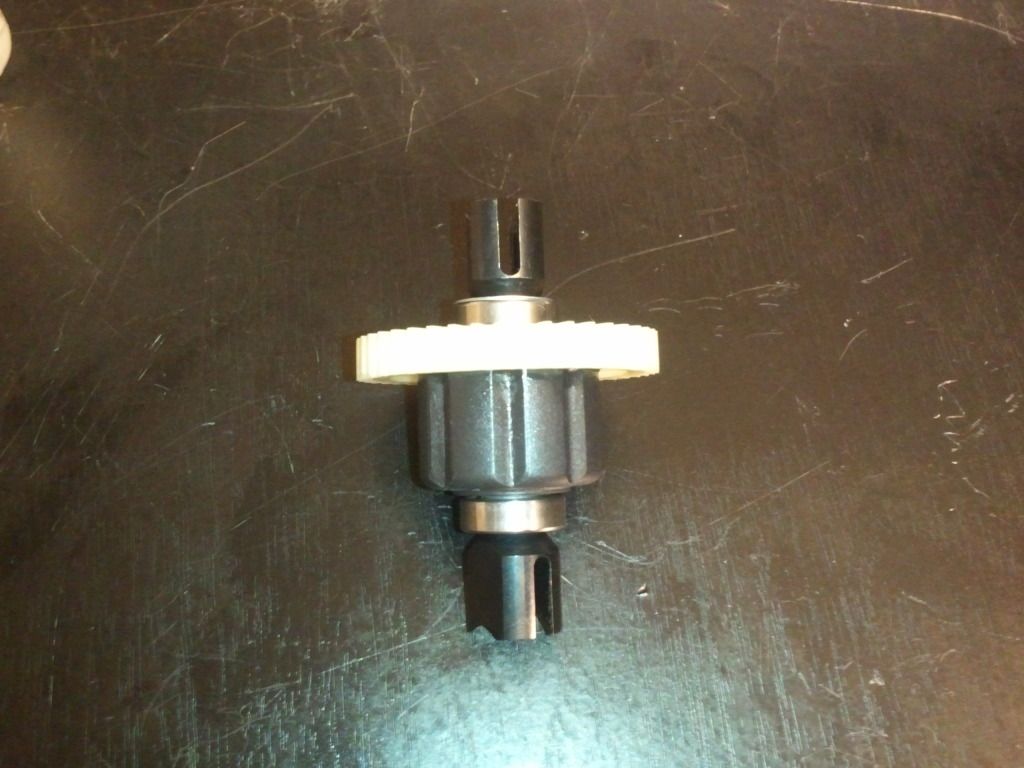
Next up was Bag "B"
Bag B is the front and rear Diffs....both built the same way but with different weight oils..The front Diff used #5000 oil and the rear used #3000 oil..
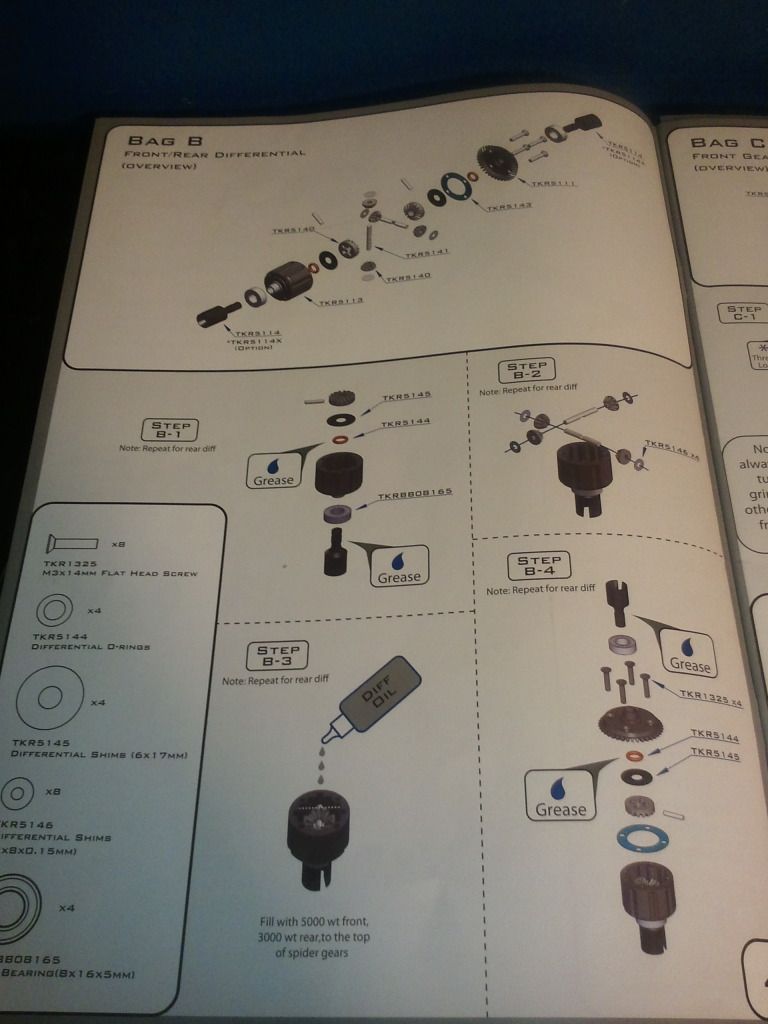
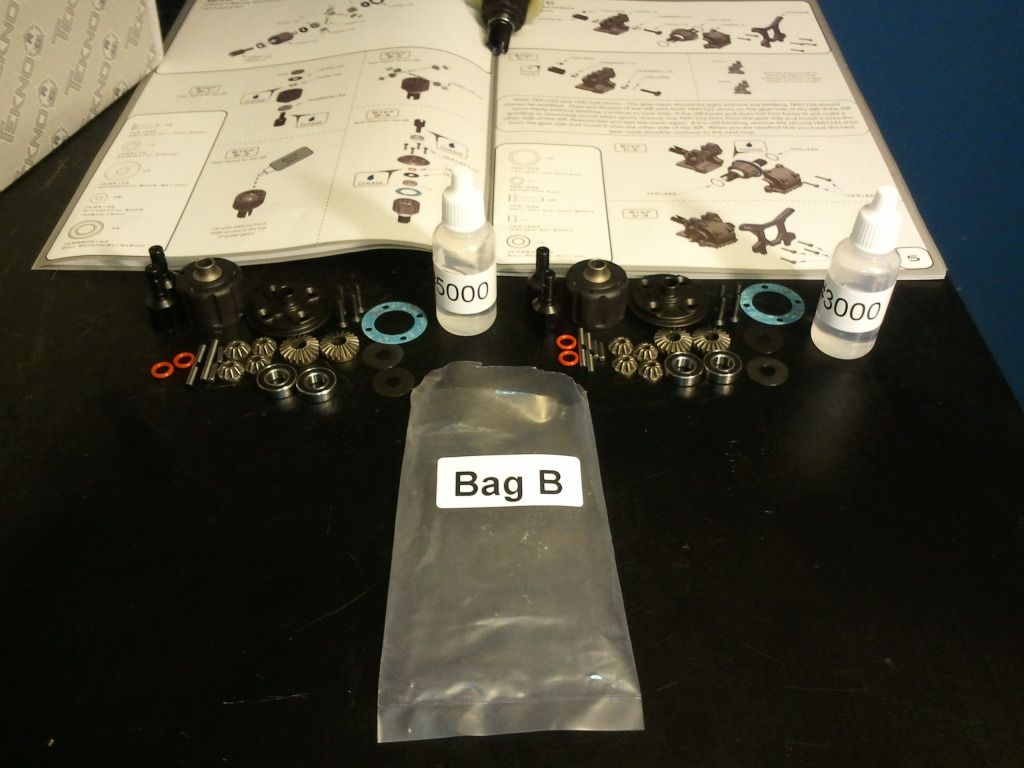
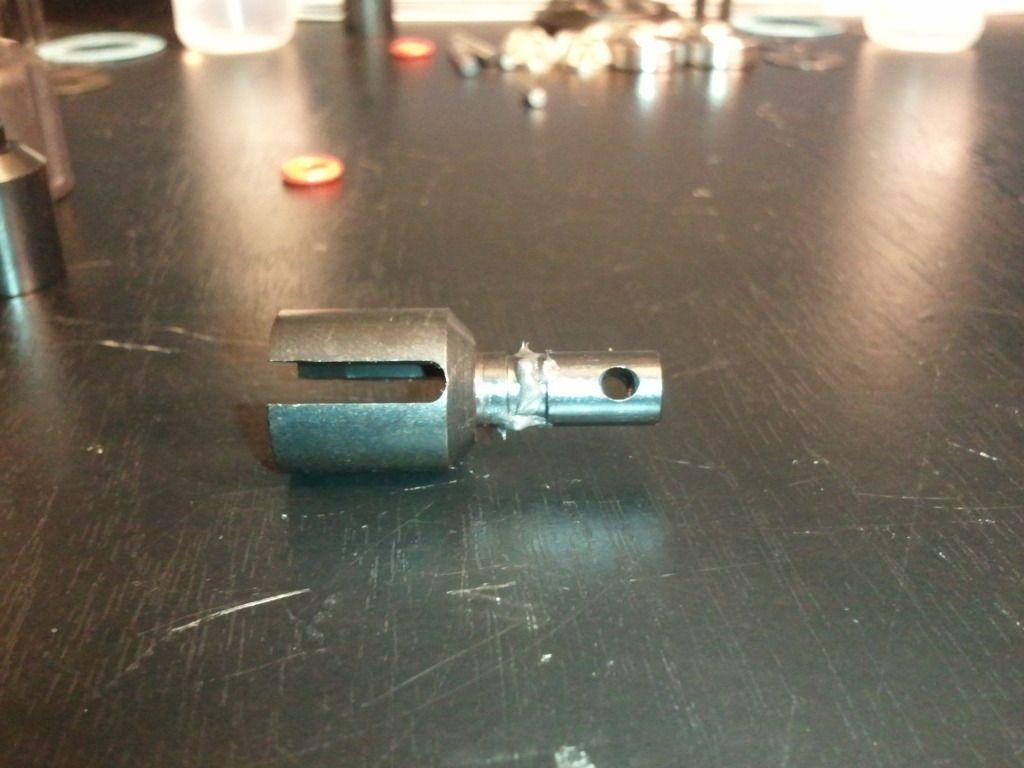
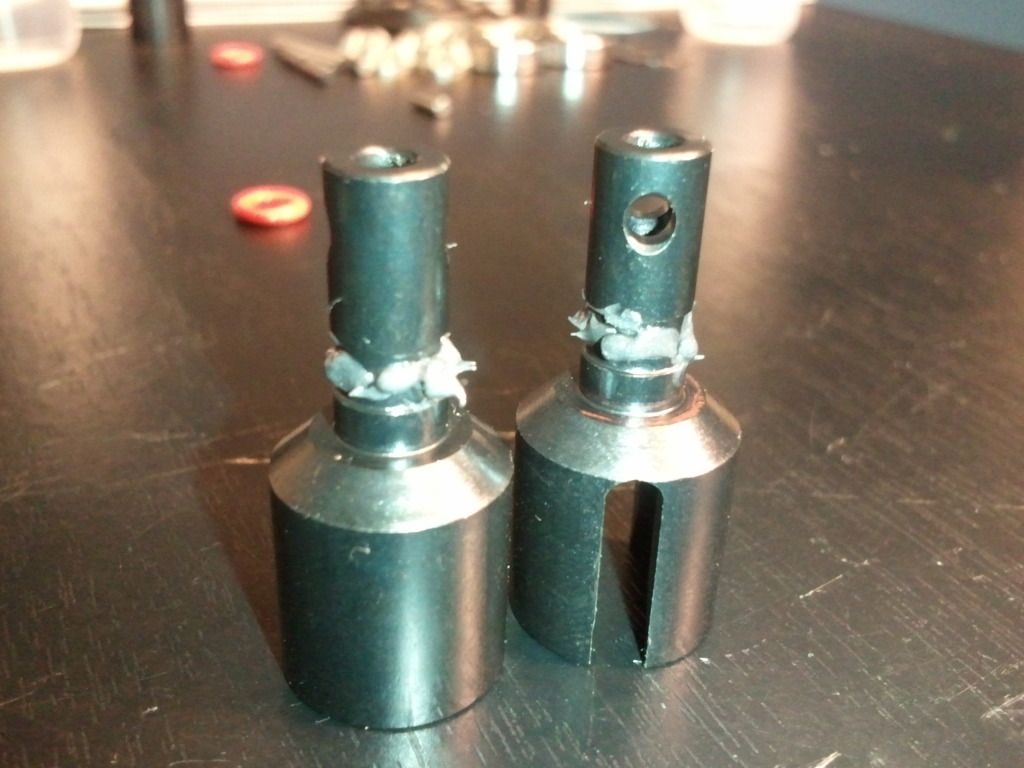
Started with greasing the output shafts again...
Then I built up the Diff halves and added the oil to the spider gears....
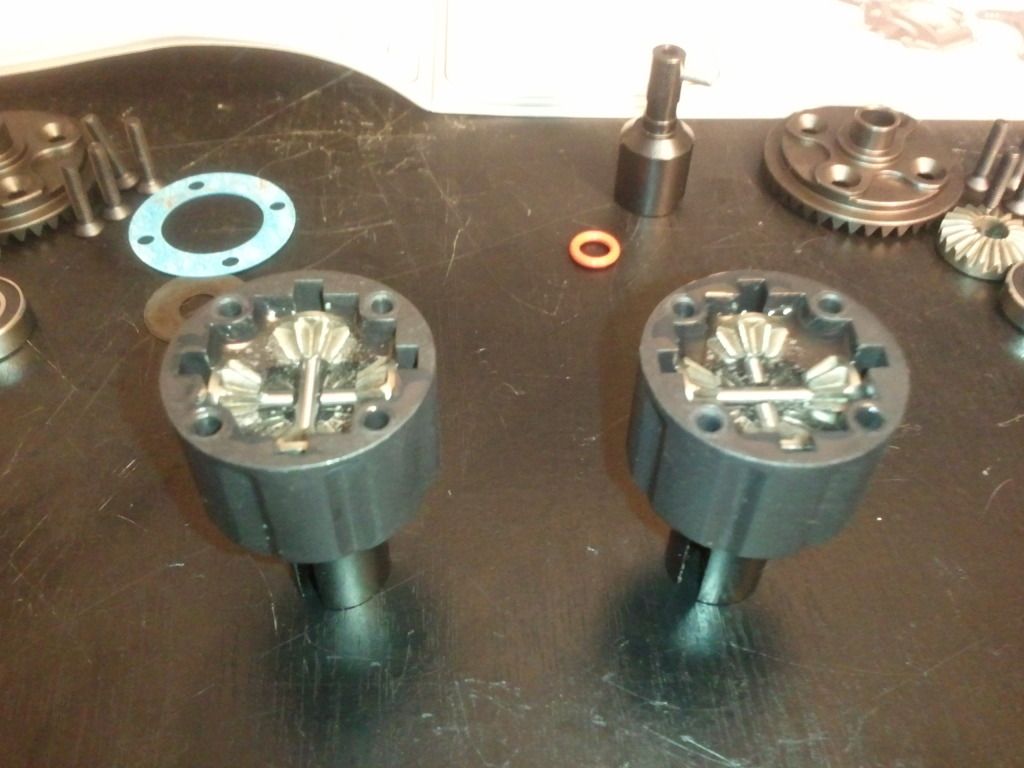
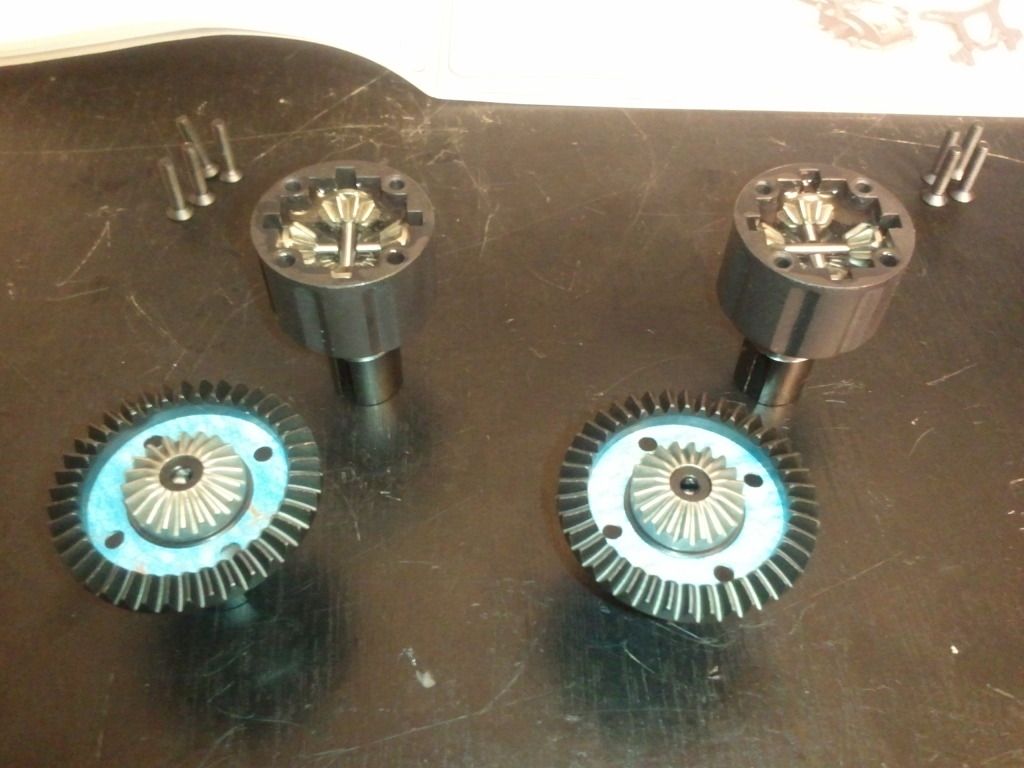
Here is the Front, Center and Rear Differential completely assmebled...
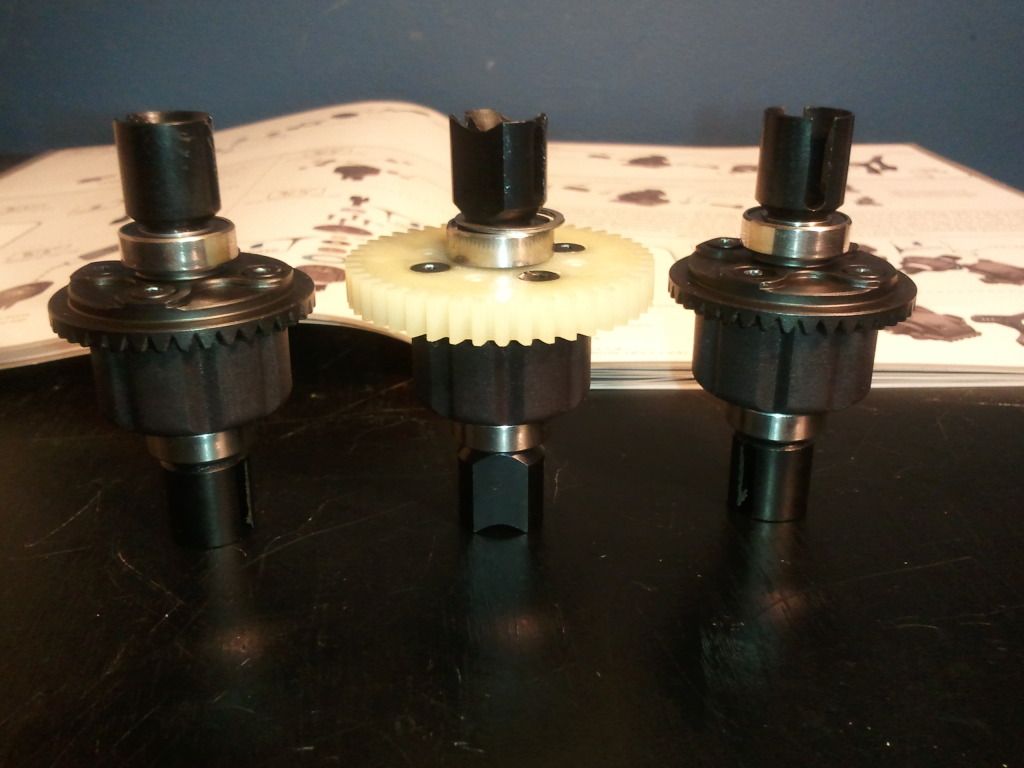
Bag B is the front and rear Diffs....both built the same way but with different weight oils..The front Diff used #5000 oil and the rear used #3000 oil..
Started with greasing the output shafts again...
Then I built up the Diff halves and added the oil to the spider gears....
Here is the Front, Center and Rear Differential completely assmebled...
11-20-2012, 06:25 AM
#4
Bag "C"...Front Gear box
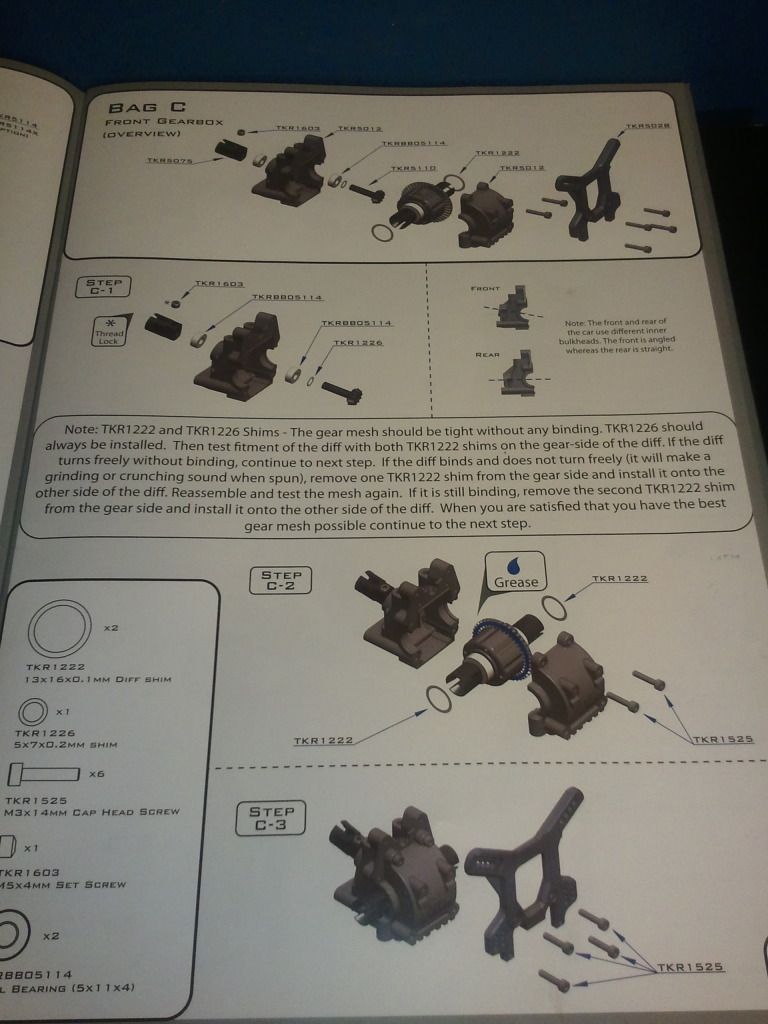
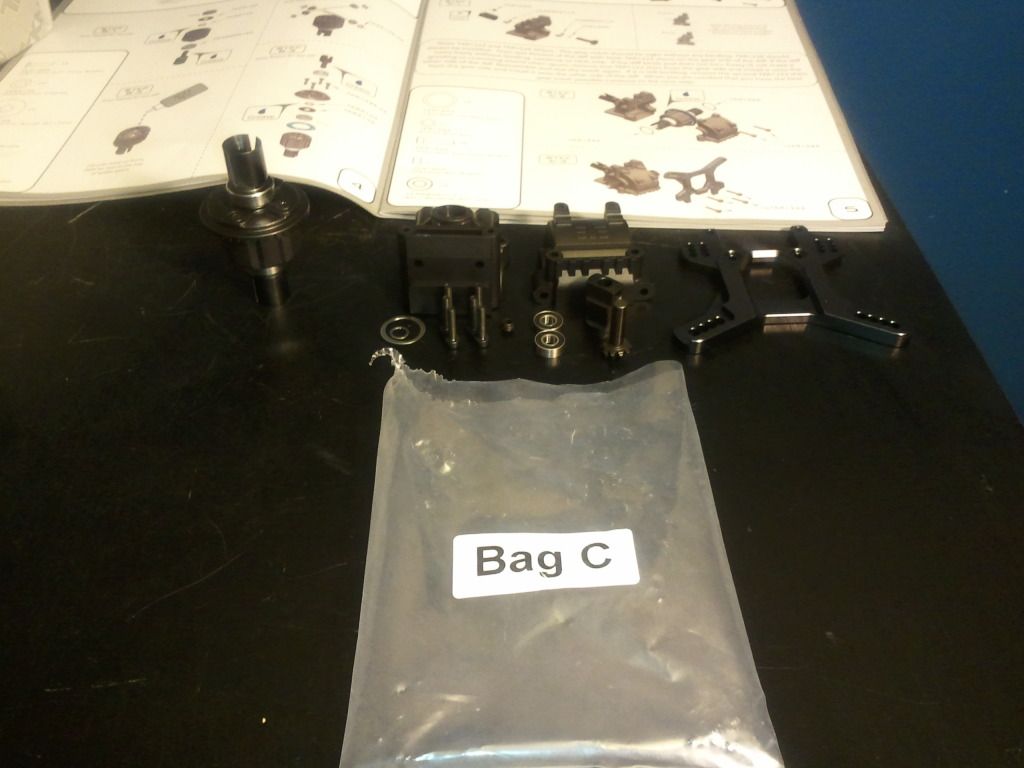
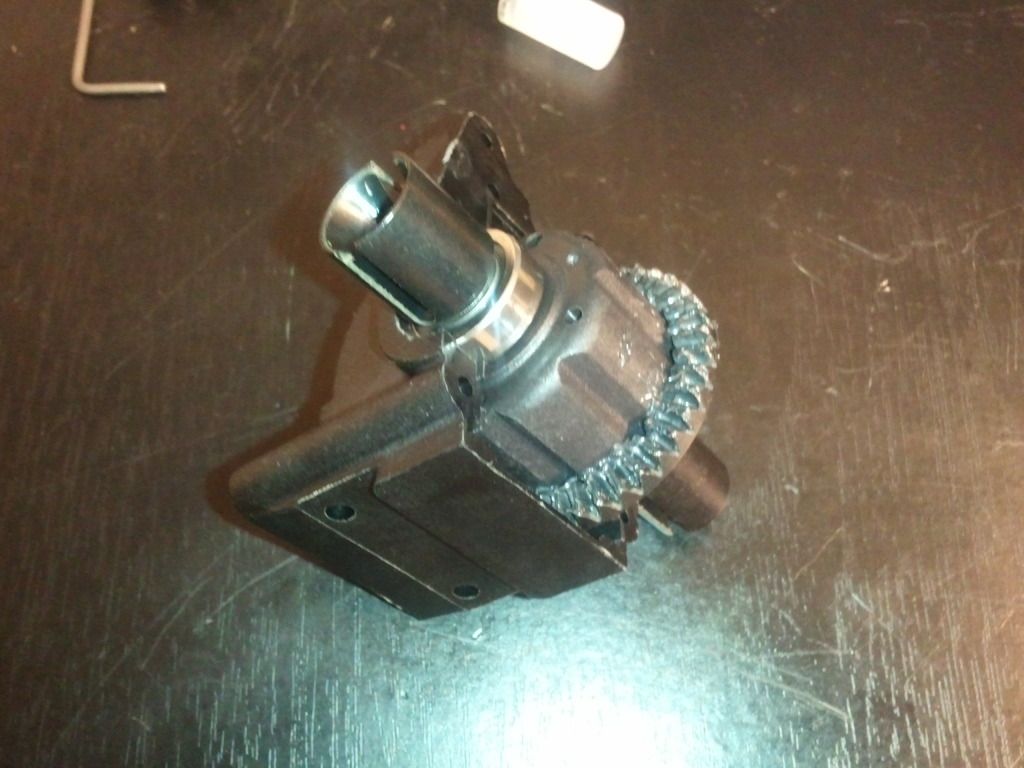
This part was actually very easy...Started out with greasing the front Diff, Then added the bearings, shims and bevel gear to the gearbox. Checked the gear mesh and and seems perfect, no grinding or binding...
Note*...The directions state if binding occurs to remove shims from gear side and put on opposite side.
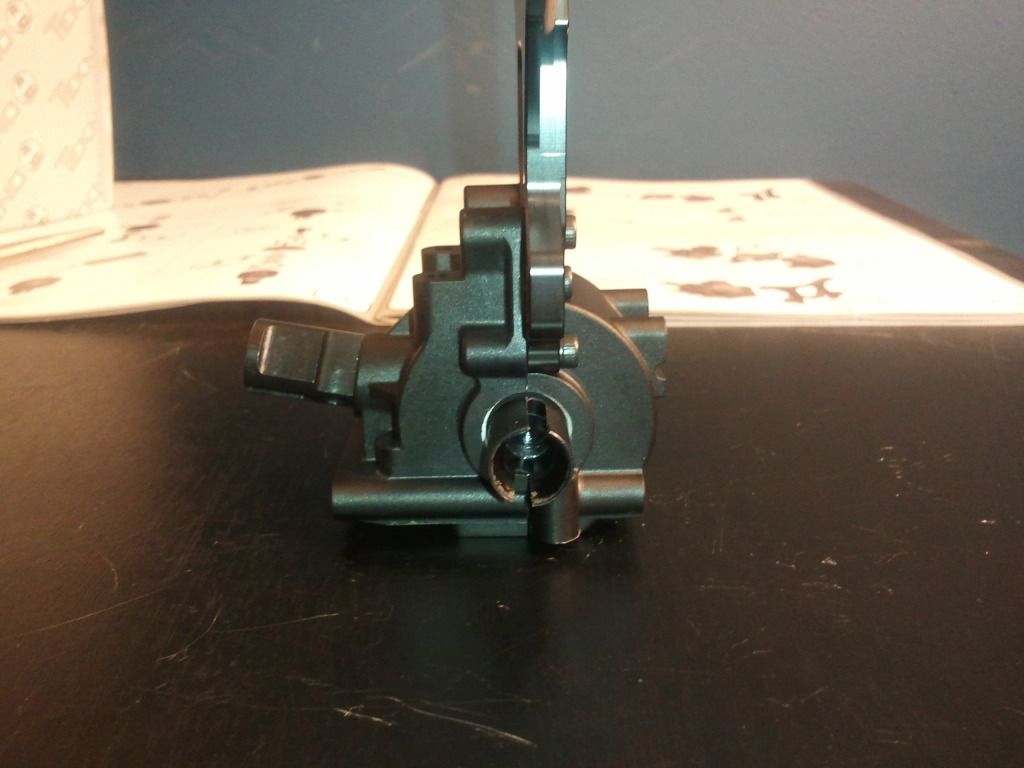
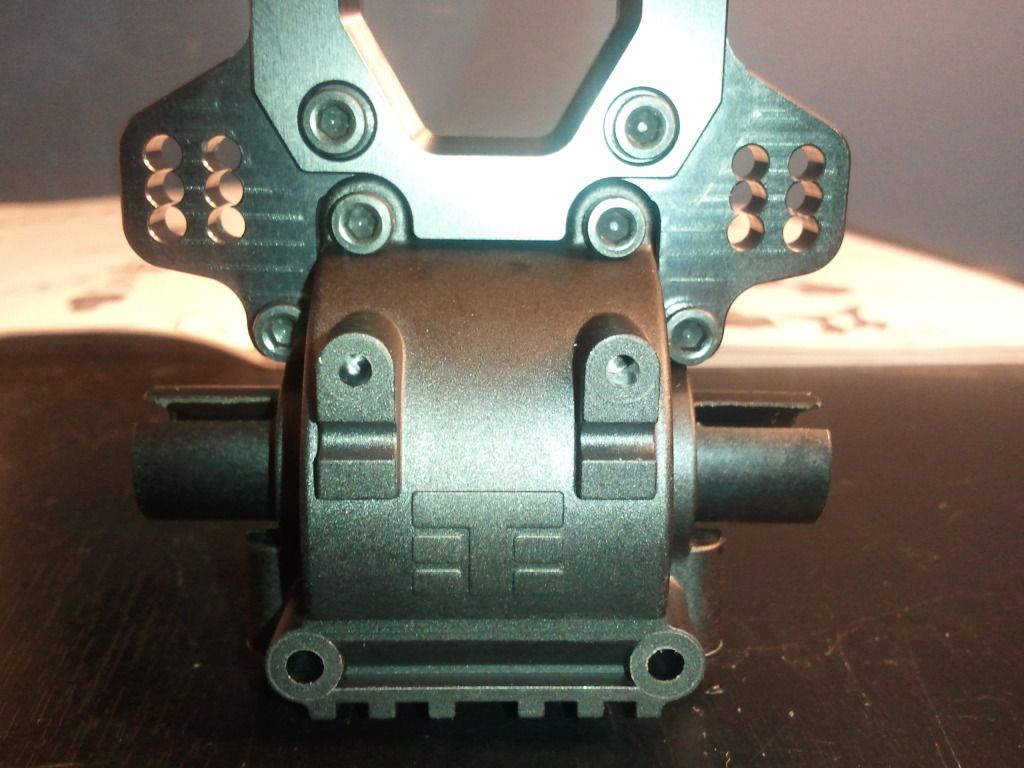
Then I assembled the Gearbox and Shock tower....once again very easy step, but important to make sure the gears are meshed proper...
This part was actually very easy...Started out with greasing the front Diff, Then added the bearings, shims and bevel gear to the gearbox. Checked the gear mesh and and seems perfect, no grinding or binding...
Note*...The directions state if binding occurs to remove shims from gear side and put on opposite side.
Then I assembled the Gearbox and Shock tower....once again very easy step, but important to make sure the gears are meshed proper...
11-20-2012, 06:26 AM
#5
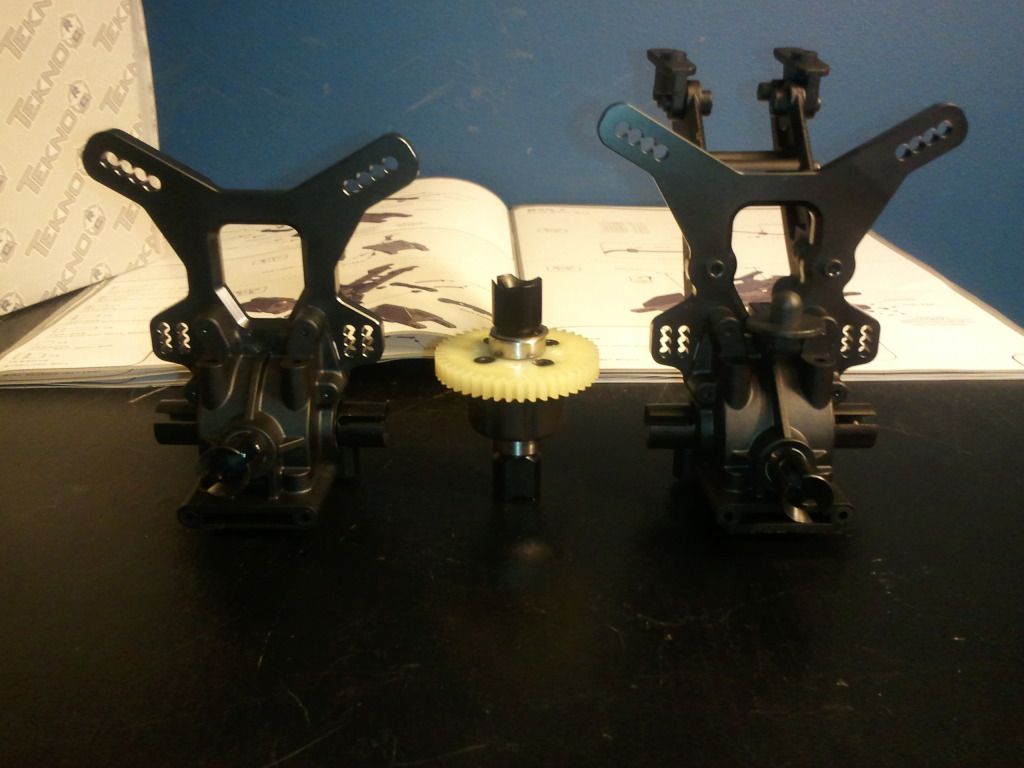
Bag "D" Rear gearbox...
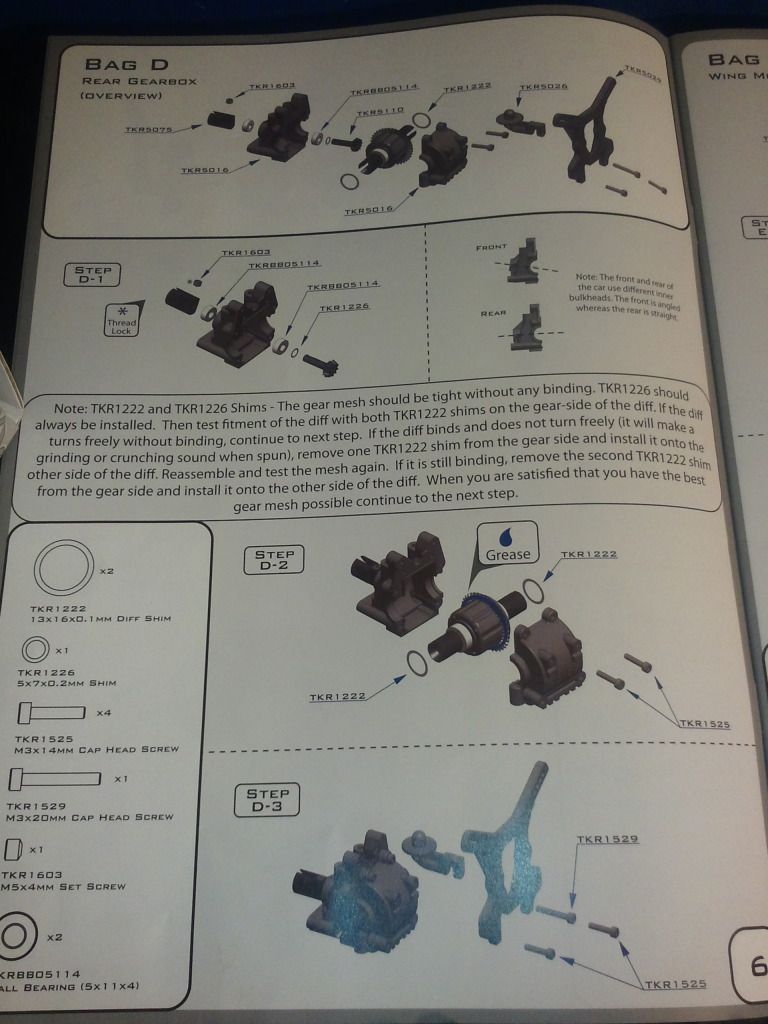
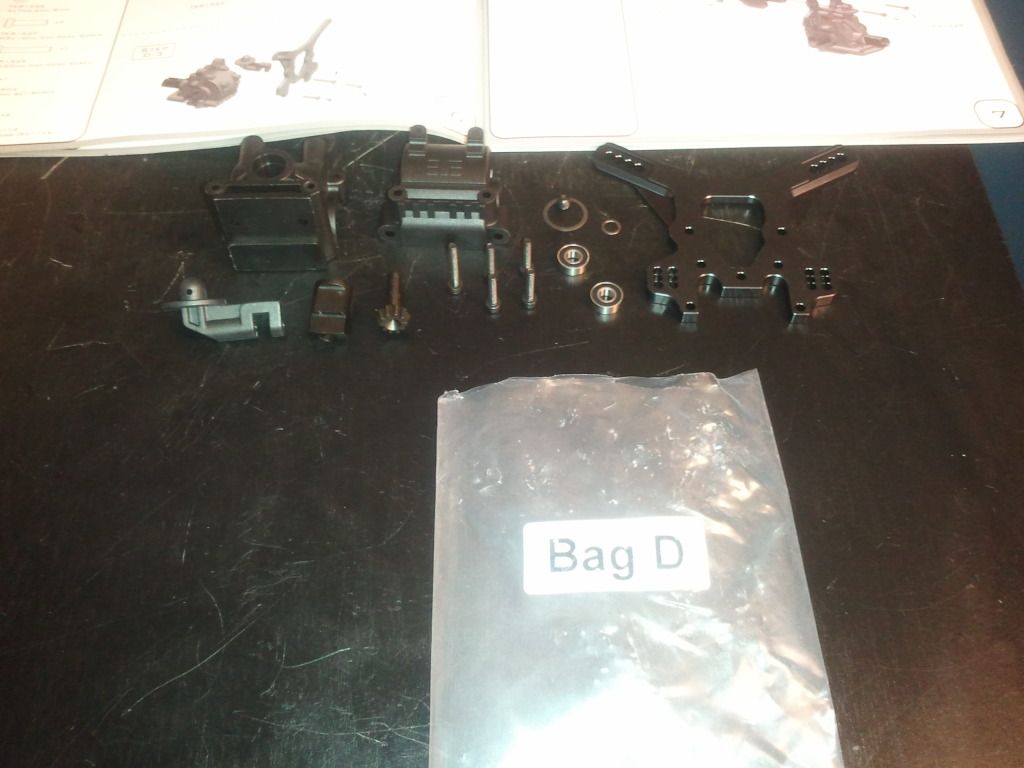
The Rear Gearbox is build the same as the front except the shock tower is mounted different to allow the rear body post and wing mount to be installed....
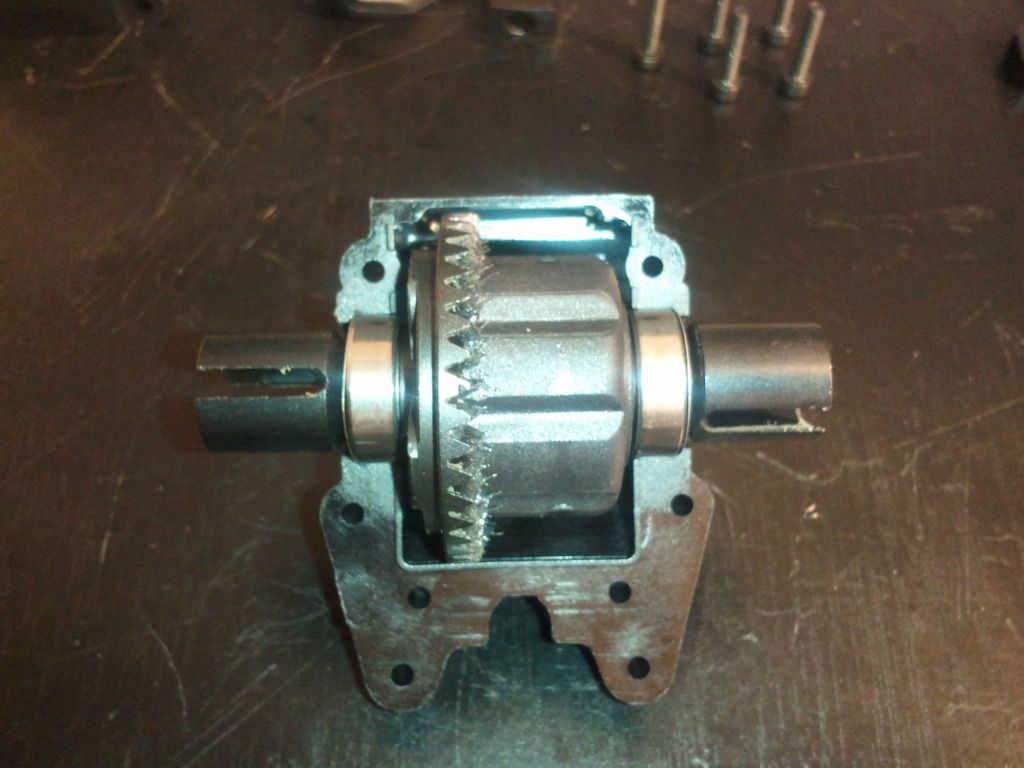
Started out the same way by greasing the Diff, adding the bearings, shims and bevel gear to the gearbox.. Mesh seemed perfect again..no trouble..
Then I added the shock tower (only 2 screws this time), and the rear body post.
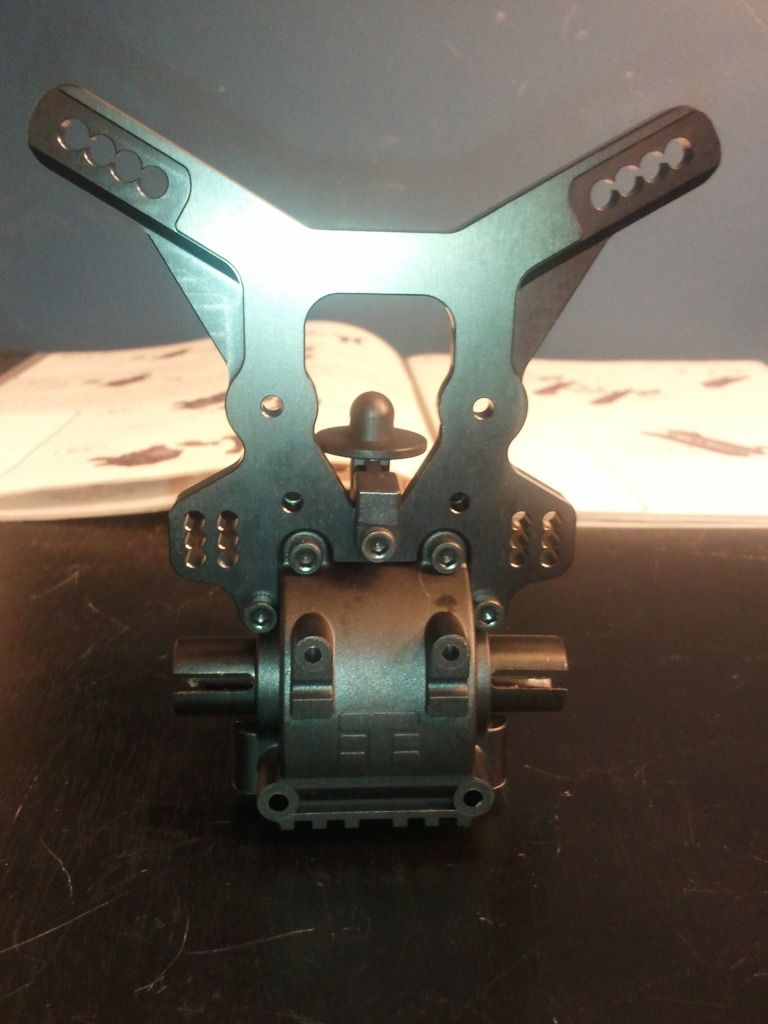
Note*.. the wing mount will screw into the back of the shock tower and then to the gearbox just like the front gearbox.
The Rear Gearbox is build the same as the front except the shock tower is mounted different to allow the rear body post and wing mount to be installed....
Started out the same way by greasing the Diff, adding the bearings, shims and bevel gear to the gearbox.. Mesh seemed perfect again..no trouble..
Then I added the shock tower (only 2 screws this time), and the rear body post.
Note*.. the wing mount will screw into the back of the shock tower and then to the gearbox just like the front gearbox.
 11-20-2012, 06:55 AM
#8
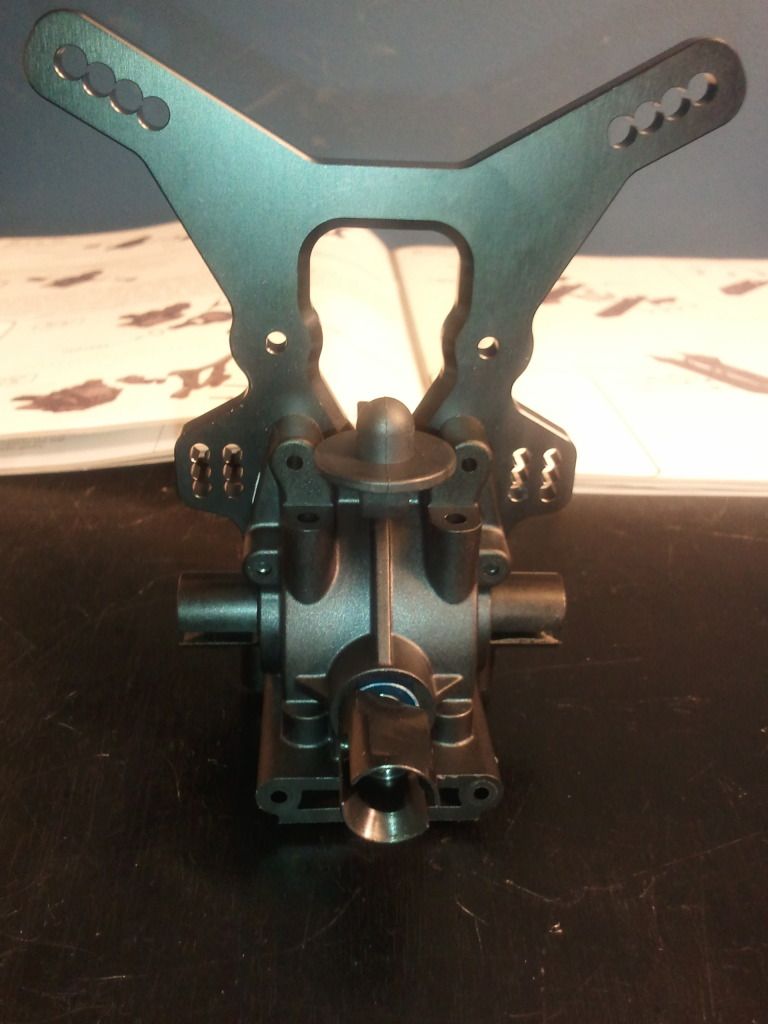
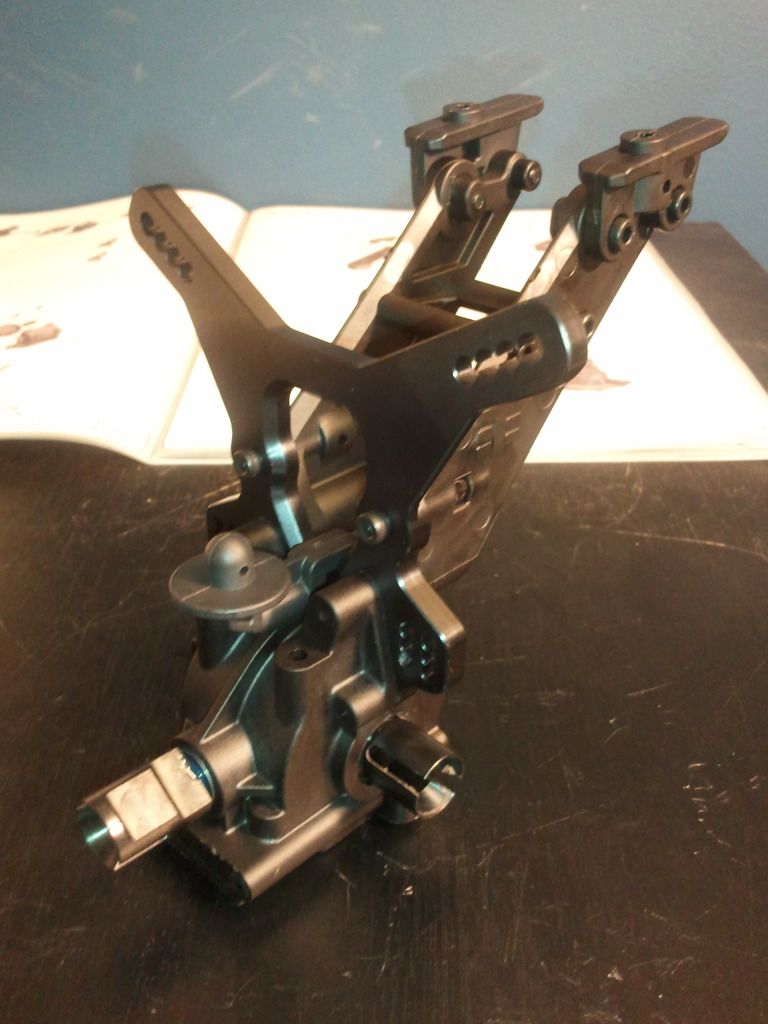
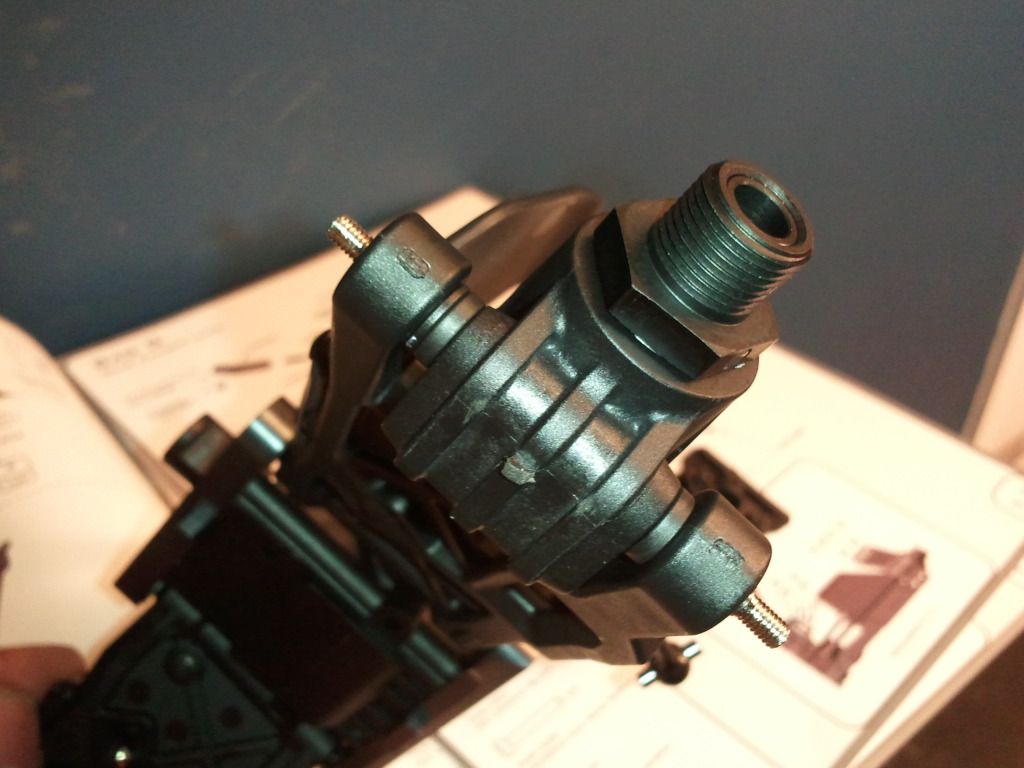
Bag "E"...Wing Mount
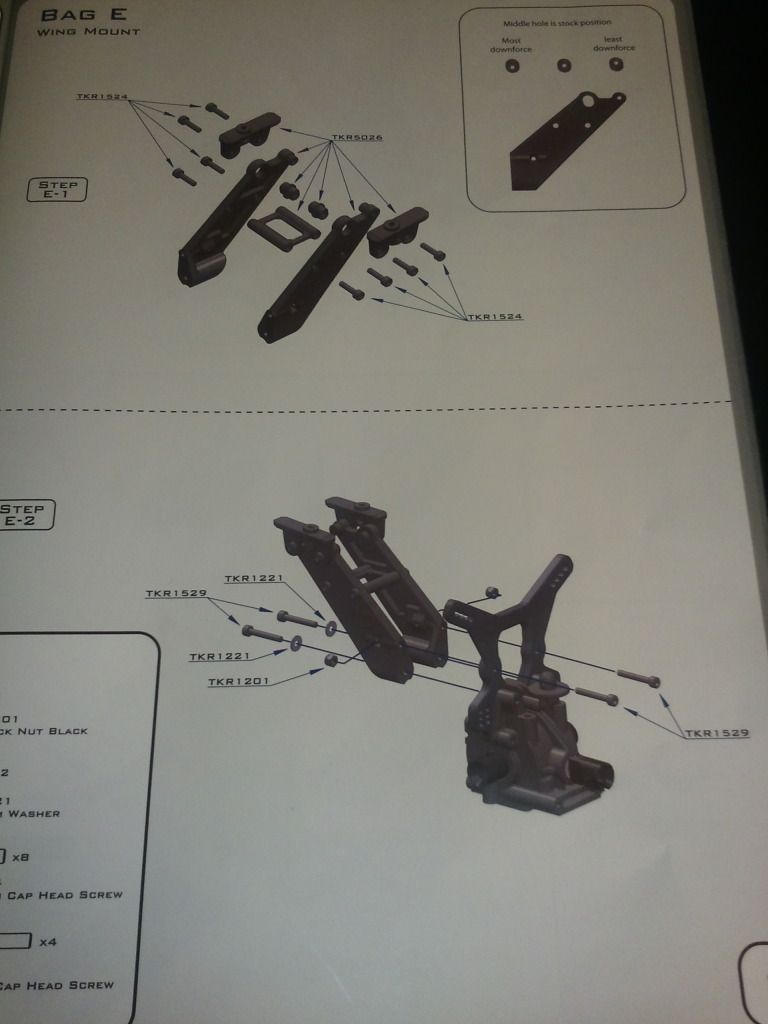
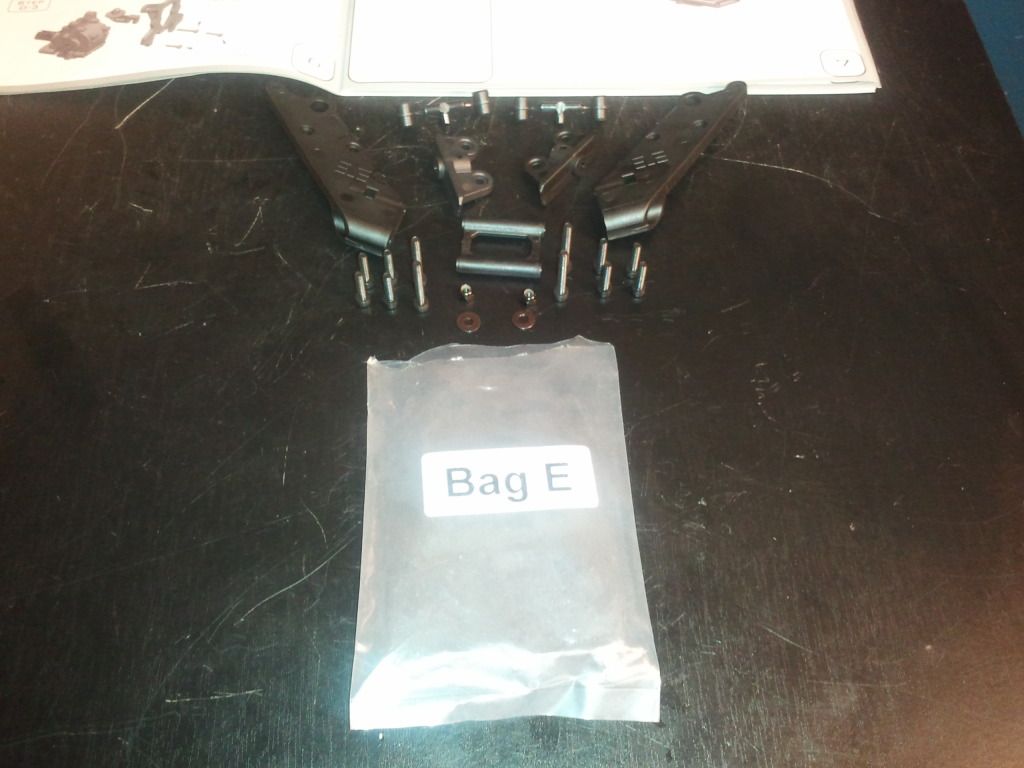
This step was actually time consuming lol....Had to assemble the Wing Mount and choose the position the wing be mounted..
I chose the stock postition for right now but might change to extreme downforce...All I have to do is change out the small tabs...
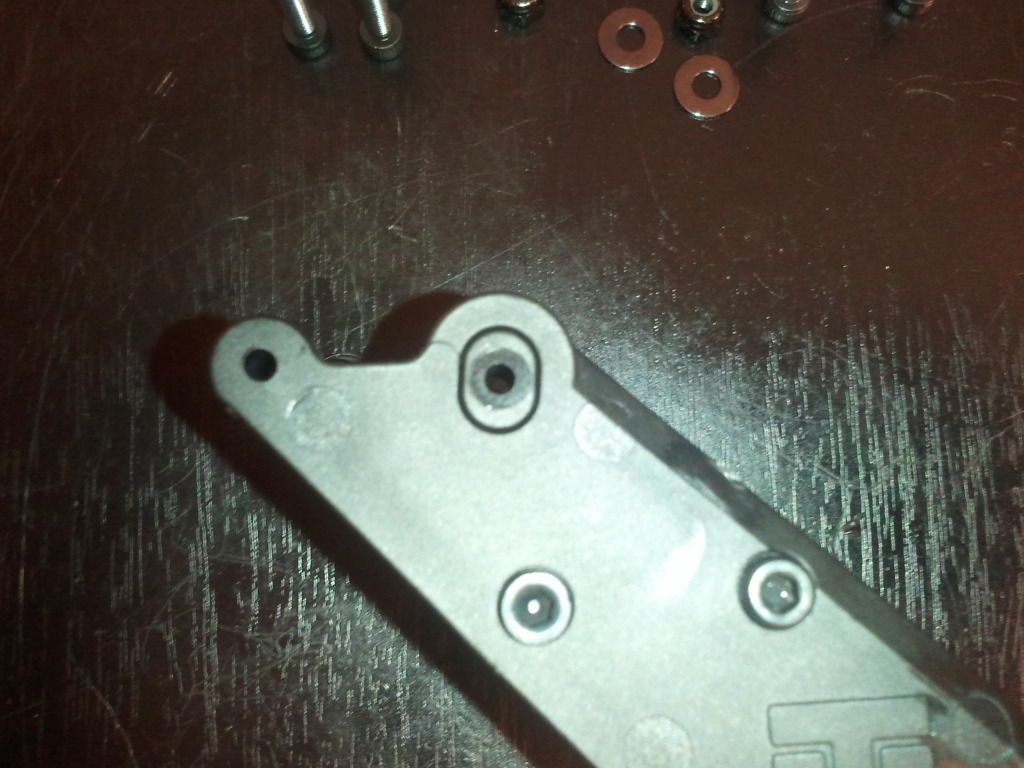

After that I attached the wing mount to the rear gearbox...It attaches in 4 places and is nice and secure...
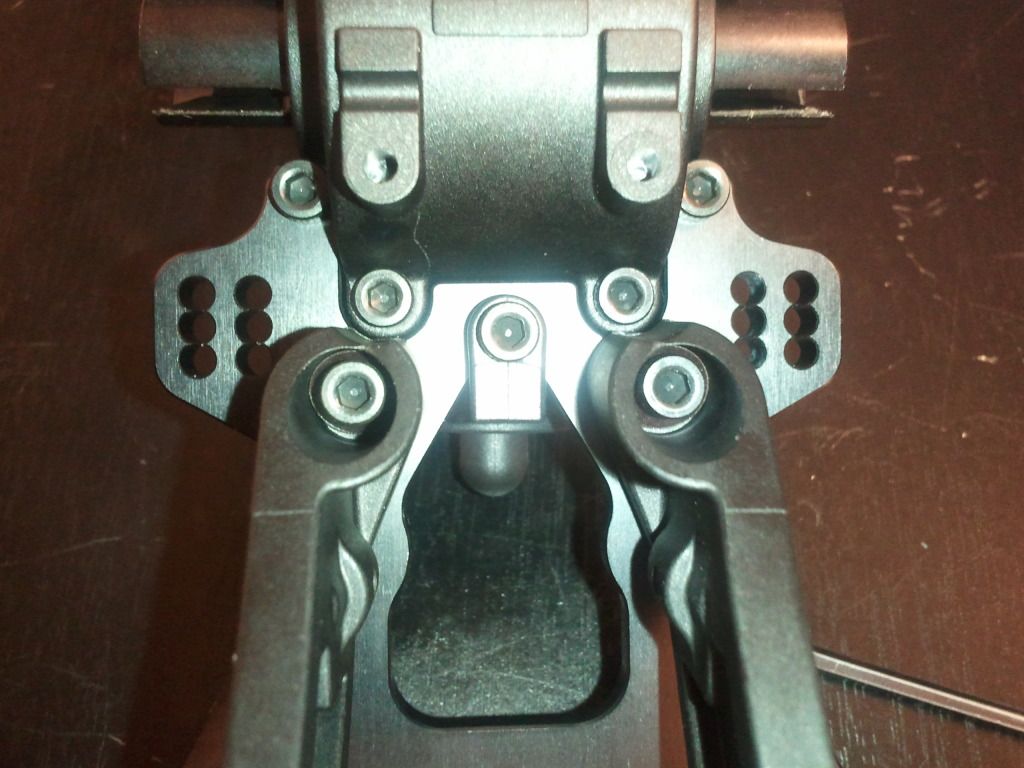
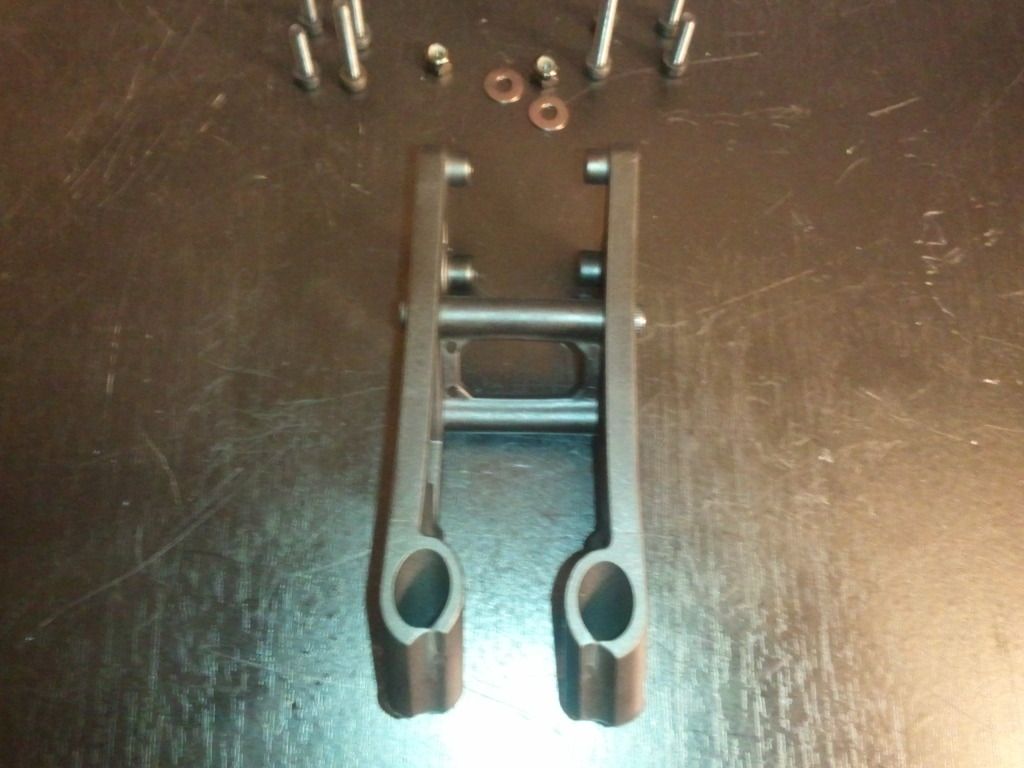
You can actually see here how the locking nut fits into the wing mount for added protection and strength...
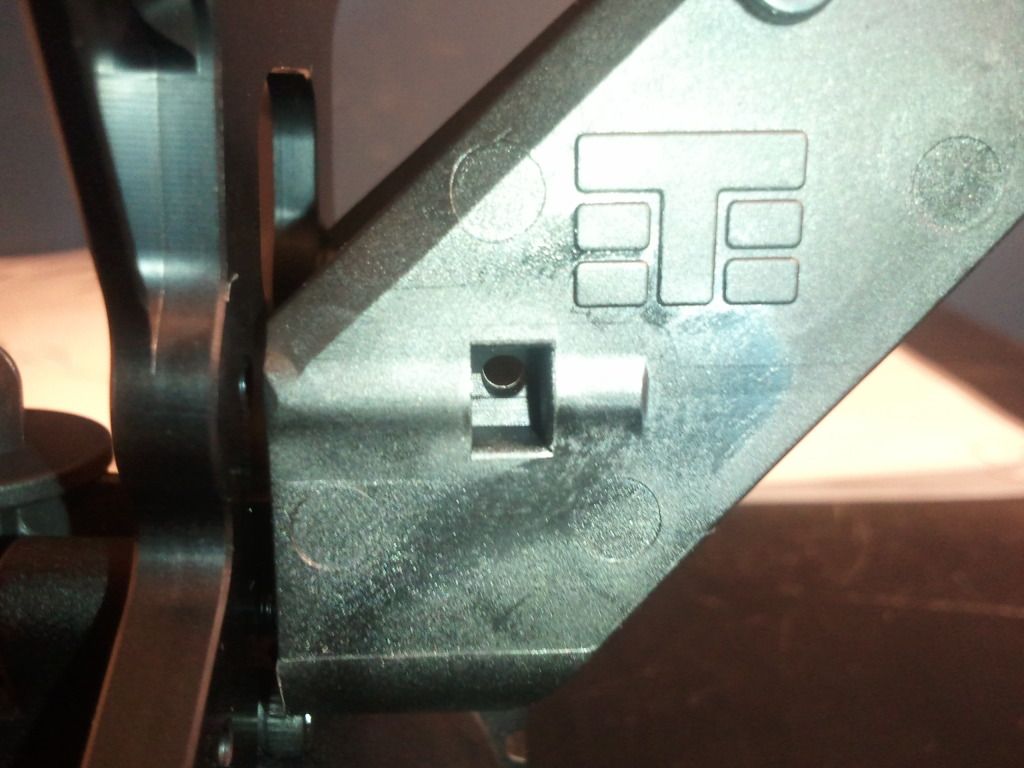
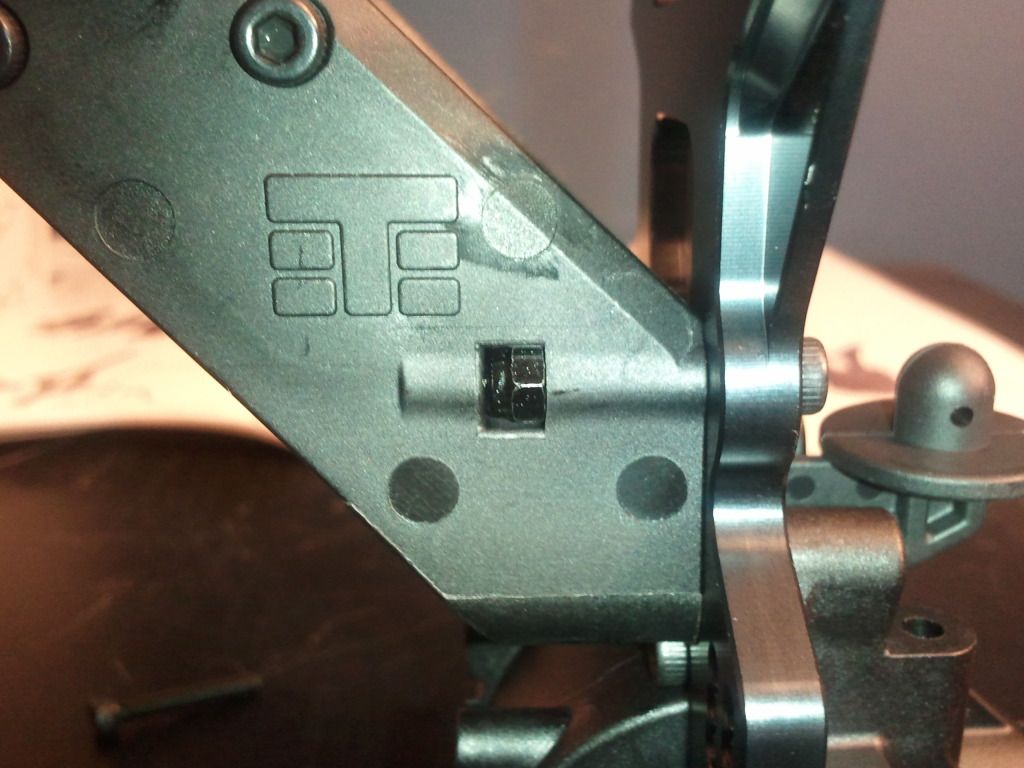
Finished product...
This step was actually time consuming lol....Had to assemble the Wing Mount and choose the position the wing be mounted..
I chose the stock postition for right now but might change to extreme downforce...All I have to do is change out the small tabs...
After that I attached the wing mount to the rear gearbox...It attaches in 4 places and is nice and secure...
You can actually see here how the locking nut fits into the wing mount for added protection and strength...
Finished product...
11-20-2012, 06:56 AM
#9
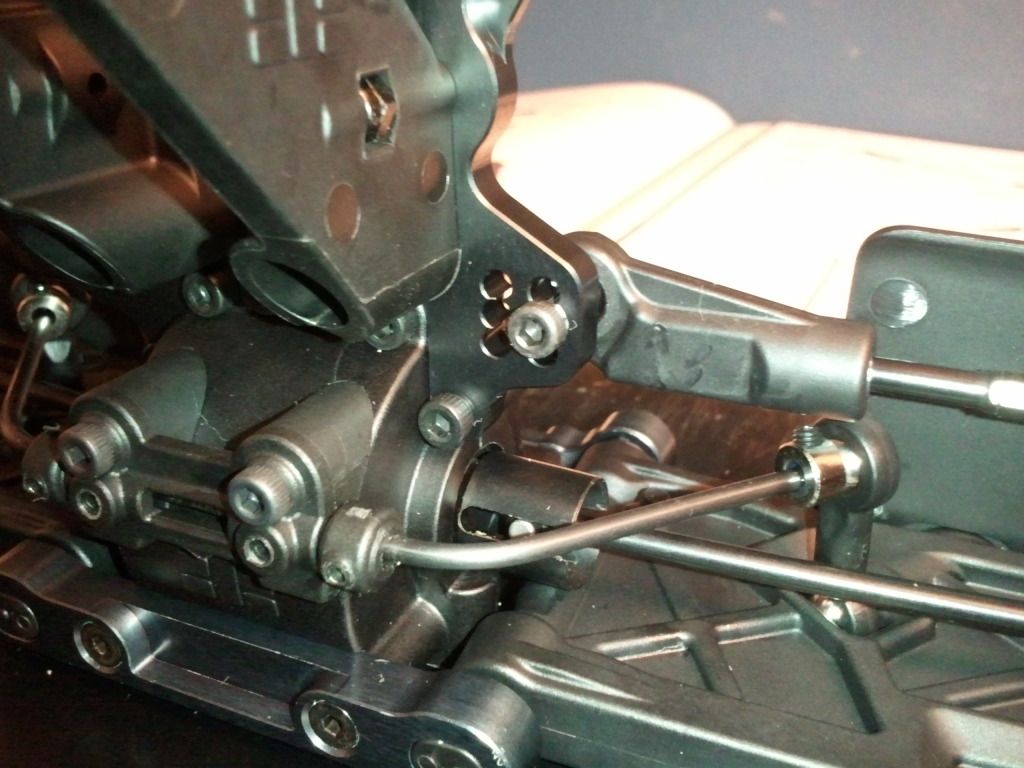
Bag "F"... Rear Suspension
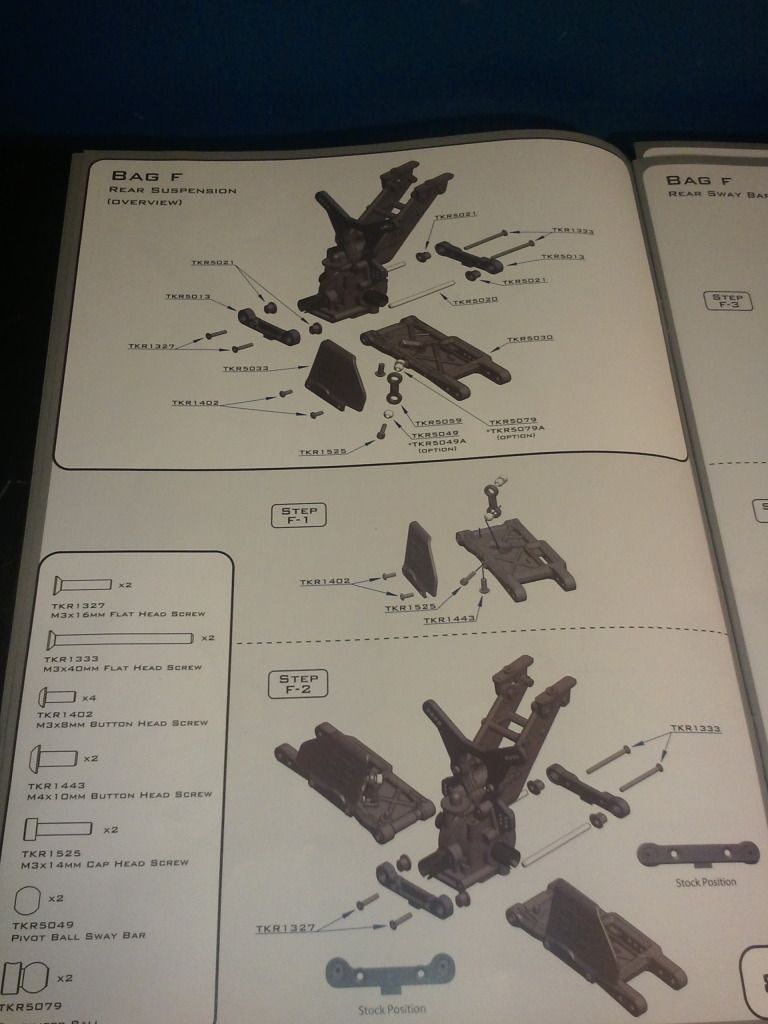
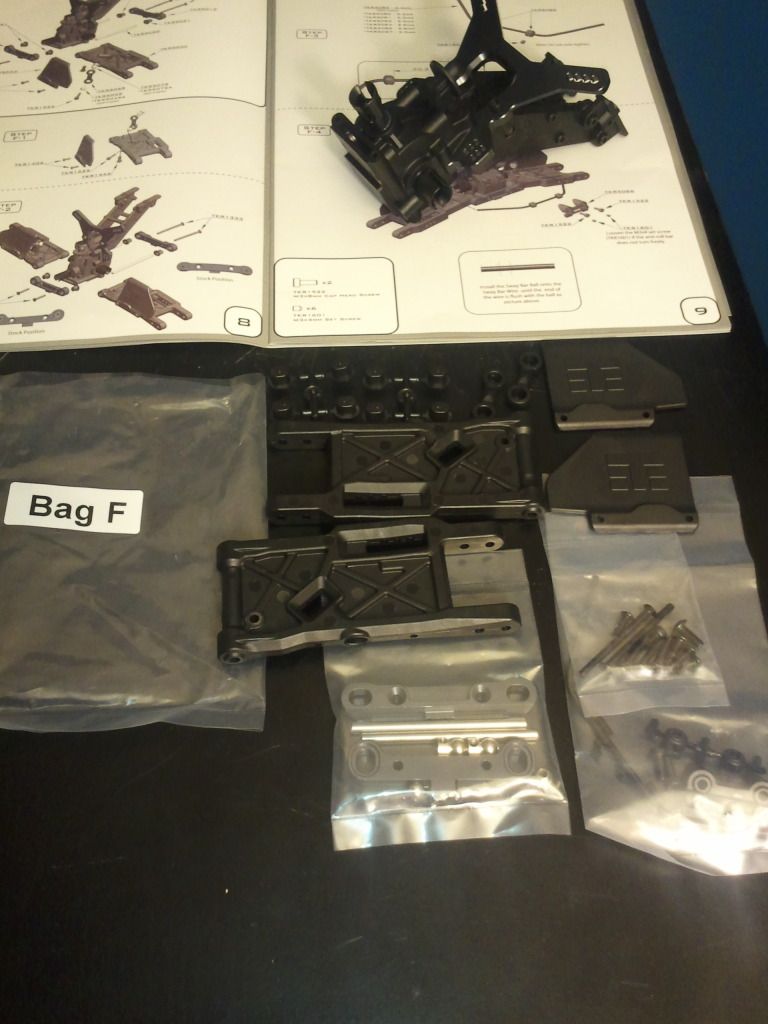
Ok starting to move along a little quicker now.... started with the arms and installed the link for the sway bar setup, then the rear arm mud guards..
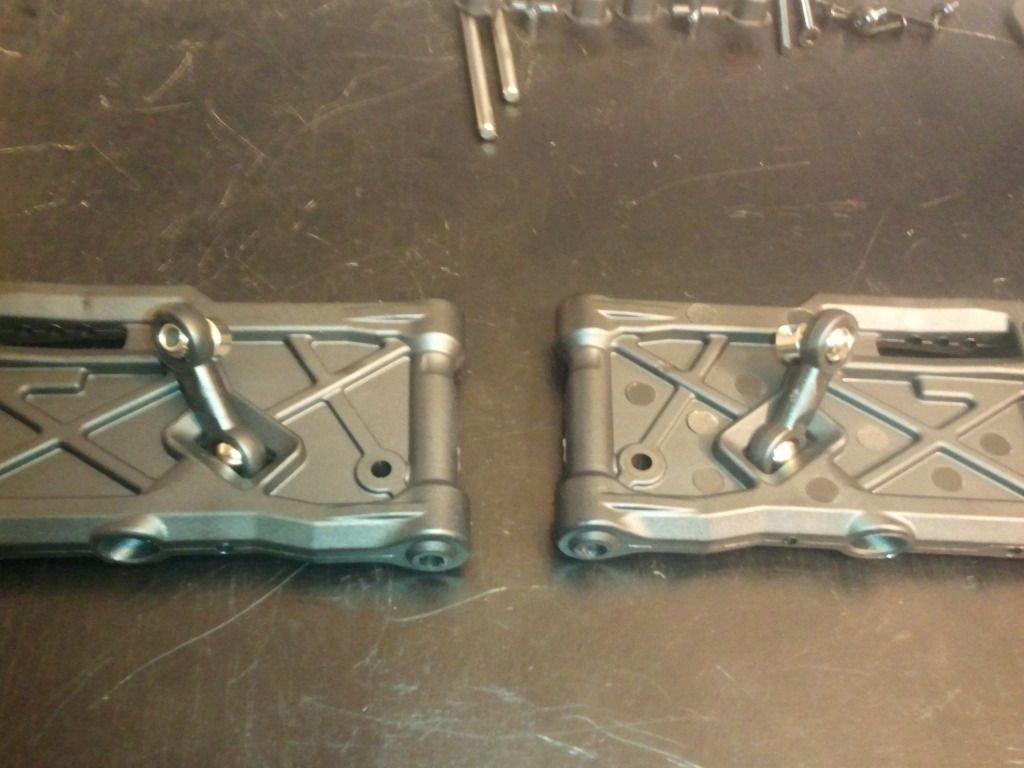
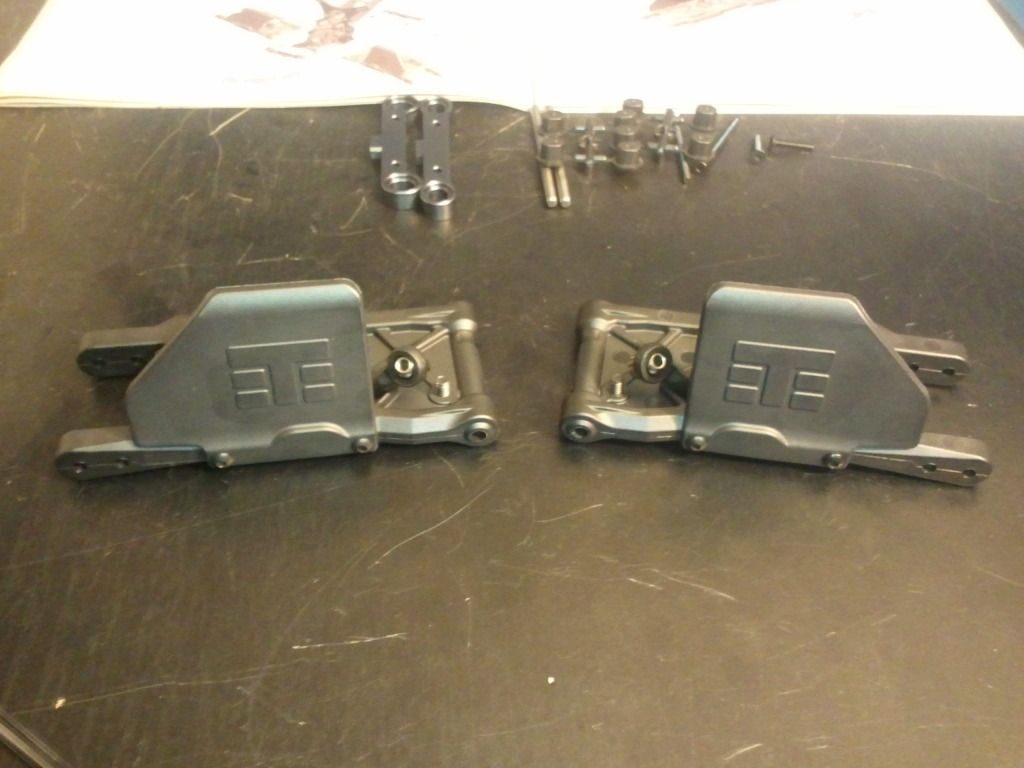
Next were the hingle pin plates...ver cool setup. The little taps allow you to adjust the setup of the hinge pins...Then connected the rear arms. Once again left everything in the stock position..
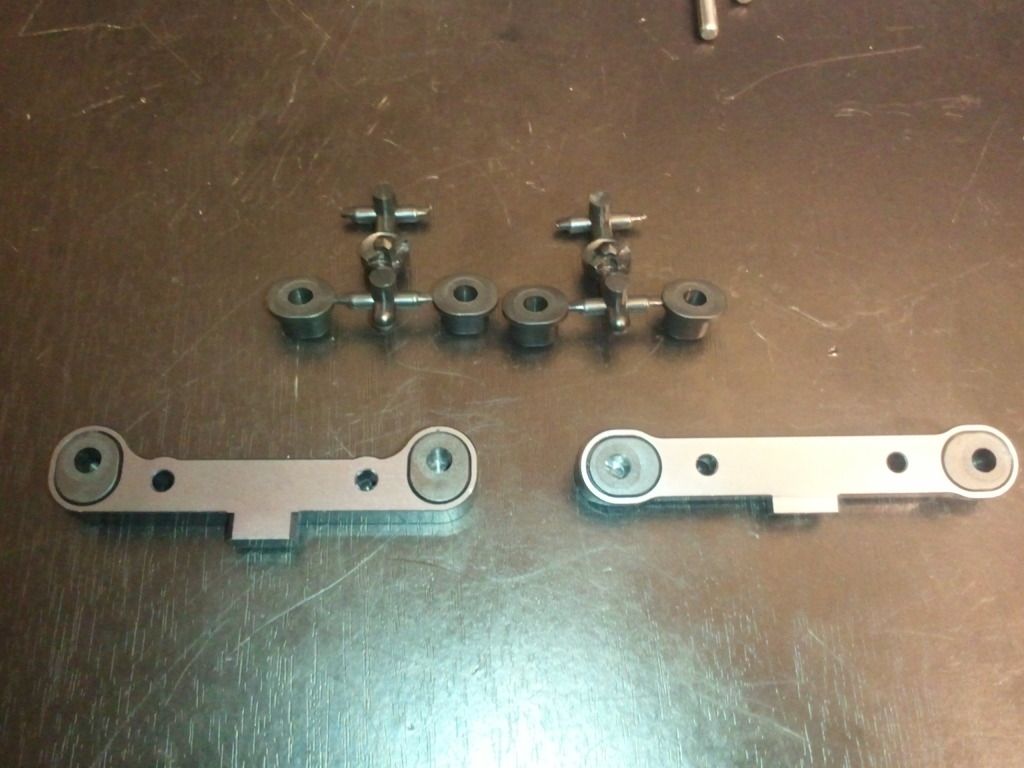
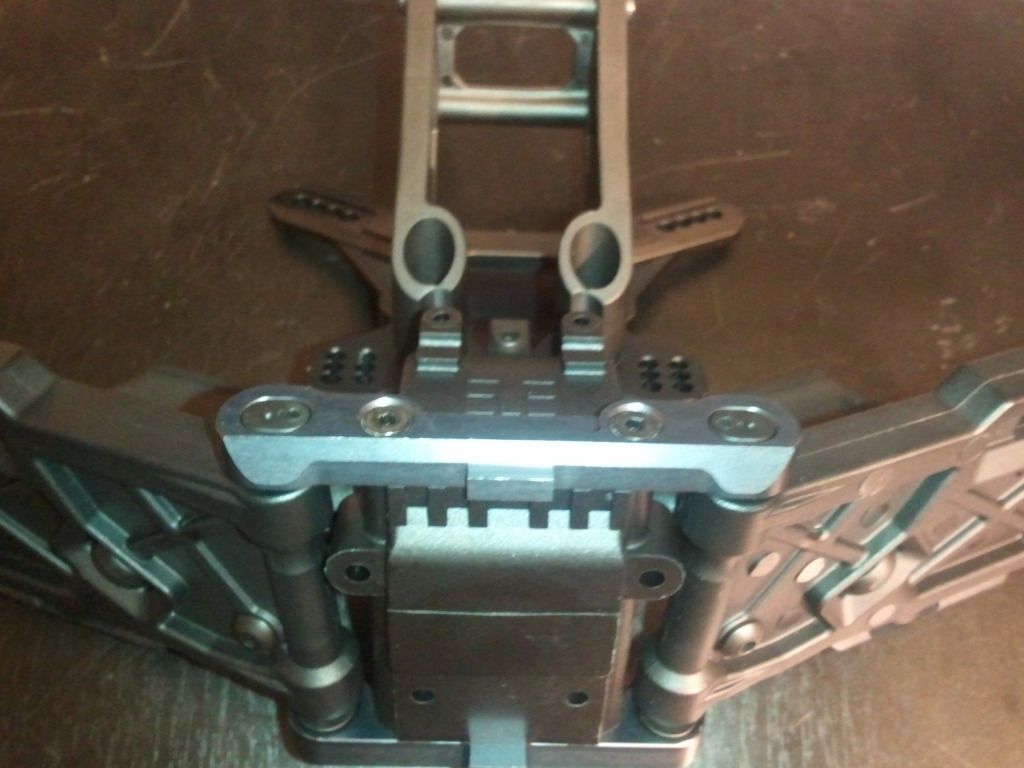
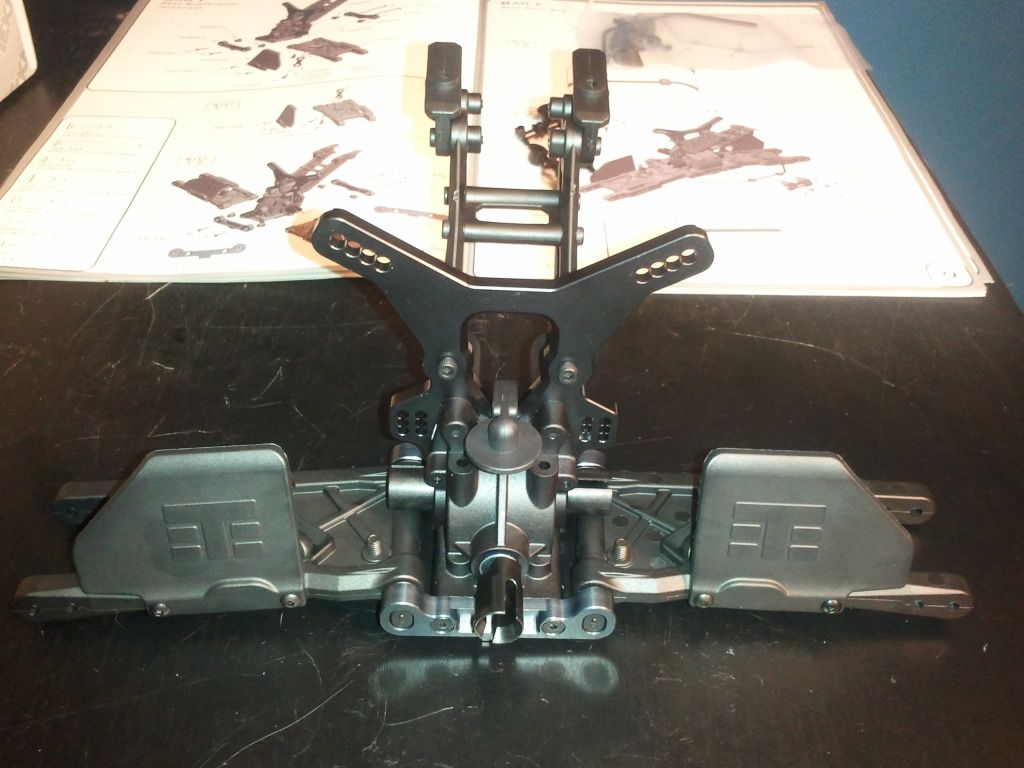
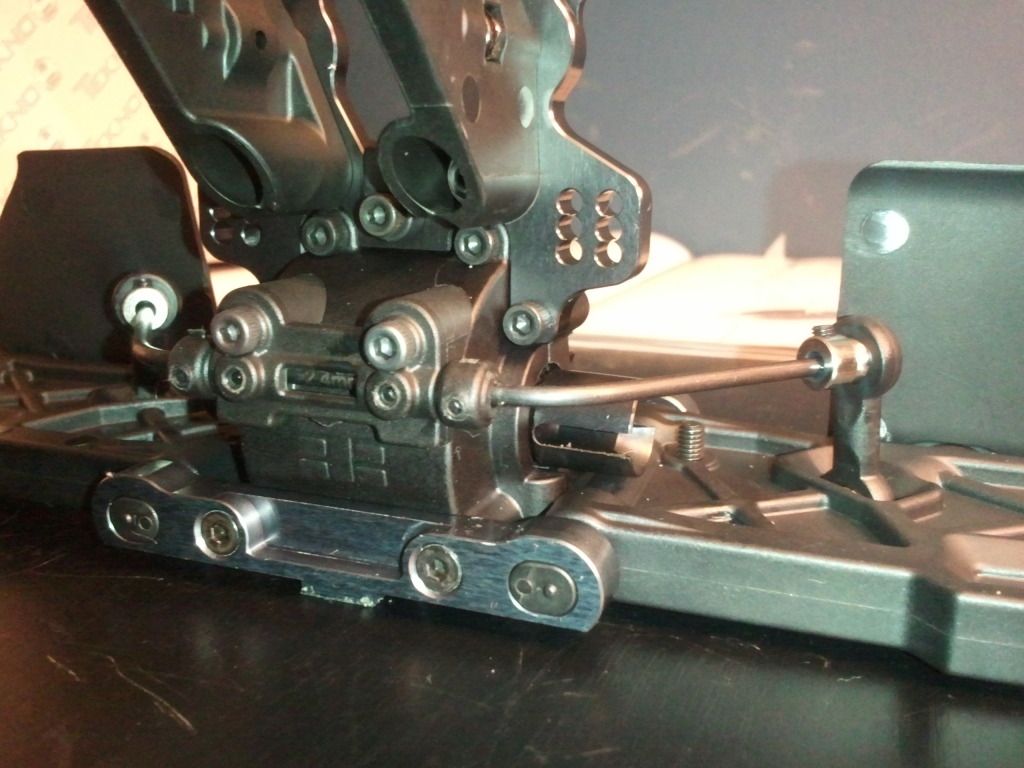
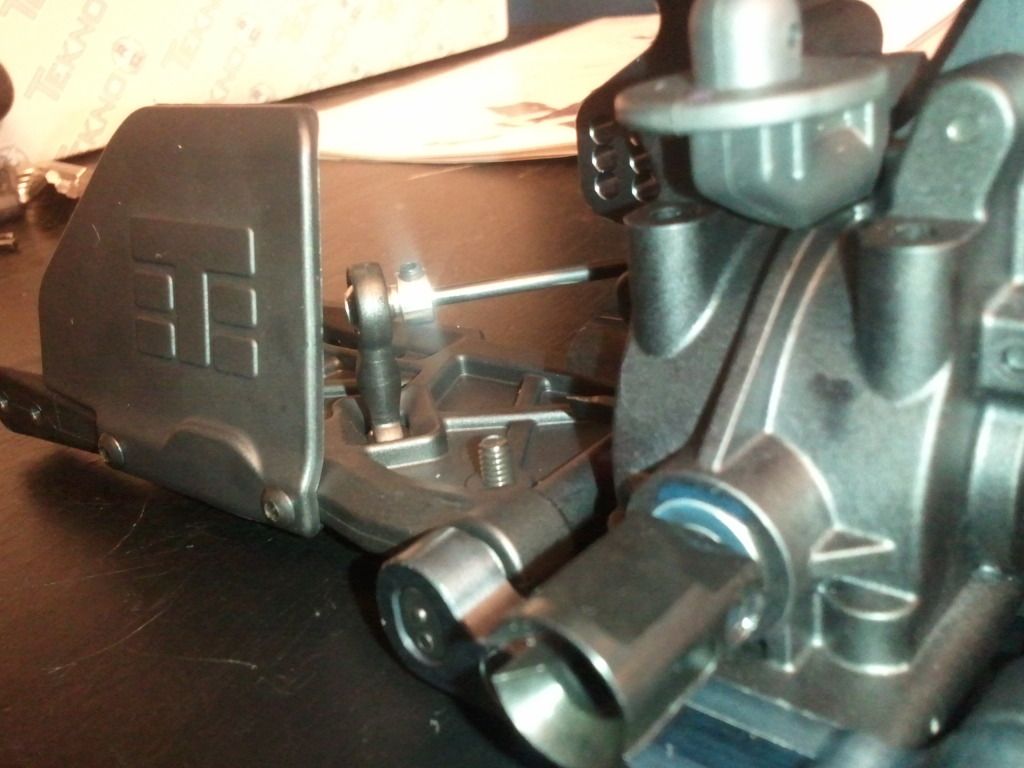
Part 2 of Bag "F" was the swaybar setup...
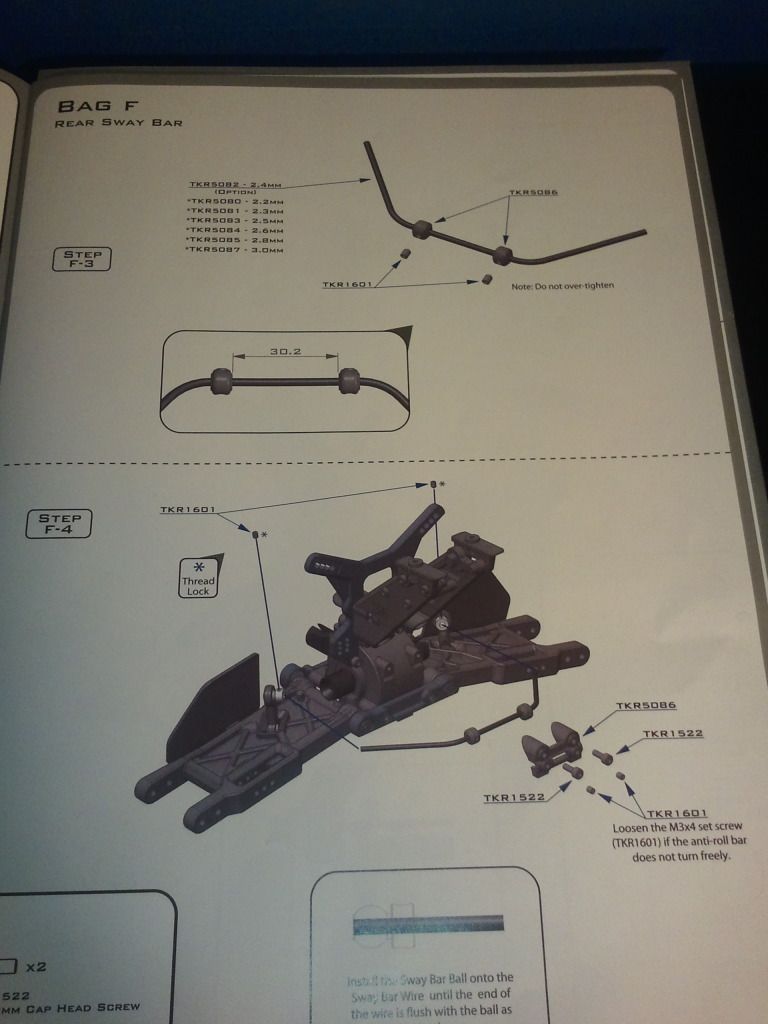
I really like how the sway bars are setup..They connect to the short link I installed on the rear arms and are secured on the rear of the gearbox.
Ok starting to move along a little quicker now.... started with the arms and installed the link for the sway bar setup, then the rear arm mud guards..
Next were the hingle pin plates...ver cool setup. The little taps allow you to adjust the setup of the hinge pins...Then connected the rear arms. Once again left everything in the stock position..
Part 2 of Bag "F" was the swaybar setup...
I really like how the sway bars are setup..They connect to the short link I installed on the rear arms and are secured on the rear of the gearbox.
11-20-2012, 06:57 AM
#10
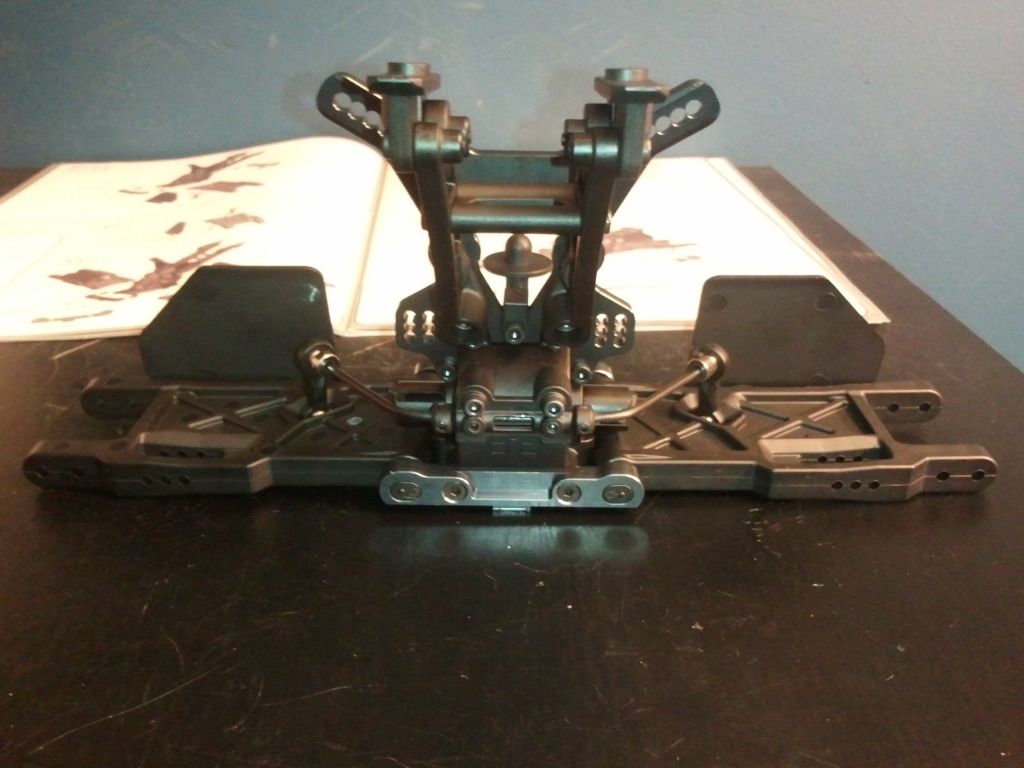
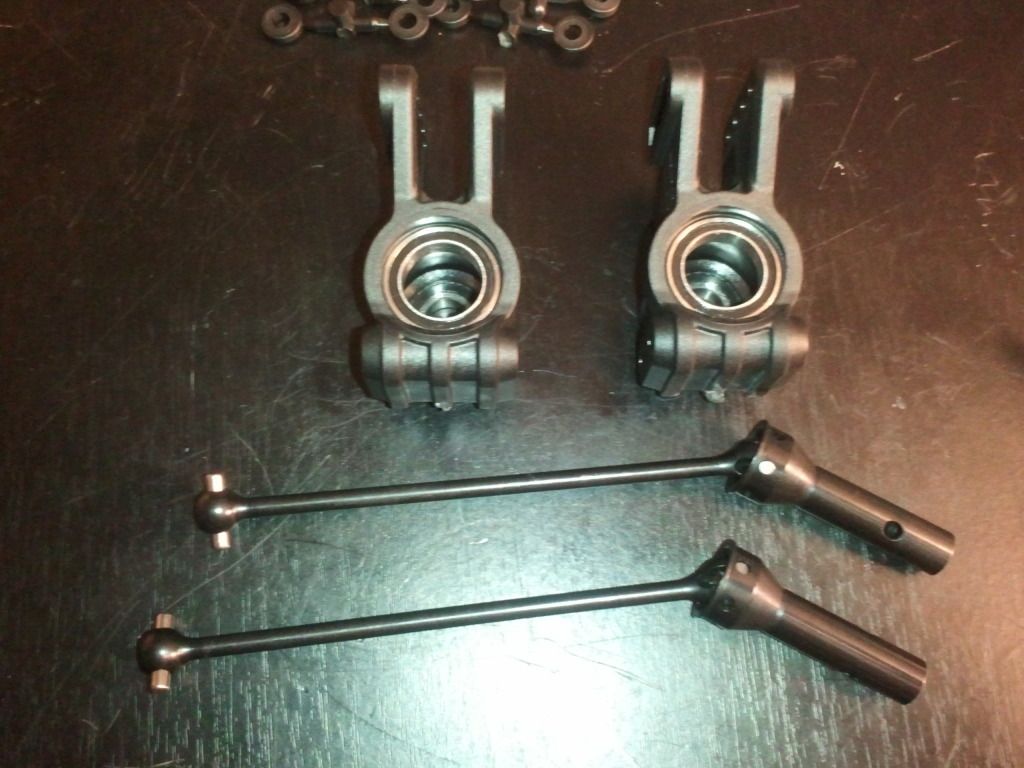
Next up Bag "G"...Rear Hub Assembly
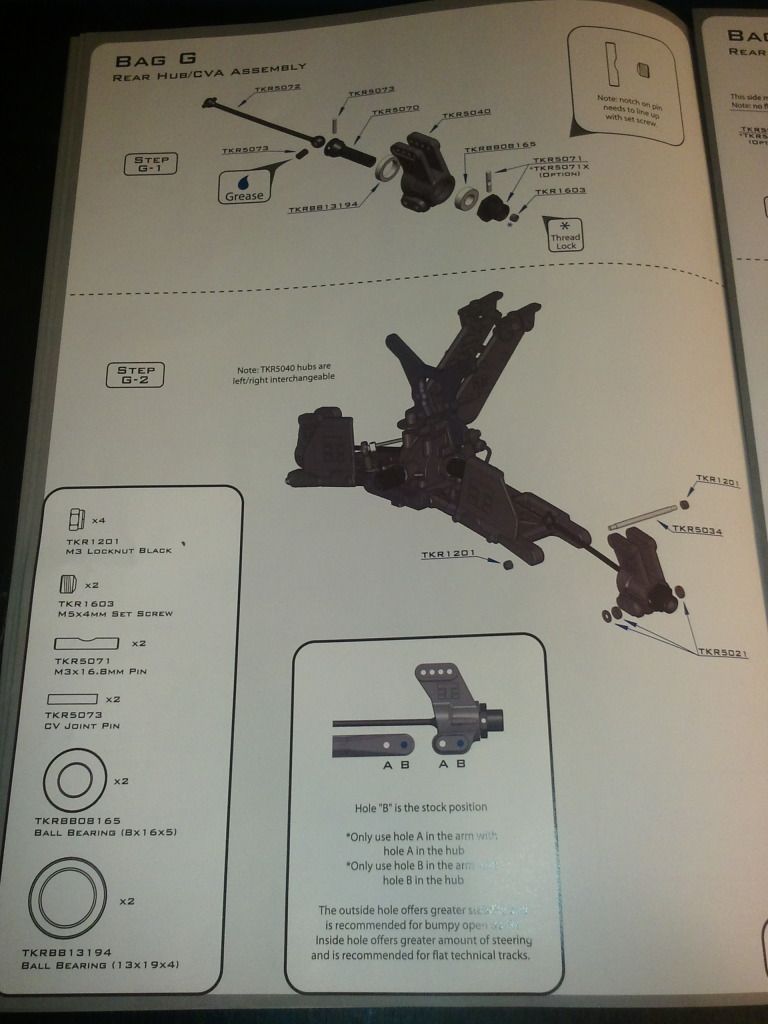
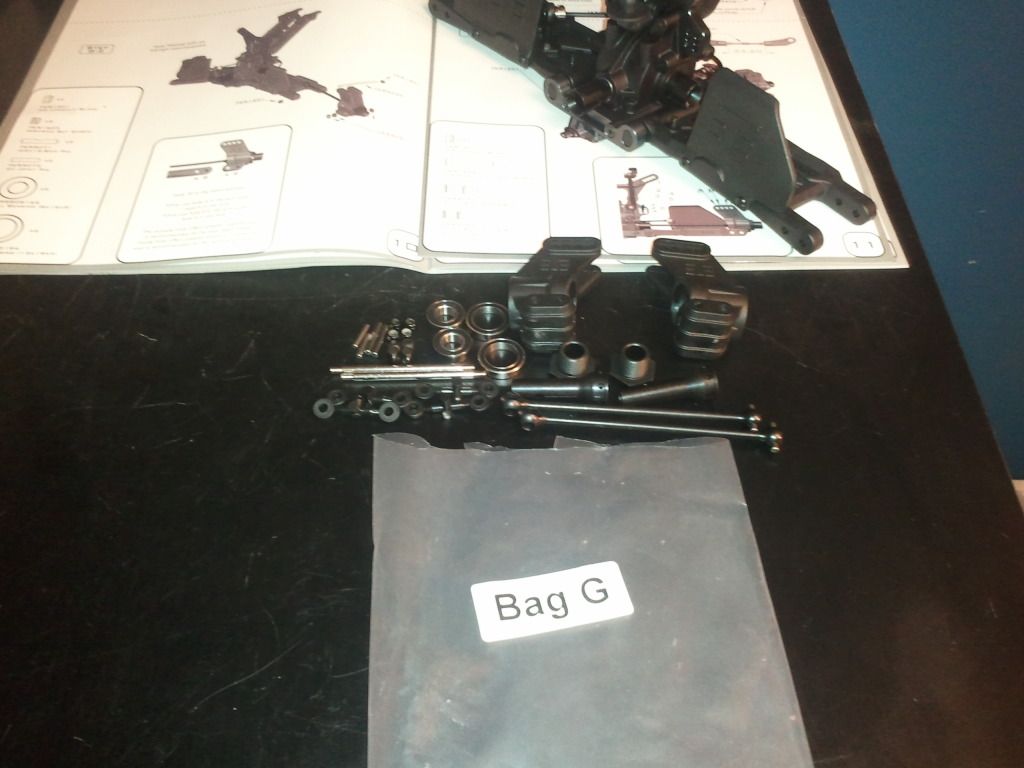
Installing the Rear hub and driveshafts was fun and fairly easy...I put the bearings in the hub and assembled the stub axles onto the driveshafts...then attached the wheel hubs..
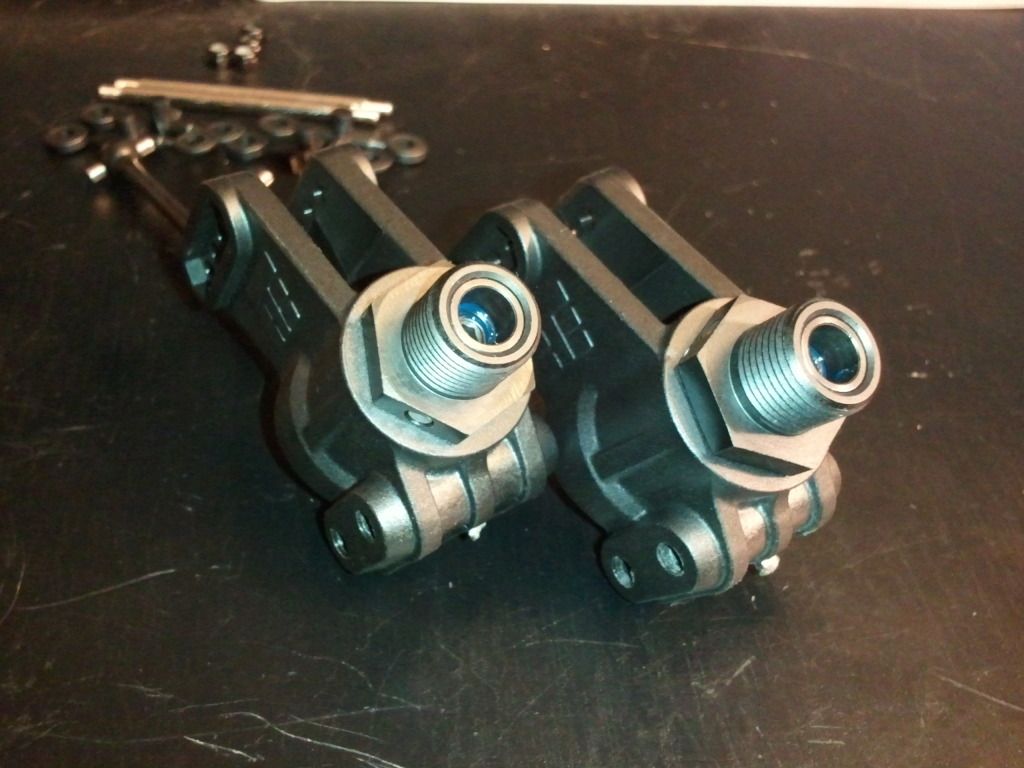
Then I attached the hubs to the arms with hinge pins...
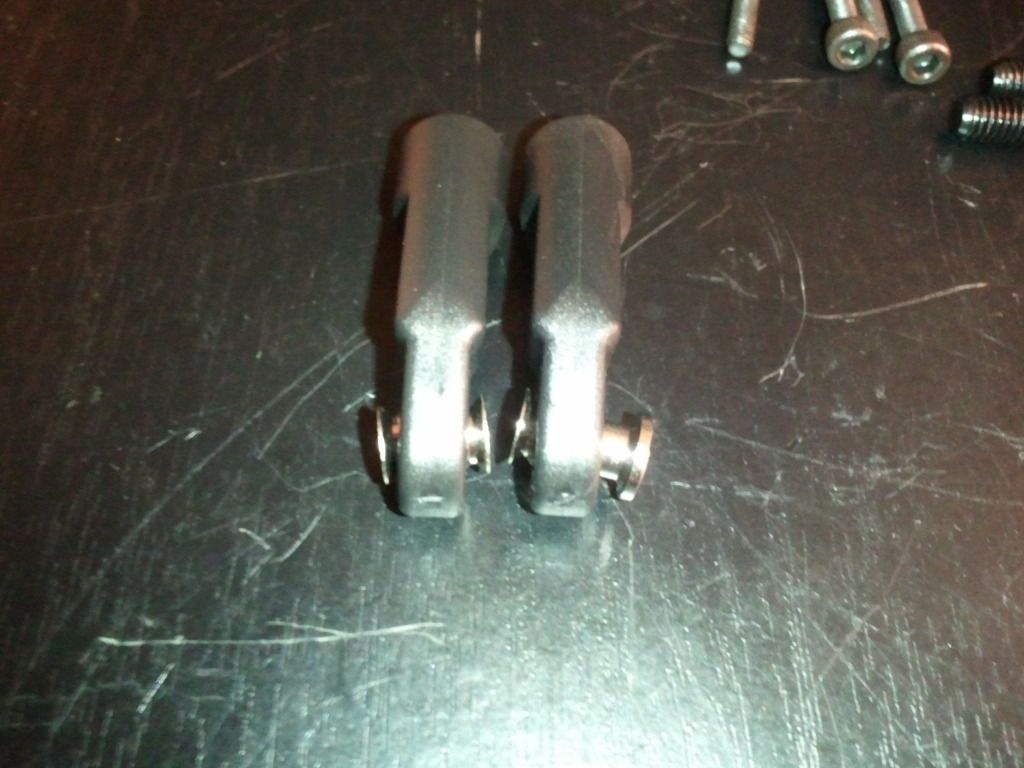
Part 2 of Bag G was installing the Camber Links..I think I made this part a little harder than it needed to be....had to take a food break and energize my brain lol..Once I got to this step on the front gearbox it was a little smoother lol..Started out by putting the pivot balls on the rod ends..the attached them to the rear hub and shock tower..

Installing the Rear hub and driveshafts was fun and fairly easy...I put the bearings in the hub and assembled the stub axles onto the driveshafts...then attached the wheel hubs..
Then I attached the hubs to the arms with hinge pins...
Part 2 of Bag G was installing the Camber Links..I think I made this part a little harder than it needed to be....had to take a food break and energize my brain lol..Once I got to this step on the front gearbox it was a little smoother lol..Started out by putting the pivot balls on the rod ends..the attached them to the rear hub and shock tower..
11-20-2012, 06:58 AM
#11
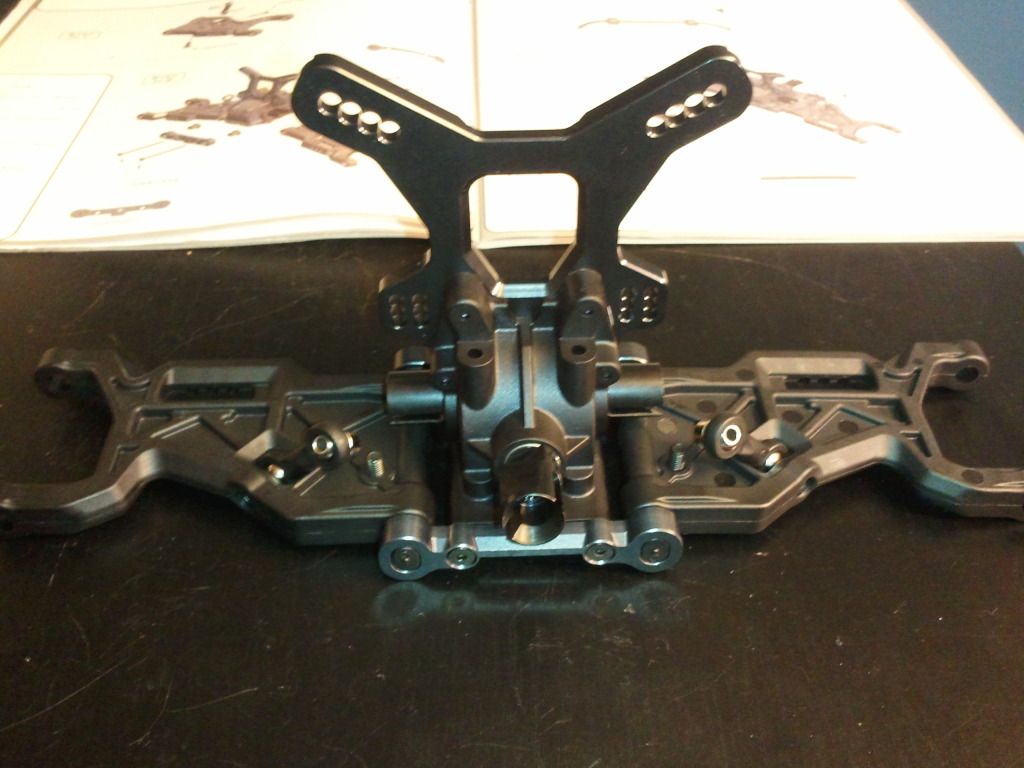
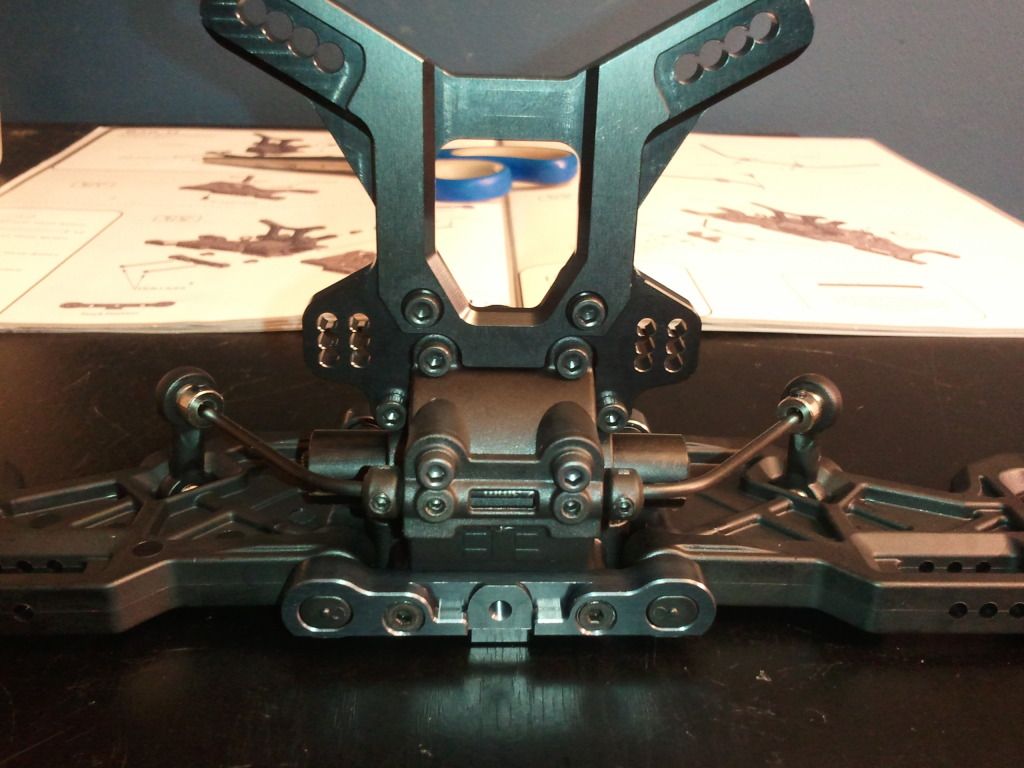
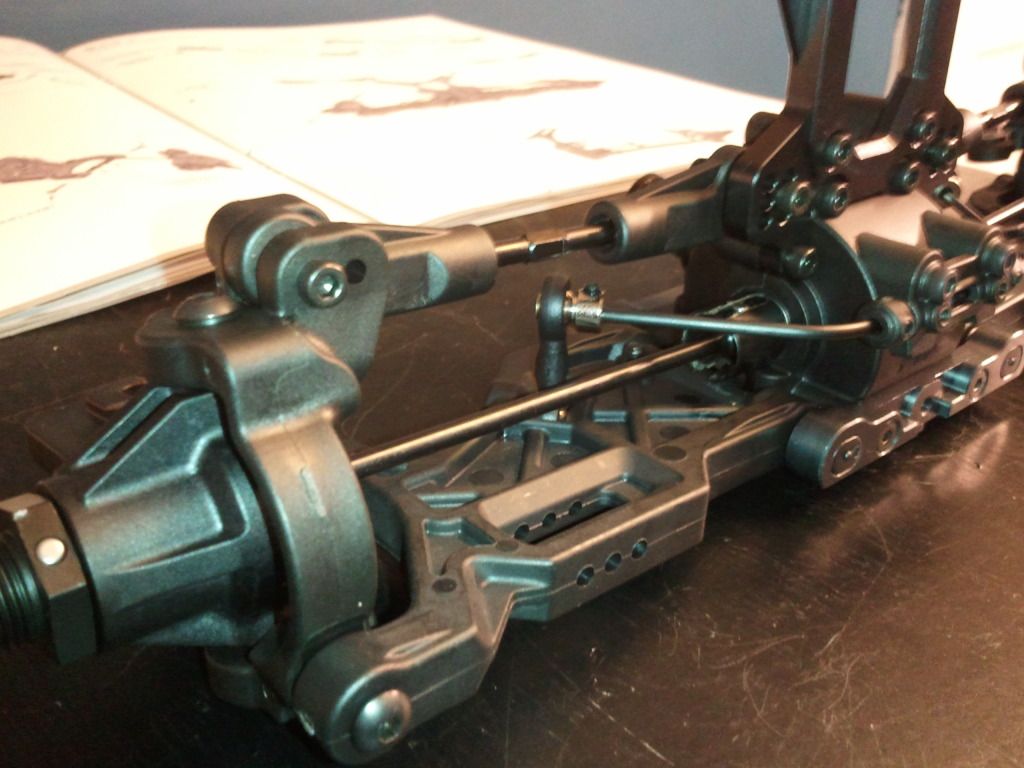
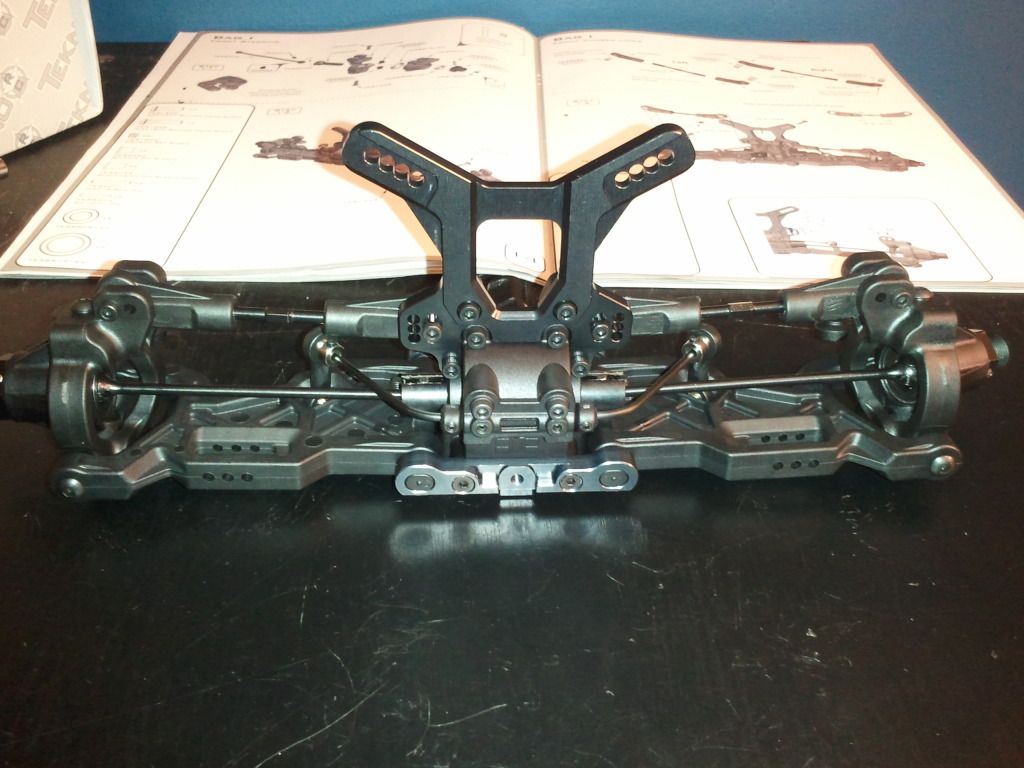
Next up Bag "H" Front Suspension...
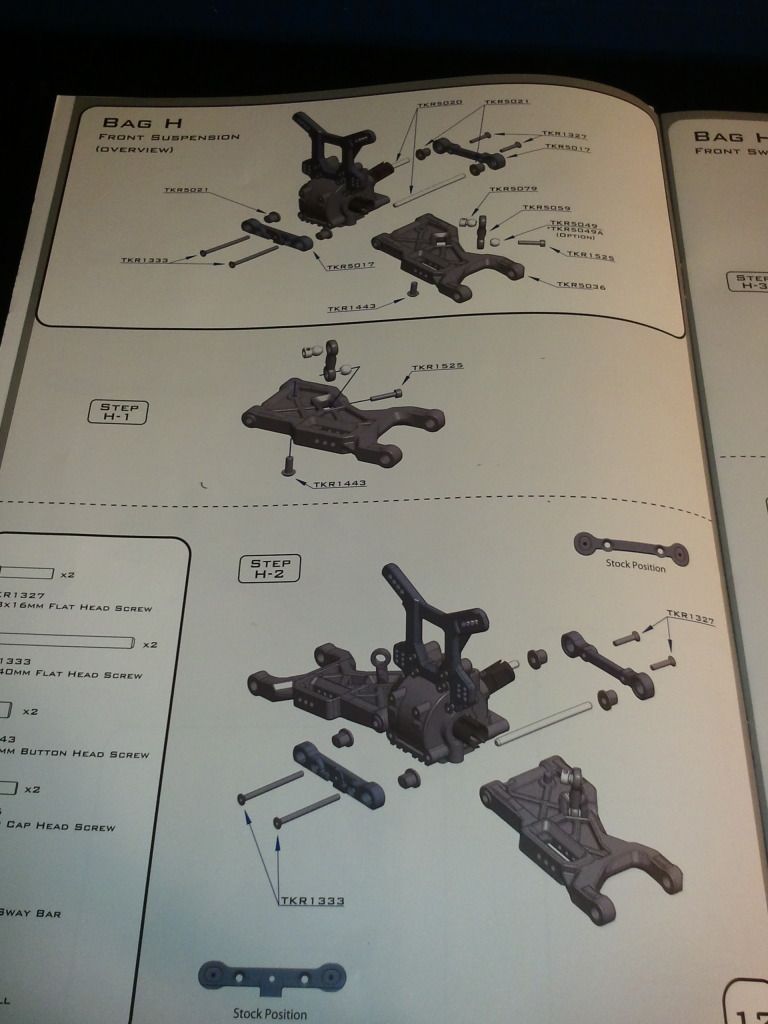
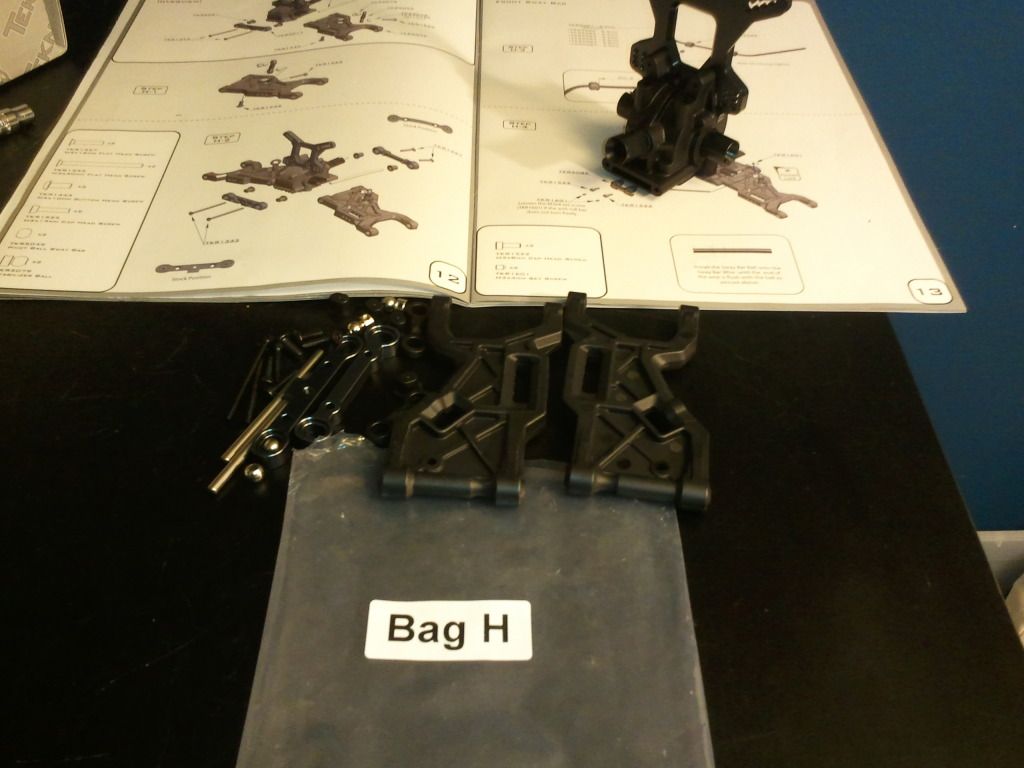
The front suspension is pretty much the same process as the rear suspension so I wont go into too many details...I was able to assemble it quicker after learning from my mistake with the rear setup..Attached the arms and those heavy duty hinge pin plates. Then moved onto the sway bar setup again...
The front suspension is pretty much the same process as the rear suspension so I wont go into too many details...I was able to assemble it quicker after learning from my mistake with the rear setup..Attached the arms and those heavy duty hinge pin plates. Then moved onto the sway bar setup again...
11-20-2012, 07:11 AM
#12
Next up Bag "I"...Front steering/hub Assembly..
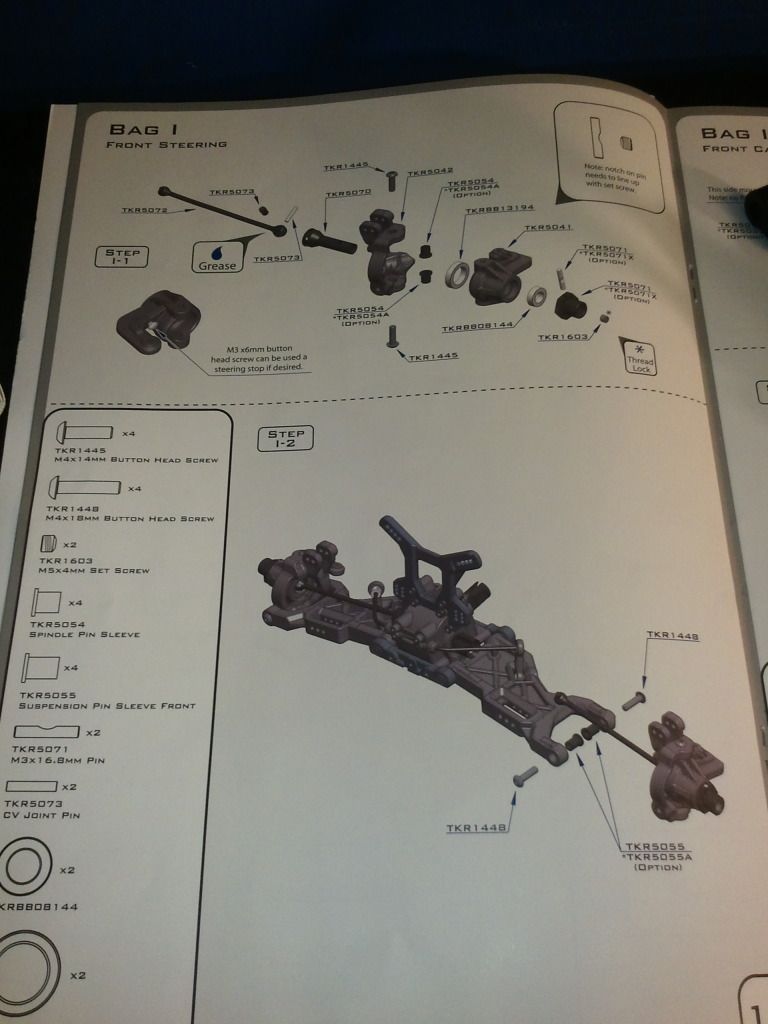
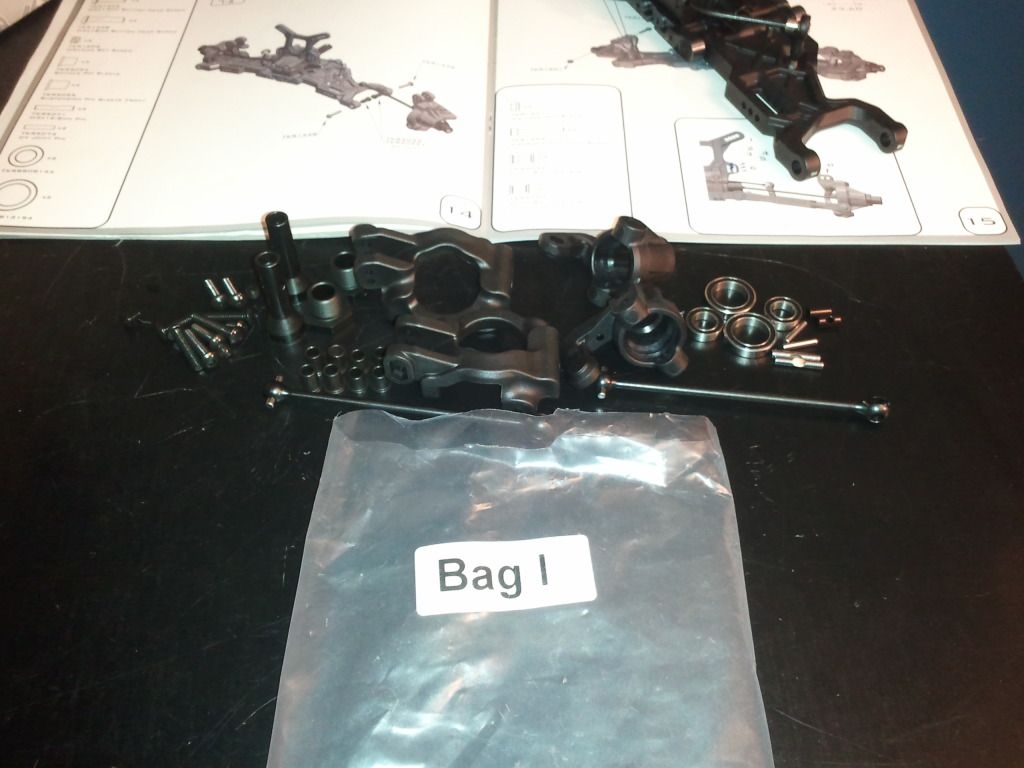
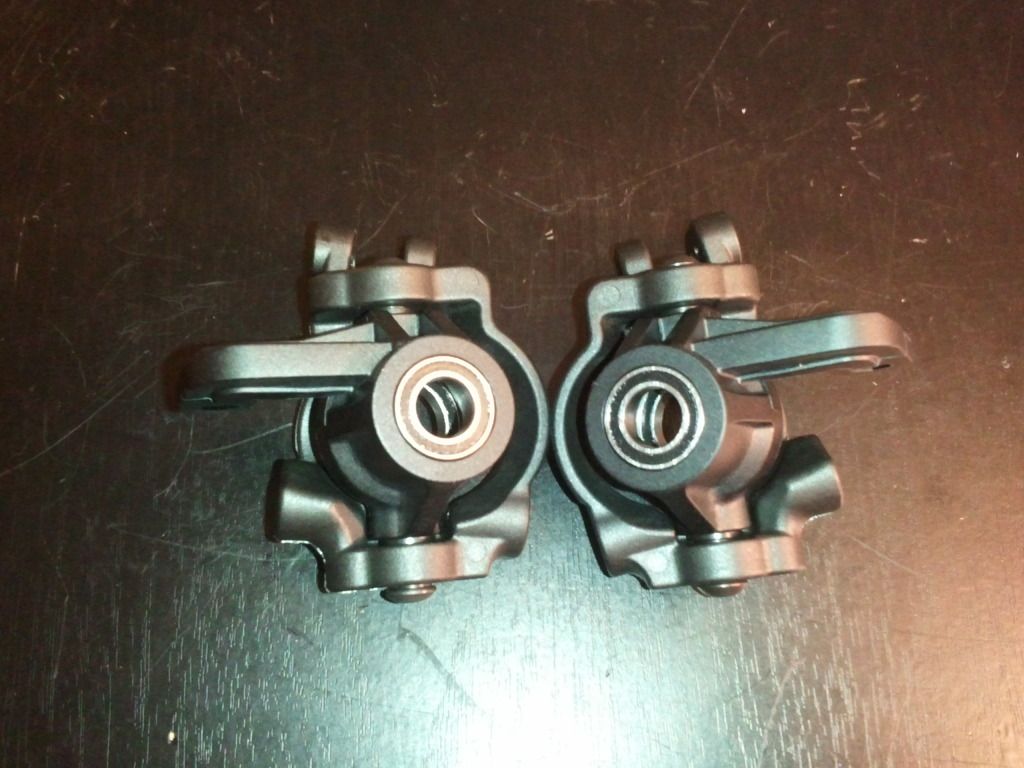
Once again the front steering/hub assembly is basically the same as the rear except it adds steering....I wont go into too much detail here either, but just like in Bag H, I learned alot from the rear and it made the front come together alot easier...First I installed the bearings and top hats to the hub carrier and steering knuckle and attached them to the front arms...
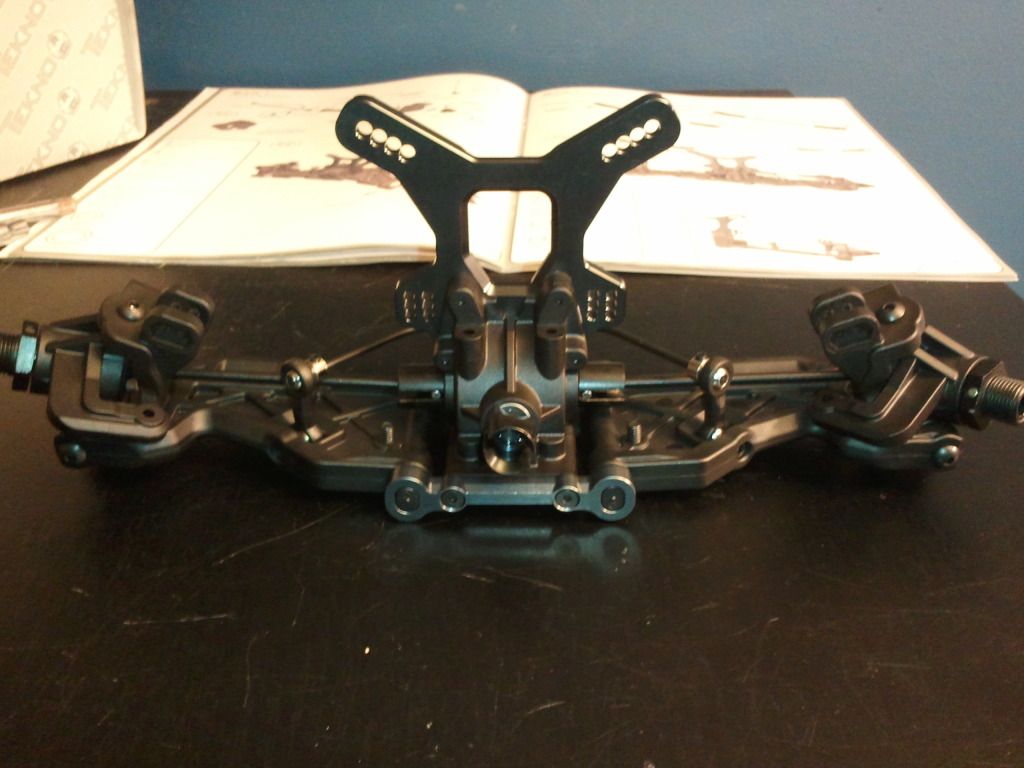
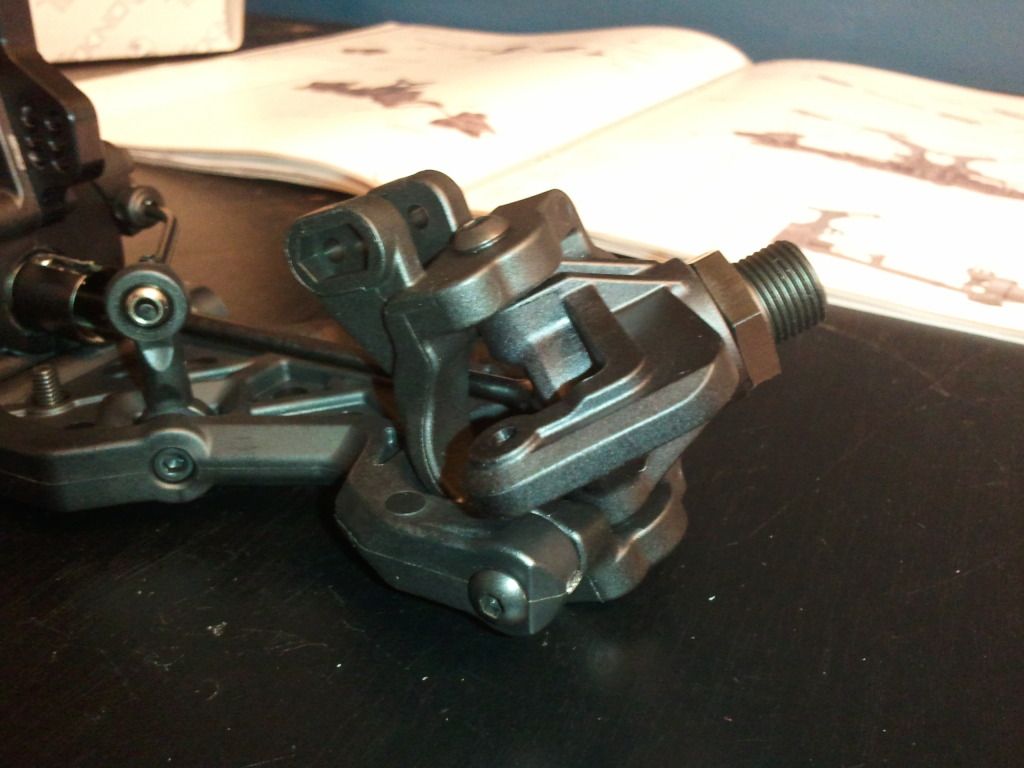
Part 2 of Bag "I"...front camber links
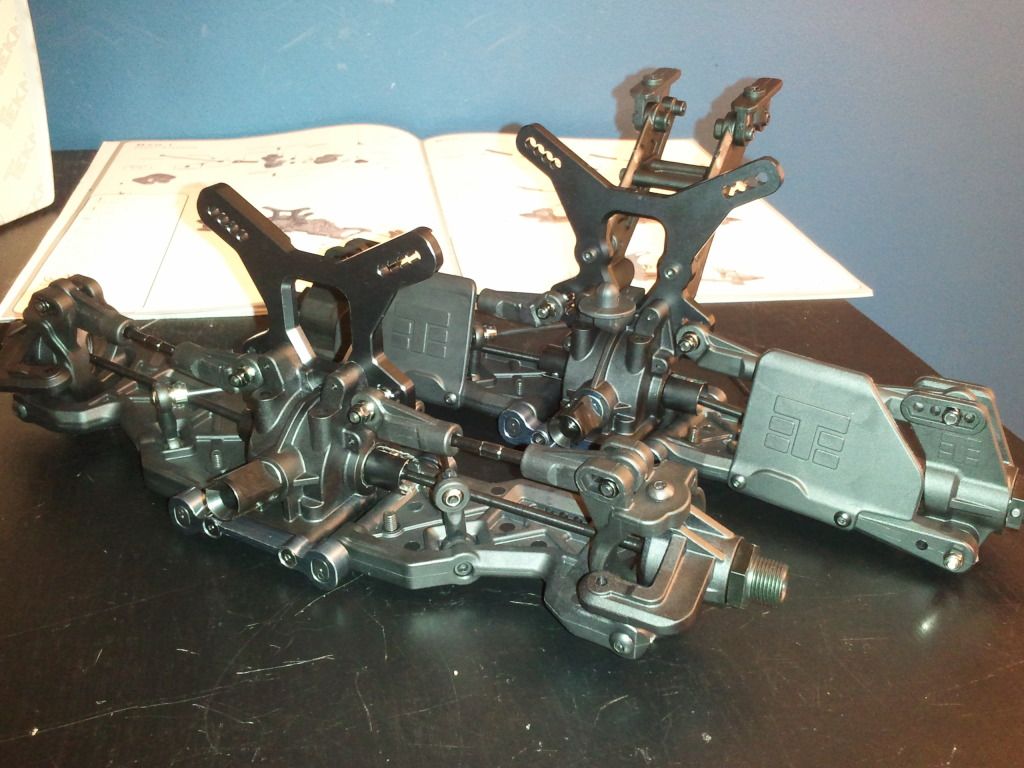
And here are the finished (sorta) front and rear setups....Initial thoughts of the kit are very well laid out and easy to follow...Great support too...More to come soon!
Once again the front steering/hub assembly is basically the same as the rear except it adds steering....I wont go into too much detail here either, but just like in Bag H, I learned alot from the rear and it made the front come together alot easier...First I installed the bearings and top hats to the hub carrier and steering knuckle and attached them to the front arms...
Part 2 of Bag "I"...front camber links
And here are the finished (sorta) front and rear setups....Initial thoughts of the kit are very well laid out and easy to follow...Great support too...More to come soon!
11-20-2012, 08:56 AM
#13
So far so good with the Tekno EB48 Kit...I love how easy the directions are to follow and Tekno support is great...I can see why alot of people are raving about this Buggy, It has alot of adjustiblitly too. I will be able to toy with thousands of setups through out the Buggy...
My Original plan for Electronics was to go with a Tekin T8 RX8 system and 4s Lipo, Unfortunately with the holidays coming up I wont have the money to go with Tekin...right now. So I have decided to use SCT electronics and run it on a 2s Lipo. If Santa thinks Ive been a good boy I might have a Castle Mamba Monster under the tree (they are on sale this week on their site for Black Friday)...Also gonna go with a Savox servo for steering. I run Savox servos in all of my MTs and they are great...Probably will go with a 1256 or 1258. Gens Ace Lipos have worked out great for me too so I will grab 1 or 2 more from hobbypartz.com
I picked up a set of cheap "generic" wheels and tires so I could have a rolling chassis and something to bash with and not have to worry about ruining good race tires lol. I did find a few sets of tires I liked on VP Pro Racing.
So I hope by Thanksgiving I will have a rolling chassis and then I can anxiously wait for electronics lol....Thanks for checking out the thread and more to come soon!
11-20-2012, 08:58 AM
#14
Nice build thread! That Tekno looks beefy!
11-20-2012, 09:00 AM
#15
Thanks for this thread