


Wratchet's Project "Head Honcho"
 02-13-2010, 11:23 PM
#1
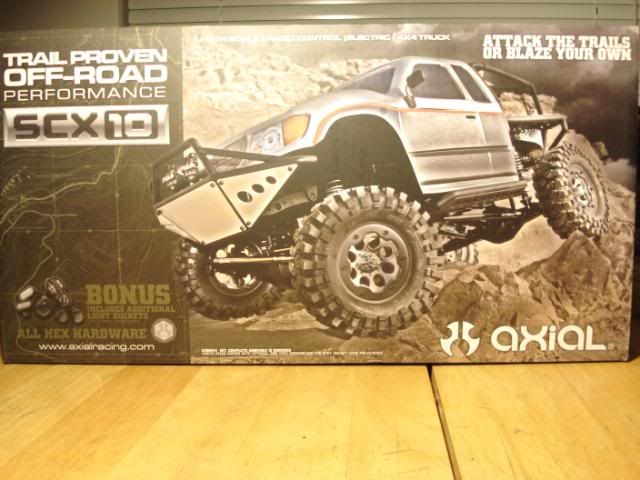
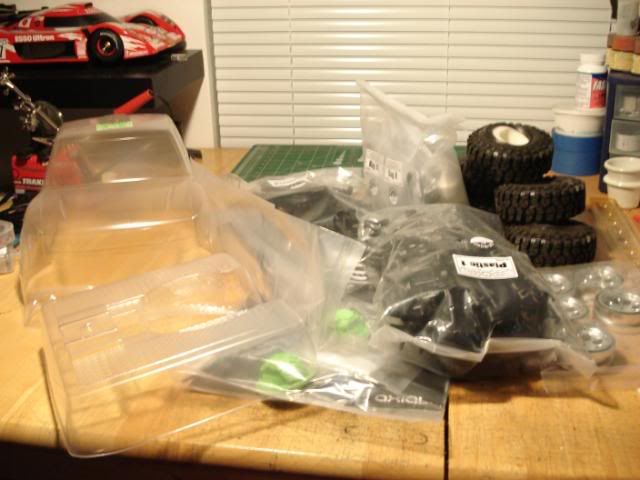
Hey All; Well all I really needed from the LHS was a can of paint and look what stray followed me home. My very own Axial Honcho. Since the F-103GT build is about wrapped up I am using what is left from my Xmas bonus for this rig. There it was just sitting on the back shelf calling my name. Need to do a bit of research on this rig and scoure the www for info and pics for ideas. You all know me so let the fun begin. So the short list includes. Motor/ESC,Recv./Servo. Winch and wire rope. A few scale items. Axial interior/exterior detail kits.That should get me started. lol Here are a few pics. The seal is still fresh. But for how long.lol l8r,w.
I am stoked about this build. Have finally popped the seals on the lid and Wrenching has commenced.lol I ordered a few items. I went with a Tekin FXR ESC 35T HW motor combo. Some GateKeeper rock sliders.A 4 link rear axel truss bar.Bowtie decals. Got a MG645 servo and CC BEC from my LHS. Still a ton of goodies to go. But need another paycheck for those. Well here is my late night day #1 build time.
Get on my build table Bitc*. lol Everybody out da box.
OK then lets get started.
Stage 1;Step 1.
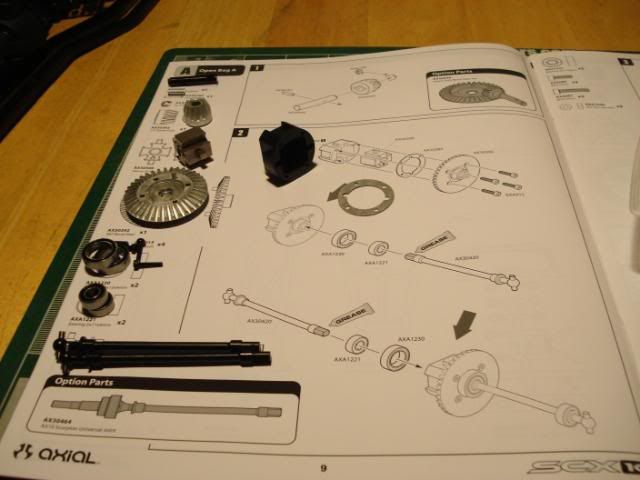
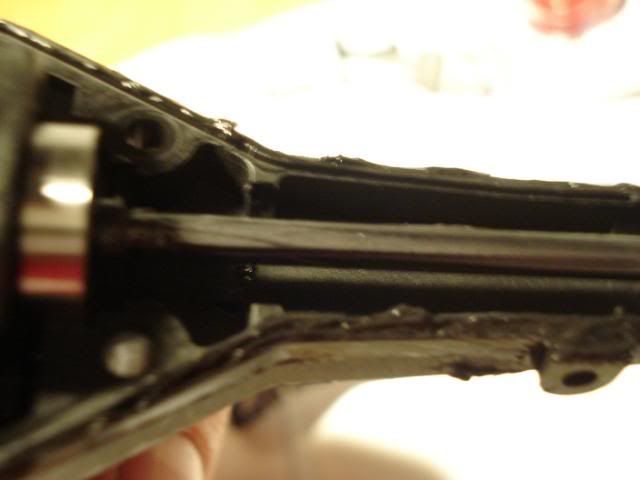
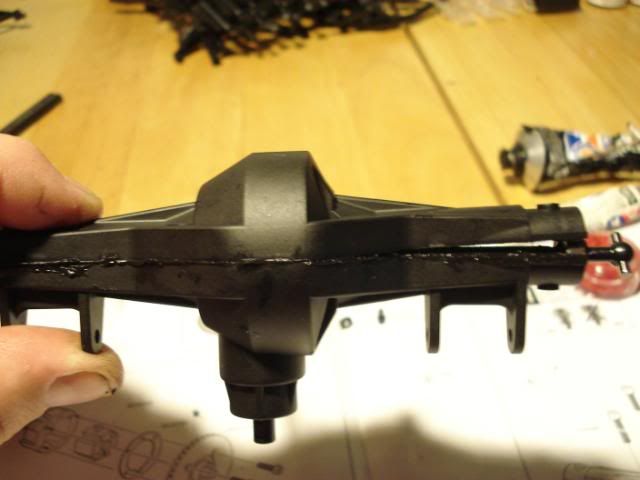
I sealed the axels with silicone and greased all the bearings and axels.

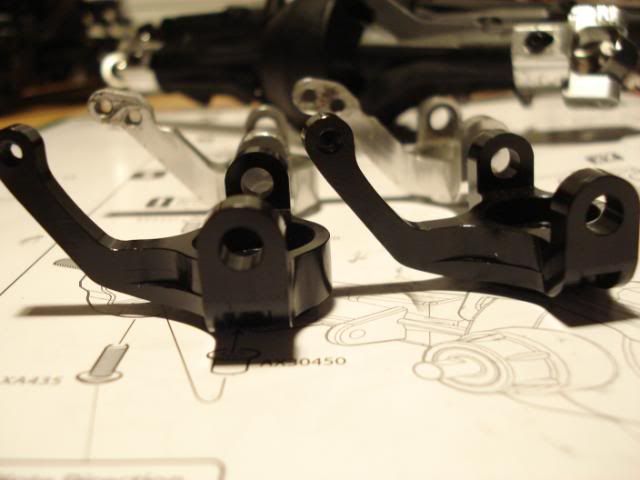
Had some alloy parts and a set of cvd's.
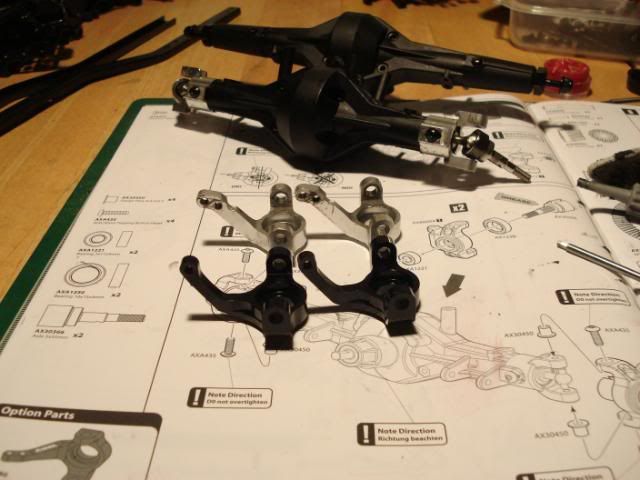
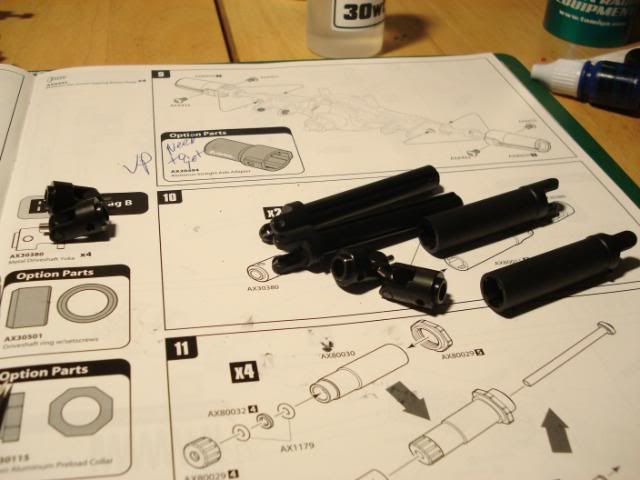
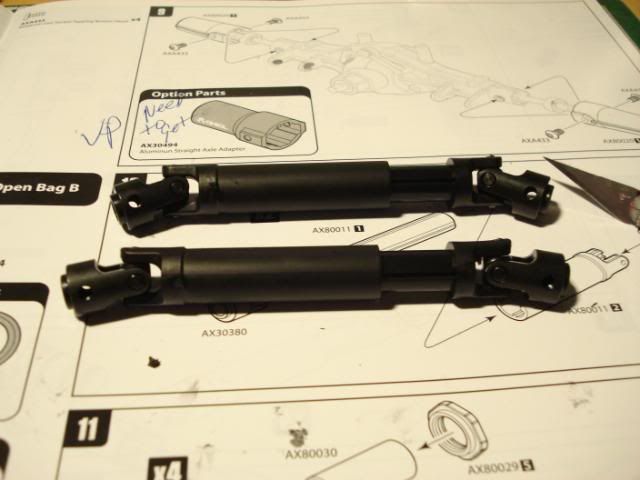
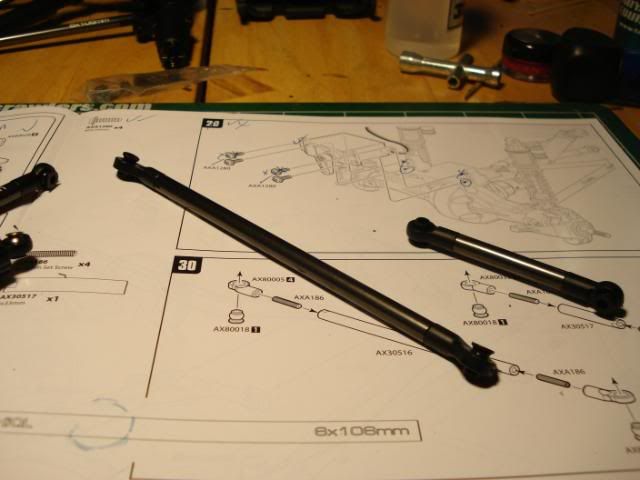
time for some drive line axels. what a PITA to get those U jionts in. 2 cuts later its''s done.
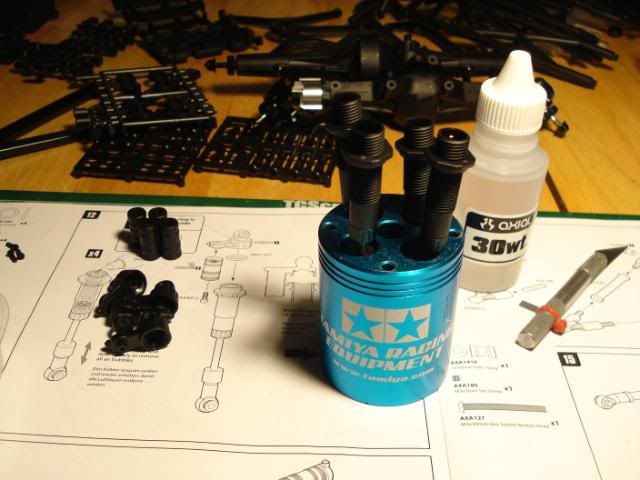
So next was onto the shocks. Wow I never really like doing these but I still do. Have had a few issues with these stockers so I am going to get a set of ProLine Powerstroke Scale Shocks. On my list after some bills get paid first. Sux those keep showing up every month.lol
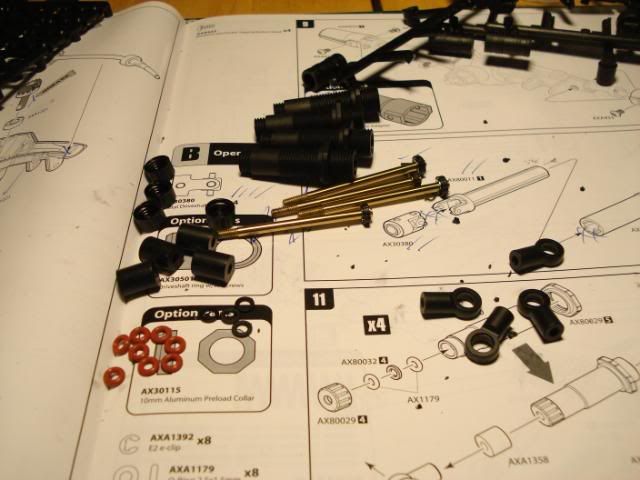
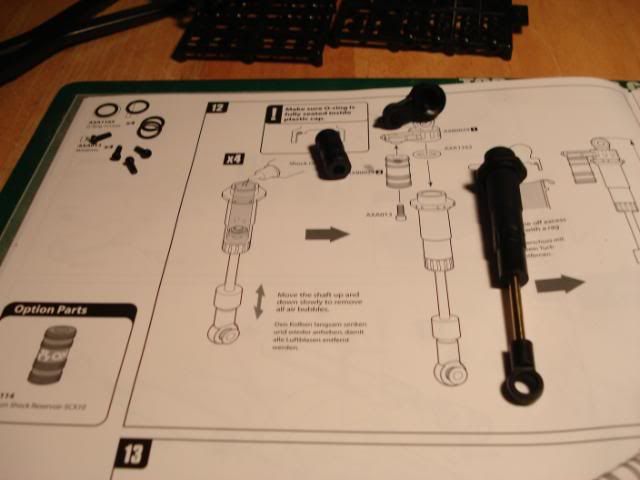
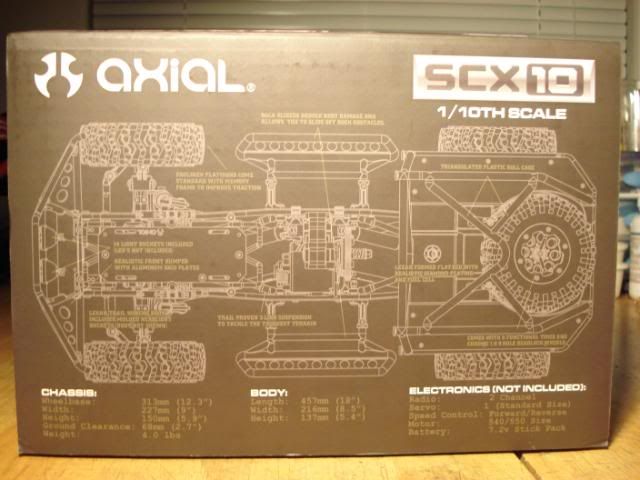
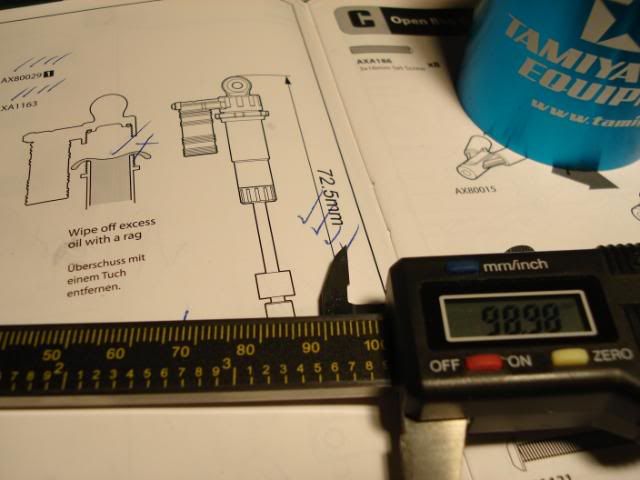
Only one problem the shox don't seem to match the measurments in the book. Typo or F up?

And time for some links to add to the pile of shocks and axels. Starting to look a bit like something. Naa still just a pile O parts.lol
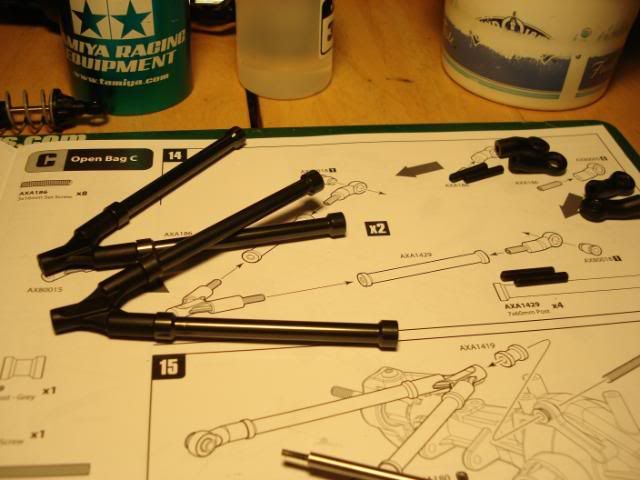
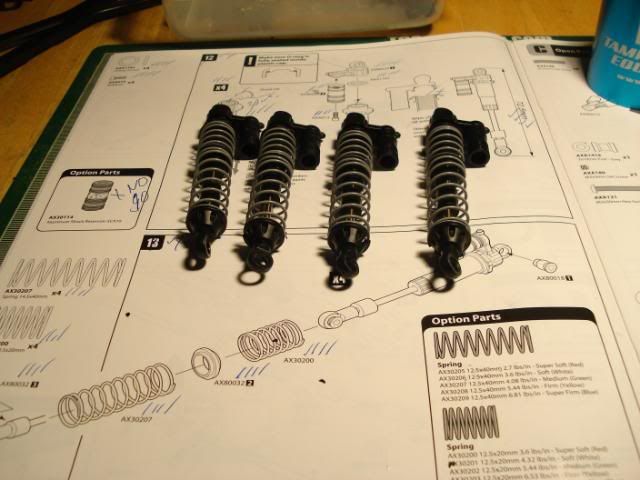
Add the lowers and we got a set ready to go.
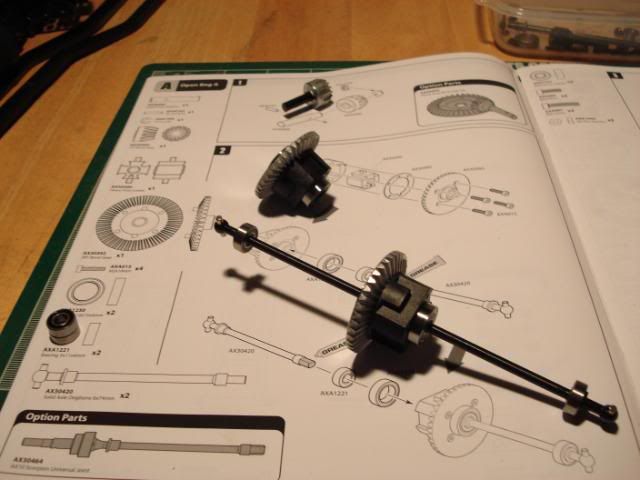
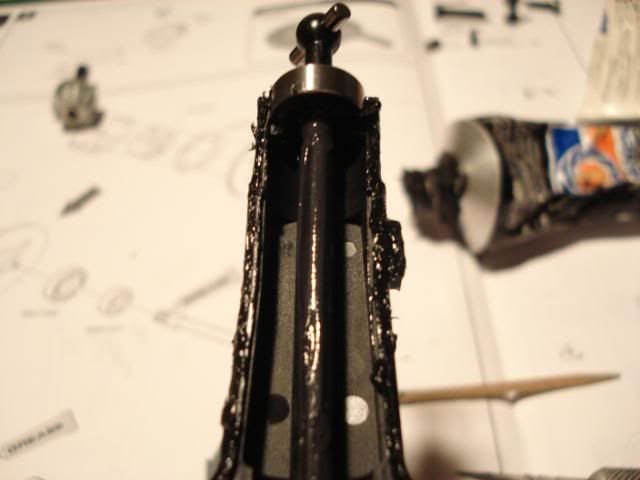
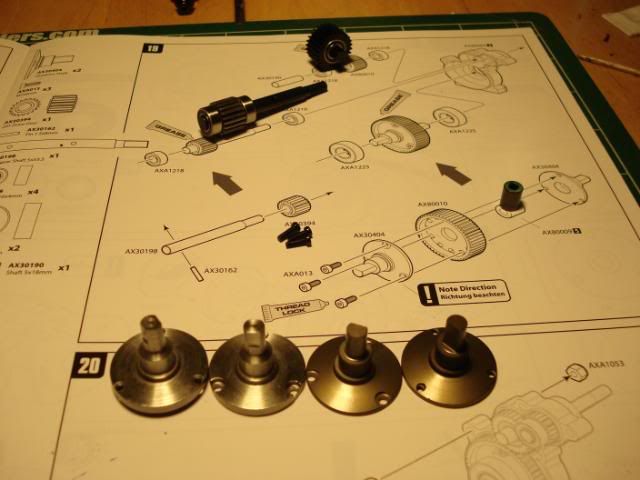
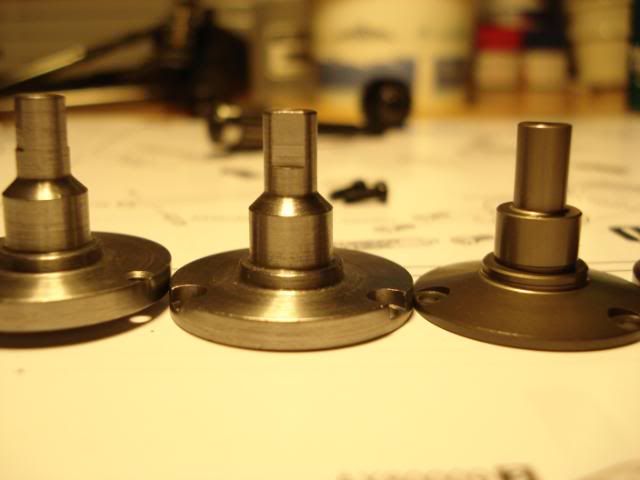
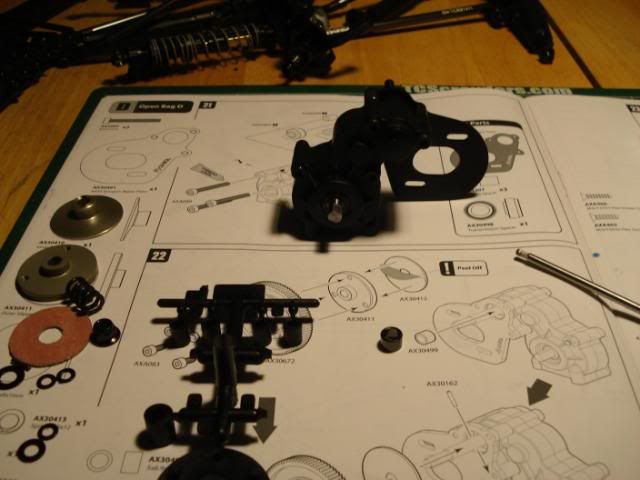
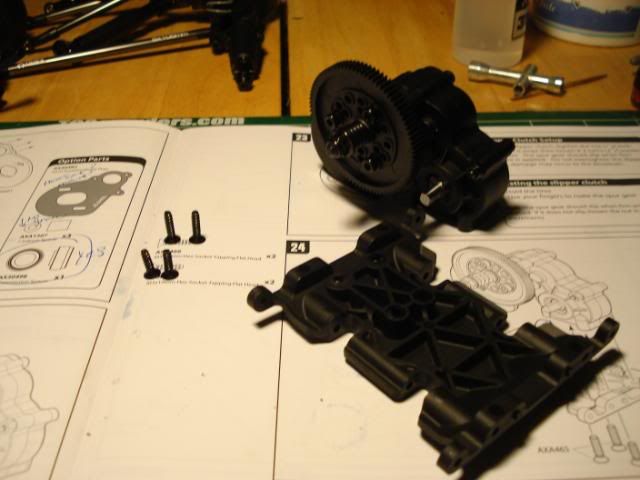
And what good are axels without a trannsmision. Gots to make em go roundy rounds,right.lol I had a Extra Heavy Duty set of Trans outdrives I scooped up on RCC.Shouldn't have any probs with these. I hope.lol Also I decided to seal the trans with RTV silicone as well. Trying to make it a bit water resistant. Trying optimal word.
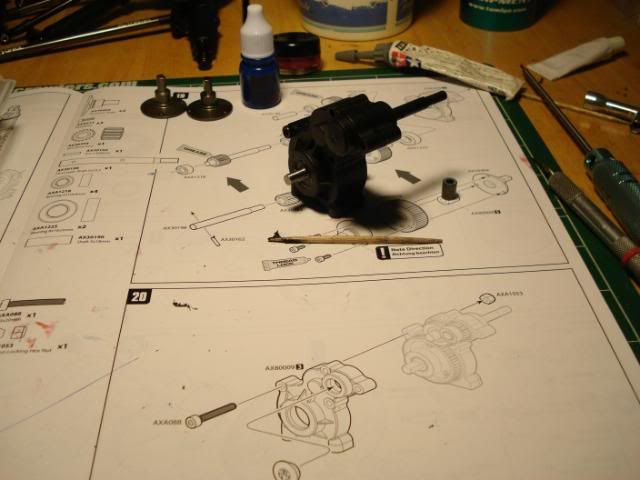
Going to source up a non slipper clutch but for now I installed the stocker .I did lock it down fully.
Hey All; Well onto the next faze of the build. So now I need to mount the trans to the skid and build the chassis so I can add the axels and trans.Then onto the next few pages. I will deveate a bit so as paint is drying I can work in some parts pages.I did a bit of reading before I even opened the box. Sucked waiting 2 days to even look inside the box.So stuff I ordered started coming in. Got my TACO decals. And my My Tekin showed up tonight. So while researching on RCC I saw a guy who did a inside out paint job. He painted the outside for the scale look. But painted the inside as well so when you scratch the outside the paint inside shows through. Sweet idea had to give it a try. Also been working on the rims and tires. Weighted the wheels and deanodized the outside rock rings. Man that is a lot of screws. So here are the next set of pics. enjoy the journey.l8r,w.
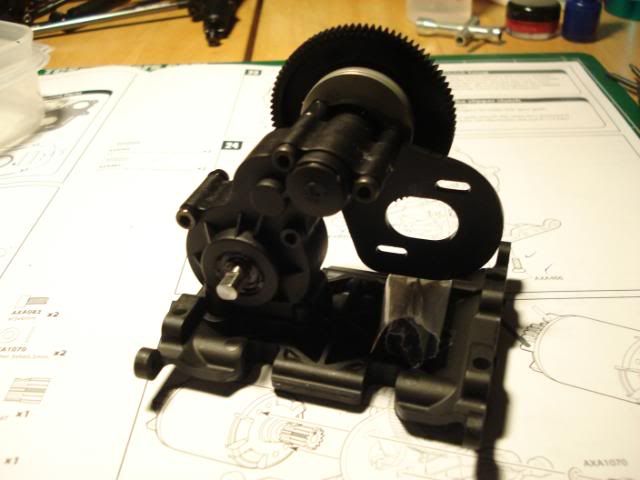
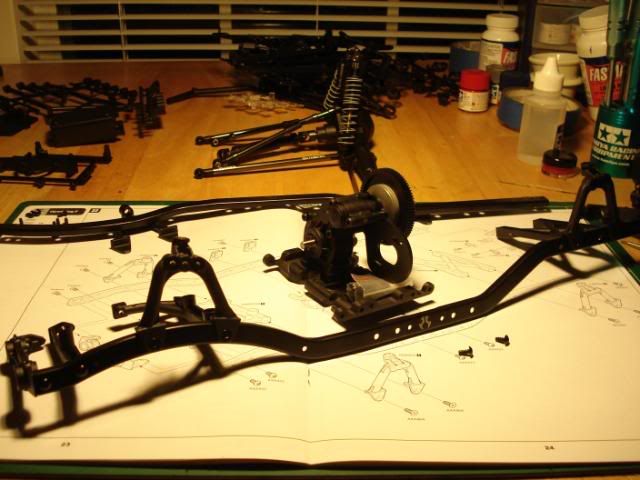
Trans and skid.
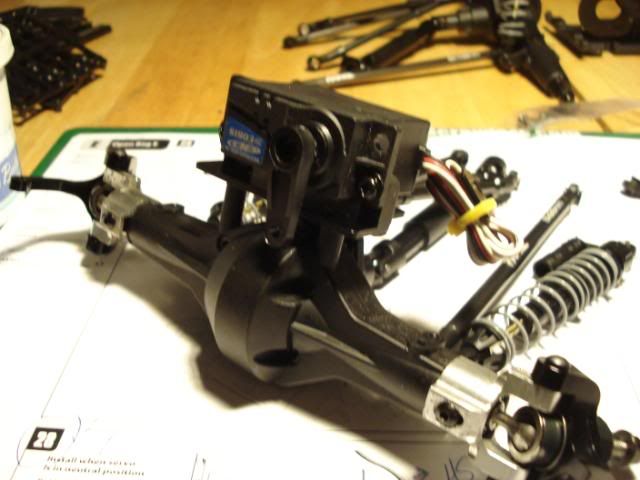
Fill in servo. I ordered a HS795TG for my AX-10 and will move that servo (witch I barrowed from my Turmiol Pro) to the slash and move the HS645MG waterproofed servo in the slash to the Head Honcho. I am going to get a handbros chassis servo mount kit. When funding allows.
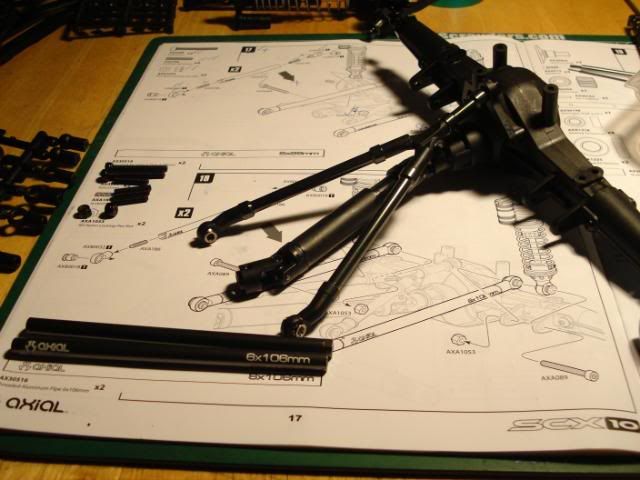
Gotts to have a set of rods to make the wheels move.
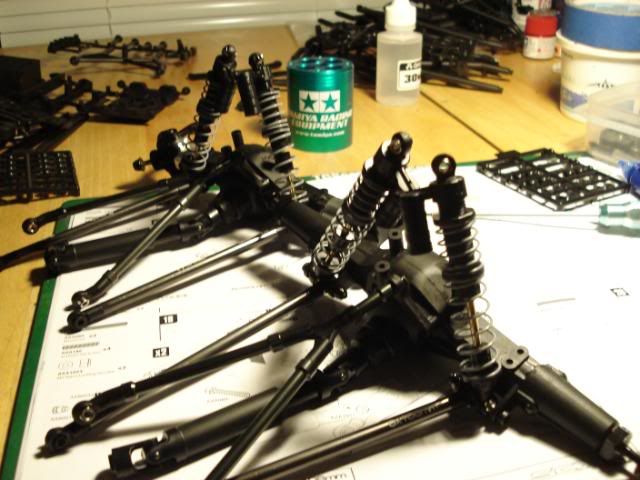
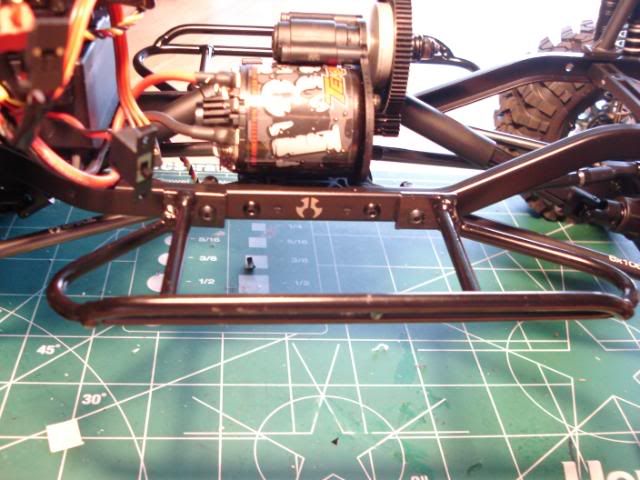
Well time to spread out the back bone and build it into a spine. This is gunna be fun.

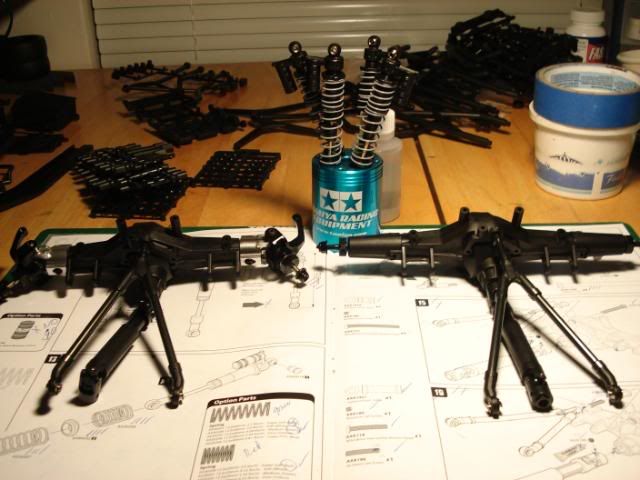
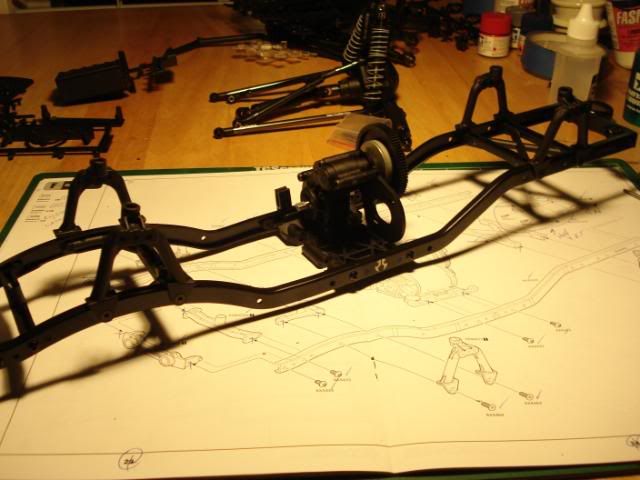
Decided to put 1/2 the stuff all on one side. Then spin the workmat and repeat the other side.
Walla,ready for axels.
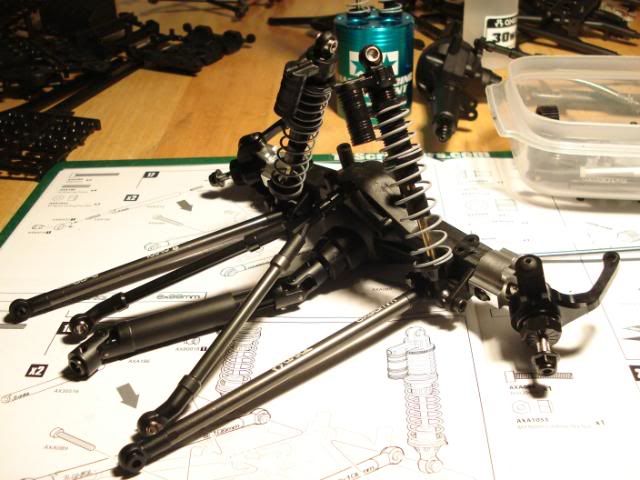
Anyone ready to hang an axel. I am. Woo Hoo starting to look like a Taco to me.
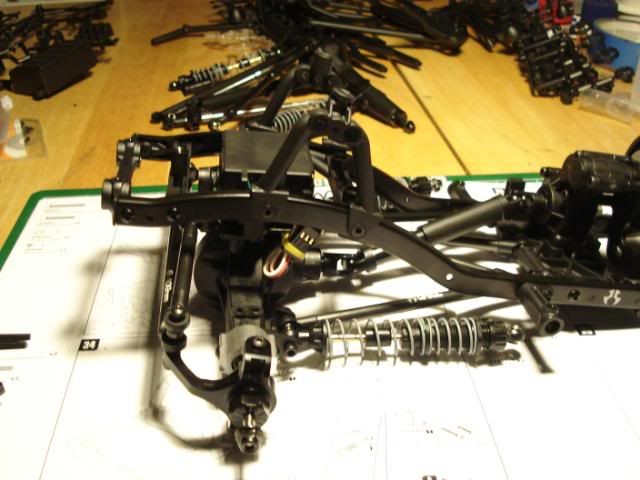
And just have to add the next one as well. all good trucks need 2.
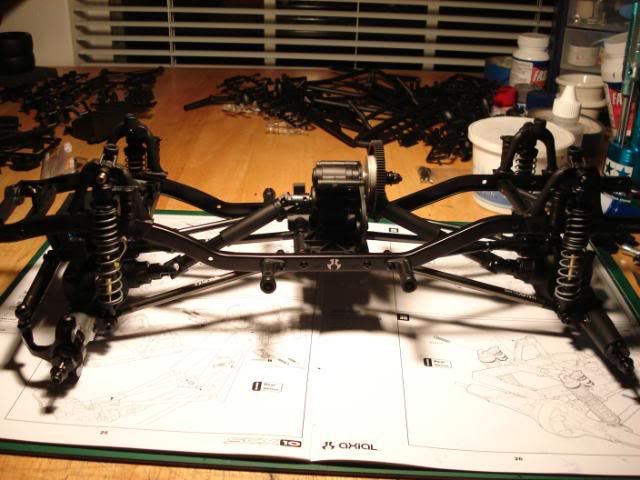
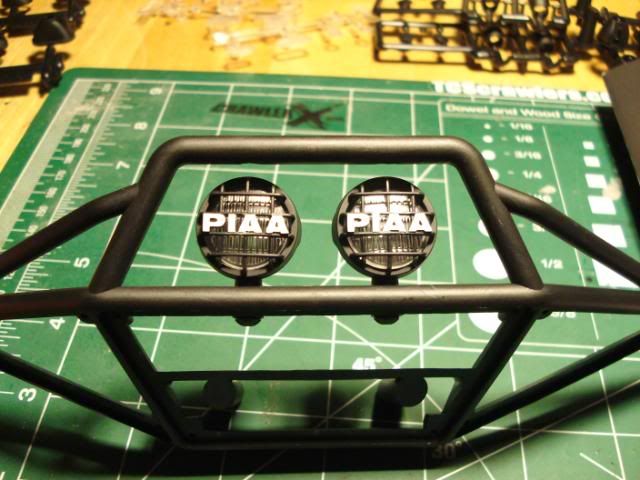
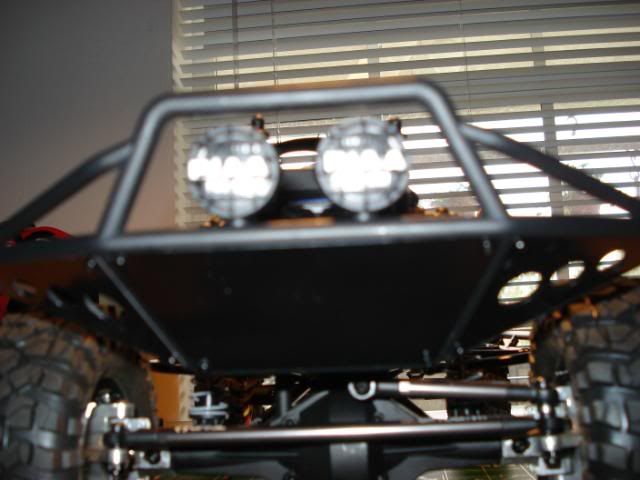
Starting to get some of the tube work put together. I deided to add a scale touch to the front bumper light covers. Just used a toothpic and some white model paint.
I am stoked about this build. Have finally popped the seals on the lid and Wrenching has commenced.lol I ordered a few items. I went with a Tekin FXR ESC 35T HW motor combo. Some GateKeeper rock sliders.A 4 link rear axel truss bar.Bowtie decals. Got a MG645 servo and CC BEC from my LHS. Still a ton of goodies to go. But need another paycheck for those.
Well here is my late night day #1 build time.Get on my build table Bitc*. lol Everybody out da box.
OK then lets get started.
Stage 1;Step 1.
I sealed the axels with silicone and greased all the bearings and axels.
Had some alloy parts and a set of cvd's.
time for some drive line axels. what a PITA to get those U jionts in. 2 cuts later its''s done.
So next was onto the shocks. Wow I never really like doing these but I still do. Have had a few issues with these stockers so I am going to get a set of ProLine Powerstroke Scale Shocks. On my list after some bills get paid first. Sux those keep showing up every month.lol
Only one problem the shox don't seem to match the measurments in the book. Typo or F up?
And time for some links to add to the pile of shocks and axels. Starting to look a bit like something. Naa still just a pile O parts.lol
Add the lowers and we got a set ready to go.
And what good are axels without a trannsmision. Gots to make em go roundy rounds,right.lol I had a Extra Heavy Duty set of Trans outdrives I scooped up on RCC.Shouldn't have any probs with these. I hope.lol Also I decided to seal the trans with RTV silicone as well. Trying to make it a bit water resistant. Trying optimal word.
Going to source up a non slipper clutch but for now I installed the stocker .I did lock it down fully.
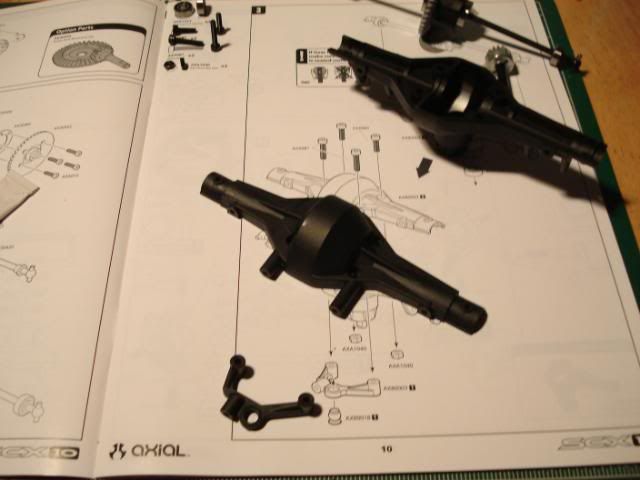
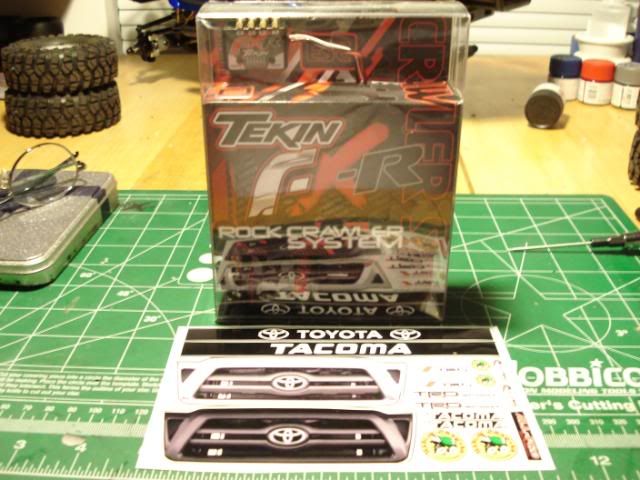
Hey All; Well onto the next faze of the build. So now I need to mount the trans to the skid and build the chassis so I can add the axels and trans.Then onto the next few pages. I will deveate a bit so as paint is drying I can work in some parts pages.I did a bit of reading before I even opened the box. Sucked waiting 2 days to even look inside the box.So stuff I ordered started coming in. Got my TACO decals. And my My Tekin showed up tonight. So while researching on RCC I saw a guy who did a inside out paint job. He painted the outside for the scale look. But painted the inside as well so when you scratch the outside the paint inside shows through. Sweet idea had to give it a try. Also been working on the rims and tires. Weighted the wheels and deanodized the outside rock rings. Man that is a lot of screws. So here are the next set of pics. enjoy the journey.l8r,w.
Trans and skid.
Fill in servo. I ordered a HS795TG for my AX-10 and will move that servo (witch I barrowed from my Turmiol Pro) to the slash and move the HS645MG waterproofed servo in the slash to the Head Honcho. I am going to get a handbros chassis servo mount kit. When funding allows.
Gotts to have a set of rods to make the wheels move.
Well time to spread out the back bone and build it into a spine. This is gunna be fun.
Decided to put 1/2 the stuff all on one side. Then spin the workmat and repeat the other side.
Walla,ready for axels.
Anyone ready to hang an axel. I am. Woo Hoo starting to look like a Taco to me.
And just have to add the next one as well. all good trucks need 2.
Starting to get some of the tube work put together. I deided to add a scale touch to the front bumper light covers. Just used a toothpic and some white model paint.
 02-14-2010, 11:00 PM
#2

It's interesting that your measurements don't match Axial's specs. That's very odd. Did you figure out why?
Are you a member on RCCrawler? If so I'm sure those guys could she light on the situation.
Are you a member on RCCrawler? If so I'm sure those guys could she light on the situation.
02-15-2010, 07:59 PM
#4
Yea I posted there and turns out I did everything right. Need to go back and take out the bumpstops I was told. But, I have been eyeing some Pro-Line Powerstroke Shocks. So I am not going to dump any time or $ into them. Was going to call Axial but fugured no need.
 02-15-2010, 08:29 PM
#5
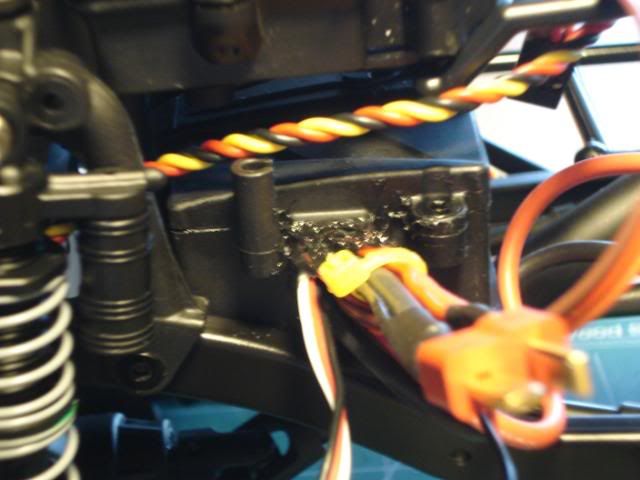
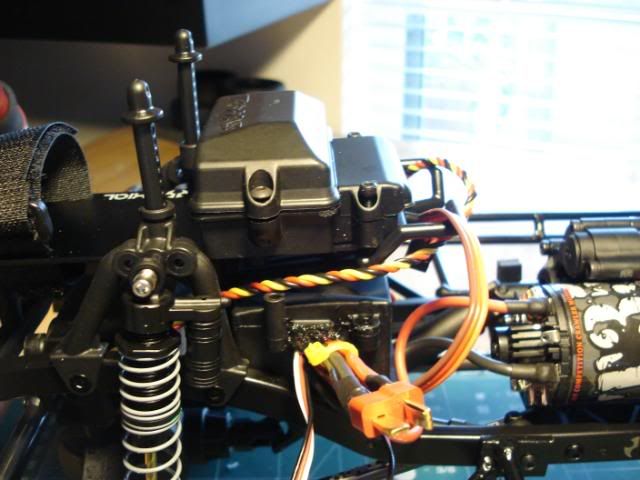
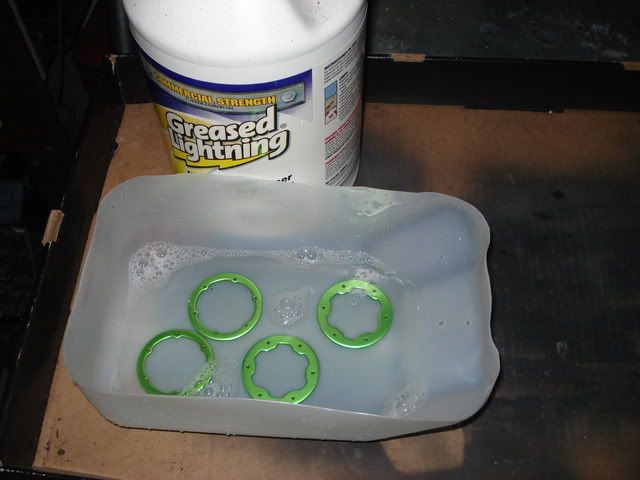
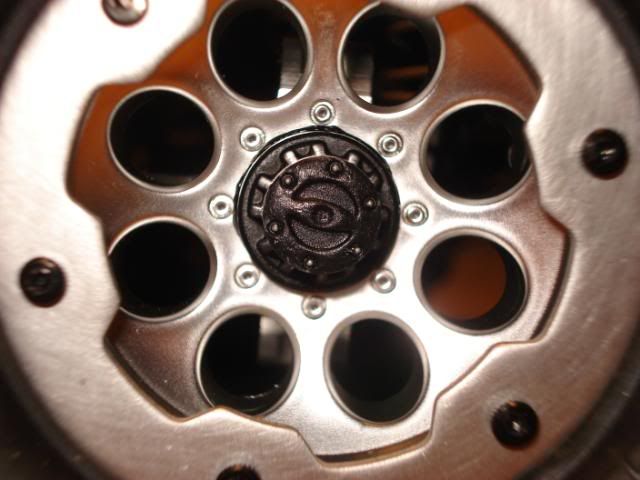
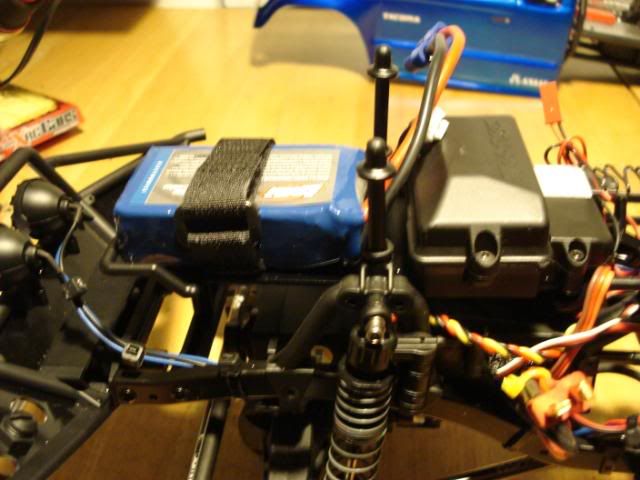
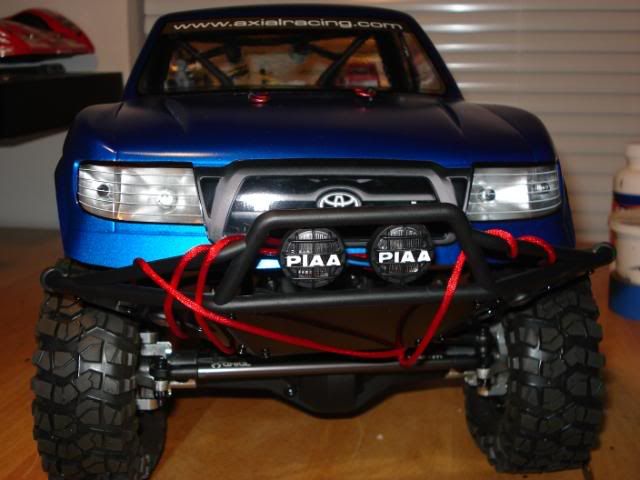
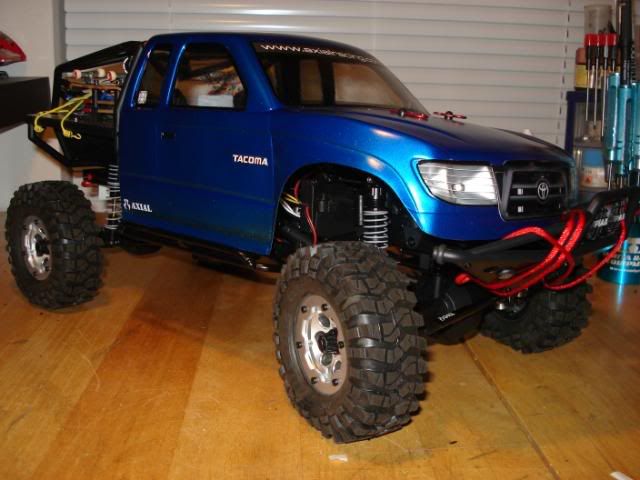
Well onto the next pages of the build job. So I ordered up a Tekin FXR with a 35t motor. I installed Deans plugs on everything and since I plan on getting a 3 Cell LiPo for it I went up one guage size in wire diameter on the Battery side of the ESC. Kit supplies 14G I bumper to 12G Wet Noodle Deans Wire.Left the 12G wire going to the motor leads. I also decided to use the Axial recv. box for my ESC and BEC storage. I sealed the top and wire outlet hole with some more RTV Silcone to waterproof things a bit. Since I will be running a Losi Comp Crawler 3 cell battery I will have room on the battery tray for a Traxxas Waterproof Recv. box.It has been mounted as well and ready for a recv. Scored a set of Rock Sliders from GateKeeper designs. Got the wheels weighted and the tires mounted up and on the chassis. I didn't like the grey rock rings and had a set of green ones I stripped to silver but didn't use for the Blazer build and found them in the spares box and they look better. I detailed the wheel nut caps and added a dab of glue to hold them in place.One more thing I got done was to paint the front bumper metal inserts black with some appliance epoxy paint. Waiting on a fairlead and a 3Racing winch to complete the front bumper.So here are some pics to go with. l8r,w.
Time to bust out the goodied. Here is the heart and the brains of the operation. Hmmm 3 cell and 35 turn motor. Should do pretty good on wheel speed.I like opening NIB electronics.
Solder station is up and running with help from my buddy Deans. Upped the battery wires and soldered in the CC BEC.
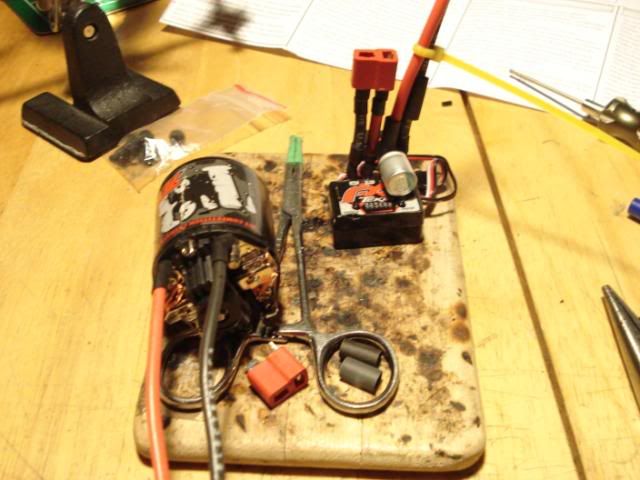
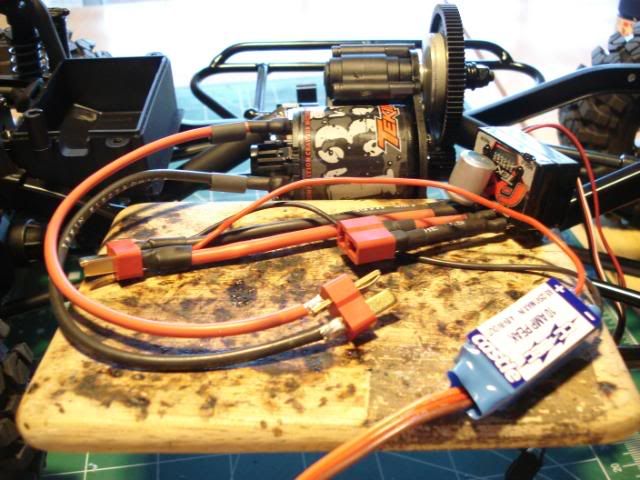
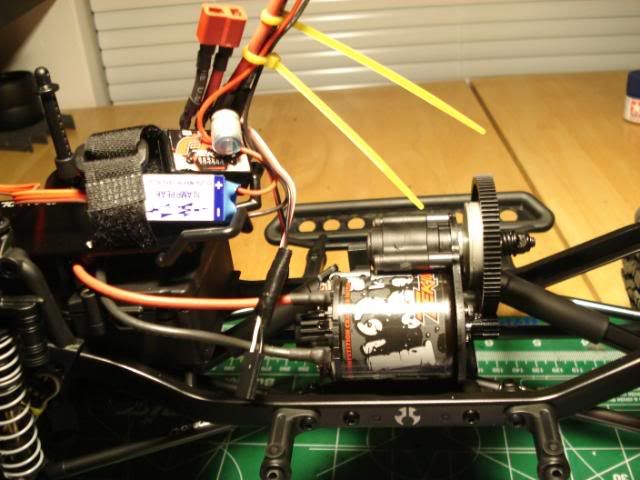
Decided later to just solder the motor leads direct to the ESC and remove those 2 deans plugs. Live and learn. Was going to make it moveable from rig to rig. But If I waterproof it I don't wanna break the seal.lol
Added the second recv. box from a slash.
Gatekeeper Rock sliders all mounted up.
Went all black on the front bumper. Hope this new epoxy paint holds up. If not I'll strip it off.
Went and stripped my green rings from my leftovers build. The grey ones are harder to strip. And I like the silver look.
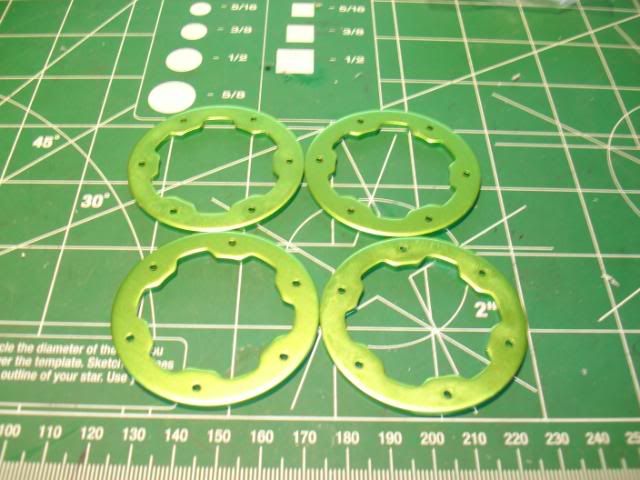
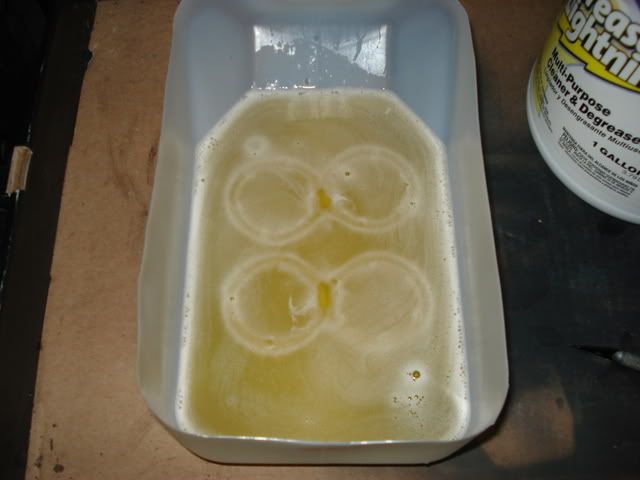
Stripped em in under 30 mins. Love greased lightning.
Finished up and mounted up. Man that is alot of screws.
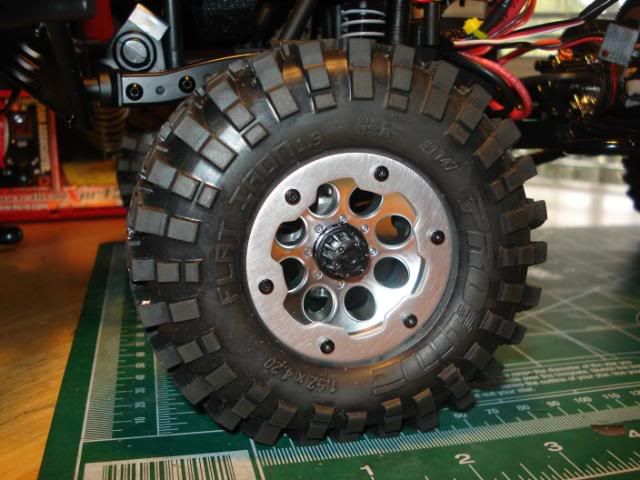
Went and detailed the center caps a bit.
Time to bust out the goodied. Here is the heart and the brains of the operation. Hmmm 3 cell and 35 turn motor. Should do pretty good on wheel speed.I like opening NIB electronics.
Solder station is up and running with help from my buddy Deans. Upped the battery wires and soldered in the CC BEC.
Decided later to just solder the motor leads direct to the ESC and remove those 2 deans plugs. Live and learn. Was going to make it moveable from rig to rig. But If I waterproof it I don't wanna break the seal.lol
Added the second recv. box from a slash.
Gatekeeper Rock sliders all mounted up.
Went all black on the front bumper. Hope this new epoxy paint holds up. If not I'll strip it off.
Went and stripped my green rings from my leftovers build. The grey ones are harder to strip. And I like the silver look.
Stripped em in under 30 mins. Love greased lightning.
Finished up and mounted up. Man that is alot of screws.
Went and detailed the center caps a bit.
02-15-2010, 11:14 PM
#6
You really dislike their shocks that much? They look nice for being stock, composite shocks. The Pro-Lines look great too, but definitely not cheap!
The project is looking good. These SCX-10s are so cool.
Beadlocks are convienent, but all those screws are definitley a PITA. You should try doing a set of my RC4WD beadlocks. They have 12 screws per side and that doesn't even include the 8 screws for the scale center cap. So yeah that's a total of 32 screws per wheel vs Axial's 12 per wheel!
 You need to do what I did and invest in a power screwdriver! I never felt the need to have one for RCs until I started using beadlocks.
02-19-2010, 07:33 PM
You need to do what I did and invest in a power screwdriver! I never felt the need to have one for RCs until I started using beadlocks.
02-19-2010, 07:33 PM
#7
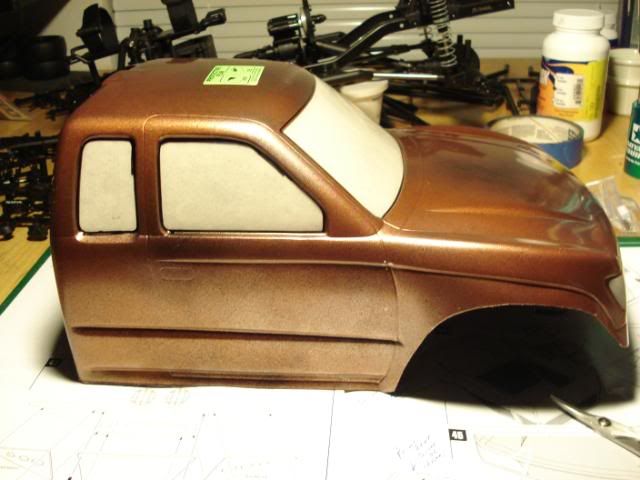
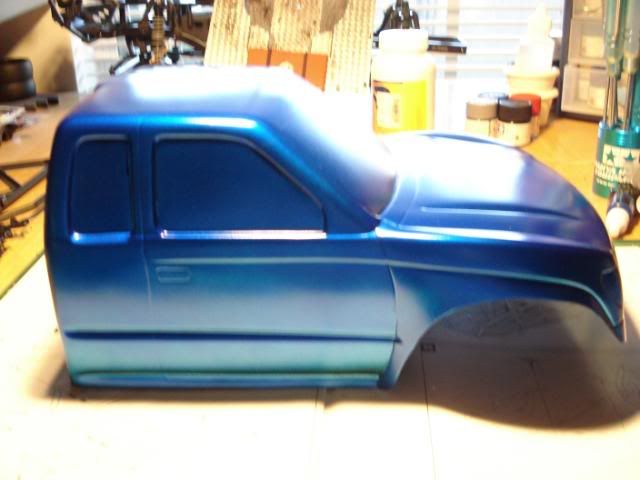
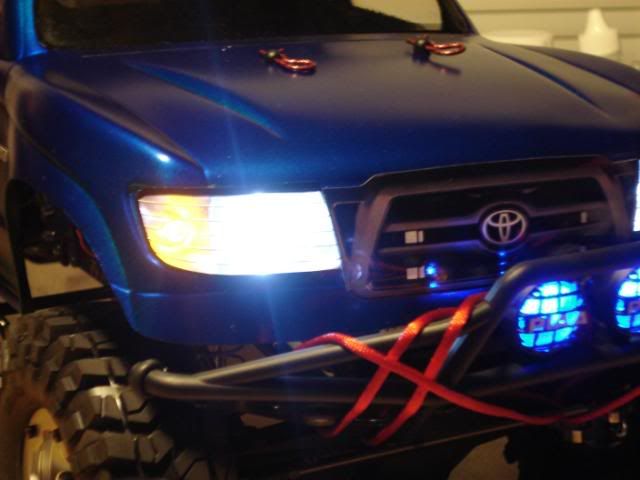
Wazz Upp All; So I have had some time to get a few things in the mail and on the truck. The ESC/Motor is all done. As well as the Hitec HS645MG servo. Decided to just toss a TQ2 radio set at it for test and tune.So here is the finished work for the bodywork and paintjob. I decided to barrow an idea off RCC about an inside out paintjob. I painted the inside lightly with some black and some silver followed by a full coat of Copper.Ana then painted the outside like a hardbody rig. So when it gets scratched the copper color shines through from underneath. Neat idea and will post up some after pics when I shag it a bit. Well here are the pics to with,Enjoy.l8r,w.
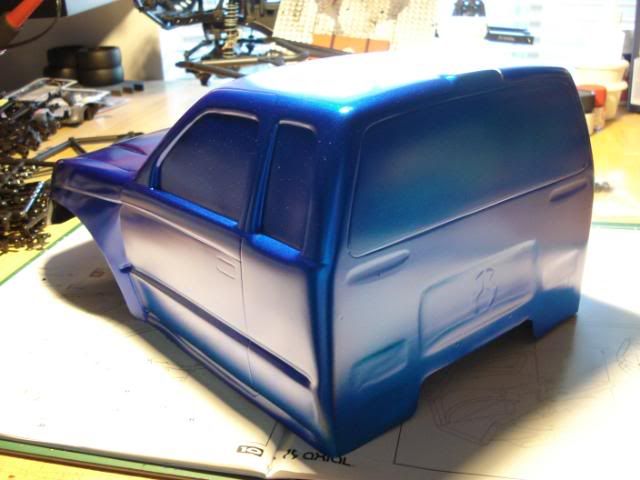
So I washed it real good and lightly tossed some black and silver in the big areas,Then added a full coat of the new Testors RC Copper color for Lexan. Then I backed it with black.
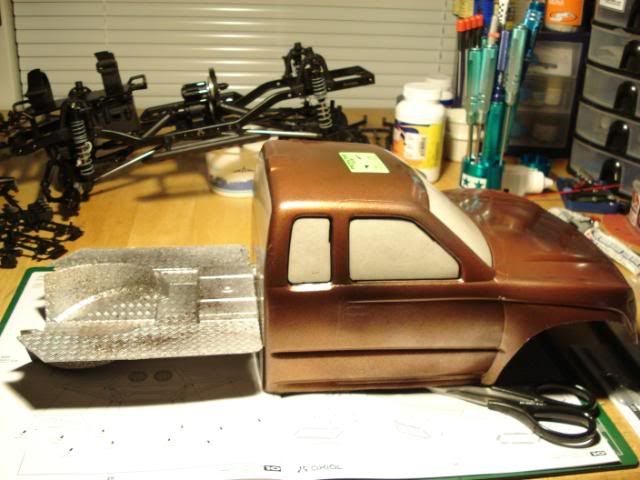
Here is the cab and the bed in mock up faze.
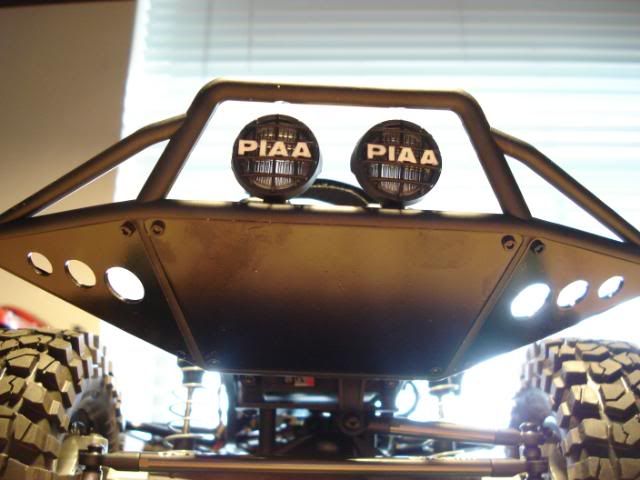
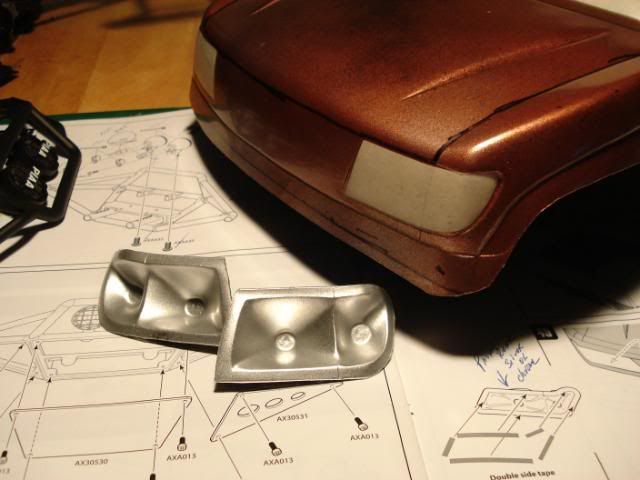
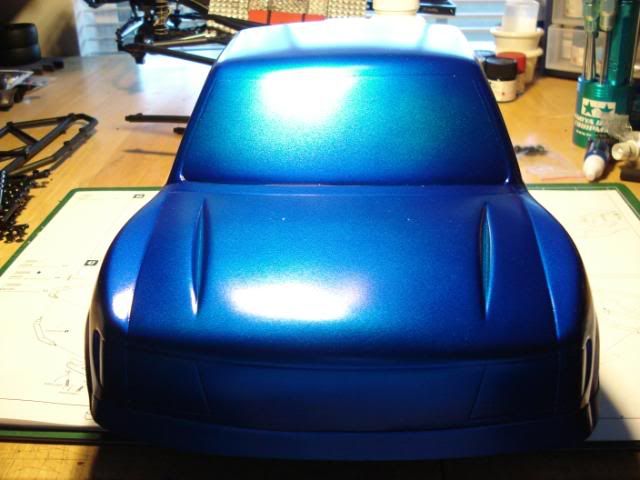
Close up pic of copper paintwork on the inside on the hood area.Also painted up the light buckets and got them ready for LED's.
So after the paint dryed I decided to cut off the outer plastic cover. But leave the windows covered.Then I scuffed up the outside with a scotchbrite pad.Painted a coat of Indy Silver first then went with a coat or 3 of Candy Blue.
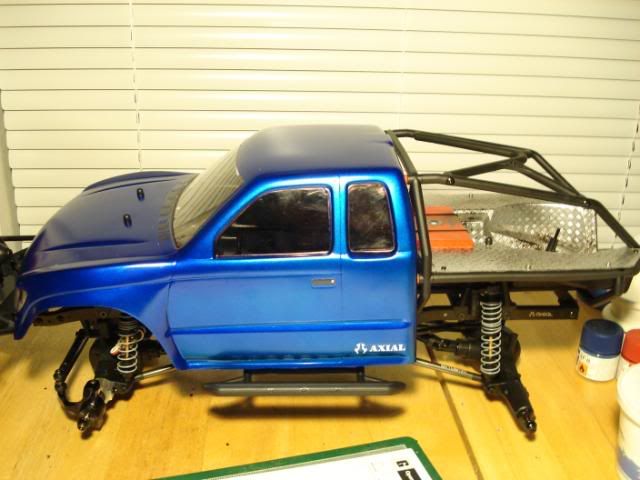
So after pealing off the inside and outside window masks and a few decals it was time to combine the rear bed section and the Lexan cab. What a PITA. The screws all the way up on the top on the inside really reaally SUCK. Here is TACO HELL. Still in mock up awaiting LED work and my winch as well.Looking at some new scale rims as well.
So I washed it real good and lightly tossed some black and silver in the big areas,Then added a full coat of the new Testors RC Copper color for Lexan. Then I backed it with black.
Here is the cab and the bed in mock up faze.
Close up pic of copper paintwork on the inside on the hood area.Also painted up the light buckets and got them ready for LED's.
So after the paint dryed I decided to cut off the outer plastic cover. But leave the windows covered.Then I scuffed up the outside with a scotchbrite pad.Painted a coat of Indy Silver first then went with a coat or 3 of Candy Blue.
So after pealing off the inside and outside window masks and a few decals it was time to combine the rear bed section and the Lexan cab. What a PITA. The screws all the way up on the top on the inside really reaally SUCK. Here is TACO HELL. Still in mock up awaiting LED work and my winch as well.Looking at some new scale rims as well.
02-22-2010, 06:41 PM
#8
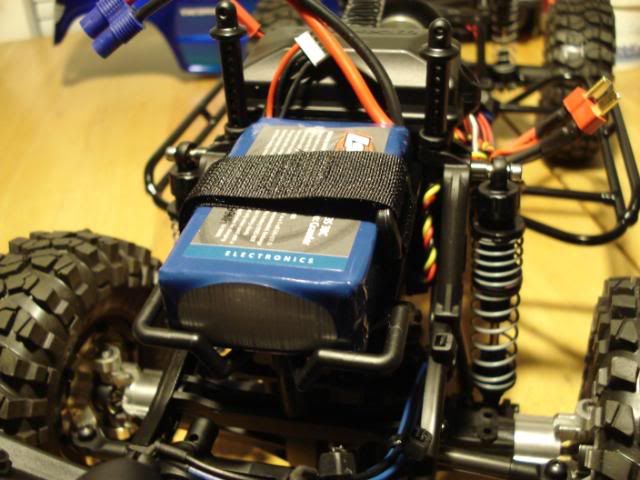
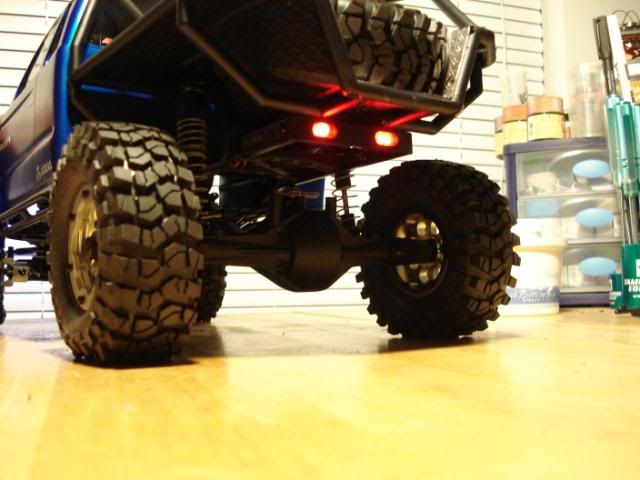
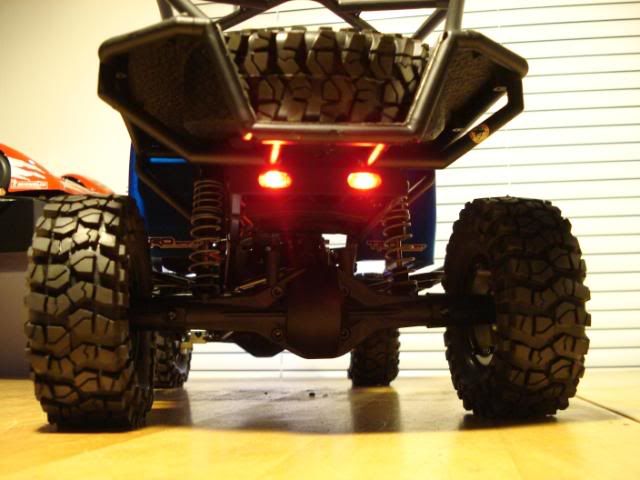
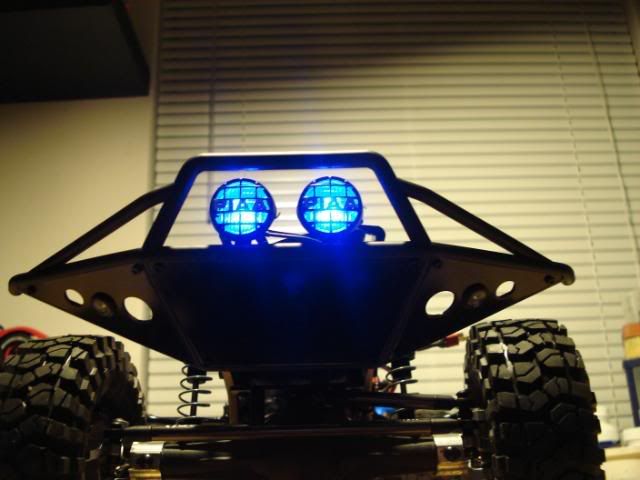
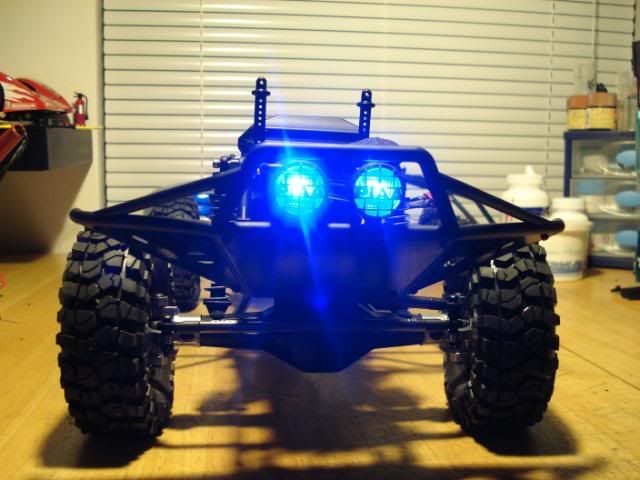
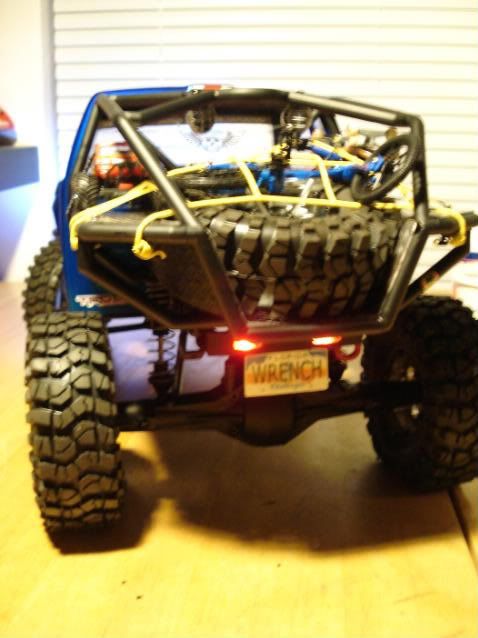
Well onto the next phaze of this build. Time to get LIT UP!!!! LED's here we come. So I have had this Yea Racing 6 light Drifter kit I scored cheep. And have been waiting to use it. Well here is the build for it. I went with 2 colors mounted on the frame and 2 colors in the body and 2 more on order since the kit only came with 4 light sets. 1 White,1 Red,1 Yellow, 1 Blue. Also for the rear lights I saw an idea on RCC and added to it a bit. I sanded down a clear lens that was close to fitting in the chassis brace light mount rear bumper. I then used some Tamiya clear red model paint on the inside of the lens. Then glued them in place with some black RTV silicone. I am working on the lightbuckets for the body and mounted the white/yellow led's in those. Just need to let them dry and then mount them in the body. Here are a couple pice of the red rears and the blue front spots. I ordered 2 sets of whites for rocklights to fill out the 6 outlets on the main box. Also scored my new Losi 3 cell comp crawler battery. That fits like it was made for it.l8r,w.
New power plant go go juice. 3 cell 30C
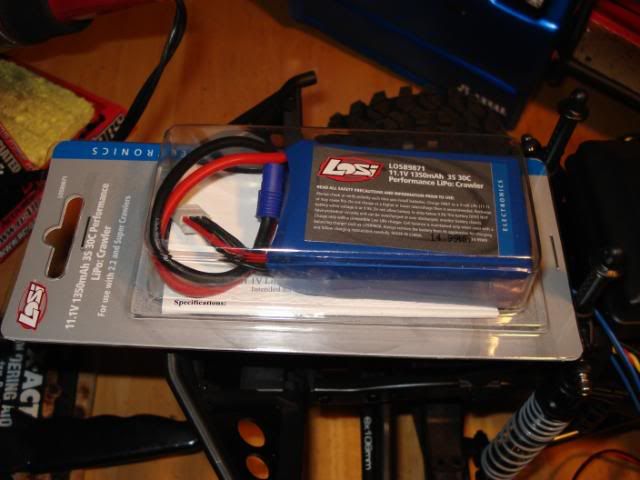
Fits like it was made for it. me likey lots.
Here are the lenses mounted and ready for some LED power.
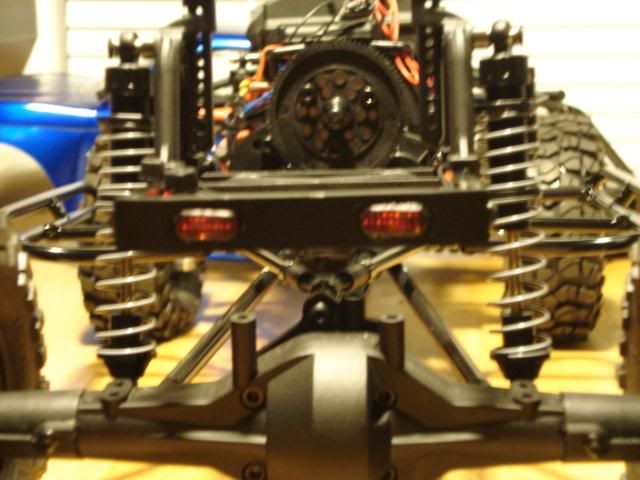
Powered up. Extra red.
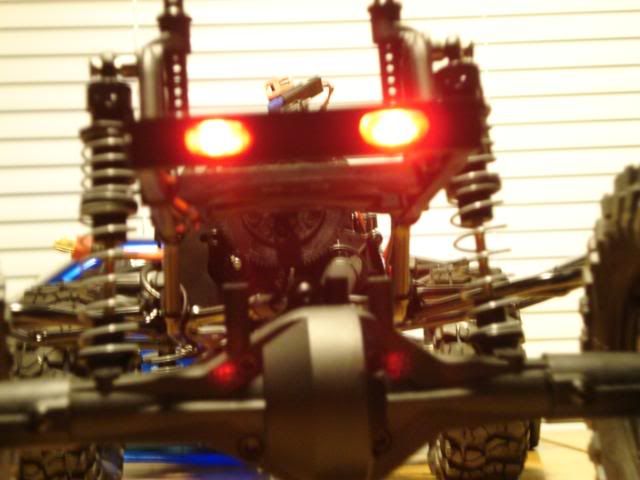
Here is what they look like with the bed on the chassis. I like the look.
And here is the Blue LED's up front in the spots. You will see why later down the road. he he he.....
New power plant go go juice. 3 cell 30C
Fits like it was made for it. me likey lots.
Here are the lenses mounted and ready for some LED power.
Powered up. Extra red.
Here is what they look like with the bed on the chassis. I like the look.
And here is the Blue LED's up front in the spots. You will see why later down the road. he he he.....
02-22-2010, 06:49 PM
#9
For the rings, did you just let them sit in the greased lightning? How long?
 02-24-2010, 06:22 PM
#11
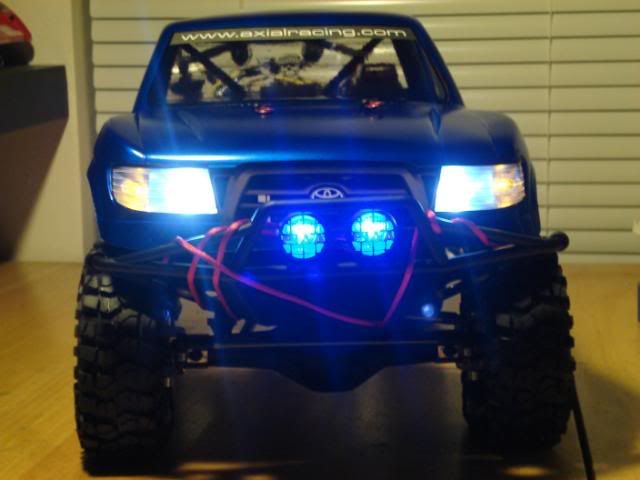
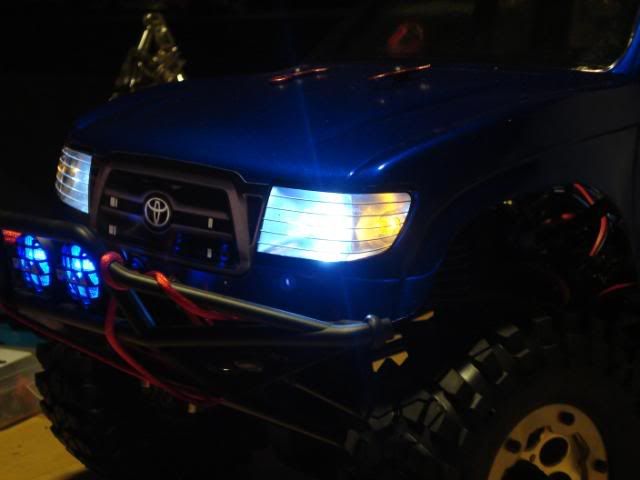
Hey All: I got the lights mounted in the body for the headlights and running / marker lights. Here are the pics to go with. Can't wait for my winch to get here so I can finish up the front bumper. Oh well other things are showing up and on order. Got some sweet scale items variety pak from Team36 racing and paintworx. Norm hooked me up real good. Got my rear 4 link axel truss in today from R2J Kustoms. And finally got my Proline Powerstroke shocks ordered as well.So enjoy the pics.l8r,w.
Just a short test vod of the light kit.
http://www.youtube.com/watch?v=EflaNdf-7tM
Just a short test vod of the light kit.
http://www.youtube.com/watch?v=EflaNdf-7tM
02-27-2010, 08:58 PM
#12
Hey All;
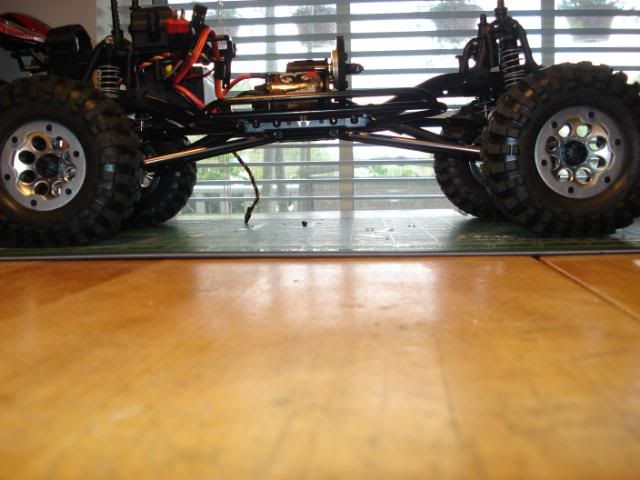
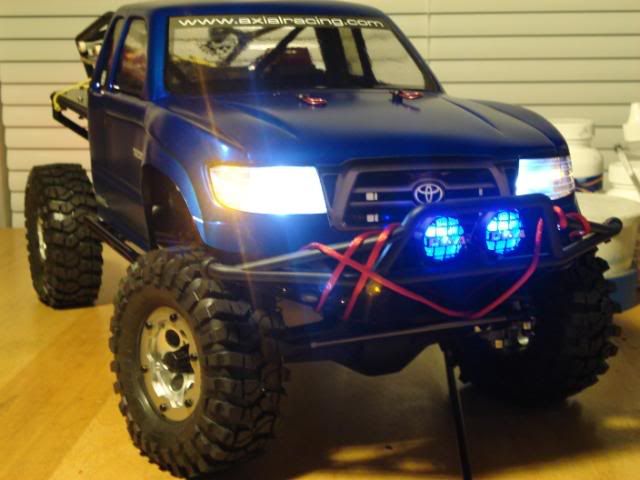
Well I have the rig almost ready for test runs. Was going to go out today but weather has changed all that. Also seems I am having a bit of a problem with my charger. Connection Breakdown appears in the display whenever I try and charge a 3 Cell LiPo and beeps like mad till I hit reset. But it will charge a 2 cell no problems. Man I don't need this now. I am still waiting on some goodies and I need to order some more goodies as well. lol we all know that all too well. So here are a few shots of it on the workbench. Thanks for all the kinds words from you fellas as the build has progressed. I really appreciate it alot. Enjoy.Wrench.
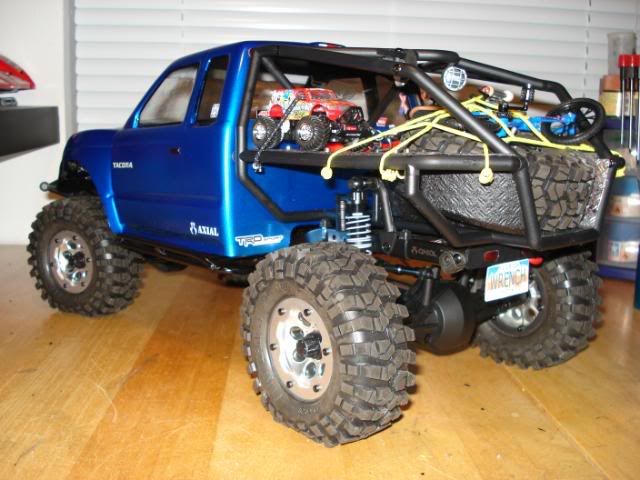
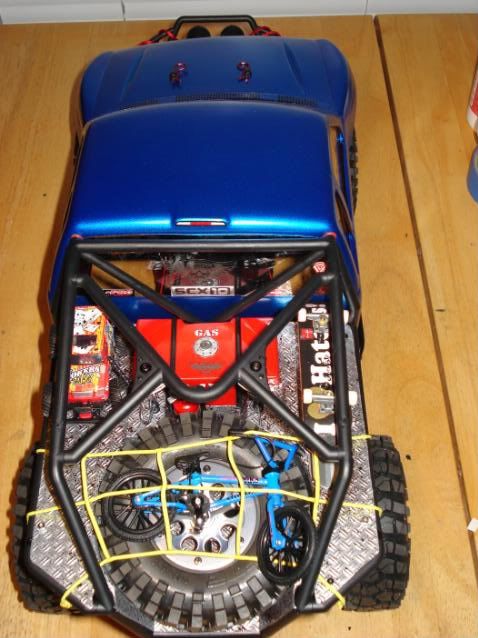
Well I have the rig almost ready for test runs. Was going to go out today but weather has changed all that. Also seems I am having a bit of a problem with my charger. Connection Breakdown appears in the display whenever I try and charge a 3 Cell LiPo and beeps like mad till I hit reset. But it will charge a 2 cell no problems. Man I don't need this now. I am still waiting on some goodies and I need to order some more goodies as well. lol we all know that all too well. So here are a few shots of it on the workbench. Thanks for all the kinds words from you fellas as the build has progressed. I really appreciate it alot. Enjoy.Wrench.
02-28-2010, 10:13 PM
#13
Tech Rookie
WratchetHead,
NICE build ! Just received my Honcho in the mail last week and more stuff arriving to go along with it as well !
Did you get the LED set off Ebay - Hong Kong seller ( I think ) - seller does a demo via youtube from their Ebay listing that show's just the light's with them toggling a switch... ?
Thank's,
Douglas
03-02-2010, 05:23 PM
#14
WratchetHead,
NICE build ! Just received my Honcho in the mail last week and more stuff arriving to go along with it as well !
Did you get the LED set off Ebay - Hong Kong seller ( I think ) - seller does a demo via youtube from their Ebay listing that show's just the light's with them toggling a switch... ?
Thank's,
Douglas
NICE build ! Just received my Honcho in the mail last week and more stuff arriving to go along with it as well !
Did you get the LED set off Ebay - Hong Kong seller ( I think ) - seller does a demo via youtube from their Ebay listing that show's just the light's with them toggling a switch... ?
Thank's,
Douglas
03-03-2010, 01:30 AM
#15
Tech Rookie
Hey WratchetHead,
I see you live in "sunny southwest FL", I live by the Space center ( Rockledge ), where about's are ya' ?
I see you live in "sunny southwest FL", I live by the Space center ( Rockledge ), where about's are ya' ?